@ViewBuilder
구현 목표
- 뷰 빌더를 제네릭과 함께 사용
- 내장 뷰 모듈(네비게이션 뷰, 탭 뷰 등) 확장성
- 클로저 자체를 뷰 컨텐츠로 전달하는 커스텀
구현 태스크
- 컴포넌트 뷰로 사용하는 서브 뷰 내부 값을 각자 설정하지 않고 상위 뷰(즉 서브 뷰를 사용하는 뷰 단)에서 클로저로 곧바로 특정 뷰를 그리기
- 뷰 컨텐츠 자체를 파라미터로 주기
- 뷰 컨텐츠를 그리는 클로저 자체를 파라미터로 주기
@ViewBuilder프로토콜 준수 클로저
핵심 코드
init(title: String, @ViewBuilder content: () -> Content) {
        self.title = title
        self.content = content()
    }
...
HeaderViewGeneric(title: "CONTENT CLOSURE!") {
                    HStack {
                        Text("HI!")
                        Image(systemName: "bolt.fill")
                    }
                }
@ViewBuilder프로토콜을 준수하는 클로저 매개변수는 곧 해당 뷰에서 어떻게 뷰 컨텐츠를 그릴지 알려주는 방법. 뷰 구조체 이니셜라이저 단에서 클로저 자체를 매핑- 서브 뷰를 사용하는 상위 뷰에서 곧바로 쓰고 싶은 뷰를 클로저 내에서 작성하면 되기 때문에 확장성 매우 높다.
소스 코드
struct HeaderViewRegular: View {
    let title: String
    let description: String?
    let iconName: String?
    var body: some View {
        VStack(alignment: .leading) {
            Text(title)
                .font(.largeTitle)
                .fontWeight(.semibold)
            if let description = description {
                Text(description)
                    .font(.callout)
            }
            if let iconName = iconName {
                Image(systemName: iconName)
                    .resizable()
                    .scaledToFit()
                    .frame(width: 20, height: 20)
            }
            RoundedRectangle(cornerRadius: 5)
                .frame(height: 2)
        }
        .frame(maxWidth: .infinity, alignment: .leading)
        .padding()
    }
}- 일반적으로 타입이 정해진 상태의 컴포넌트 뷰. 특정 컨텐츠를 주고 싶을 때마다 뷰를 커스텀해야 함(
description,iconName등)
struct HeaderViewGeneric<Content:View>: View {
    let title: String
    let content: Content

    init(title: String, content: Content) {
        self.title = title
        self.content = content
    }

    init(title: String, @ViewBuilder content: () -> Content) {
        self.title = title
        self.content = content()
    }
    var body: some View {
        VStack(alignment: .leading) {
            Text(title)
                .font(.largeTitle)
                .fontWeight(.semibold)
            content
            RoundedRectangle(cornerRadius: 5)
                .frame(height: 2)
        }
        .frame(maxWidth: .infinity, alignment: .leading)
        .padding()
    }
}- 제네릭 컨텐츠를 통해 뷰를 구성하는 뷰 컨텐츠 + 뷰 컨텐츠를 구성하는 클로저 자체를 파라미터로 전달
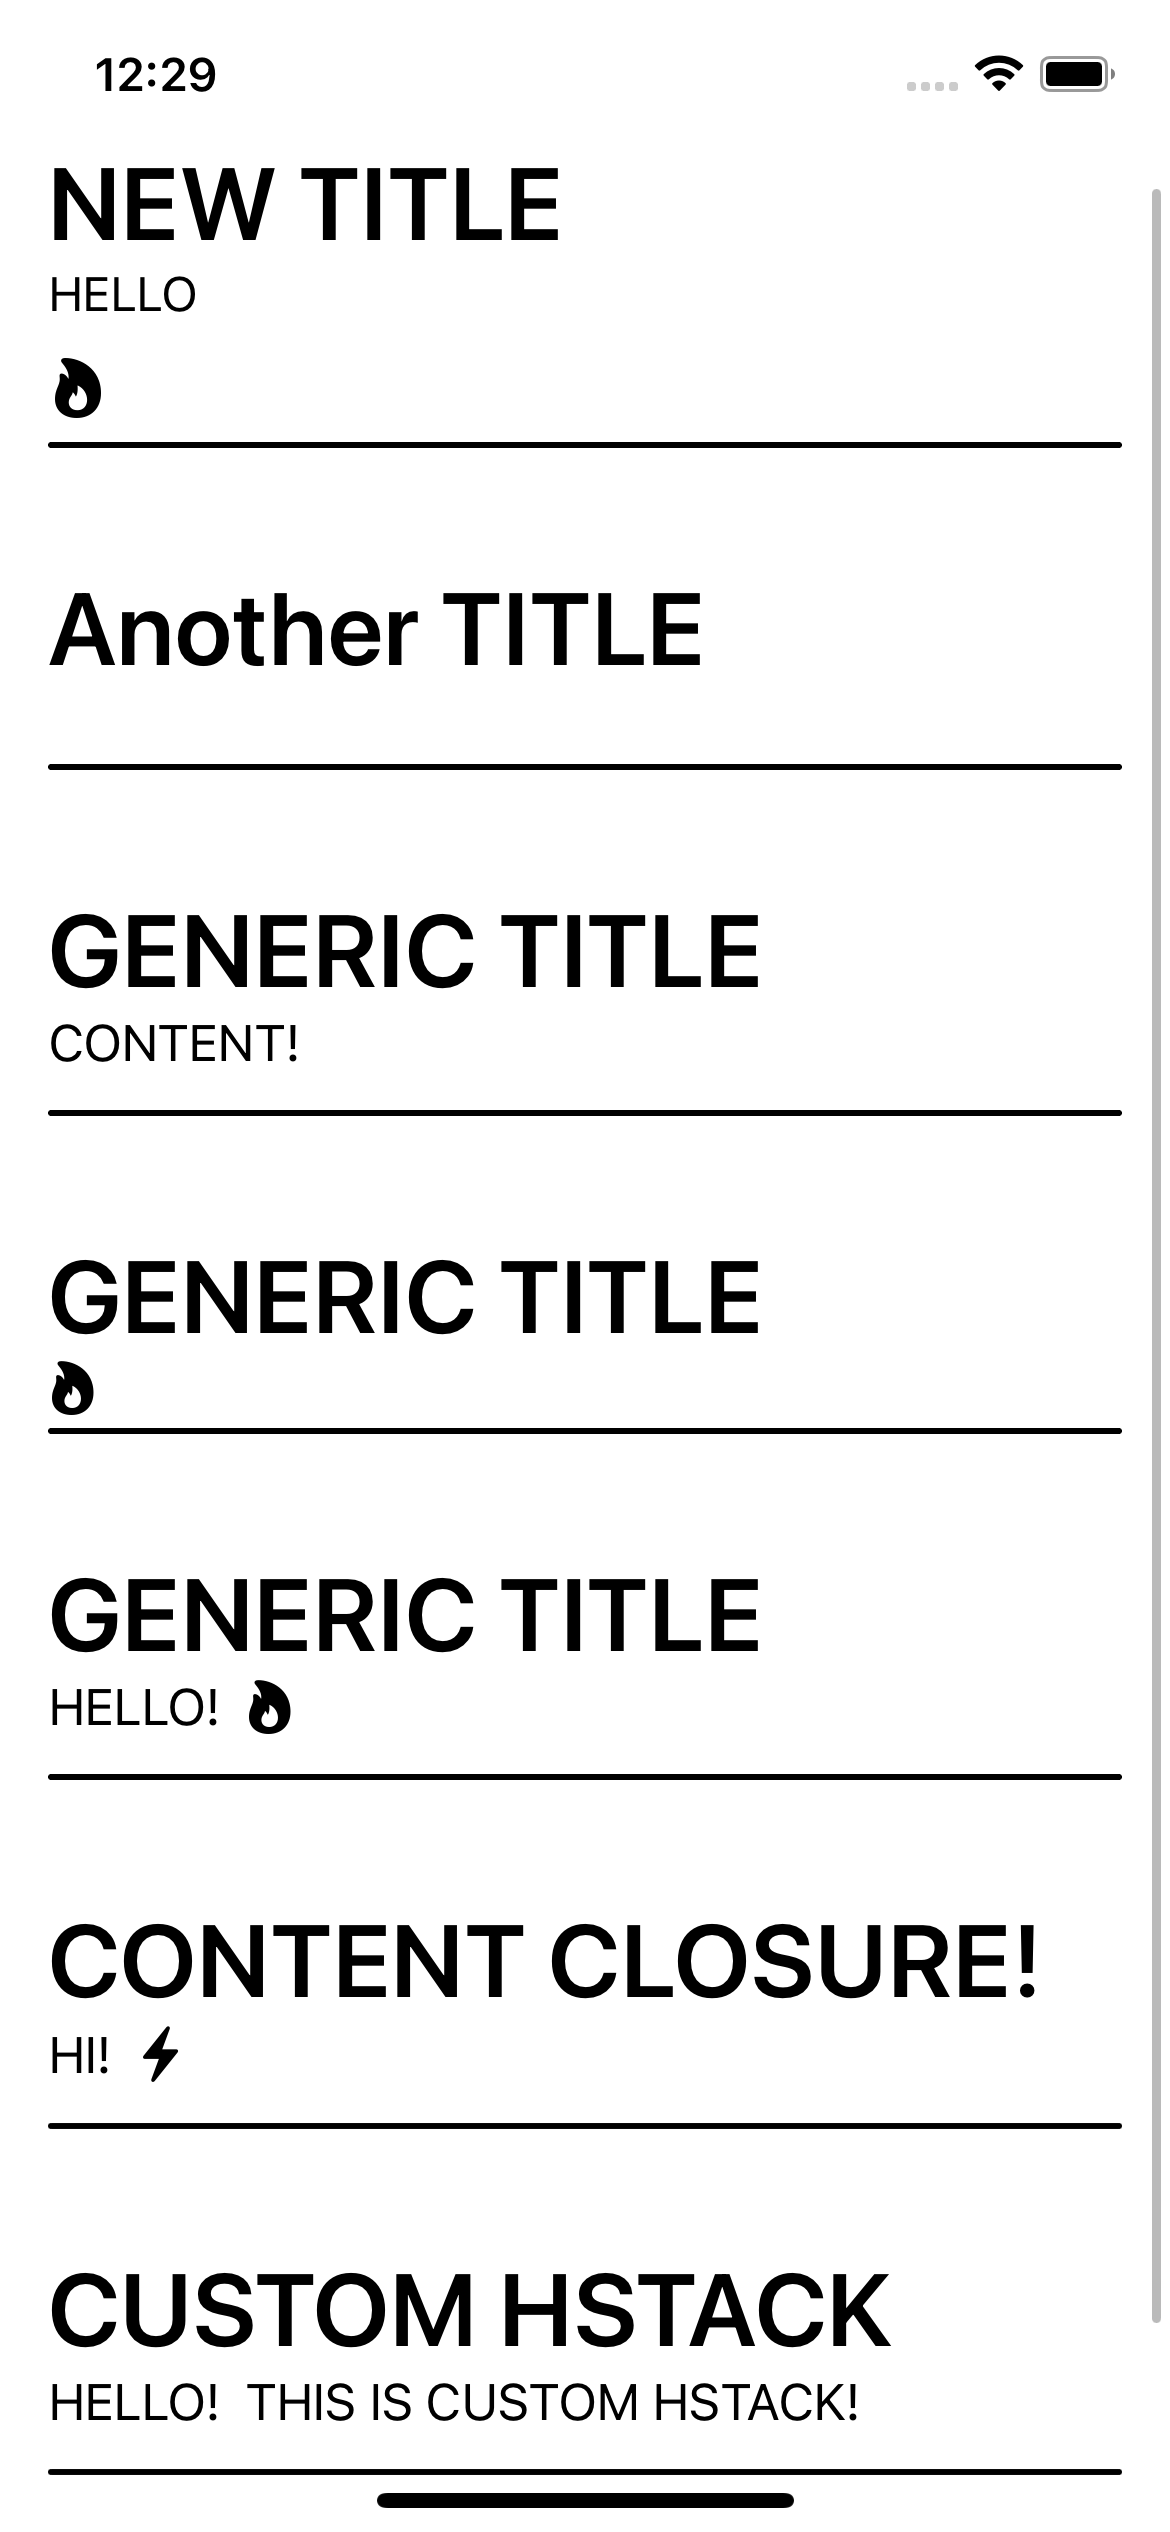
struct ViewBuilderBootCamp: View {
    var body: some View {
        ScrollView {
            VStack {
                HeaderViewRegular(title: "NEW TITLE", description: "HELLO", iconName: "flame.fill")
                HeaderViewRegular(title: "Another TITLE", description: nil, iconName: nil)
                HeaderViewGeneric(title: "GENERIC TITLE", content: Text("CONTENT!"))
                HeaderViewGeneric(title: "GENERIC TITLE", content: Image(systemName: "flame.fill"))
                HeaderViewGeneric(title: "GENERIC TITLE", content: HStack {
                    Text("HELLO!")
                    Image(systemName: "flame.fill")
                })
                HeaderViewGeneric(title: "CONTENT CLOSURE!") {
                    HStack {
                        Text("HI!")
                        Image(systemName: "bolt.fill")
                    }
                }
                HeaderViewGeneric(title: "CUSTOM HSTACK") {
                    CustomHStack {
                        Text("HELLO!")
                        Text("THIS IS CUSTOM HSTACK!")
                    }
                }
                Spacer()
            }
        }
    }
}- 뷰 컨텐츠를 단일한 뷰 컨텐츠 하나만 줄 수도, 뷰 컨텐츠를 그리는 클로저 자체를 줄 수도 있음
struct CustomHStack<Content: View>:View {
    let content: Content

    init(@ViewBuilder content: () -> Content) {
        self.content = content()
    }

    var body: some View {
        HStack {
            content
        }
    }
}- 뷰 컨텐츠를 그리는 클로저를 컨텐츠로 주는 이니셜라이저를 선언할 때에는
@ViewBuilder프로토콜을 준수하는 클로저여야 함
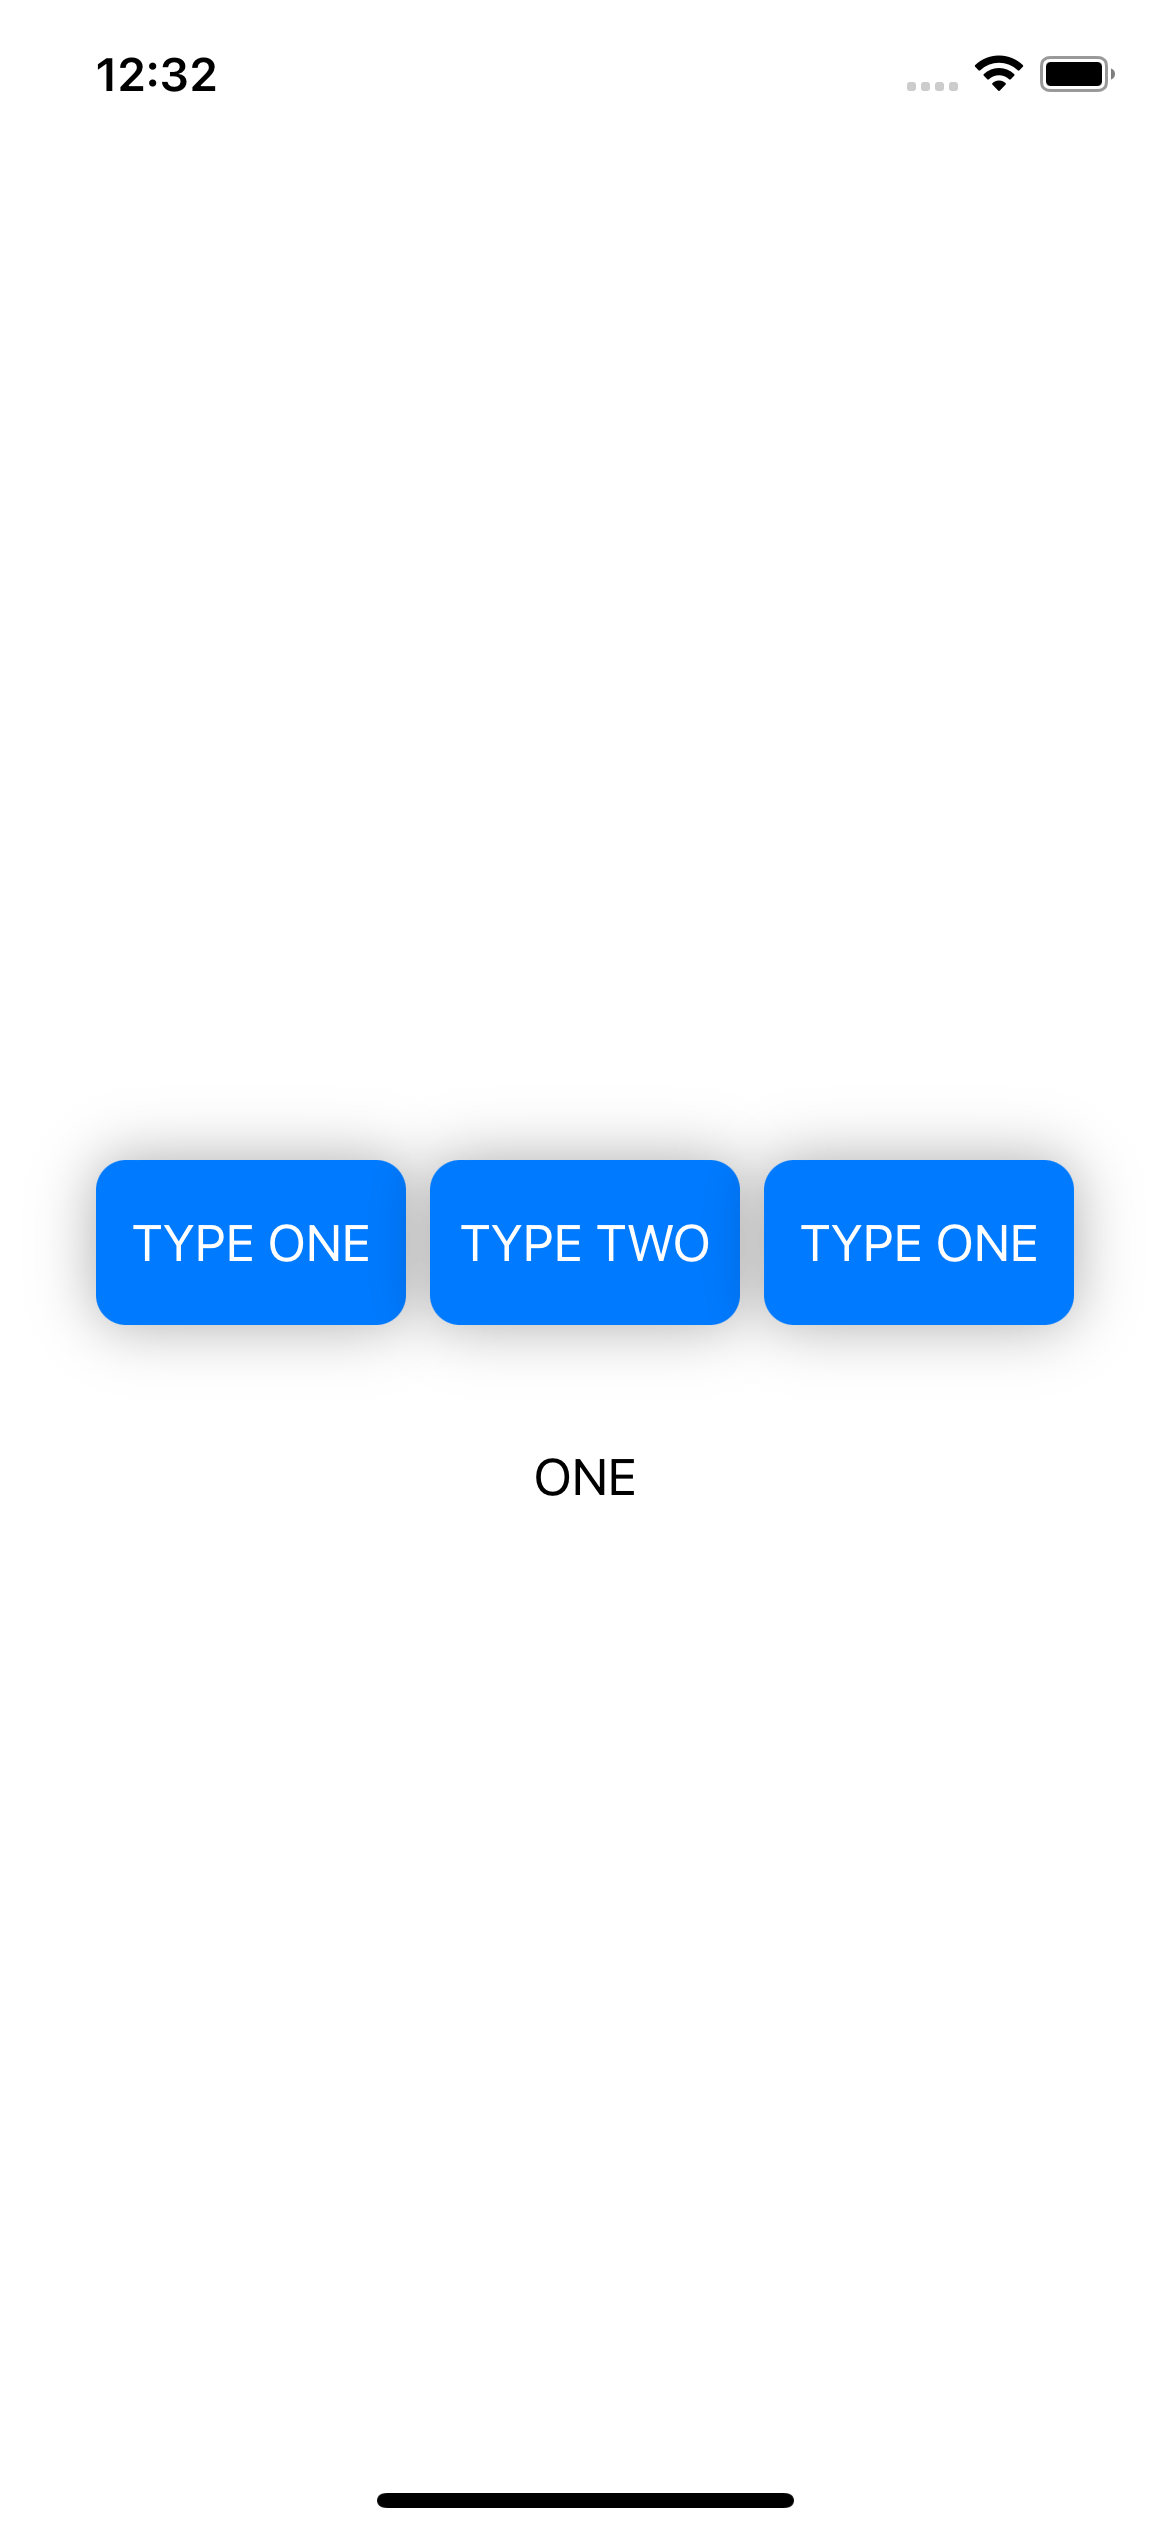
struct LocalViewBuilder: View {
    enum ViewType {
        case one, two, three
    }
    @State private var type: ViewType = ViewType.one
    var body: some View {
        VStack {
            buttonView
            .padding()
            headerSection
        }
    }

    @ViewBuilder private var headerSection: some View {
        switch type {
        case .one:
            viewOne
        case .two:
            viewTwo
        case .three:
            viewThree
        }
    }

    private var buttonView: some View {
        HStack {
            Button {
                type = .one
            } label: {
                Text("TYPE ONE")
                    .withDefaultButtonFormmating()
            }
            .withPressableStyle(0.9)
            Button {
                type = .two
            } label: {
                Text("TYPE TWO")
                    .withDefaultButtonFormmating()
            }
            .withPressableStyle(0.9)
            Button {
                type = .three
            } label: {
                Text("TYPE ONE")
                    .withDefaultButtonFormmating()
            }
            .withPressableStyle(0.9)
        }
        .padding()
    }

    private var viewOne: some View {
        Text("ONE")
    }

    private var viewTwo: some View {
        VStack {
            Text("TWO")
            Image(systemName: "flame.fill")
        }
    }

    private var viewThree: some View {
        HStack {
            Text("THREE")
            Image(systemName: "flame.fill")
        }
    }
}- 뷰 내부의 뷰 컨텐츠를 나누는 과정.
@ViewBuilder주의 switch case를 통해 보다 효율적으로 작성 가능
구현 화면
- 스위치 케이스에 맞춰서 서로 다른 뷰 빌더 구조(
VStack,HStack등)를 호출하는 형태

JUST DO IT