iOS Dev 36: Getting Started with Animations | Swift 5, XCode 13
Animations: Get Started
구현 목표
- 간단한 애니메이션 UIKit을 통해 구현
구현 태스크
- 스프링 애니메이션 뷰의
top제약조건 변수화 - 해당
constraint값 변경 애니메이션 효과 적용
핵심 코드
private func springAnimateView() {
        UIView.animate(withDuration: 1.0,
                       delay: 0,
                       usingSpringWithDamping: 0.6,
                       initialSpringVelocity: 0.4,
                       options: []) { [weak self] in
            guard let self = self else { return }
            if self.isActive {
                self.topConstraint?.constant = 20
            } else {
                self.topConstraint?.constant = -(self.animationView.frame.origin.y) - self.animationView.frame.height
            }
            self.view.layoutIfNeeded()
        } completion: { _ in
            print("Animation Completed")
        }
}withDuration은 해당 애니메이션이 얼마 동안 일어나는지,delay는 해당 애니메이션이 얼마 뒤에 일어나는지 설정usingSpringWithDamping은 0에 가까울 수록 세게 튕기는 댐핑 효과가 적용되고, 1에 가까울 수록 튕기지 않음initialSpringVelocity는 프로퍼티의 이름처럼 처음에 튀어오르는 속도를 결정한다. 값이 0에 가까울 수록 빠름
소스 코드
import UIKit

class ViewController: UIViewController {
    private let animationView: UIView = {
        let view = UIView()
        view.layer.masksToBounds = true
        view.layer.cornerRadius = 12
        view.backgroundColor = .systemGreen
        return view
    }()
    private let label: UILabel = {
        let label = UILabel()
        label.font = .preferredFont(forTextStyle: .title1)
        label.textColor = .white
        label.text = "Simple Animation"
        return label
    }()
    private let animateButton: UIButton = {
        let button = UIButton()
        var config = UIButton.Configuration.filled()
        config.title = "Animate"
        config.baseBackgroundColor = .systemBlue
        config.baseForegroundColor = .white
        config.titleAlignment = .center
        button.configuration = config
        return button
    }()
    private var topConstraint: NSLayoutConstraint?
    private var isActive = true

    override func viewDidLoad() {
        super.viewDidLoad()
        setUI()
    }

    private func setUI() {
        view.backgroundColor = .systemBackground
        animationView.translatesAutoresizingMaskIntoConstraints = false
        view.addSubview(animationView)
        topConstraint = animationView.topAnchor.constraint(equalTo: view.safeAreaLayoutGuide.topAnchor, constant: 10)
        guard let topConstraint = topConstraint else { return }
        let viewConstraints = [
            topConstraint,
            animationView.centerXAnchor.constraint(equalTo: view.centerXAnchor),
            animationView.widthAnchor.constraint(equalToConstant: view.frame.width - view.safeAreaInsets.left - view.safeAreaInsets.right - 20),
            animationView.heightAnchor.constraint(equalToConstant: 50)
        ]
        NSLayoutConstraint.activate(viewConstraints)

        animationView.addSubview(label)
        label.translatesAutoresizingMaskIntoConstraints = false
        let labelConstraints = [
            label.centerXAnchor.constraint(equalTo: animationView.centerXAnchor),
            label.centerYAnchor.constraint(equalTo: animationView.centerYAnchor)
        ]
        NSLayoutConstraint.activate(labelConstraints)

        animateButton.translatesAutoresizingMaskIntoConstraints = false
        view.addSubview(animateButton)
        let buttonConstraints = [
            animateButton.centerXAnchor.constraint(equalTo: view.centerXAnchor),
            animateButton.centerYAnchor.constraint(equalTo: view.centerYAnchor)
        ]
        NSLayoutConstraint.activate(buttonConstraints)
        animateButton.addTarget(self, action: #selector(didTapButton), for: .touchUpInside)
    }

    @objc private func didTapButton() {
        isActive.toggle()
        springAnimateView()
    }

    private func animateView() {
        UIView.animate(withDuration: 0.5) { [weak self] in
            guard let self = self else { return }
            if self.isActive {
                self.topConstraint?.constant = 20
            } else {
                self.topConstraint?.constant = -(self.animationView.frame.origin.y) - self.animationView.frame.height
            }
            self.view.layoutIfNeeded()
        }
    }

    private func springAnimateView() {
        UIView.animate(withDuration: 1.0,
                       delay: 0,
                       usingSpringWithDamping: 0.6,
                       initialSpringVelocity: 0.4,
                       options: []) { [weak self] in
            guard let self = self else { return }
            if self.isActive {
                self.topConstraint?.constant = 20
            } else {
                self.topConstraint?.constant = -(self.animationView.frame.origin.y) - self.animationView.frame.height
            }
            self.view.layoutIfNeeded()
        } completion: { _ in
            print("Animation Completed")
        }
    }
}- 오토 레이아웃을 통해 뷰, 라벨, 버튼 위치를 잡을 때 레이아웃이 변경되는
topConstraint만을 별도로 할당해서 저장 - 해당 제약조건 변수를 전역으로 들고 있기 때문에 버튼 토글링을 통해 해당 값의
constraint를 직접 변경 가능, 이 이벤트가 애니메이션 효과 내부에서 발생하기 때문에 곧 애니메이션이 일어나는 것
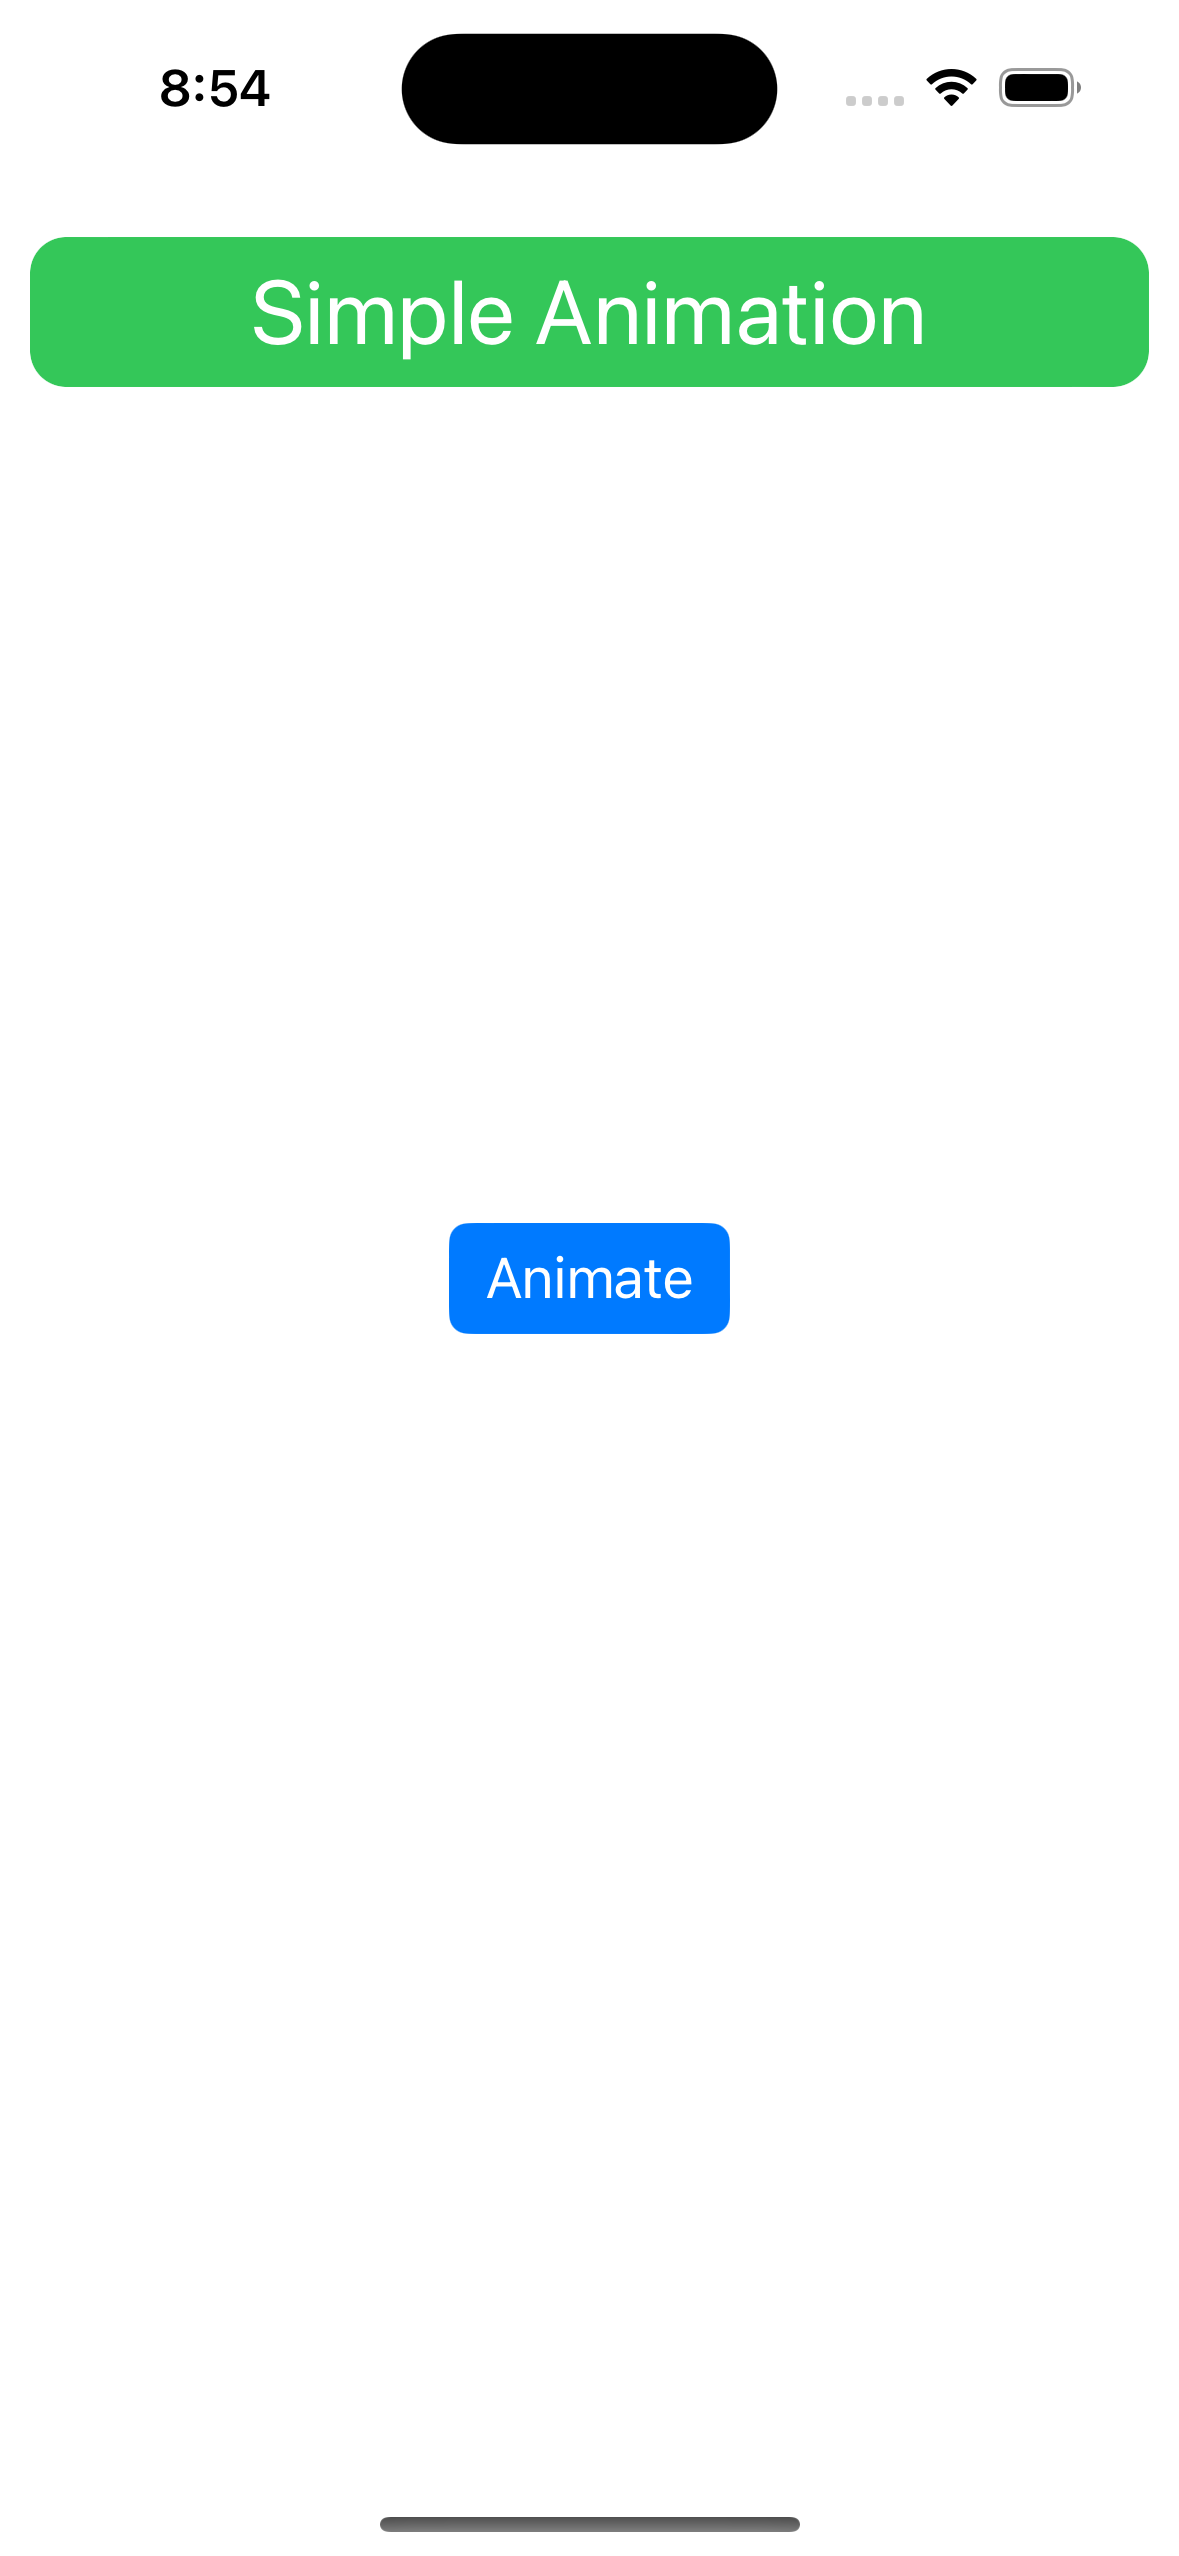
구현 화면
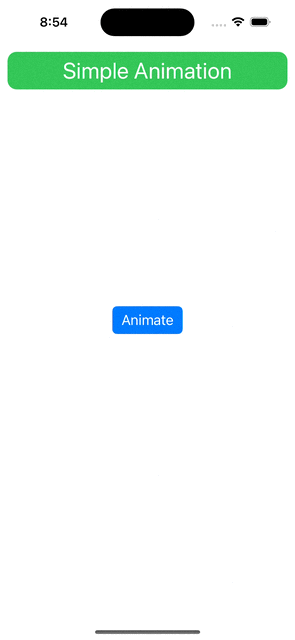
SwiftUI의 애니메이션과 UIKit의 애니메이션 역시 내부 구조는 상동하다. 즉 모두 익숙해질 수 있도록 노력하자! 애니메이션이야말로 가장 어려운 태스크 가운데 하나이지 않을까?

JUST DO IT