
깃허브 로그인 붙이기
이번 팀 프로젝트에 깃허브 로그인을 사용해 설정 과정을 정리해보려고 한다.
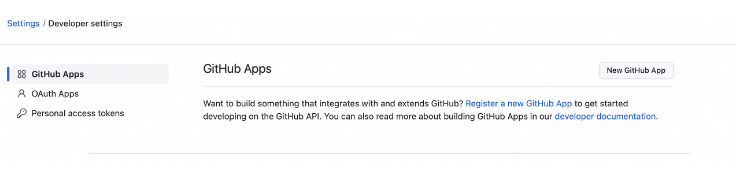
- 깃허브 로그인후 settings -> Developer settings로 들어가 Github 앱을 만들어준다.
- 앱 설정을 해준다
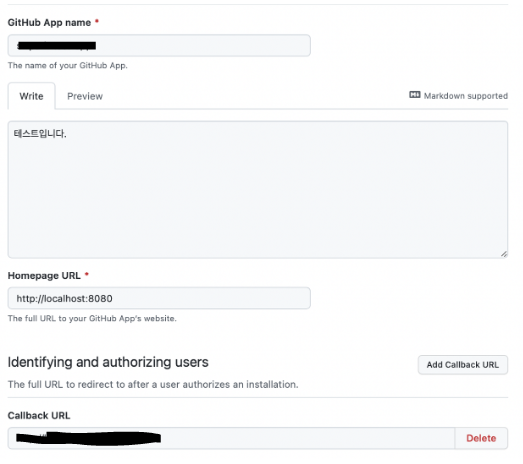
*여기서 callback URL이 로그인후 이동시켜줄 URL이다. 이때 Code를 획득한다.
3.https://github.com/login/oauth/authorize?client_id={client_id}로 로그인을 한다.
4.이렇게 얻은 정보로 https://github.com/login/oauth/access_token을 통해 토큰을 가져온다.
client_id,client_secret,code필요
MultiValueMap<String, String> params = new LinkedMultiValueMap<>();
        params.add("code", code);
        params.add("client_id", "************");
        params.add("client_secret", "***************");

        HttpHeaders headers = new HttpHeaders();
        headers.setContentType(MediaType.APPLICATION_FORM_URLENCODED);

        HttpEntity<MultiValueMap<String, String>> entity = new HttpEntity<>(params, headers);

        ResponseEntity<JsonNode> responseNode = restTemplate.exchange(
            "https://github.com/login/oauth/access_token", HttpMethod.POST,
            entity,
            JsonNode.class);
JsonNode accessTokenNode = responseNode.getBody();5.https://api.github.com/user 를 통해 정보를 가져온다.
 HttpHeaders headers = new HttpHeaders();
        headers.set("Authorization", "Bearer " + accessToken);
        HttpEntity<MultiValueMap<String, String>> entity = new HttpEntity<>(null, headers);

        return restTemplate.exchange("https://api.github.com/user", HttpMethod.GET, entity,
            JsonNode.class).getBody();
이전에 구글 OAuth를 했고 이번에 깃허브 OAuth까지 진행해보니 이제 로그인 API는 생각보다 쉽게 붙일수 있을것같다.

나다운사람