HAproxy와 kubeadm을 활용해 쿠버네티스 고가용성 클러스터를 구성하자.
쿠버네티스의 마스터 노드는 단일 실패 지점이 될 가능성이 크다.
마스터 노드가 실패하면 워커 노드를 컨트롤할 방법이 없기 때문에 반드시 마스터 노드의 고가용성을 위해 다수의 마스터 노드를 배치한다.
여기서는 etcd를 마스터 노드에 포함한 형태의 마스터 노드를 구성한다.
구성
1대의 haproxy 서버와 3대의 마스터 노드, 워커 노드를 구성한다.
10.138.0.26 haproxy
10.138.0.22 master-1
10.138.0.27 master-2
10.138.0.28 master-3
10.138.0.23 node-1
10.138.0.24 node-2
10.138.0.25 node-3
해당 도메인을 /etc/hosts에 추가시켜준다.
k8s 설치
haproxy를 제외한 모든 노드에는 kubeadm, kubelet, kubectl을 설치해야 한다
기존의 설치 문서를 기반으로 shell script를 작성하여 각 노드에 설치한다.
#!/bin/sh

sed -i '/ swap / s/^\(.*\)$/#\1/g' /etc/fstab
swapoff -a

apt update
apt install ca-certificates curl gnupg lsb-release -y

curl -fsSL https://download.docker.com/linux/ubuntu/gpg | gpg --dearmor -o /usr/share/keyrings/docker-archive-keyring.gpg

echo \
  "deb [arch=$(dpkg --print-architecture) signed-by=/usr/share/keyrings/docker-archive-keyring.gpg] https://download.docker.com/linux/ubuntu \
  $(lsb_release -cs) stable" | sudo tee /etc/apt/sources.list.d/docker.list > /dev/null

apt update
apt install docker-ce docker-ce-cli containerd.io -y

mkdir /etc/docker
cat <<EOF | sudo tee /etc/docker/daemon.json
{
  "exec-opts": ["native.cgroupdriver=systemd"],
  "log-driver": "json-file",
  "log-opts": {
    "max-size": "100m"
  },
  "storage-driver": "overlay2"
}
EOF

systemctl enable docker
systemctl daemon-reload
systemctl restart docker

modprobe overlay
modprobe br_netfilter

cat <<EOF | sudo tee /etc/sysctl.d/k8s.conf
net.bridge.bridge-nf-call-ip6tables = 1
net.bridge.bridge-nf-call-iptables = 1
EOF

apt update
apt apt-transport-https

curl -fsSLo /usr/share/keyrings/kubernetes-archive-keyring.gpg https://packages.cloud.google.com/apt/doc/apt-key.gpg

echo "deb [signed-by=/usr/share/keyrings/kubernetes-archive-keyring.gpg] https://apt.kubernetes.io/ kubernetes-xenial main" | sudo tee /etc/apt/sources.list.d/kubernetes.list

apt update
apt install -y kubelet kubeadm kubectl

sed -i 's/"cri"//g' /etc/containerd/config.toml
systemctl restart containerd
haproxy 구성
haproxy와 apache2를 설치한다.
sudo apt update && apt install -y apache2 haproxy
/etc/haproxy/haproxy.cfg에 로드밸런싱할 수 있도록 설정한다.
아래 스크립트 내용을 빼고는 건드리지 않는다.
mode    tcp # https 트래팩도 받을 수 있도록 tcp로 설정 변경
option  tcplog # https 트래팩도 받을 수 있도록 tcp로 설정 변경

frontend proxynode
  bind *:6443
  stats uri /proxystats
  default_backend masters

# 백엔드 설정
backend masters
  balance roundrobin
  server master-1 10.138.0.22:6443 check
  server master-2 10.138.0.27:6443 check # 나중에 주석 해제
  server master-3 10.138.0.28:6443 check # 나중에 주석 해제

# haproxy ui 설정
listen stats
  bind :9999
  mode http
  stats enable
  stats hide-version
  stats uri /stats
설정 후 haproxy를 재 시작한다.
systemctl stop apache2
systemctl restrt haproxy
클러스터 구성
클러스터를 초기화 한다.
--control-plane-endpoint을 사용하면 다수의 마스터 노드를 구성할 수 있는 세팅이 준비된다.
여기에는 로드 밸런서 정보를 입력한다.
--upload-certs은 마스터 노드간에 인증서를 공유할 수 있도록 하는 옵션이다.
kubeadm init --control-plane-endpoint haproxy:6443 --upload-certs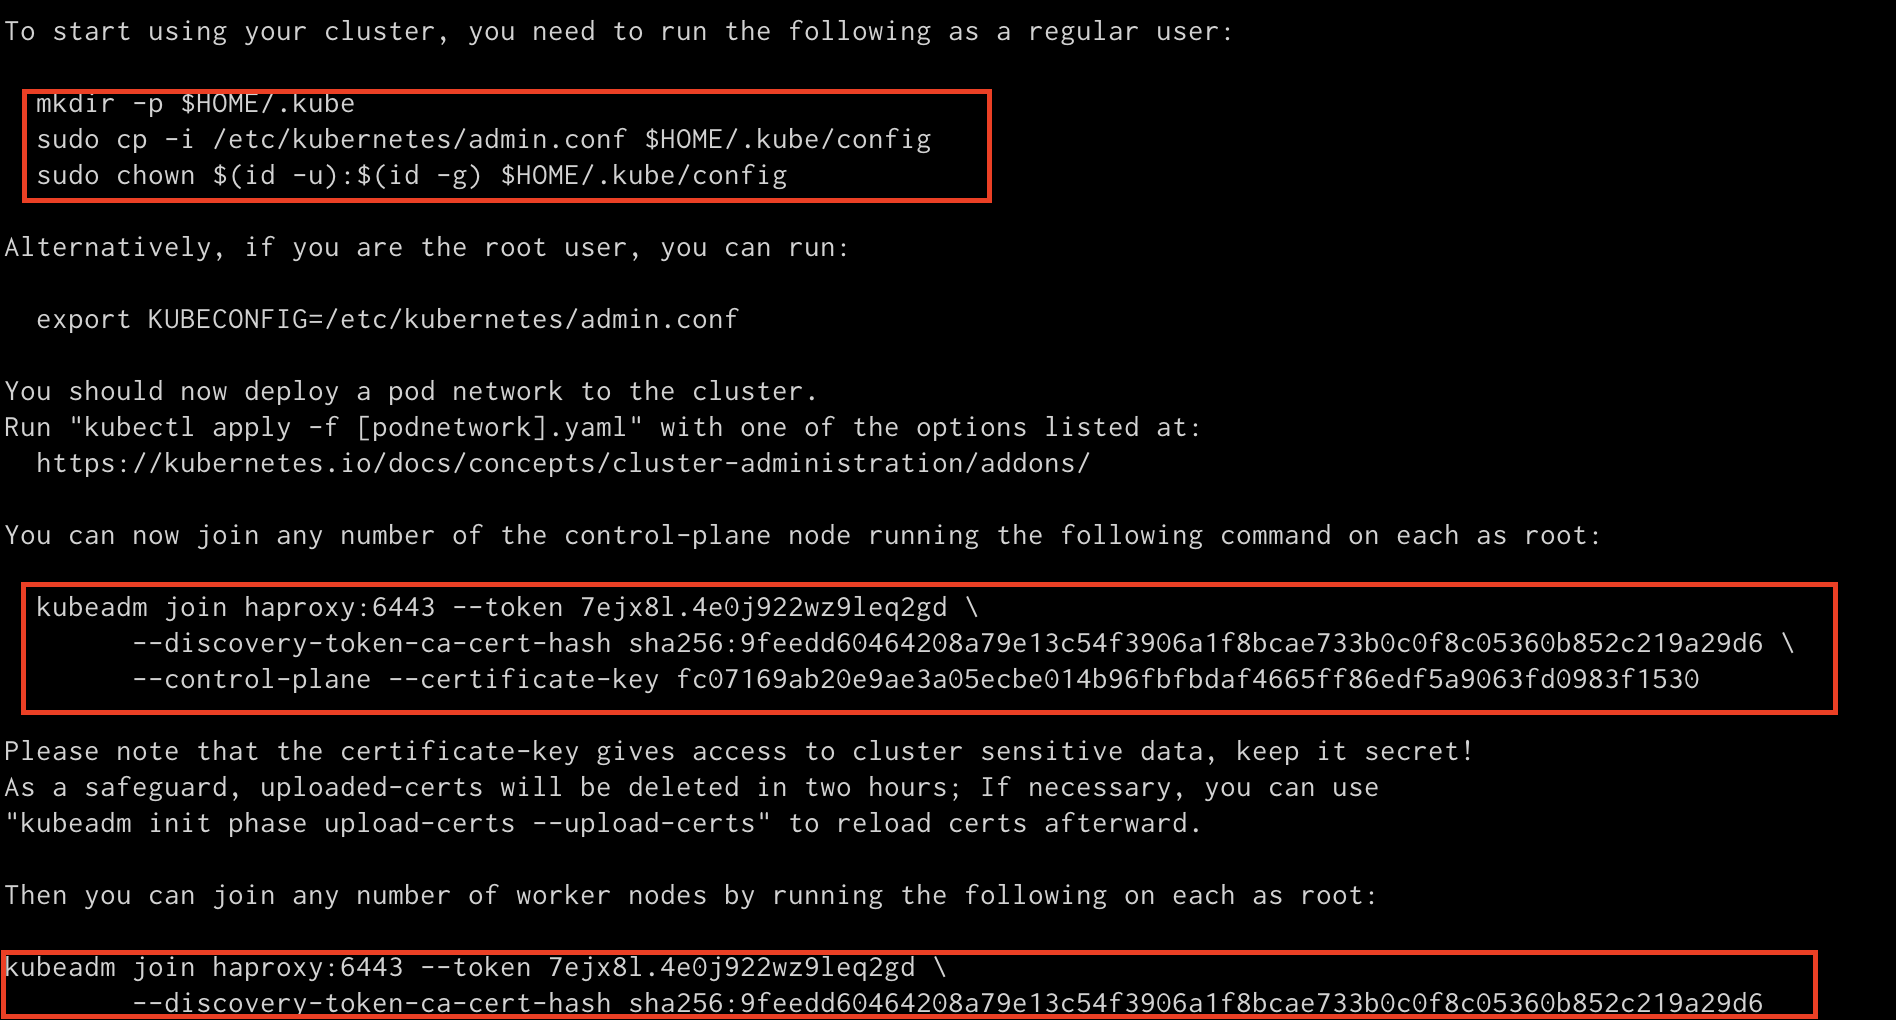
기존의 단일 마스터 노드의 쿠버네티스 구축 과정과 달리 다른 마스터 노드의 조인을 위한 명령어가 함께 출력되는 것을 볼 수 있다.
클러스터 조인
함께 사용할 마스터 노드의 경우 위의 2가지 join 키워드 중 위의 것을 워커 노드는 아래 것을 사용하면 된다.
join시 아래와 같은 에러가 발생하였을 때
accepts at most 1 arg(s), received 3 To see the stack trace of this error execute with --v=5 or higher
나의 경우는 대부분 token을 새로 발급 받으면 해결 되었다.
kubeadm token create --print-join-command위 키워드를 사용하면 join 명령어 형식 대로 새로 토큰을 발급해주므로 쉽게 사용이 가능하다.
마스터 노드의 경우 --certificate-key값이 필요한데 이는,
kubeadm init phase upload-certs --upload-certs이 명령어를 통해 키를 새로 발급받을 수 있다.
CNI 설치
kubectl apply -f "https://cloud.weave.works/k8s/net?k8s-version=$(kubectl version | base64 | tr -d '\n')"위 명령어를 통해 weave CNI를 설치한다.
성공적으로 생성 되었다면,

이와 같이 확인할 수 있다.
haproxy 확인

haproxy:9999/stats 으로 접근해보면,
위와 같은 화면을 확인할 수 있다.
master-1, master-2, master-3가 잘 나타난다.