- 사용자가 소스코드 저장소의 모든 브랜치에 대해 파이프라인을 자동으로 생성하게 해준다.
- 깃이나 깃허브 저장소의 브랜치 중 어떤 곳에서 변경이 발생하면 자동으로 빌드를 시작시키기 위해 설계됐다.
1. 깃허브 인증을 젠킨스에 추가
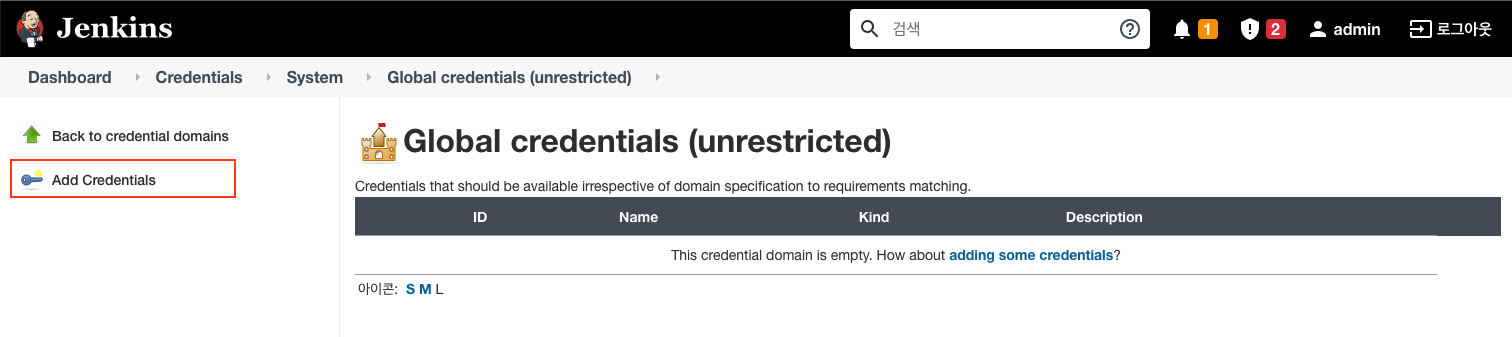
- Credentials > System > Global credentials
- Add Credentials 클릭
- Kind > Secret text 선택
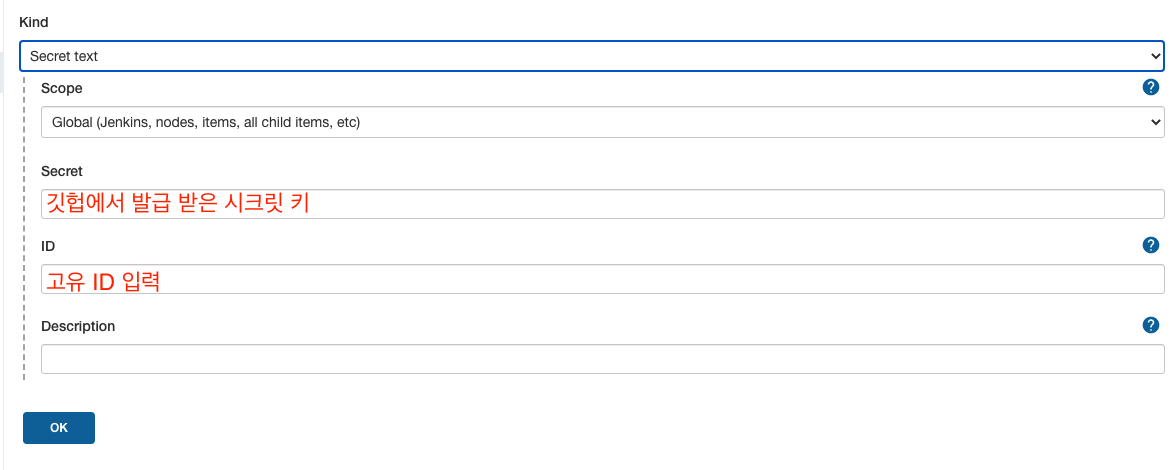
- 위처럼 값 입력 후 OK 클릭
- Add Credentials 클릭
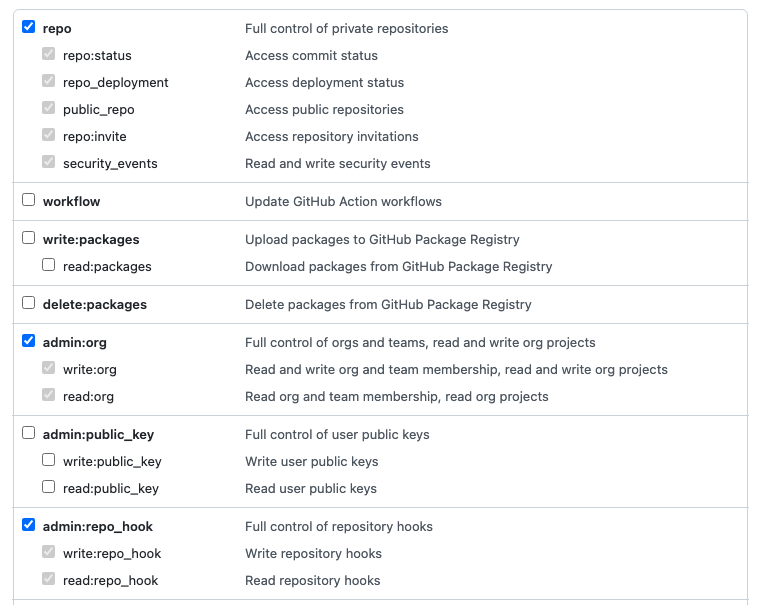
- 깃허브에서 시크릿 키 발급
- Setting > Developer settings > Personal access tokens
- 다음과 같이 체크박스 체크 후 발급받기
2. 젠킨스에 깃허브 Webhooks 설정
- Jenkins 관리 > 시스템 설정 > GitHub > Add GitHub Server
Credentials 부분은 위에서 만든 Credentials를 선택하고 테스트 버튼 클릭
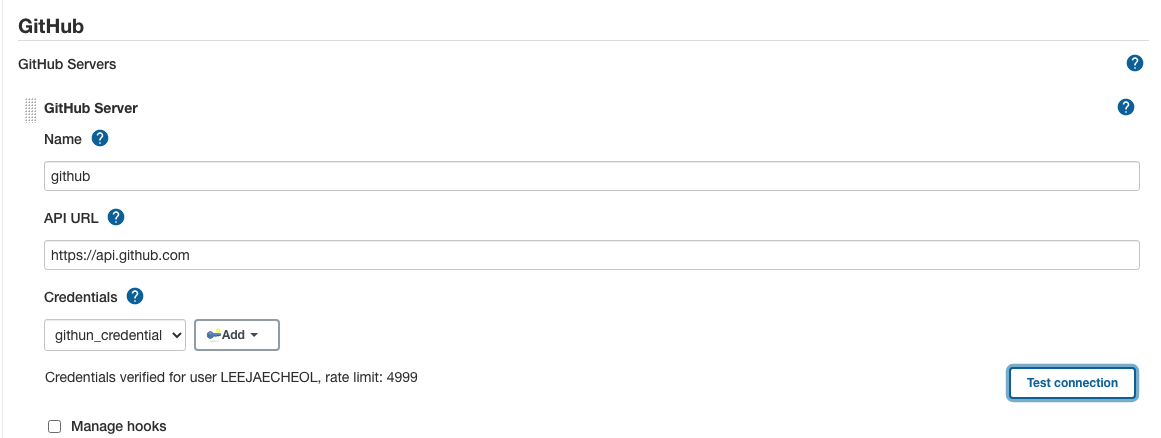
- 테스트가 성공하면 저장 버튼 클릭
3. 새로운 깃허브 저장소 만들기
- https://github.com/jglick/simple-maven-project-with-tests
- 위의 저장소를 Fork 할것임!!

4. Jenkinsfiles 이용하기
- 위 저장소에서 포크한 레포지토리에서 Jenkinsfiles를 다음과 같이 작성 후 커밋!
node('master') {
checkout scm
stage('Build') {
withMaven(maven: 'M3'){
if(isUnix()){
sh 'mvn -Dmaven.test.failure.ignore clean package'
}
else {
bat 'mvn -Dmaven.test.failure.ignore clean package'
}
}
}
stage('Results') {
junit '**/target/surefire-reports/TEST-*.xml'
archive 'target/*.jar'
}
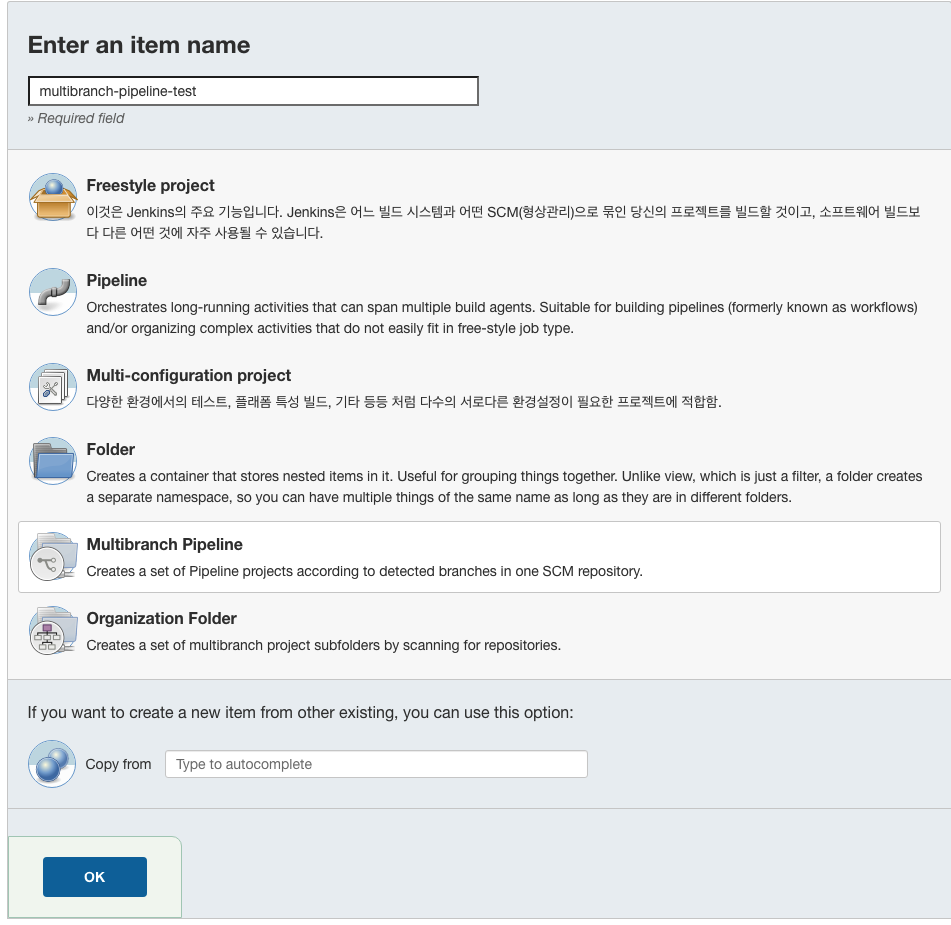
}5. 젠킨스에서 멀티브랜치 파이프라인 생성하기
- 대시보드 > New Item > multibranch-pipeline 선택
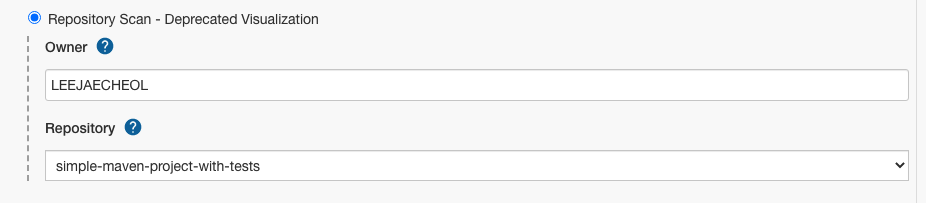
- Branch Sources 탭 클릭 > Add Source 클릭 > Github을 선택하면 아래 이미지처럼 새로운 영역이 생김

- Credentials 는 만들어 둔것을 선택하고
(Secret text는 목록에서 안뜸. 이거를 해결해야할 듯.. 그래야 7번 테스트가 잘될듯함.)
Repository는 아래 이미지처럼 입력 및 선택한다
- 저장 클릭!
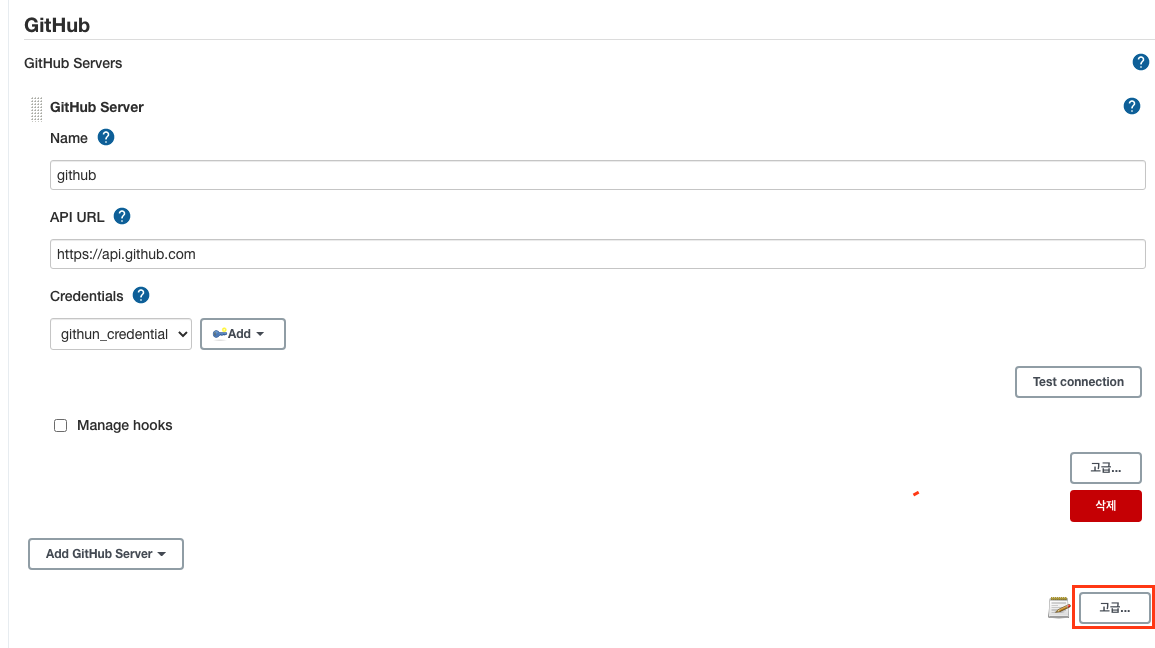
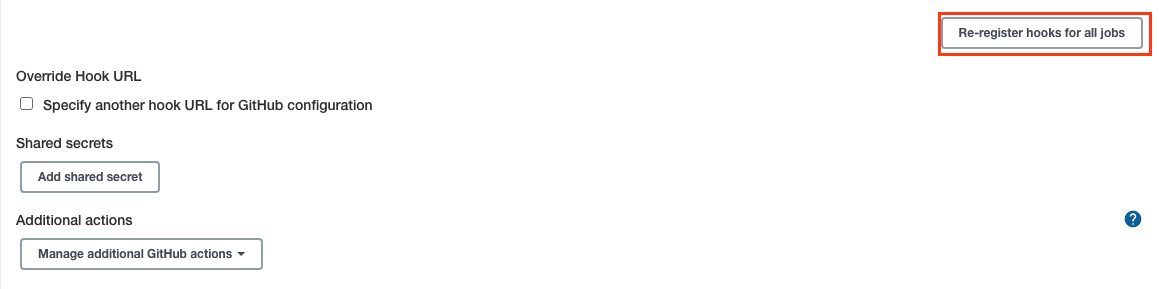
6. Webhooks 재등록
- Jenkins 관리 > 시스템 설정 > Github 영역에서 두번째 고급 버튼 클릭
- Re-register hooks for all jobs 버튼 클릭
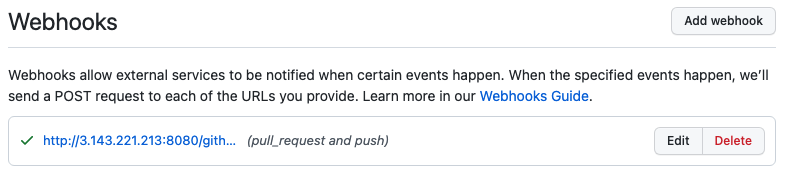
- 해당 레포지토리 > Settings > Webhooks 탭
아래의 이미지처럼 웹훅스가 등록된 것을 볼 수 있다.
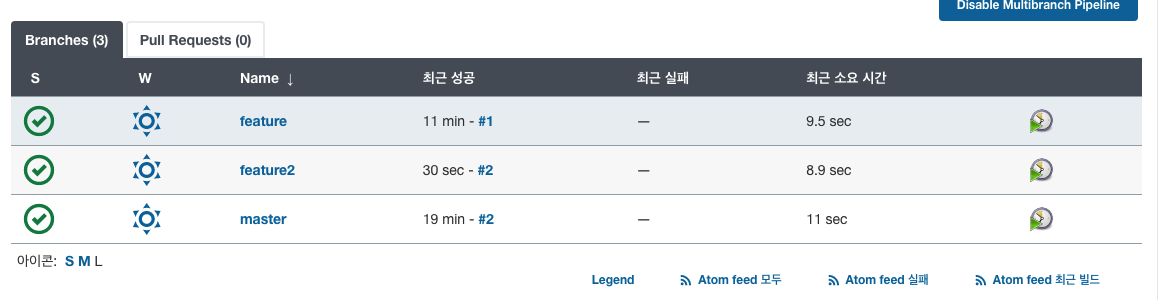
7. 멀티브랜치 파이프라인 테스트
- 레포지토리에서 feature라는 브랜치 생성하면 젠킨스 파이프라인은 즉시 실행함.

Hi