🖊️Roles Decorator 작업
관리자만 Post를 삭제할 수 있도록 RBAC을 사용하겠습니다. 먼저 관리자인지 아닌지를 구분하는 데코레이터를 만들겠습니다.
- users/decorator/roles.decorator.ts
import { SetMetadata } from "@nestjs/common";
import { RolesEnum } from "../const/roles.const";

export const ROLES_KEY = 'user_roles';

// @Roles(RolesEnum.ADMIN) -> admin 사용자만 사용 가능
export const Roles = (role: RolesEnum) => SetMetadata(ROLES_KEY, role) // 키값과 키값에 해당하는 데이터 넣기- posts.controller.ts
@Delete(':id')
@UseGuards(AccessTokenGuard)
@Roles(RolesEnum.ADMIN) // admin만 접근 가능
deletePost(@Param('id', ParseIntPipe) id: number) {
  	return this.postsService.deletePost(id);
}
메타데이터를 적용했으니까, 관리자가 아니면 아래 deletePost 기능을 못하게 만들겠습니다. 즉, 특정 코드를 막는 기능이기 때문에 Guard를 사용하겠습니다. user에 관한 guard이기 때문에 user에서 생성하겠습니다.
- users/guard/roles.guard.ts
import { CanActivate, ExecutionContext, ForbiddenException, Injectable, UnauthorizedException } from "@nestjs/common";
import { Reflector } from "@nestjs/core";
import { ROLES_KEY } from "../decorator/roles.decorator";

@Injectable()
export class RolesGuard implements CanActivate {

    constructor(
    	private readonly reflector: Reflector,
    ) {}

    async canActivate(context: ExecutionContext): Promise<boolean> {
        /**
         * Roles annotation에 대한 metadata를 가져와야한다.
         *
         * Reflector: IoC에서 자동으로 주입을 받을 수 있다.
         * getAllAndOverride():
         *    ROLES_KEY에 해당되는 annotation에 대한 정보를 전부 가져옵니다.
         *    그중에서 가장 가까운 값을 가져와서 override(덮어씌운다)한다.
         *    EX) 컨트롤러에 붙여도, 메소드에 적용된 어노테이션을 가져온다.
         */
        const requireRole = this.reflector.getAllAndOverride(
            ROLES_KEY,
            [
                // 어떤 context에서 가져올거야?
                context.getHandler(),
                context.getClass()
            ]
        );

        // Roles Annotation 등록 X
        if (!requireRole) return true;

        // RolesGuard를 실행하기전에 AccessToken이 통과되기 때문에
        const {user} = context.switchToHttp().getRequest();
        if (!user) throw new UnauthorizedException(`토큰을 제공해주세요! `);
        if (user.role !== requireRole) throw new ForbiddenException(`이 작업을 수행할 권한이 없습니다. ${requireRole} 권한이 필요합니다.`);
        return true;
    }
}
이 Guard는 전역적으로 적용할 것입니다. 왜냐하면 아래의 아래의 코드 때문입니다. 해당 코드는 권한을 필요로 하는 모든 경우 전부 적용시키도록 하겠습니다.

- app.module.ts
providers: [AppService,
    {
        provide: APP_INTERCEPTOR,
        useClass: ClassSerializerInterceptor, // 다른 모듈에서도 ClassSerializerInterceptor를 적용받는다.
    },
    {
        provide: APP_GUARD,
        useClass: RolesGuard
    }
],
포스트맨으로 테스트를 하겠습니다.

{
    "message": "토큰을 제공해주세요! ",
    "error": "Unauthorized",
    "statusCode": 401
}
다음과 같이 에러가 나는 이유는 우리가 적용한 Guard가 전역적으로 먼저 발동하기 때문에 AccessToken 보다 먼저 실행되어서 user가 존재하지 않기 때문입니다.
🖊️모든 Route Private로, IsPublic Annotation 생성
이번에는 AccessToken이 @Roles보다 먼저 실행되도록 글로벌하게 만들겠습니다. 보안을 위해서는 전역적으로 AccessTokenGuard가 작용하게 만들고, 필요하지 않는 것만 @IsPublic 을 만들어서 적용하겠습니다.
- app.module.ts
providers: [AppService,
    {
        provide: APP_INTERCEPTOR,
        useClass: ClassSerializerInterceptor, // 다른 모듈에서도 ClassSerializerInterceptor를 적용받는다.
    },
    {
        // 보안을 위해서는 기본값을 이렇게 만든다
        provide: APP_GUARD,
        useClass: AccessTokenGuard,
    },
    {
        provide: APP_GUARD,
        useClass: RolesGuard
    }
],
common쪽에 @IsPublic을 만들어 주겠습니다.
- common/decorator/is-public.decorator.ts
import { SetMetadata } from "@nestjs/common";

export const IS_PUBLIC_KEY = 'is_public';

export const IsPublic = () => SetMetadata(IS_PUBLIC_KEY, true);
이제 IsPublic을 감지해야할 기능이 필요합니다. 따라서 감지하는 기능은 token쪽에 작성을 하겠습니다.
- auth/guard/bearer-token.guard.ts
@Injectable()
export class BearerTokenGuard implements CanActivate {

    constructor(
    	private readonly authService: AuthService,
     	private readonly userService: UsersService,
     	private readonly reflector: Reflector,
    ) {}

    async canActivate(context: ExecutionContext): Promise<boolean> {
        // 토큰을 검증하기 전에 reflect metadata 기능을 사용해서
        // public route를 달았는지 안 달았는지를 확인하는 검증을 하고
        // 달려있으면 바로 true를 반환하는 기능
        const isPublic = this.reflector.getAllAndOverride(
          IS_PUBLIC_KEY,
          [
            context.getHandler(),
            context.getClass(),
          ]
        );
        const req = context.switchToHttp().getRequest();
        if (isPublic) {
          	req.isRoutePublic = true; // 표시
          	return true;
        }

        const rawToken = req.headers['authorization'];
        if (!rawToken) throw new UnauthorizedException('토큰이 없습니다.');
        const token = this.authService.extractTokenFromHeader(rawToken, true);
        const result = await this.authService.verifyToken(token);
      	.
        .
}

@Injectable()
export class AccessTokenGuard extends BearerTokenGuard {
     async canActivate(context: ExecutionContext): Promise<boolean> {
          await super.canActivate(context);
          const req = context.switchToHttp().getRequest();
          if (req.isRoutePublic) return true; // 추가
          if (req.tokenType !== 'access') throw new UnauthorizedException('Access Token이 아닙니다.');
          return true;
     }
}

@Injectable()
export class RefreshTokenGuard extends BearerTokenGuard {
     async canActivate(context: ExecutionContext): Promise<boolean> {
          await super.canActivate(context);
          const req = context.switchToHttp().getRequest();
          if (req.isRoutePublic) return true; // 추가
          if (req.tokenType !== 'refresh') throw new UnauthorizedException('Refresh Token이 아닙니다.');
          return true;
     }
}@IsPublic을 사용하는 곳에서는 return true가 되기 때문에 토큰이 필요없게 됩니다.
post 컨트롤러 1곳에만 적용을 해보겠습니다.
- posts.controller.ts
@Get()
@IsPublic()
getPosts(
  	@Query() query: PaginatePostDto,
) {
  	return this.postsService.paginatePosts(query);
}
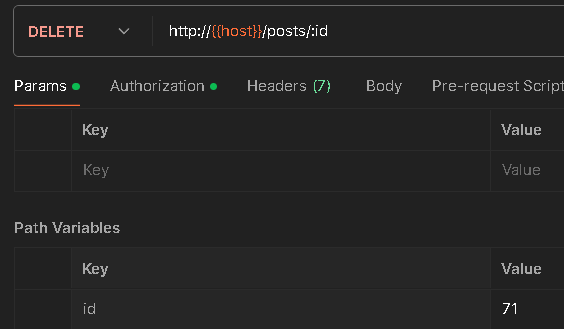
포스트맨으로 요청하면 응답이 에러없이 잘 나오는 것을 알 수 있습니다. 또한 삭제도 잘 되는 것을 알 수 있습니다.
🖊️Public Route 정리
- auth
@Post('token/access')
@IsPublic()
@UseGuards(RefreshTokenGuard)
postTokenAccess

@Post('token/refresh')
@IsPublic()
@UseGuards(RefreshTokenGuard)
postTokenRefresh(

@Post('login/email')
@IsPublic()
@UseGuards(BasicTokenGuard)
postLoginEmail(

@Post('register/email')
@IsPublic()
postRegisterEmail(- common
@Post('image')
@UseInterceptors(FileInterceptor('image'))
postImage- posts
@Get()
@IsPublic()
getPosts

@Post('random')
async postPostsRandom

@Get(':id')
@IsPublic()
getPost

@Post()
@UseInterceptors(TransactionInterceptor)
async postPosts

@Patch(':id')
patchPost

@Delete(':id')
@Roles(RolesEnum.ADMIN)
deletePost- users
@Get()
@Roles(RolesEnum.ADMIN)
getUsers
Great insights on implementing RBAC in NestJS! Using decorators for role management is an excellent strategy for simplifying access control. To enhance user engagement, consider incorporating game elements like the Sprunki game, which could provide an interactive way for users to learn about role-based access on your platform. Gamifying this process can foster better understanding and retention of RBAC principles. Keep up the good work!
https://sprunkii.io