texlive 설치
2014년이후 texlive에 ko.TeX가 포함되었다.
이제는 texlive를 설치하는 것 만으로 한글 문서 작성을 할 수 있다.
Ubuntu에서 texlive를 설치하는 방법은 간단하다.
sudo apt install texlive-full다른 운영체제에서 설치하고 싶다면 아래 문서를 참고하기 바란다.
http://www.ktug.org/xe/?mid=Install
VSCode 설치
VSCode를 설치하기 위해서는 repository를 추가해야 한다.
sudo apt install wget gpg -y

wget -qO- https://packages.microsoft.com/keys/microsoft.asc | gpg --dearmor > packages.microsoft.gpg

sudo install -D -o root -g root -m 644 packages.microsoft.gpg /etc/apt/keyrings/packages.microsoft.gpg

sudo sh -c 'echo "deb [arch=amd64,arm64,armhf signed-by=/etc/apt/keyrings/packages.microsoft.gpg] https://packages.microsoft.com/repos/code stable main" > /etc/apt/sources.list.d/vscode.list'

rm -f packages.microsoft.gpg
package cache를 업데이트한 후 설치하면 된다.
sudo apt install apt-transport-https

sudo apt update

sudo apt install code
LaTeX Workshop 설치
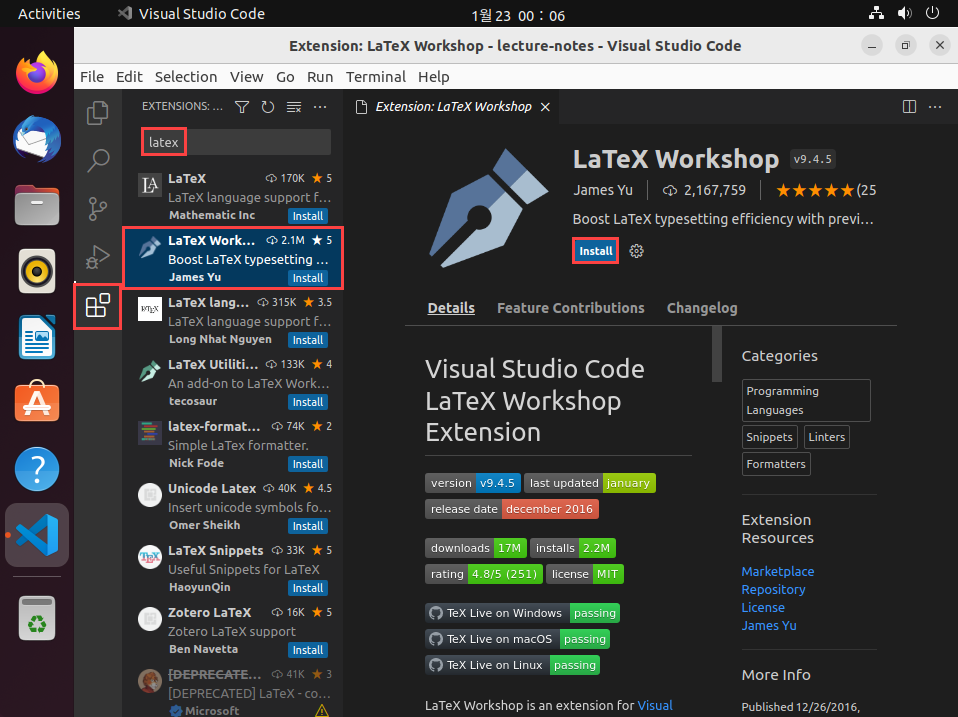
-
VSCode의 오른쪽 메뉴 중 extensions를 선택한다. (단축키:
ctrl+shift+x) -
latex을 검색하면 두 번째 정도에 LaTeX Workshop이 등장한다. -
install버튼을 누르면 설치가 완료된다.
발표자료 샘플 출력해보기
-
아래 링크에서
Download Template Code를 클릭하면 TeX 파일을 받을 수 있다. -
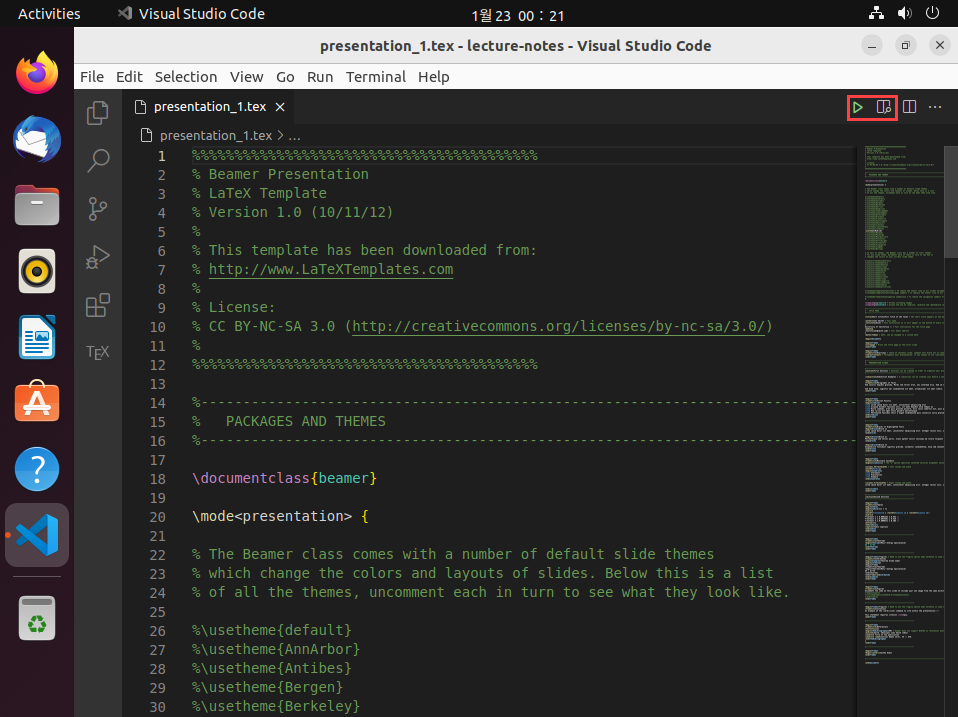
VScode에서 파일을 열면 코드를 확인해볼 수 있다.
-
오른쪽 상단의
Build버튼을 누르면 pdf 파일을 만들 수 있다. (단축키:ctrl+alt+b) -
Build버튼 옆의View LaTeX PDF file버튼을 누르면 pdf 파일을 볼 수 있다. (단축키:ctrl+alt+v)
-
-
아래 그림과 같이 코드를 작성하며 결과를 바로 확인할 수 있다.
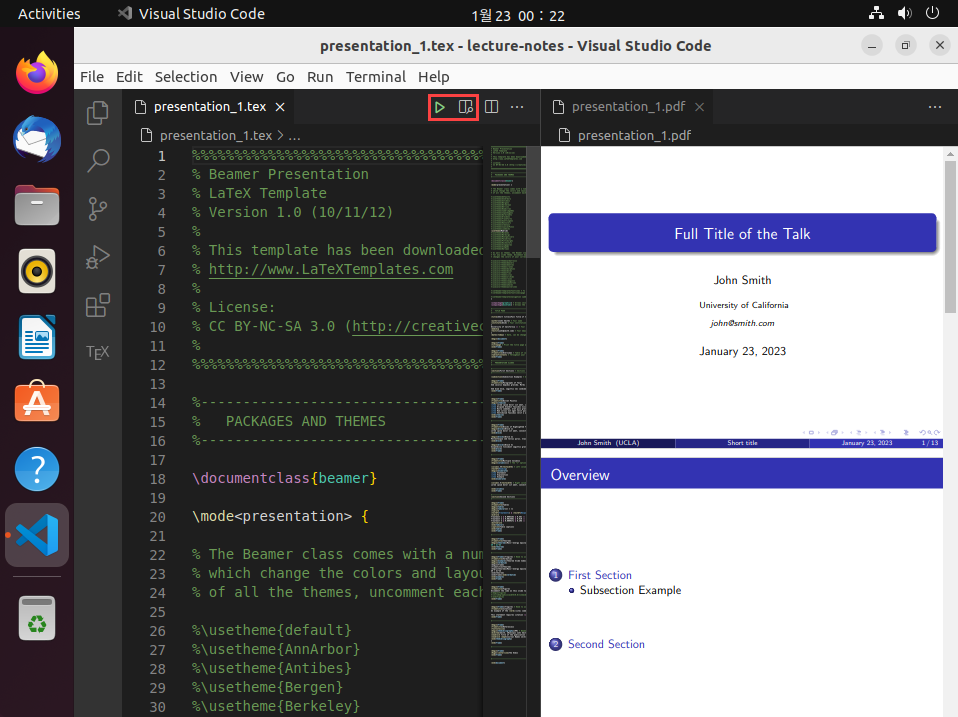
-
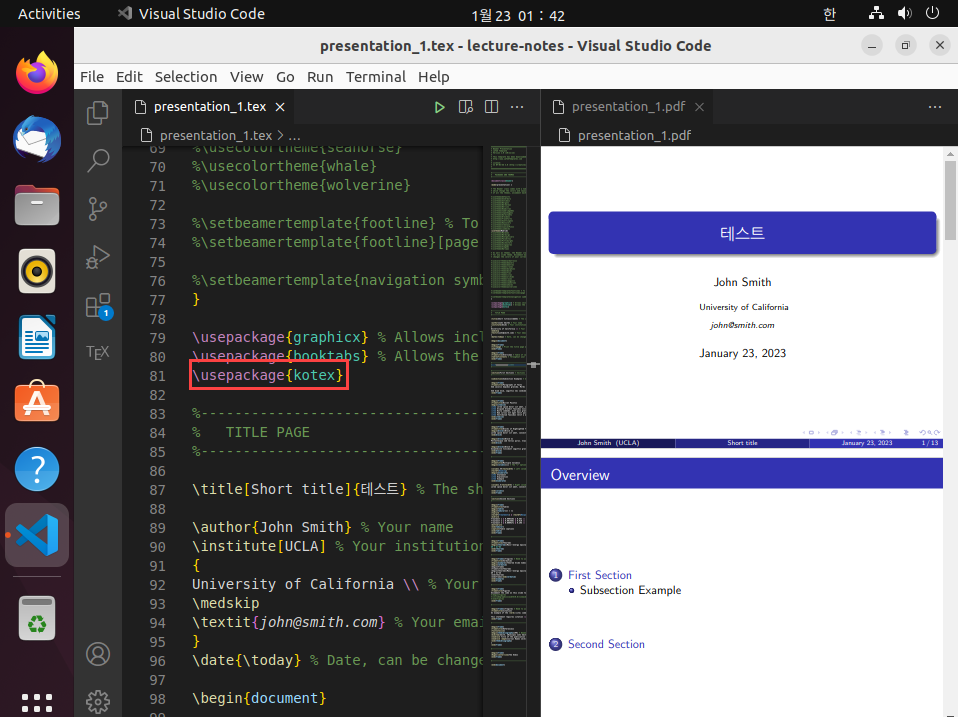
\usepackage{kotex}를 이용해 kotex 패키지를 불러오면 한글을 사용할 수 있다.- 아래 그림과 같이 타이틀을 테스트로 바꾸었을 때 정상 출력하는 것을 확인할 수 있다.

한양대학교 은재형