이번 사이드 프로젝트를 진행하면서 이메일 인증이 필요하였다. 그래서 하나씩 구글링과 AI를 통해 열심히 찾아보고 구현하였는데, 이렇게 정리해야 나중에도 이해할 수 있고, 쓸 수 있다고 생각하여 정리하게 되었다.
참고한 블로그는 : 참고 여기서 보면 될 것 같다.
구글 이메일로 하기로 하였으므로 이 블로그에서 SMTP 설정은 완료하고 보면 될 것 같다.
이메일 인증 번호 생성 및 구현
1) yml 파일 설정
mail:
  host: smtp.gmail.com  # Gmail의 SMTP 서버 호스트
  port: 587 # Gmail SMTP 서버는 587번 포트를 사용
  username: aa@gmail.com //내 이메일
  sender-email: "aa@gmail.com" //내 이메일
  password: aaaa bbbb cccc dddd //앱 비밀번호
  properties:
    mail:
      smtp:
        auth: true # SMTP 서버에 인증 필요한 경우 true로 지정 Gmail은 요구함
        starttls:
          enable: true # SMTP 서버가 TLS를 사용하여 안전한 연결을 요구하는 경우 true로 설정
          required: true
        connectiontimeout: 5000 # 클라이언트가 SMTP 서버와의 연결을 설정하는 데 대기해야 하는 시간
        timeout: 5000 # 클라이언트가 SMTP 서버로부터 응답을 대기해야 하는 시간
        writetimeout: 5000 # 클라이언트가 작업을 완료하는데 대기해야 하는 시간
  auth-code-expiration-millis: 1800000  # 30 * 60 * 1000 == 30분 이메일 인증 코드의 만료 시간(Millisecond)
일단 yml파일에서 mail관련 설정을 해야 한다.
username - 나의 이메일
sender-email은 이제 나중 email 서비스에서
    @Value("${mail.sender-email}") // 프로퍼티에서 이메일 주입
    private String senderEmail;
이런식으로 사용하기 위해 설정하였다. username과 같이 쓸까 했지만, 용도가 조금 다르다고 생각하여 같은 값이여도 분리하였다.
마지막으로 password는 앱 비밀번호 값을 넣어주면된다.
2) Config
1. EmailConfig
@Configuration
public class EmailConfig {

    @Value("${mail.host}")
    private String host;

    @Value("${mail.port}")
    private int port;

    @Value("${mail.username}")
    private String username;

    @Value("${mail.password}")
    private String password;

    @Value("${mail.properties.mail.smtp.auth}")
    private boolean auth;

    @Value("${mail.properties.mail.smtp.starttls.enable}")
    private boolean starttlsEnable;

    @Value("${mail.properties.mail.smtp.starttls.required}")
    private boolean starttlsRequired;

    @Value("${mail.properties.mail.smtp.connectiontimeout}")
    private int connectionTimeout;

    @Value("${mail.properties.mail.smtp.timeout}")
    private int timeout;

    @Value("${mail.properties.mail.smtp.writetimeout}")
    private int writeTimeout;


    @Bean
    public JavaMailSender javaMailSender() {
        JavaMailSenderImpl mailSender = new JavaMailSenderImpl();
        mailSender.setHost(host);
        mailSender.setPort(port);
        mailSender.setUsername(username);
        mailSender.setPassword(password);
        mailSender.setDefaultEncoding("UTF-8");
        mailSender.setJavaMailProperties(getMailProperties());

        Properties props = mailSender.getJavaMailProperties();
        props.put("mail.transport.protocol", "smtp");
        props.put("mail.smtp.auth", "true");
        props.put("mail.smtp.starttls.enable", "true");
        props.put("mail.debug", "true");

        return mailSender;
    }

    private Properties getMailProperties() {
        Properties properties = new Properties();
        properties.put("mail.smtp.auth", auth);
        properties.put("mail.smtp.starttls.enable", starttlsEnable);
        properties.put("mail.smtp.starttls.required", starttlsRequired);
        properties.put("mail.smtp.connectiontimeout", connectionTimeout);
        properties.put("mail.smtp.timeout", timeout);
        properties.put("mail.smtp.writetimeout", writeTimeout);

        return properties;
    }
}
이메일 전송을 위한 config를 설정해준다.
2. RedisConfig
@Configuration
public class RedisConfig {
    @Value("${mail.data.redis.host}")
    private String host;

    @Value("${mail.data.redis.port}")
    private int port;

    @Bean
    public RedisConnectionFactory redisConnectionFactory() {
        return new LettuceConnectionFactory(host, port);
    }

    @Bean
    public RedisTemplate<?, ?> redisTemplate() {
        RedisTemplate<byte[], byte[]> redisTemplate = new RedisTemplate<>();
        redisTemplate.setConnectionFactory(redisConnectionFactory());
        return redisTemplate;
    }
}
그리고 이메일 인증을 위한 RedisConfig도 설정해준다.
3) 이메일 전송을 위한 dto 생성
1. EmailRequest - 이메일 인증 번호를 보내기 위한 Dto
@Data
@AllArgsConstructor
@NoArgsConstructor
public class EmailRequest {

    @Email
    @NotEmpty
    private String email;
}
2. VerifyCodeRequest - 이메일 검증을 위한 Dto
@Data
public class VerifyCodeRequest {

    @Email
    private String email;

    @NotBlank
    private String authCode;

}
그리고 이메일 인증 번호를 받기 위한 dto를 생성해준다.
4) EmailService 구현
@Slf4j
@Transactional
@Service
@RequiredArgsConstructor
public class EmailService {

    private final JavaMailSender javaMailSender;

    @Value("${mail.sender-email}") // 프로퍼티에서 이메일 주입
    private String senderEmail;

    private final RedisUtil redisUtil;

    // 랜덤으로 숫자 생성
    public String createNumber() {
        Random random = new Random();
        StringBuilder key = new StringBuilder();

        for (int i = 0; i < 8; i++) { // 인증 코드 8자리
            int index = random.nextInt(3); // 0~2까지 랜덤, 랜덤값으로 switch문 실행

            switch (index) {
                case 0 -> key.append((char) (random.nextInt(26) + 97)); // 소문자
                case 1 -> key.append((char) (random.nextInt(26) + 65)); // 대문자
                case 2 -> key.append(random.nextInt(10)); // 숫자
            }
        }
        return key.toString();
    }

    public MimeMessage createMail(String mail, String number) throws MessagingException {
        MimeMessage message = javaMailSender.createMimeMessage();

        message.setFrom(senderEmail);
        message.setRecipients(MimeMessage.RecipientType.TO, mail);
        message.setSubject("이메일 인증");
        String body = "";
        body += "<h3>요청하신 인증 번호입니다.</h3>";
        body += "<h1>" + number + "</h1>";
        body += "<h3>감사합니다.</h3>";
        message.setText(body, "UTF-8", "html");

        return message;
    }


    // 메일 발송
    public String sendSimpleMessage(String sendEmail) {
        String number = createNumber(); // 랜덤 인증번호 생성

        try {

            MimeMessage message = createMail(sendEmail, number); // 메일 생성
            javaMailSender.send(message); // 메일 발송

            // Redis에 인증 코드 저장
            String key = redisUtil.generateKey(sendEmail);
            redisUtil.setDataExpire(key, number, 300); // 5분 동안 유효
            log.info("인증 코드 저장: Key={}, Code={}", key, number);

        } catch (MailException | MessagingException e) {
            throw new EmailSendException("메일 발송 중 오류가 발생했습니다.", e); // 사용자 정의 예외 던지기
        }

        return number; // 생성된 인증번호 반환
    }

    //메일 검증

    // 코드 검증
    public Boolean verifyEmailCode(String email, String code) {
        String key = redisUtil.generateKey(email);
        String storedCode = redisUtil.getData(key);

        log.info("Redis에서 조회된 코드: {}", storedCode);

        if (storedCode == null) {
            log.warn("Redis에 저장된 코드가 없습니다. Key={}", key);
            return false;
        }

        boolean isVerified = storedCode.equals(code);
        if (isVerified) {
            redisUtil.deleteData(email); // 인증 성공 후 Redis에서 코드 삭제
            log.info("인증 성공: Key={}, Code={}", key, code);
        } else {
            log.warn("인증 실패: Key={}, 입력된 Code={}, 저장된 Code={}", key, code, storedCode);
        }
        return isVerified;
    }
}
createNumber()
8자리 랜덤 인증 코드를 생성함.(영문 대소문자 및 숫자 포함).
createMail(String mail, String number)
이메일과 인증 코드를 받아 인증 이메일 메시지를 생성.
sendSimpleMessage(String sendEmail)
랜덤 인증 코드를 생성한 뒤 이메일로 발송하고 Redis에 5분 동안 인증 코드를 저장함.
verifyEmailCode(String email, String code)
Redis에서 저장된 인증 코드를 조회해 입력된 코드와 비교한 후 검증 결과를 반환하고, 인증 성공 시 Redis에서 데이터를 삭제함.
5) RedisUtil
@RequiredArgsConstructor
@Service
@Transactional
public class RedisUtil {

    private final StringRedisTemplate template;

    public String generateKey(String email) {
        if (email == null || email.isEmpty()) {
            throw new EmailNotFoundException("이메일이 존재하지 않습니다.");
        }
        return "email_verification:" + email;
    }

    public String getData(String key) {
        validateKey(key);
        if (!existData(key)) { // Key 존재 여부 확인
            throw new KeyNotFoundException("Redis에 존재하지 않는 키입니다. key = " + key);
        }
        ValueOperations<String, String> valueOperations = template.opsForValue();
        return valueOperations.get(key);
    }

    public boolean existData(String key) {
        validateKey(key);
        return Boolean.TRUE.equals(template.hasKey(key));
    }

    public void setDataExpire(String key, String value, long duration) {
        validateKey(key);
        ValueOperations<String, String> valueOperations = template.opsForValue();
        Duration expireDuration = Duration.ofSeconds(duration);
        valueOperations.set(key, value, expireDuration);
    }

    public void deleteData(String key) {
        validateKey(key);
        template.delete(key);
    }

    private void validateKey(String key) {
            if (key == null || key.isEmpty()) {
                throw new KeyNotFoundException("키 값이 null이거나 비어 있습니다.");
            }
        }
}
generateKey(String email)
이메일을 기반으로 Redis 키를 생성하며, 이메일이 null 또는 빈 값이면 예외를 던짐.
getData(String key)
Redis에서 해당 키의 데이터를 조회하며, 키가 없으면 예외를 던짐.
existData(String key)
Redis에 해당 키가 존재하는지 확인함.
setDataExpire(String key, String value, long duration)
지정된 키와 값을 Redis에 저장하고 TTL(유효기간)을 설정함.
deleteData(String key)
Redis에서 지정된 키를 삭제함.
validateKey(String key)
키가 null이거나 빈 값인지 확인하며, 그렇다면 예외를 던짐.
6) EmailController
@RestController
@RequiredArgsConstructor
@RequestMapping("/api/v1/email")
public class EmailController {
    private final EmailService emailService;

    @ResponseBody
    @PostMapping("/send")
    public String emailCheck(@RequestBody EmailRequest request) {
        return emailService.sendSimpleMessage(request.getEmail());
    }

    // 인증코드 인증
    @PostMapping("/verify")
    public boolean verify(@RequestBody VerifyCodeRequest request) {
        return emailService.verifyEmailCode(request.getEmail(), request.getAuthCode());
    }
}
send로 이메일 인증 번호 보내는지 확인하고
verify로 검증한다.
7) 기타 exception
1) EmailNotFoundException
public class EmailNotFoundException extends RuntimeException{

    public EmailNotFoundException(String message) {
        super(message);
    }
}
2) EmailSendException
public class EmailSendException extends RuntimeException {

    public EmailSendException(String message, Throwable cause) {
        super(message, cause);
    }
}
3) KeyNotFoundException
public class KeyNotFoundException extends RuntimeException{
    public KeyNotFoundException() {
    }

    public KeyNotFoundException(String message) {
        super(message);
    }
}
4) GlobalExceptionHandler
@RestControllerAdvice
@Slf4j
public class GlobalExceptionHandler {

    @ExceptionHandler(EmailSendException.class)
    public ResponseEntity<String> handleEmailSendException(EmailSendException ex) {
        return ResponseEntity.status(HttpStatus.INTERNAL_SERVER_ERROR).body(ex.getMessage());
    }

    @ExceptionHandler(Exception.class)
    public ResponseEntity<String> handleGenericException(Exception ex) {
        log.error("An unexpected error occurred", ex);
        return ResponseEntity.status(HttpStatus.INTERNAL_SERVER_ERROR).body("An unexpected error occurred");
    }
}
Postman으로 검증
일단 ssh에서
redis-serverredis 켜주고
1) send
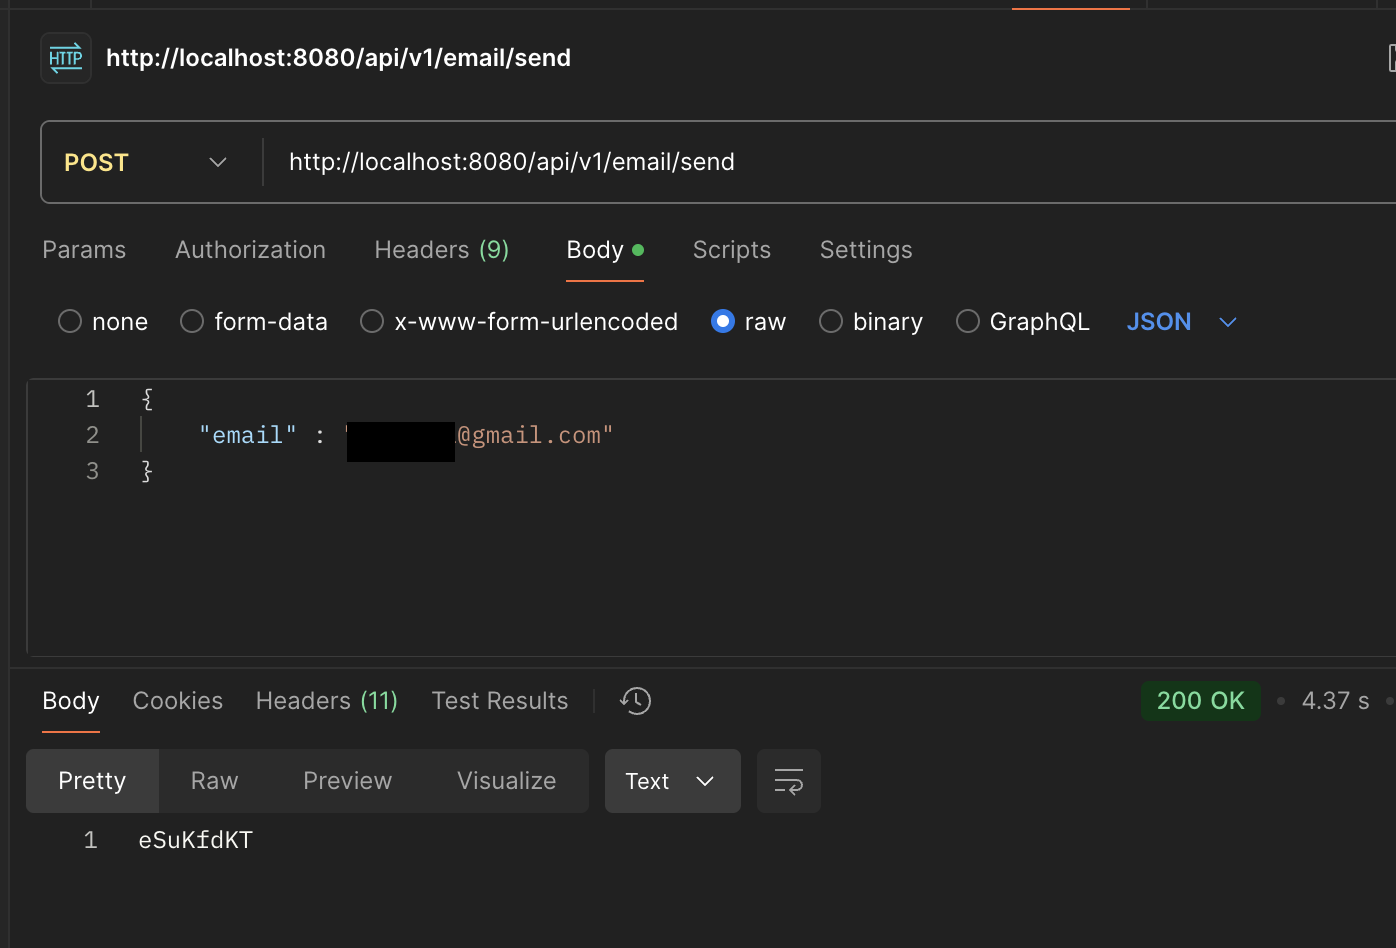
send부터 검증해보면 이렇게 인증번호가 오고
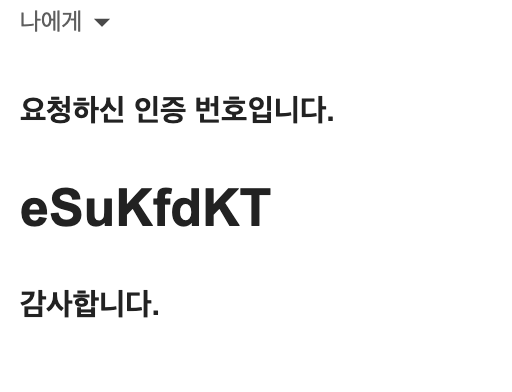
작성한 메일에 들어가보면 와있는걸 볼 수 있다.
2) verify 검증
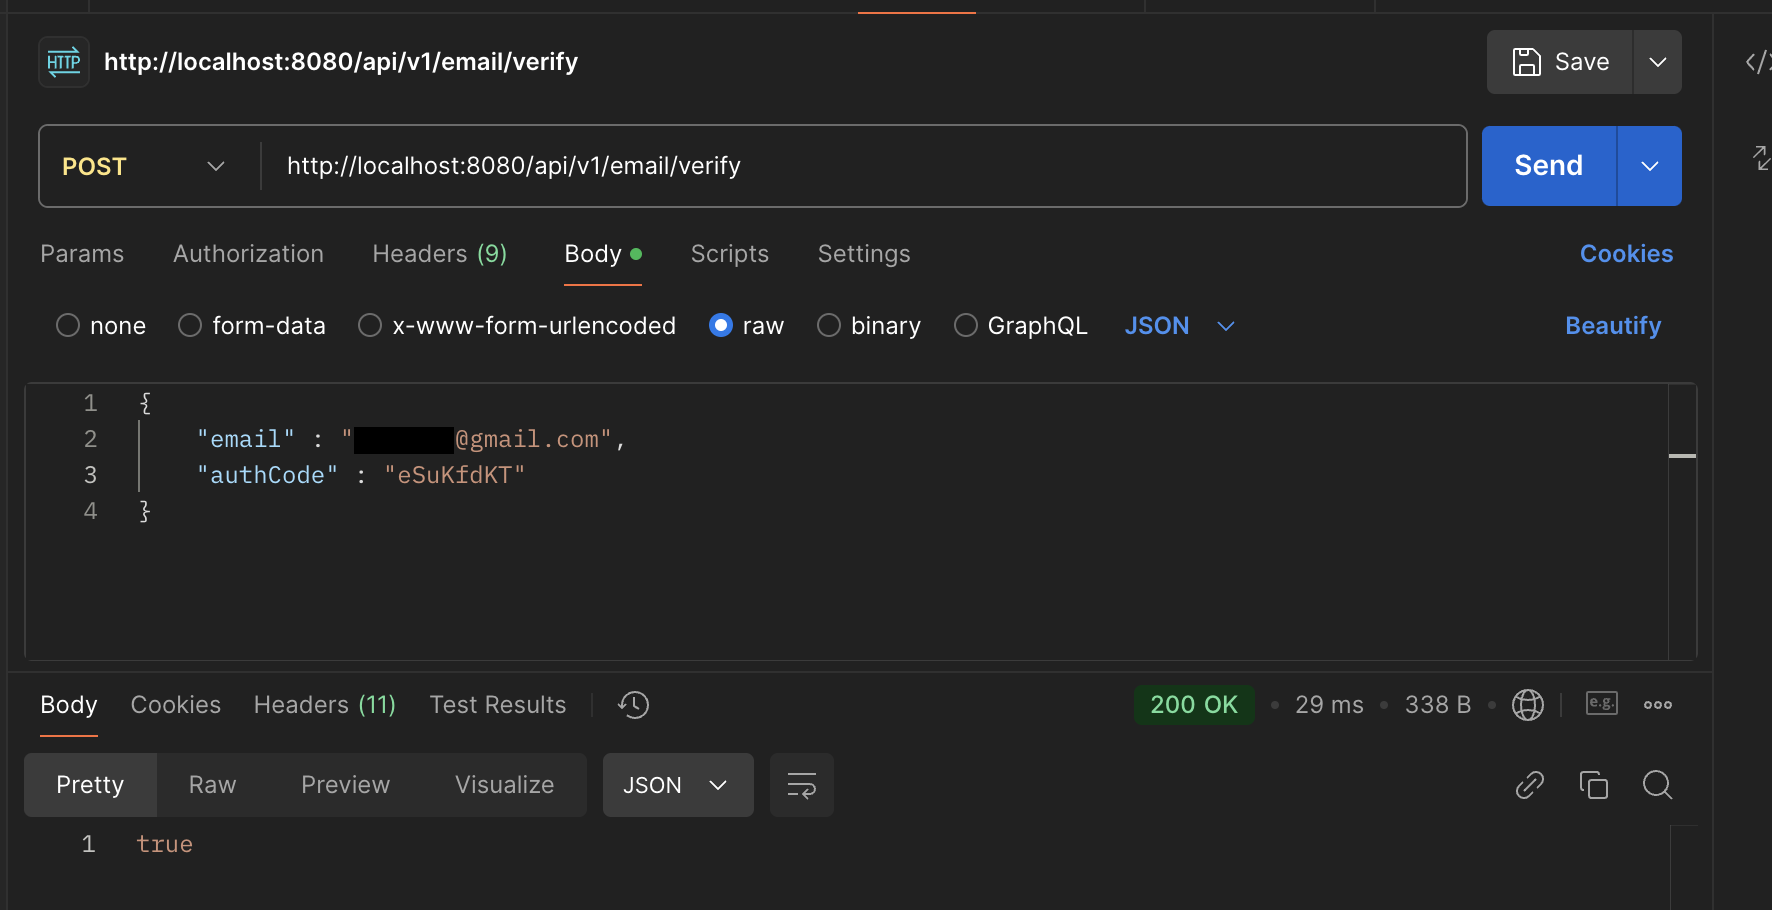
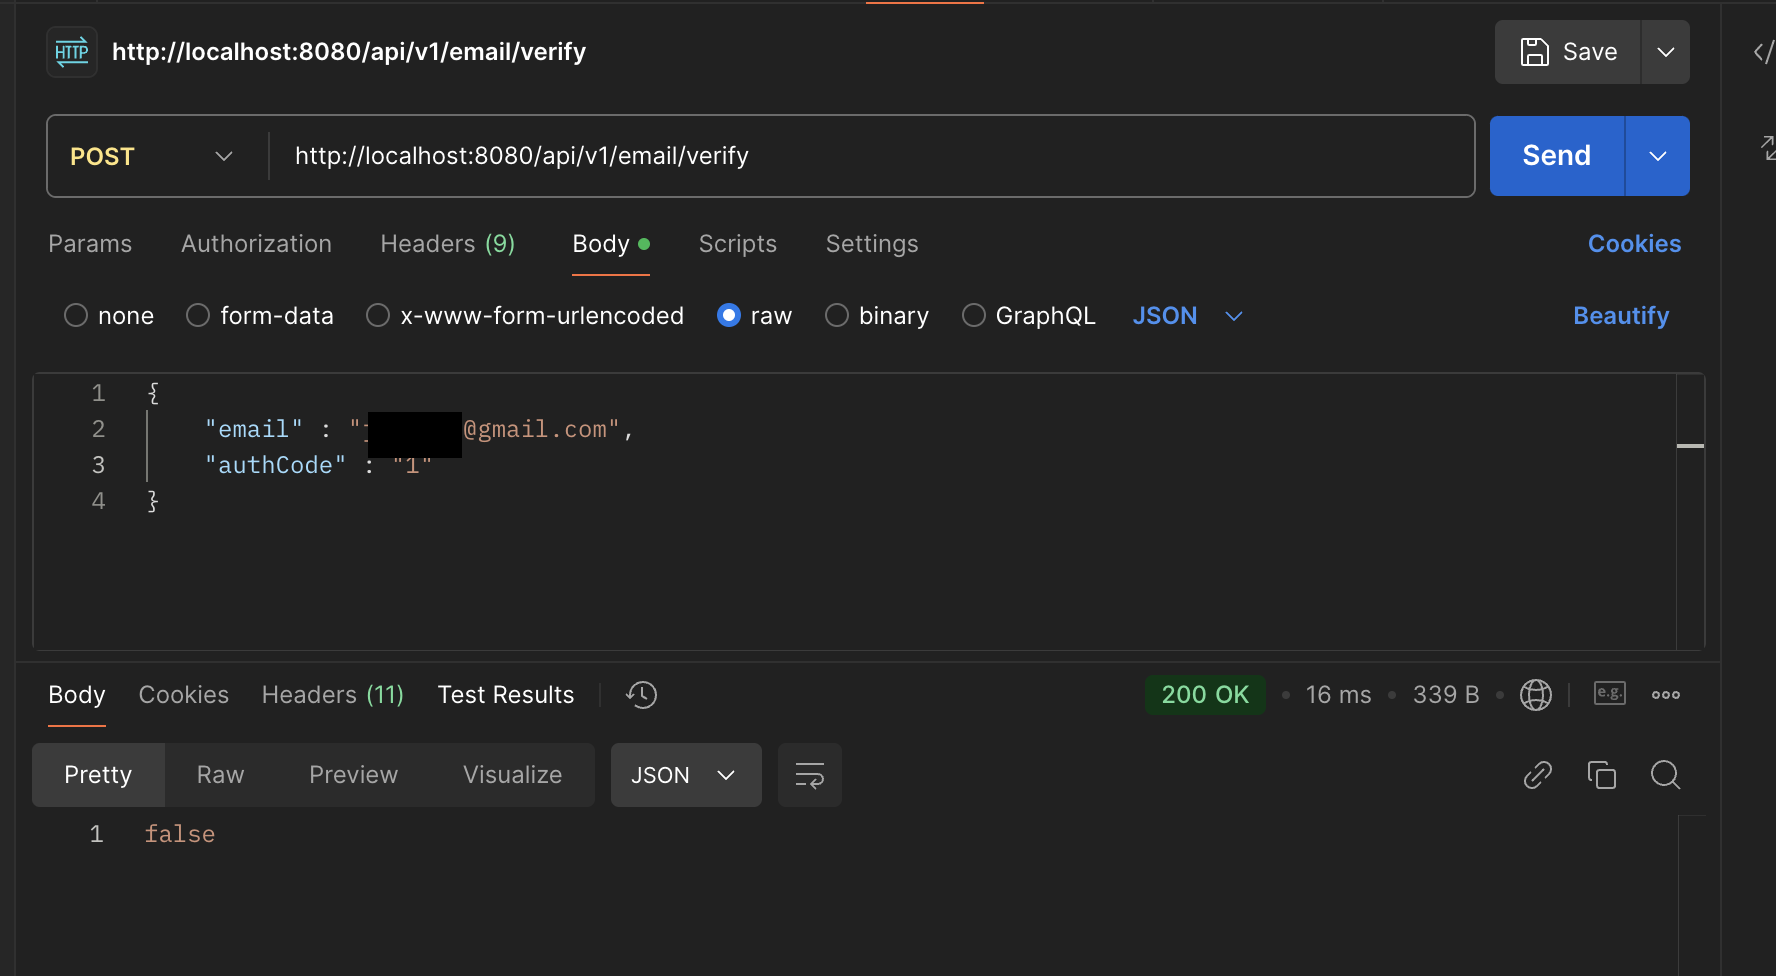
이렇게 제대로된 인증번호를 입력하면 true, 아님 false가 나오는 것을 볼 수 있다.
느낀점
처음에는 막막했지만 멋진 분들이 많이 올려주신 걸 참고하기도 했고, 열심히 해보니 해냈던 것 같다. 새로운 걸 도전할 때 일단 시도부터 해보는게 맞다는걸 느꼈다.