※ 코드는 강의에서 사용된 것과 다릅니다.
jaewon-ju Github Address
✏️ @RestController
이번 포스트를 이해하기 위해 필요한 사전 지식이다.
@Controller 어노테이션이 붙은 핸들러 클래스가 String을 반환하면, 스프링은 리턴한 것을 뷰의 논리적 이름으로 판단한다.
@Controller
public SpringController(){

    @RequestMapping("/test")
    public String process(){
    	return "test"
        // test가 뷰의 논리적 이름이구나! -> viewResolve 함
    }
}
하지만, 그냥 문자열을 응답 메시지로 내보내고 싶은 상황에서는 @RestController 어노테이션을 사용하면된다.
@RestController
public SpringController(){

    @RequestMapping("/test")
    public String process(){
    	return "test"
        // test를 화면에 찍음
    }
}
✏️ Logging
Spring MVC의 기본 기능을 알아보기 전에, 로그에 대해서 간단히 알아보자.
로그를 찍기 위해서는 로깅 라이브러리를 사용해야 한다.
스프링 부트는 기본적으로 다음의 로깅 라이브러리를 제공한다.
- SLF4J - 인터페이스
- Logback - 구현객체
장점
로그를 사용하면 다음과 같은 장점이 있다.
- System.out보다 성능이 좋다.
- 로그 레벨을 조정해서 상황에 맞게 출력 여부를 지정할 수 있다.
- 부가 정보를 함께 출력해준다.
■ 사용방법
로그를 찍으려는 위치에 다음의 코드를 추가한다.
private Logger log = LoggerFactory.getLogger(getClass());

log.info("로그 남기기");
■ 로그 레벨
로그는 다섯가지 레벨이 존재한다.
- TRACE
- DEBUG
- INFO
- WARN
- ERROR
보통 개발 서버에서는 【 2. DEBUG ~ 5. ERROR 】 까지 출력하고
운영 서버에서는 【 3. INFO ~ 5. ERROR 】 까지 출력한다.
■ 로그 사용법
application.properties에서 로그 레벨을 설정한다.
logging.level.springmvc=debug

// debug와 그 하위 로그만 출력되도록 설정한다.
@RestController
public class LogController {
private Logger log = LoggerFactory.getLogger(getClass());
@RequestMapping("/logTest")
public void logTest(){
String content = "content"
log.trace("trace log={}", content);
// 레벨이 debug로 설정되어 있으므로 출력되지 않는다.
log.debug("debug log={}", content);
log.info("info log={}", content);
log.warn("warn log={}", content);
log.error("error log={}", content);
}
}⚠️ 로그를 출력할 때는 + 연산자를 사용하면 안된다!!!
+ 연산자는 로그를 실행하지 않더라도 계산이 되므로 자원을 낭비한다.
예를 들어,log.trace("trace log =" + content);이런식으로 코드를 바꾼다면, "trace log = content" 로 문자열이 완성된 채로 대기한다.
trace는 출력되지 않으므로 의미없는 연산이 발생한 것이다.
따라서, 반드시 괄호를 사용해서 출력해야 한다.
✏️ 요청 매핑
이제 Spring MVC의 기본 기능들을 알아보도록 하자.
Spring MVC는 요청 메시지를 분석해서 요청을 처리할 수 있는 핸들러를 호출한다.
이때, 특정 조건을 만족하는 요청 메시지만 처리하도록 제한할 수 있다.
■ @RequestMapping
요청을 받았을 때 실행할 메소드를 매핑한다.
@RequestMapping("/test-request")
public String process(){
	log.info("test");
    return "test";
}- "/test-request"로 요청이 오면
process()메소드를 실행한다. - HTTP Method를 구분하지 않는다.
GET으로 요청이 오던, POST던, PATCH던 URI만 맞으면 실행된다.
■ HTTP Method 매핑
특정 HTTP Method로 들어왔을 때만 요청을 처리하도록 제한할 수 있다.
@[HTTP Method]Mapping 어노테이션을 사용한다.
@GetMapping("/test-request")
// 또는 이렇게도 작성 가능하다.
// @RequestMapping(value = "/test-request", method = RequestMethod.GET)
public String process(){
	log.info("test");
    return "test";
}- GET Method로 "/test-request"에 요청을 했을 때만 처리된다.
- 만약 POST Method로 요청 메시지를 보내면, 405 Not Allowed 를 리턴한다.
■ PathVariable
최근 HTTP API는 다음과 같이 리소스 경로에 식별자를 넣는 스타일을 선호한다.
/mapping/userA/orders/1
@RequestMapping을 사용하면 URL 경로를 템플릿화 할 수 있는데, @PathVariable을 사용하면 매칭 되는 부분을 편리하게 조회할 수 있다.
@GetMapping("/test-request/{testId}")
public String process(@PathVariable("testId") String testId){
	log.info("testId = {}",testId);
    return "test";
}

// 요청 파라미터의 key 이름과 메소드의 매개변수명이 같으면 생략할 수 있다.
// process(@PathVariable String testId)
@PathVaribale 은 다중으로도 사용 가능하다.
@GetMapping("/test-request/{testId}/{testPw}")
public String process(@PathVariable String testId, @PathVariable String testPw){

	log.info("testId = {}",testId);
   	log.info("testPw = {}",testPw);
    return "test";
}
■ 파라미터 조건 매핑
특정 파라미터가 조건에 맞을 때만 요청을 처리하도록 매핑할 수 있다.
// 요청이 /test-request에 들어오고 condition=ok 라는 파라미터가 존재해야 처리된다.
// /test-request?condition=ok
@GetMapping(value = "/test-request", params = "condition=ok")
public String process(){
	log.info("test");
    return "test";
}
■ 헤더 조건 매핑
특정 요청 헤더가 조건에 맞을 때만 요청을 처리하도록 매핑할 수 있다.
// 요청 메시지의 헤더에 myHeader: good이 작성되어 있어야 한다.
@PostMapping(value = "/test-request", headers = "myHeader=good")
public String process(){
	log.info("test");
    return "test";
}
■ Content-Type 조건 매핑
Content-Type 헤더가 조건에 맞을 때만 요청을 처리하도록 매핑할 수 있다.
// 요청 메시지의 Content-Type이 작성되어 있어야 한다.
@PostMapping(value = "/test-request", consumes = "application/json")
public String process(){
	log.info("test");
    return "test";
}
요청으로 온 데이터를 소비(consume) 하는 것이다.
■ Accept 조건 매핑
Accept 헤더가 조건에 맞을 때만 요청을 처리하도록 매핑할 수 있다.
// 요청 메시지의 Accept 헤더가 작성되어 있어야 한다.
@PostMapping(value = "/test-request", produces = "text/html")
public String process(){
	log.info("test");
    return "test";
}
요청한 클라이언트가 원하는 데이터를 제공(produce) 하는 것이다.
✏️ 요청 헤더 조회
Spring MVC는 요청한 메시지의 헤더를 조회하는 기능을 지원한다.
Servlet에서는 HttpServletRequest request 매개변수로 헤더를 조회했다.
System.out.println("request.getMethod() = " + request.getMethod());
System.out.println("request.getProtocol() = " + request.getProtocol());
System.out.println("request.getScheme() = " + request.getScheme());
System.out.println("request.getRequestURL() = " + request.getRequestURL());
...
Spring MVC의 핸들러도 HttpServletRequest request로 헤더를 조회할 수 있다.
뿐만 아니라, 다양한 파라미터를 주입받아서 사용할 수도 있다.
■ 핸들러 메소드의 매개변수
핸들러의 메소드가 주입받을 수 있는 매개변수 종류는 매우 다양하다!
| 타입 | 설명 |
|---|---|
| HttpServletRequest | 서블릿 컨테이너가 제공하는 요청 객체 |
| HttpServletResponse | 서블릿 컨테이너가 제공하는 응답 객체 |
| HttpMethod | HTTP의 METHOD를 조회하기 위한 객체 |
| Locale | Locale 정보 조회를 위한 객체 |
| @RequestHeader MultiValueMap<String, String> | 모든 HTTP 헤더를 조회하기 위한 MultiValueMap<> 객체 |
@PostMapping
public String process(
		HttpServletRequest request,
        HttpServletResponse response,
        HttpMethod httpMethod,
        Locale locale,
        @RequestHeader MultiValueMap<String, String> headerMap
	) {

    // 다양한 파라미터를 주입받아서 사용할 수 있다.
    // 주입받은 객체들을 사용해서 헤더 정보를 다룰 수 있다.
}
이렇게 다양한 타입의 매개변수를 주입받을 수 있는 이유는 무엇일까?
✓ ArgumentResolver 덕분이다.
✏️ 요청 데이터 조회 - 요청 파라미터
클라이언트에서 서버로 데이터를 보내는 방법은 딱 3가지 존재한다.
- GET - 쿼리 파라미터 사용
- POST - HTML Form 사용
- ANY METHOD - HTTP MESSAGE BODY에 데이터를 직접 담음
이번 파트에서는 요청 파라미터 형식으로 넘어온 데이터를 조회하는 방법을 알아보자.
즉, 1번과 2번 방식으로 넘어온 데이터를 조회하는 방법을 알아보자.
1. 서블릿 사용
서블릿에서 학습했던 것처럼, 쿼리 파라미터와 HTML Form으로 전송된 요청 데이터는 request.getParameter() 메소드를 사용해서 조회할 수 있다.
쿼리 파라미터로 데이터 전송
GET /test-request?product=speaker&count=1 HTTP/1.1
Host: localhost:8080
HTML Form으로 데이터 전송
POST /test-request HTTP/1.1
content-type: application/x-www-form-urlencoded
Host: localhost:8080

product=speaker&count=1
결국에는 둘 다 파라미터 형식으로 데이터를 전송한다.
➜ request.getParameter()로 둘 다 조회 가능하다.
@RequestMapping("/test-request")
public void process(HttpServletRequest request,
	HttpServletResponse response) throws IOException{

	String product = request.getParameter("product");
    int count = Integer.parseInt(request.getParameter("count"));

    log.info("product = {}", product);
    log.info("count = {}", count);

    response.getWriter().write("ok");
}

// 핸들러에서 아무것도 리턴하지 않고, 직접 응답에 값을 집어 넣으면 view를 조회하지 않는다.
2. @RequestParam 사용
@RequestParam 어노테이션을 사용하면, 메소드의 매개변수로 요청 파라미터를 직접 주입받을 수 있다.
@Slf4j
@Controller
public class requestParameterController {

    @ResponseBody // @ResponseBody를 사용하면 HTTP message body에 직접 문자열을 집어 넣는다.
    @RequestMapping("/test-requestParameter")
    public String process(
        @RequestParam("product") String product,
        @RequestParam("count") int count
        ){

        log.info("product = {}, count = {}",product,count);
        return "ok";
    }
}-
@ResponseBody어노테이션을 사용하면 해당 메소드의 리턴을 뷰의 논리적 이름으로 판단하지 않는다. 대신, 응답 메시지의 Body에 그대로 문자열을 넣는다. -
요청 파라미터의 key와 매개변수의 이름이 같다면
@RequestParam의 괄호를 생략 가능하다.
public String process(@RequestParam String product, @RequestParam int count) { ... }매개변수의 타입이
String,int같이 단순 타입이면@RequestParam도 생략가능하다.
하지만, 어노테이션 자체를 생략해버리면 다른 사람이 코드를 볼 때 이해하기 어려울 수 있다.
@RequestParam 어노테이션을 사용하면 요청 파라미터를 강제할 수 있다.
이때, 모든 매개변수는 참조 타입이어야 한다.
@ResponseBody
@RequestMapping("/test-requestParameter")
public String process(
    @RequestParam(value = "product",required = true) String product,
    @RequestParam(value = "count",required = false) Integer count
    ){

    log.info("product = {}, count = {}",product,count);
    return "ok";
}


/* 만약 매개변수가 int count 라면?
 * 해당 파라미터(count)는 필수 파라미터가 아니다.
 * count를 생략하고 product=speaker와 같이 요청 메시지를 보낸다.
 * count에는 그러면 null 값이 들어가는데, 이 때 매개변수가 기본형(int)이라면 오류가 발생한다.
 */

/* 만약 빈문자를 넣는다면?
 * product= 처럼 파라미터 이름만 입력하고 빈 문자를 요청한다면 어떻게 될까
 * 그냥 통과된다.
 * 따라서, 빈 문자로 요청 시 기본 값을 넣어주는 defaultValue 옵션이 필요하다.
 *
 * @RequestParam의 defaultValue 옵션을 사용하면 파라미터가 입력되지 않았을 시 기본 값을 적용한다.
 * @RequestParam(value = "product", required = true, defaultValue = "none") String product
 * @RequestParam(value = "count", required = false, defaultValue = "-1") int count
 */
3. @ModelAttribute
상품(product)과 개수(count)가 요청 파라미터로 넘어오면, 그것을 Order 객체로 저장하는 로직을 살펴보자.
@ResponseBody
@RequestMapping("/test-requestParameter")
public String process(@RequestParam("product") String product, @RequestParam("count") int count){

    Order order = new Order();
    order.setProduct(product);
    order.setCount(count);

    return "ok";
}
@ModelAttribute 어노테이션을 사용하면 이 과정을 매우 짧게 단축시킬 수 있다.
@ResponseBody
@RequestMapping("/test-requestParameter")
public String process(@ModelAttribute Order order){
    return "ok";
}
@ModelAttribute어노테이션은
1. 매개변수인Order객체를 생성하고
2. 요청 파라미터의 이름으로Order객체의 프로퍼티를 찾는다.
3. 그리고 해당 프로퍼티의 setter를 호출해서 파라미터의 value를 입력한다.
@ModelAttribute어노테이션은 생략 가능하다.
@RequestParam어노테이션도 생략 가능하니 혼란이 발생할 수 있다.
스프링은 매개변수가 단순 타입인 경우@RequestParam가 생략되었다 판단하고
나머지 타입인 경우@ModelAttribute가 생략되었다 판단한다.
✏️ 요청 데이터 조회 - Message Body(Text)
이번 파트에서는 요청 메시지의 Body로 넘어온 TEXT 데이터를 조회하는 방법을 알아보자.
@RequestParam 이나 @ModelAttribute는 사용 불가능하다.
1. InputStream
서블릿에서 학습했던 ServletInputStream 객체를 활용해서 메시지 Body 전체를 읽을 수 있다.
@Slf4j
@Controller
@RequestMapping("/test/request-body")
class requestBodyController {

    @ResponseBody
    @PostMapping("/v1")
    public String process(HttpServletRequest request) throws IOException {
        ServletInputStream inputStream = request.getInputStream();
        String body = StreamUtils.copyToString(inputStream, StandardCharsets.UTF_8);

        return "ok";
    }

}InputStream객체 자체를 매개변수로 받을 수도 있다.
public String process2(InputStream inputStream) throws IOException { ... }2. HttpEntity<>
HttpEntity객체는 HTTP 메시지의 header, body 정보를 편리하게 조회할 수 있게 해준다.
⚠️ 요청 파라미터를 조회하는 기능과는 무관하다.
HttpEntity는 응답에도 사용 가능하다.HttpEntity를 상속받은RequestEntity, ResponseEntity객체도 같은 기능을 제공한다.
	@ResponseBody
    @PostMapping("/v3")
    public String process3(HttpEntity<String> httpEntity) {
        String body = httpEntity.getBody();

        return "ok";
    }
3. @RequestBody
@RequestBody어노테이션을 사용하면 메시지 body의 내용을 매개변수로 바로 주입받을 수 있다.
    @ResponseBody
    @PostMapping("/v4")
    public String process4(@RequestBody String body) {
        return "ok";
    }
✏️ 요청 데이터 조회 - Message Body(JSON)
이번 파트에서는 요청 메시지의 Body로 넘어온 JSON 데이터를 조회하는 방법을 알아보자.
위에서 TEXT 데이터를 조회했던 방법 3가지를 똑같이 활용한다.
1. InputStream
@Slf4j
@Controller
@RequestMapping("/test/request-body-json")
public class requestBodyJsonController {

    private ObjectMapper objectMapper = new ObjectMapper();

    @ResponseBody
    @PostMapping("/v1")
    public String process1(HttpServletRequest request) throws IOException {
        ServletInputStream inputStream = request.getInputStream();
        String body = StreamUtils.copyToString(inputStream, StandardCharsets.UTF_8);

        Order order = objectMapper.readValue(body, Order.class);

        return "ok";
}- 서블릿에서 학습했던
ObjectMapper객체가 사용되었다. ObjectMapper객체는 JSON 문자열을 객체로 저장해준다.
2. HttpEntity<>
HttpEntity 객체를 사용하면, ObjectMapper를 쓰지 않고 응답 메시지 body 자체를 주입 받을 수 있다.
    @ResponseBody
    @PostMapping("/v2")
    public String process2(HttpEntity<Order> httpEntity) throws IOException{
        Order order = httpEntity.getBody();

        return "ok";
}- TEXT 데이터를 주입받을 때는
HttpEntity<String>타입을 사용했다.
JSON 데이터를 주입받을 때는HttpEntity<JSON에서 변환할 객체 타입>을 사용한다.
3. @RequestBody
역시나 가장 간단한 방법은 @RequestBody 어노테이션을 사용하는 것이다.
    @ResponseBody
    @PostMapping("/v3")
    public String process3(@RequestBody String body) throws IOException{
        Order order = objectMapper.readValue(body, Order.class);

        return "ok";
}- 요청 메시지 body를 문자열로 읽어와서
objectMapper객체를 통해Order객체로 변환
InputStream과 똑같은 로직이다.
@RequestBody에 직접 만든 객체를 지정할 수 있다.
    @ResponseBody
    @PostMapping("/v4")
    public String process4(@RequestBody Order order) throws IOException{
        return "ok";
    }
}
✏️ Argument Resolver
HttpServletRequest, HttpServletResponse, Model, @RequestParam 기본형 변수, @RequestParam 객체, HttpEntity<> 등..
핸들러의 메소드는 여러종류의 매개변수를 주입받을 수 있다.
어떻게 가능할까?
누가 이런 변수/객체를 생성해서 핸들러의 메소드에 전달하는 것일까?
핸들러의 메소드를 호출하는 것은 핸들러 어댑터이다.
핸들러 어댑터는 Argument Resolver 로부터 메소드의 매개변수로 전달할 변수/객체를 받는다.
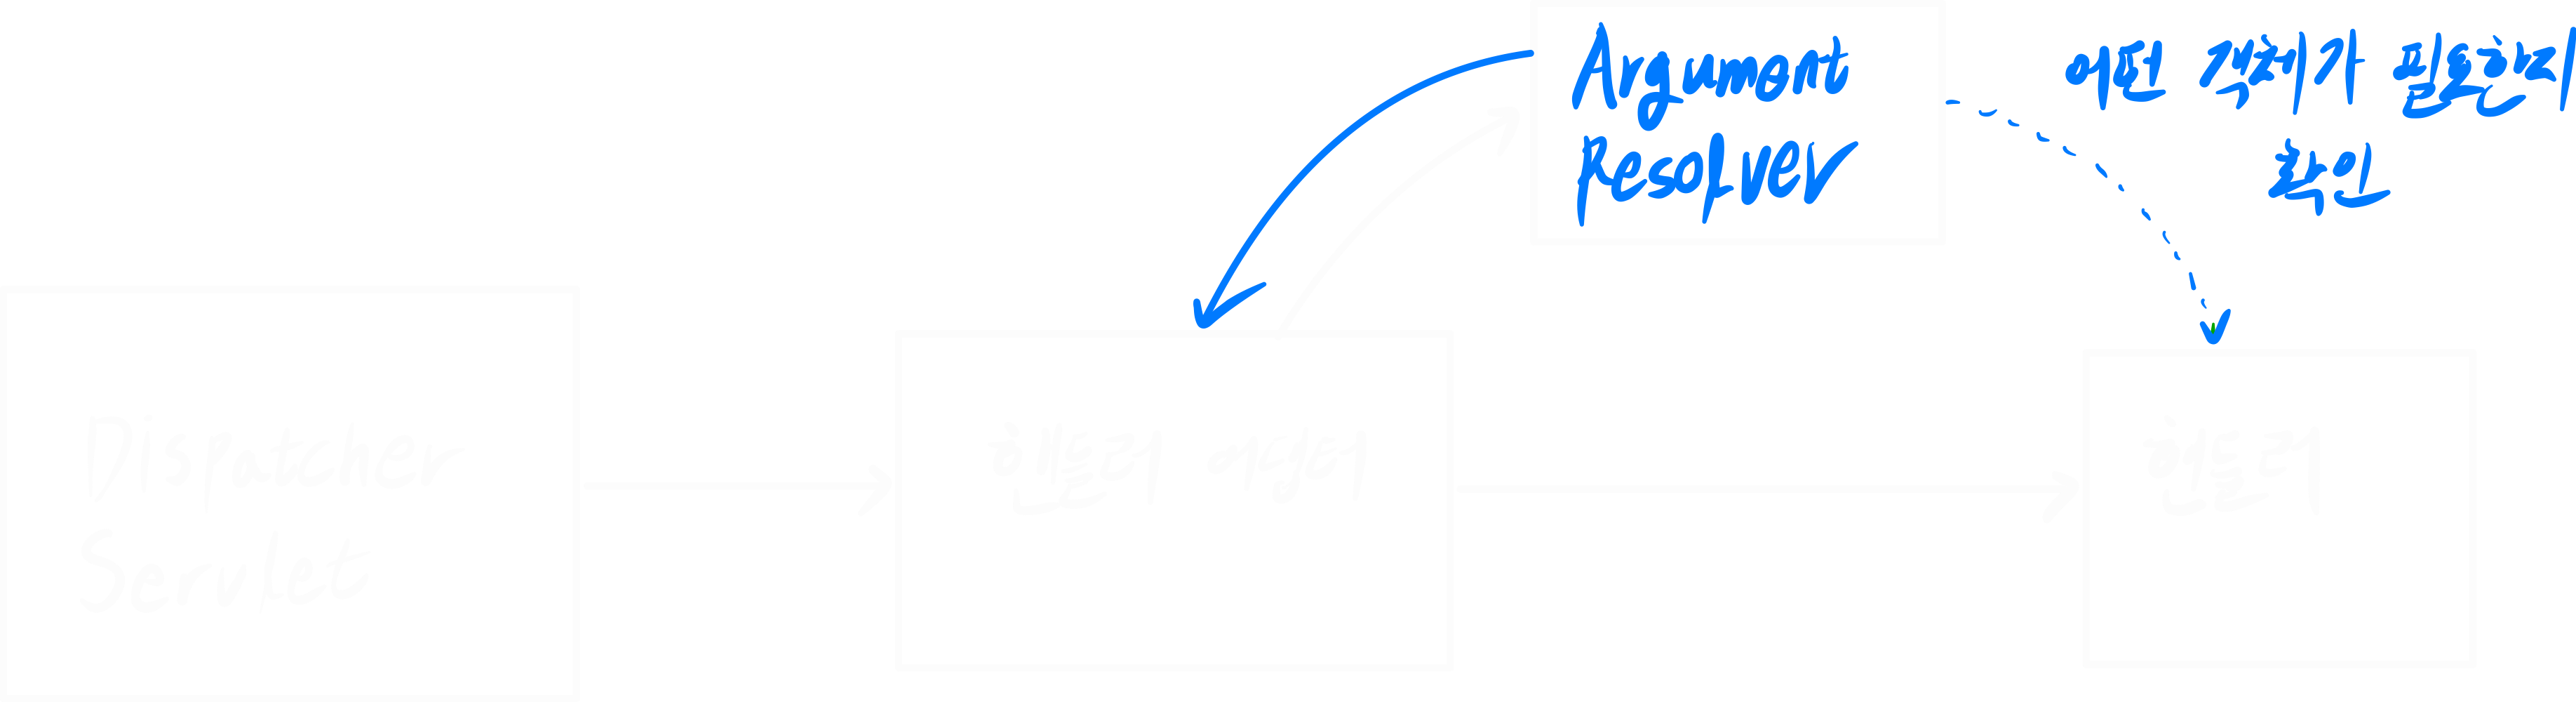
- Argument Resolver는 핸들러의 파라미터, 어노테이션 정보를 보고 전달할 데이터를 생성한다.
- Argument Resolver는 생성한 데이터를 어댑터에 전달한다.
■ HTTP Message Converter
Arugment Resolver는 HTTP와 관련이 없는,
HttpServletRequest,HttpServletResponse,Model같은 객체들은 스스로 생성할 수 있지만, HTTP 메시지 관련 객체는 HTTP Message Converter의 도움을 받아야 한다.
- Argument Resolver는 메소드의 매개변수에
@RequestParam또는HttpEntity<>가 존재하면 HTTP Message Converter를 호출한다.
예를 들어, 핸들러의 메소드가 Order 객체를 주입받으려 한다.
요청 메시지는 Body에 JSON 데이터를 넣어서 전달한다.public void process(@RequestParam Order order)
- Argument Resolver는 해당 메시지의 body를 분석해서, JSON 데이터를 사용해서 Order 객체를 생성해줄 수 있는 HTTP Message Converter 구현객체를 조회한다.
- 컨버터를 찾으면, 해당 컨버터로 Order 객체를 생성 한 뒤에 Argument Resolver로 보내고, Argument Resolver는 어댑터에 리턴한다.
HTTP Message Converter 인터페이스를 구현한 다양한 구현 객체가 존재한다.
그 중, Argument Resolver는 핸들러 메소드 매개변수의 타입과 Content-Type을 체크해서 컨버터를 선택한다.
| 우선순위 | HTTP Message Converter 구현 객체 | 매개변수 타입 | Content-Type |
|---|---|---|---|
| 0 | ByteArrayHttpMessageConverter | byte[] | 모두 |
| 1 | StringHttpMessageConverter | String | 모두 |
| 2 | MappingJackson2HttpMessageConverter | 객체 or HashMap | application/json |
HTTP Message Converter는 응답에서도 사용된다!
REFERENCE