스프링과 JPA 기반 웹 애플리케이션 개발 #55 스터디 개설
해당 내용은 인프런, 스프링과 JPA 기반 웹 애플리케이션 개발의 강의 내용을 바탕으로 작성된 내용입니다.
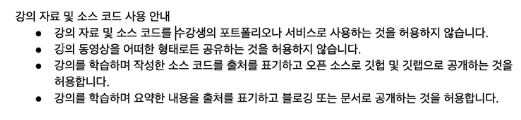
강의를 학습하며 요약한 내용을 출처를 표기하고 블로깅 또는 문서로 공개하는 것을 허용합니다 라는 원칙 하에 요약 내용을 공개합니다. 출처는 위에 언급되어있듯, 인프런, 스프링과 JPA 기반 웹 애플리케이션 개발입니다.
제가 학습한 소스코드는 https://github.com/n00nietzsche/jakestudy_webapp 에 지속적으로 업로드 됩니다. 매 커밋 메세지에 강의의 어디 부분까지 진행됐는지 기록해놓겠습니다.
도메인 재개편
나는 @ManyToMany 애노테이션을 사용하지 않는다. 그 이유는 다음과 같다.
- DB와 1:1 매칭이 되지 않는다.
- N:N 관계에서 오는 중간 도메인의 추가 정보를 삽입할 수 없다.
그래서 전부 1:N+N:1로 연동되는 관계로 바꾸었다.
StudyAccount
@Entity
// 관리자, 부관리자 등 다양한 권한을 부여하거나,
// 관리자가 된 시점, 부관리자가 된 시점,
// 관리자를 임명한 사람, 부관리자를 임명한 사람
// 등 추가 정보를 기입하려면 따로 빼는게 좋다고 판단했음
// 그리고 따로 멤버와 관리자를 나눠야 할 이유가 없는 것 같다고 판단
@NoArgsConstructor
public class StudyAccount {

    @Id @GeneratedValue
    private Long id;
    @Enumerated(value = EnumType.STRING)
    private StudyAccountRole role;
    // 많은 스터디 계정은 하나의 스터디에 속할 수 있다.
    @ManyToOne
    @JoinColumn(name = "STUDY_ID")
    private Study study;
    // 많은 스터디 계정은 (각각 다른 스터디에 속하니까) 하나의 계정을 가리킬 수 있다.
    @ManyToOne
    @JoinColumn(name = "ACCOUNT_ID")
    private Account account;

    public StudyAccount(Study study, Account account, StudyAccountRole role){
        this.study = study;
        this.account = account;
        this.role = role;
    }
}
따로 Study에 managers 필드나 members 필드를 설정하기보다도 Study에 가입되어 있는 계정들을 보관하는 StudyAccount 라는 도메인을 새로 생성 후에 StudyAccountRole이라는 Enum 타입 필드를 만들어 권한을 설정하는 방식으로 정했다.
StudyAccountRole
public enum StudyAccountRole {
    STUDY_MANAGER, STUDY_MEMBER
}
현재는 STUDY_MANAGER와 STUDY_MEMBER가 있다.
StudyTag
@Entity
@NoArgsConstructor
public class StudyTag {
    @Id @GeneratedValue
    private Long id;

    @ManyToOne
    @JoinColumn(name = "STUDY_ID")
    private Study study;

    @ManyToOne
    @JoinColumn(name = "TAG_ID")
    private Tag tag;

    public StudyTag(Study study, Tag tag) {
        this.study = study;
        this.tag = tag;
    }
}N:N을 1:N과 N:1로 풀면서 생긴 테이블이다. 생성자만 짤막하게 추가하였다.
StudyZone
@Entity
@NoArgsConstructor
public class StudyZone {
    @Id @GeneratedValue
    private Long id;

    @ManyToOne
    @JoinColumn(name = "STUDY_ID")
    private Study study;

    @ManyToOne
    @JoinColumn(name = "ZONE_ID")
    private Zone zone;

    public StudyZone(Study study, Zone zone) {
        this.study = study;
        this.zone = zone;
    }
}N:N을 1:N과 N:1로 풀면서 생긴 테이블이다. 생성자만 짤막하게 추가하였다.
StudyController 생성
@Controller
@RequiredArgsConstructor
public class StudyController {

    private final StudyService studyService;
    private final ModelMapper modelMapper;
    private final StudyFormValidator studyFormValidator;

    @InitBinder
    public void initBinderStudyForm(WebDataBinder webDataBinder) {
        webDataBinder.addValidators(studyFormValidator);
    }

    @GetMapping("/new-study")
    public String newStudyForm(@LoginAccount Account loginAccount, Model model) {
        model.addAttribute(loginAccount);
        model.addAttribute(new StudyForm());
        return "study/form";
    }

    @PostMapping("/new-study")
    public String newStudy(@LoginAccount Account loginAccount, @Valid StudyForm studyForm, Errors errors, Model model) {
        if(errors.hasErrors()) {
            return "study/form";
        }

        Study newStudy = studyService.createNewStudy(modelMapper.map(studyForm, Study.class), loginAccount);
        return "redirect:/study/" + URLEncoder.encode(newStudy.getPath(), StandardCharsets.UTF_8);
    }
}
코드의 패턴은 이전과 같다. Form을 보여주는 GetMapping 만들고, 실제 처리를 수행하는 PostMapping 만들고, @Valid로 검증하고...
달라진 부분은 한글이 URL에 나올 수 있기 때문에 그것에 대비한 URLEncoder.encode() 메소드가 추가되었다.
StudyForm
@Data
public class StudyForm {
    @NotBlank
    @Length(min = 2, max = 20)
    @Pattern(regexp = "^[ㄱ-ㅎ가-힣a-z0-9_-]{2,20}$")
    private String path;

    @NotBlank
    @Length(max = 50)
    private String title;

    @NotBlank
    @Length(max = 100)
    private String shortDescription;

    @NotBlank
    private String fullDescription;
}
StudyValidator
@Component
@RequiredArgsConstructor
public class StudyFormValidator implements Validator {

    private final StudyRepository studyRepository;

    @Override
    public boolean supports(Class<?> clazz) {
        return StudyForm.class.isAssignableFrom(clazz);
    }

    @Override
    public void validate(Object target, Errors errors) {
        StudyForm studyForm = (StudyForm) target;
        if(studyRepository.existsByPath(studyForm.getPath())) {
            errors.rejectValue("path", "wrong.path", "해당 스터디 경로는 이미 존재합니다.");
        }
    }
}
StudyService
@Service
@Transactional
@RequiredArgsConstructor
public class StudyService {
    private final StudyRepository studyRepository;
    private final StudyAccountRepository studyAccountRepository;
    private final StudyZoneRepository studyZoneRepository;
    private final StudyTagRepository studyTagRepository;

    public Study createNewStudy(Study study, Account account) {
        Study newStudy = studyRepository.save(study);

        StudyAccount studyAccount = new StudyAccount(newStudy, account, StudyAccountRole.STUDY_MANAGER);
        studyAccountRepository.save(studyAccount);

        return newStudy;
    }
}
이전과 같은 패턴으로 Service는 Controller로 부터 데이터의 변화에 관련된 로직을 위임받는다.
Form.html
<!DOCTYPE html>
<html lang="en" xmlns:th="http://www.thymeleaf.org">
<head>
  <title>새 스터디</title>
  <th:block th:replace="fragments :: headLibraryInjection"></th:block>
</head>
<body class="bg-light">

<th:block th:replace="fragments :: main-nav"></th:block>

<div class="container">
  <div class="py-5 text-center">
    <h2>스터디 만들기</h2>
  </div>
  <div class="row justify-content-center">
    <form class="needs-validation col-sm-10" action="#"
          th:action="@{/new-study}" th:object="${studyForm}" method="post" novalidate>
      <div class="form-group">
        <label for="path">스터디 URL</label>
        <input id="path" type="text" th:field="*{path}" class="form-control"
               placeholder="예) study-path" aria-describedby="pathHelp" required min="2" max="20">
        <small id="pathHelp" class="form-text text-muted">
          공백없이 문자, 숫자, 대시(-)와 언더바(_)만 2자 이상 20자 이내로 입력하세요. 스터디 홈 주소에 사용합니다. 예) /study<b>study-path</b>
        </small>
        <small class="invalid-feedback">스터디 경로를 입력하세요.</small>
        <small class="form-text text-danger" th:if="${#fields.hasErrors('path')}" th:errors="*{path}">Path Error</small>
      </div>

      <div class="form-group">
        <label for="title">스터디 이름</label>
        <input id="title" type="text" th:field="*{title}" class="form-control"
               placeholder="예) 영어회화 스터디" aria-describedby="titleHelp" required max="50">
        <small id="titleHelp" class="form-text text-muted">
          스터디 이름을 50자 이내로 입력하세요.
        </small>
        <small class="invalid-feedback">스터디 이름을 입력하세요.</small>
        <small class="form-text text-danger" th:if="${#fields.hasErrors('title')}" th:errors="*{title}">Title Error</small>
      </div>

      <div class="form-group">
        <label for="shortDescription">짧은 소개</label>
        <input id="shortDescription" type="textarea" th:field="*{shortDescription}" class="form-control"
               placeholder="스터디를 짧게 소개해주세요." aria-describedby="shortDescriptionHelp" required>
        <small id="shortDescriptionHelp" class="form-text text-muted" maxlength="100">
          100자 이내로 스터디를 짧게 소개해보세요.
        </small>
        <small class="invalid-feedback">짧은 소개를 입력하세요.</small>
        <small class="form-text text-danger" th:if="${#fields.hasErrors('shortDescription')}" th:errors="*{shortDescription}">ShortDescription Error</small>
      </div>

      <div class="form-group">
        <label for="fullDescription">상세 소개</label>
        <input id="fullDescription" type="textarea" th:field="*{fullDescription}" class="form-control"
               placeholder="스터디를 자세히 소개해주세요." aria-describedby="fullDescriptionHelp" required>
        <small id="fullDescriptionHelp" class="form-text text-muted">
          스터디의 목표, 일정, 진행방식, 사용할 교재 또는 인터넷 강좌 그리고 모집중인 스터디원 등 스터디에 대해 자세히 적어보세요.
        </small>
        <small class="invalid-feedback">짧은 소개를 입력하세요.</small>
        <small class="form-text text-danger" th:if="${#fields.hasErrors('fullDescription')}" th:errors="*{fullDescription}">FullDescription Error</small>
      </div>

      <div class="form-group">
        <button class="btn btn-primary btn-block" type="submit" aria-describedby="submitHelp">
          스터디 만들기
        </button>
      </div>
    </form>
  </div>
</div>

<th:block th:replace="fragments :: footer"></th:block>
<script th:replace="fragments :: form-validation"></script>
<script src="/static/node_modules/summernote/dist/summernote-bs4.js"></script>
<script type="application/javascript">
  $(function() {
    $("#fullDescription").summernote({
      fontNames: ['Arial', 'Arial Black', 'Comic Sans MS', 'Courier New', 'Noto Sans KR', 'Merriweather'],
      placeholder: "스터디의 목표, 일정, 진행방식, 사용할 교재 또는 인터넷 강좌 그리고 모집중인 스터디원 등 스터디에 대해 자세히 적어보세요.",
      tabsize: 2,
      height: 300
    });
  });
</script>
</body>
</html>summernote라는 라이브러리를 다운받아 적용했다.
summernote는 한국인 개발자들이 만든 wysiwyg 라이브러리이다.