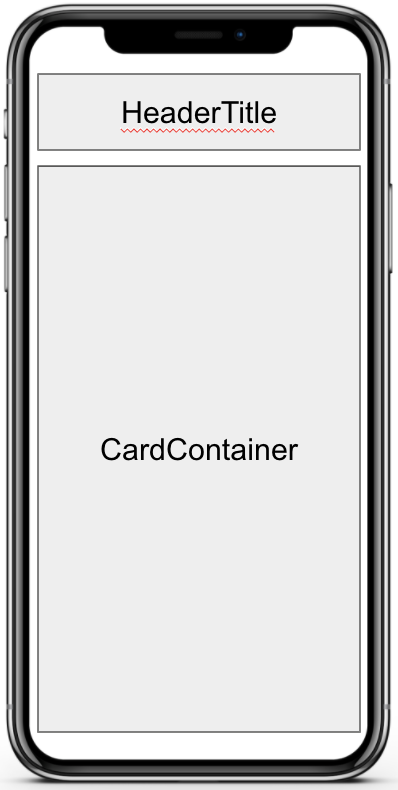
전체 틀 스케치

크게 두 가지로 나눴다.
제목을 넣을 HeaderTitle 부분
컨텐츠를 넣을 CardContainer 부분
완성된 모습

이제 코드를 살펴보자.
CSS
import styled from "styled-components";
.
.
.

const Container = styled.SafeAreaView`
  flex: 1;
  background-color: #fff;
`;

const HeaderTitle = styled.Text`
  text-align: center;
  font-size: 40px;
  font-weight: 300;
  color: #ff7272;
  margin: 10px 0 30px 0;
  background-color: red;
`;

const CardContainer = styled.View`
  flex: 1;
  background-color: yellow;
  border-radius: 10px;
  margin: 0 10px 0 10px;
`;

//*margin(top, right, bottom, left) 순서*//
앱에 전체를 잡아주는 Container 안에
HeaderTitle과 CardContainer가 잘 들어갔는지 임의로
색을 주어봤다.
빨간색인 HeaderTitle과 노란색인 CardContainer가 보일 것이다.
이제 잘 나눠진 것이 확인 되었으니, 원하는 색으로 바꿔준다.
진짜진짜 완성된 전체 틀

전체 코드
import { StatusBar } from "expo-status-bar";
import React from "react";
import { StyleSheet, Text, View } from "react-native";
import styled from "styled-components";

export default function App() {
  return (
    <Container>
      <StatusBar style="auto" />
      <HeaderTitle>TodoList</HeaderTitle>
      <CardContainer>
        <Text>Card Container</Text>
      </CardContainer>
    </Container>
  );
}

const Container = styled.SafeAreaView`
  flex: 1;
  background-color: #faf4f4;
`;

const HeaderTitle = styled.Text`
  text-align: center;
  font-size: 40px;
  font-weight: 300;
  color: #ff7272;
  margin: 10px 0 30px 0;
  background-color: #faf4f4;
`;

const CardContainer = styled.View`
  flex: 1;
  background-color: #fff;
  border-radius: 10px;
  margin: 0 10px 0 10px;
`;
