[토이 프로젝트] 장미전쟁 score tracker 만들기: username입력받는 모달창 구현하여 store로 전역 상태 관리(redux toolkit)
어제 로그인 구현이 마무리 되었으니 로그인한 유저를 위해 본격적으로 게임 보드 만들기에 들어가야 한다!
Get Score 버튼을 누르면 user1과 user2의 이름을 입력하는 모달창이 뜨고, 이름 입력 후 확인을 누르면 게임 보드가 화면에 뜨도록 구현할 것이다.
GlobalStyle로 컴포넌트 별 배경 이미지 지정
그런데 Get Score 버튼을 누르면 좀 더 light한 장미 배경을 적용하고 싶었다. 근데 어떻게 해야하지..?!
이미 GlobalStyle로 앱 전반에 걸친 배경을 dark한 장미 배경으로 깔아주었기 때문이다.
GlobalStyle.tsx
// 앱 전반 style
export const GlobalStyle = createGlobalStyle`
  @font-face {
  font-family: 'Inika';
  src: url(${FontURL.FontInika}) format('truetype');
    }

 *{
    box-sizing: border-box;
    margin: 0;
    font-family: 'Inika', sans-serif;

 }
 // 이미 rose background가 앱 전반에 깔려있는 상태
 body{
   background-image: url("/rose background.png") ;
 }
`;
오? 몰랐는데 찾아보니까 createGlobalStyle로 컴포넌트 별 style도 적용할 수 있네?
예를 들어서 GameResult 컴포넌트에 적용할 style을
// GameResult 컴포넌트에 적용할 style
export const GameResultStyle = createGlobalStyle`
   body{
// GameResult 컴포넌트에는 light한 장미를 깔아줄겨~
   background-image: url("/rose background light.png") ;
 }
`;
새롭게 생성하고 GameResult 컴포넌트에 얹어주면
GameResult.tsx
import { GameResultStyle } from "../../common/style/style";

function GameResult() {
  return <GameResultStyle />;
}
export default GameResult;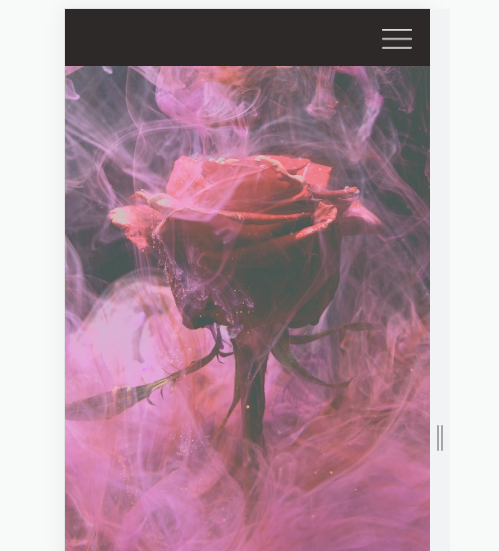
이렇게 light해진 배경색 적용 가능!
굳굳~ 다음으로는 board를 만들어보자.
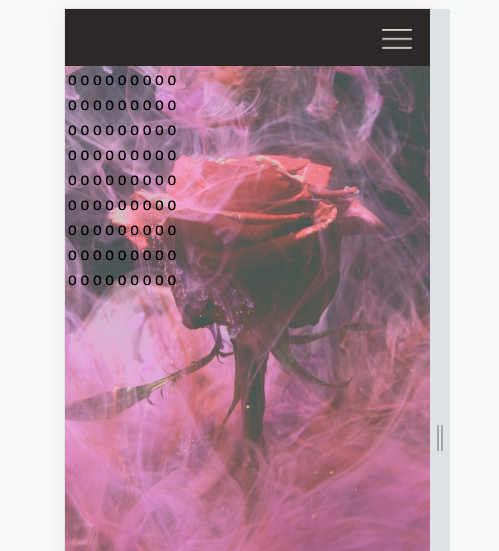
가로 9개 세로 9개이므로 9*9 board를 만들어야 한다.
table tag로 2차원 배열 화면에 렌더링
지난 번에 달력 만들기 프로젝트를 했을 때 2차원 배열을 table tag를 사용해서 만들었다.
이번에도 동일하게 table tag를 사용하여 2차원 배열을 화면에 띄워주었다.
🚧 GameResult.tsx (아직 미완성)
function GameResult() {
  const table = [...Array(9)].map((_) => [...Array(9)].map((_) => 0));
  return (
    <div>
      <GameResultStyle />
      <table>
        {table.map((row: number[]) => {
          return (
            <tr>
              {row.map((element: number) => (
                <td>0</td>
              ))}
            </tr>
          );
        })}
      </table>
    </div>
  );
}
이제 style을 적용해서 board를 중간에 띄워보자.

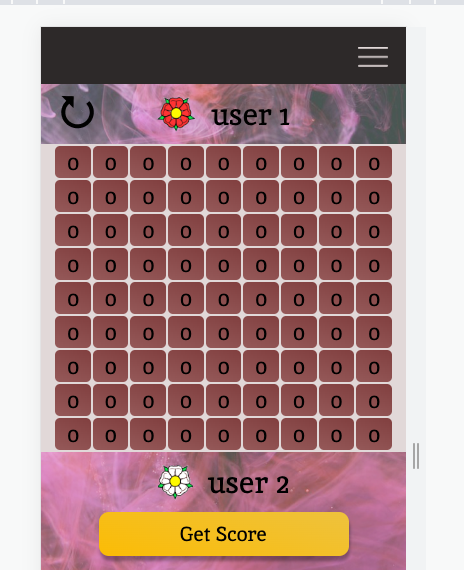
board를 이미지로 만들어서 띄웠지롱~
사실 숫자 0들은 다 color: transparent 인 상태이다. ㅋㅋㅋㅋ
export const GameBoardElement = styled.td`
  padding: 1.5px 12px 1.5px 12px;
  background-image: linear-gradient(20deg, #955959, #813f3f);
  border-radius: 5px;
  // 이부분을 주석 처리하면
  /* color: transparent; */
`;
MUI로 username 입력 받는 modal창 구현
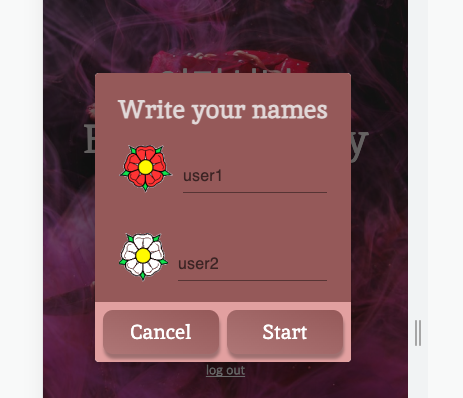
이제 모달창을 띄워서 user1과 user2의 이름을 입력받고 위의 화면에 보이는 user1, user2라는 글자 대신 띄워줄 것이다.
모달창은 주말에 공부했던 MUI를 이용하여 구현해볼 것이다.
https://mui.com/material-ui/react-dialog/
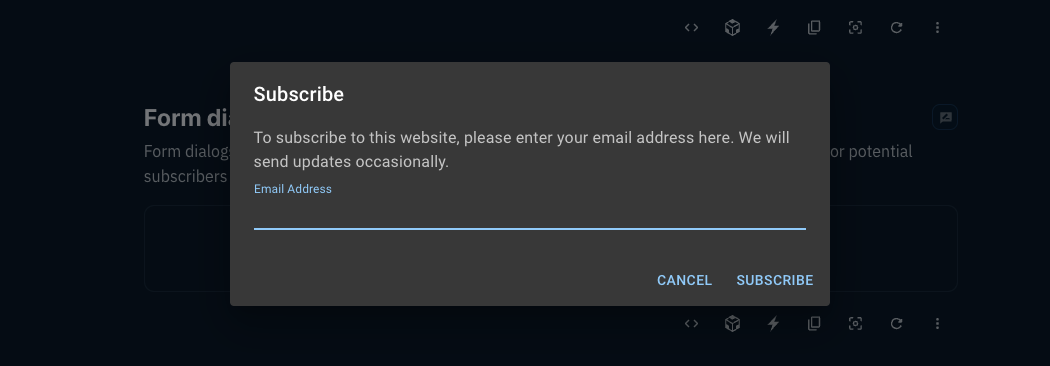
나는 유저에게 nickname 입력을 받을 거니까 Form dialog가 가장 적합해보이는군!
너로 정했다 하하하
import TextField from "@mui/material/TextField";
import Dialog from "@mui/material/Dialog";
import DialogActions from "@mui/material/DialogActions";
import DialogContent from "@mui/material/DialogContent";
import를 잔뜩 데려와서 MUI의 소스코드를 복붙하고
<StartBtn onClick={handleOpen}>Get Score</StartBtn>기본으로 주어지는 handleOpen함수를 start 버튼에 onClick으로 연결하고 나니
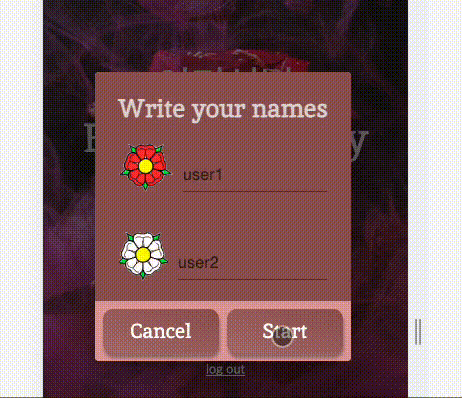
이렇게 기본 모달이 뜬다!
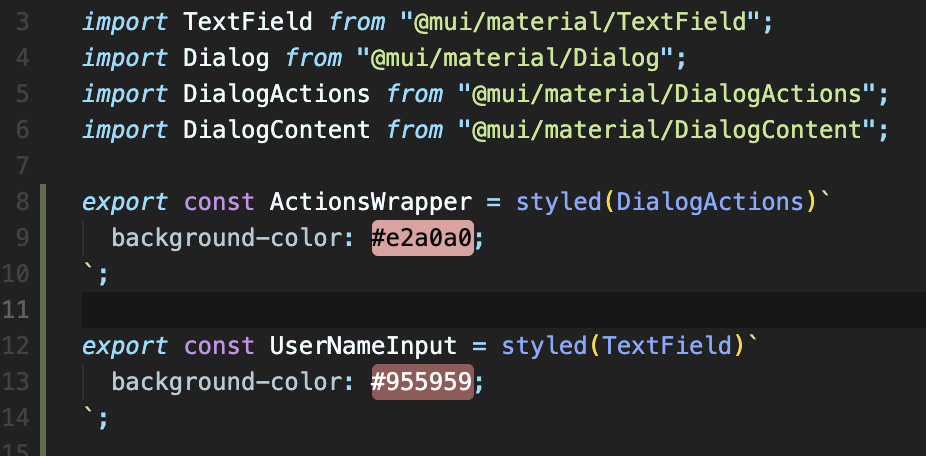
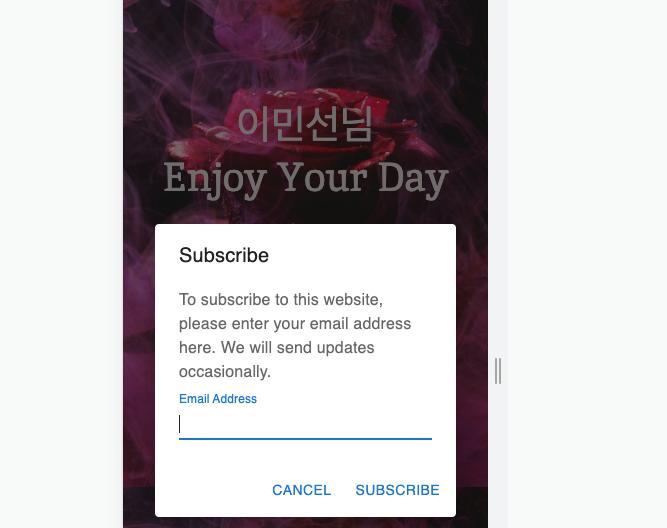
styled-component를 사용하여 내 마음대로 커스텀 제작할 수도 있다.
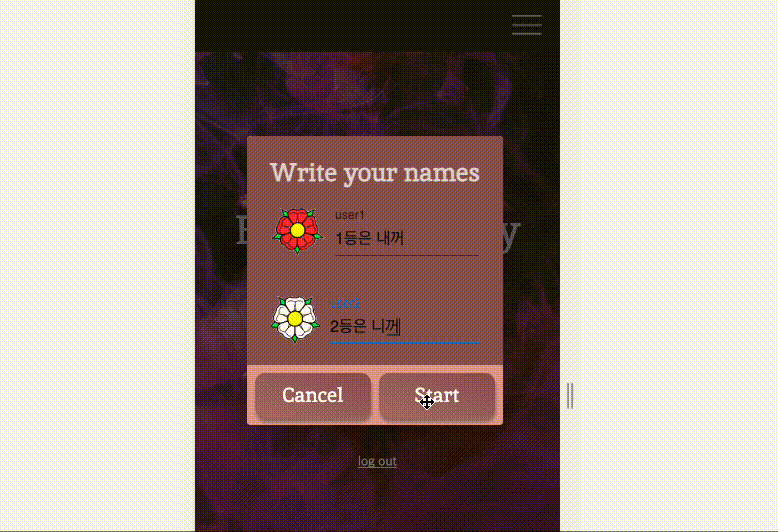
커스텀 제작 완료!
  const handleGetScore = () => {
    navigate("/score");
  };
handleGetScore 함수를 start 버튼에 연결해주면
game board로 잘 넘어간다!
이제 redux store에 userName을 저장해서 user1, user2라는 글자 대신 store에 저장된 이름을 가져와서 대체하도록 하자.
user가 입력한 이름을 전역 상태 관리할 수 있도록 redux store 생성(toolkit 사용)
usernameStore.tsx
import { PayloadAction, configureStore, createSlice } from "@reduxjs/toolkit";

type UserName = {
  userName1?: string;
  userName2?: string;
};
// initial state 지정
const initialUserNameState: UserName = {
  userName1: undefined,
  userName2: undefined,
};

export const username = createSlice({
  name: "userNameReducer",
  initialState: initialUserNameState,
  reducers: {
    addUserName1: (state: UserName, action: PayloadAction<UserName>) => {
      return { ...state, userName1: action.payload.userName1 };
    },
    addUserName2: (state: UserName, action: PayloadAction<UserName>) => {
      return { ...state, userName2: action.payload.userName2 };
    },
  },
});

export const usernameStore = configureStore({ reducer: username.reducer });
export const { addUserName1, addUserName2 } = username.actions;
새로운 userName1과 userName2를 각각 store에 전달하는 action 메서드를 생성했다.
  const dispatch = useDispatch();

// username1이 변경될 때마다 store에 새로운 state 전달
  const onChangeUserName1 = (event: React.ChangeEvent<HTMLInputElement>) => {
    const newName = event.currentTarget.value;
    dispatch(addUserName1({ userName1: newName }));
  };

// username2가 변경될 때마다 store에 새로운 state 전달
  const onChangeUserName2 = (event: React.ChangeEvent<HTMLInputElement>) => {
    const newName = event.currentTarget.value;
    dispatch(addUserName2({ userName2: newName }));
  };
onChange 함수들을 modal에 연결해주었고,
GameResult 컴포넌트 내부에서 useSelector를 이용해 redux store에 저장된 state을 불러와서 username을 대체시켰더니
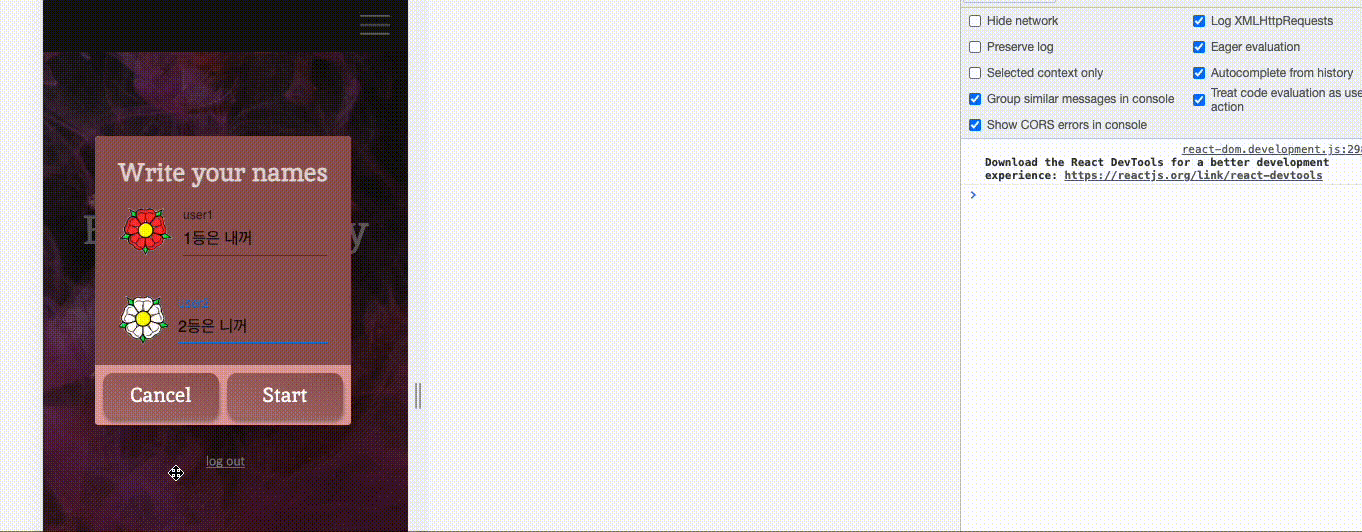
이렇게 입력받은 이름으로 잘 뜬다.
이제 모달도 잘 뜨고 store에서 username도 잘 받아왔으니 유저가 클릭한대로 점수 출력해주는 로직을 구현하는 순서군. 좀 떨리기도 하고 재밌을 것 같기도 하고 ㅎㅎㅎㅎ 사실 점수 출력이 이 토이 프로젝트의 핵심 기능이기도 하고, 이걸 구현해보고 싶어서 이 프로젝트를 한 것도 있으니깐!
아주 기대된다. 오늘의 작업도 develop 브랜치에 merge하고 마무리! 씨유 쑨~~
