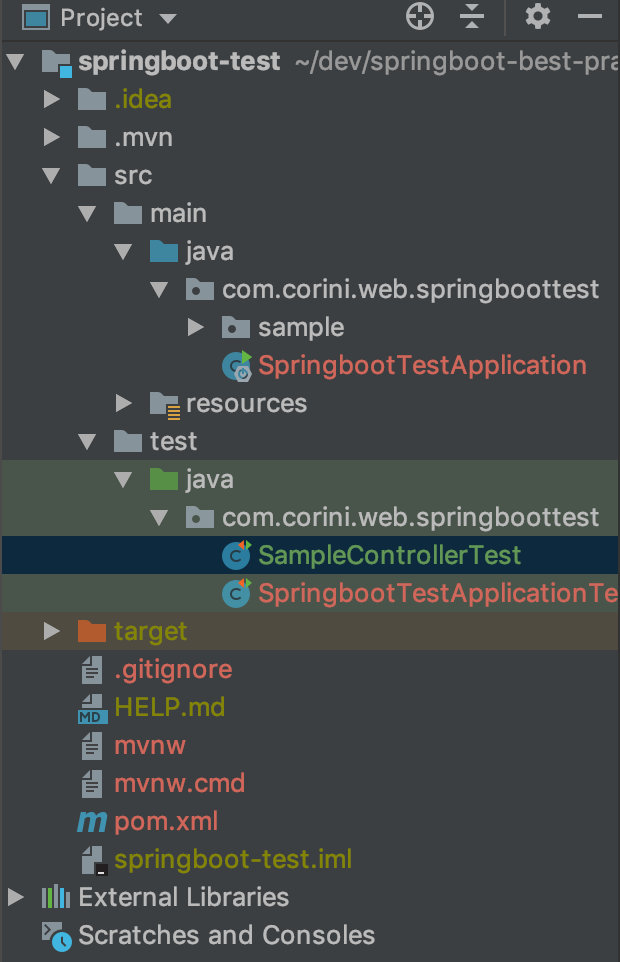
이 포스팅에서는 테스트 코드와 관련된 정보를 업데이트 해나갈 예정입니다.
스프링은 테스트 환경을 준비하려면 별도의 라이브러리를 추가하고, JUnit 등 여러 가지 신경써야 하지만 스프링 부트는 이러한 설정이 모두 자동으로 갖추어집니다.
앞으로 작성해나갈 포스팅 안의 코드들은 Github 에서 확인이 가능합니다.
프로젝트 구조

Controller 테스트
SampleController 작성
package com.corini.web.springboottest.sample;

import org.springframework.web.bind.annotation.GetMapping;
import org.springframework.web.bind.annotation.RestController;

@RestController
public class SampleController {

    @GetMapping(value = "/hello")
    public String hello() {
        return "hello";
    }

}
SampleControllerTest 작성
package com.corini.web.springboottest;

import com.corini.web.springboottest.sample.SampleController;
import org.junit.Test;
import org.junit.runner.RunWith;
import org.springframework.beans.factory.annotation.Autowired;
import org.springframework.boot.test.autoconfigure.web.servlet.WebMvcTest;
import org.springframework.test.context.junit4.SpringRunner;
import org.springframework.test.web.servlet.MockMvc;
import org.springframework.test.web.servlet.MvcResult;

import static org.springframework.test.web.servlet.request.MockMvcRequestBuilders.get;
import static org.springframework.test.web.servlet.result.MockMvcResultMatchers.content;
import static org.springframework.test.web.servlet.result.MockMvcResultMatchers.status;

@RunWith(SpringRunner.class)
@WebMvcTest(SampleController.class)
public class SampleControllerTest {

    @Autowired
    MockMvc mock;

    @Test
    public void testHello() throws Exception {
        mock.perform(get("/hello")).andExpect(content().string("hello"));
        MvcResult result = mock.perform(get("/hello"))
                .andExpect(status().isOk())
                .andExpect(content().string("hello"))
                .andReturn();

        System.out.println(result.getResponse().getContentAsString());
    }
}
최근 스프링부트는 @DataJpaTest 혹은 @JsonTest와 같이 다양한 상황에 맞게 테스트를 진행할 수 있습니다.
위의 코드는 컨트롤러에 대한 테스트입니다.
@Test 어노테이션이 선언된 메소드를 실행하거나, 클래스를 JUnit으로 실행하면 자동으로 스프링 부트가 시작되고, 해당 테스트가 진행되는 것을 볼 수 있습니다.
테스트 클래스에 @WebMvcTest 어노테이션을 추가하여 테스트 하고자하는 컨트롤러를 지정해줍니다.
@WebMvcTest를 사용하면 @Controller, @Component, @ControllerAdvice 등 작성된 코드를 인식할 수 있습니다.
컨트롤러를 테스트하려면 org.springframework.test.web.servlet.MockMvc 타입의 객체를 사용해야 합니다. @WebMvcTest와 같이 사용하면 주입(@Autowired)만으로 MockMvc 객체를 이용해 테스트 코드를 작성할 수 있어 편리합니다.
MockMvc 객체?
perform()메소드를 이용해, 브라우저에서 URL을 호출하듯이 테스트를 진행 할 수 있습니다.- 결과는
andExpect()를 이용해서 확인 가능합니다. Response에 대한 정보를 체크하는 용도로 사용할 수 있습니다.
