이전에 만들었던 웹의 index에 간단한 html코드를 response해줄 것이다.
먼저 아래와 같이 간단한 리스트가 있는 html코드를 작성한다.
<!DOCTYPE html>
<html lang="en">
<head>
    <meta charset="UTF-8">
    <meta http-equiv="X-UA-Compatible" content="IE=edge">
    <meta name="viewport" content="width=device-width, initial-scale=1.0">
    <title>Document</title>
</head>
<body>
    <h1>Django</h1>
    <ol>
        <li>routing</li>
        <li>view</li>
        <li>model</li>
    </ol>
    <h2>Welcome</h2>
    Hello, Django
</body>
</html>
그리고 아래와 같은 코드로 Django에 넣어주면
from django.shortcuts import render,HttpResponse
# Create your views here.
def index(request):
return HttpResponse('''<!DOCTYPE html>
<html lang="en">
<head>
<meta charset="UTF-8">
<meta http-equiv="X-UA-Compatible" content="IE=edge">
<meta name="viewport" content="width=device-width, initial-scale=1.0">
<title>Document</title>
</head>
<body>
<h1>Django</h1>
<ol>
<li>routing</li>
<li>view</li>
<li>model</li>
</ol>
<h2>Welcome</h2>
Hello, Django
</body>
</html>''')
def create(request):
return HttpResponse("Create!")
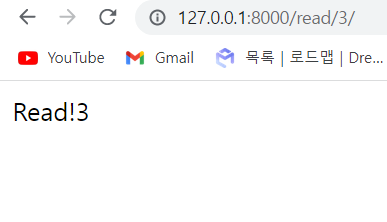
def read(request,id):
return HttpResponse(f"Read!{id}")
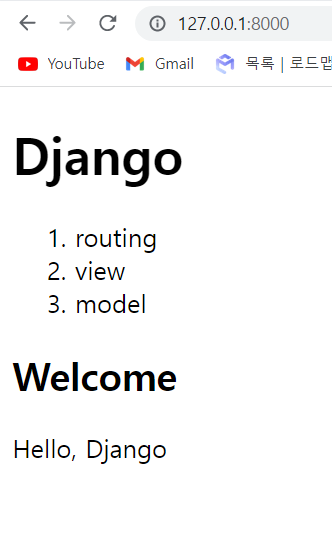
아래와 같은 템플릿이 랜더링 된다.
이 화면을 다른 방법으로 똑같이 출력할 수 있다.
바로 아래 코드를 보자.
from django.shortcuts import render,HttpResponse

topics=[
    {'id':1, 'title':'Routing','body':'Rounting is ...'}
    ,
    {'id':2, 'title':'View','body':'View is ...'}
    ,
    {'id':3, 'title':'Model','body':'Model is ...'}
]

# Create your views here.
def index(request):
    global topics
    ol=''

    for topic in topics:
        ol += f"<li>{topic['title']}</li>"
    return HttpResponse(f'''<!DOCTYPE html>
<html lang="en">
<head>
    <meta charset="UTF-8">
    <meta http-equiv="X-UA-Compatible" content="IE=edge">
    <meta name="viewport" content="width=device-width, initial-scale=1.0">
    <title>Document</title>
</head>
<body>
    <h1>Django</h1>
    <ol>
        {ol}
    </ol>
    <h2>Welcome</h2>
    Hello, Django
</body>
</html>''')
def create(request):
    return HttpResponse("Create!")
def read(request,id):
    return HttpResponse(f"Read!{id}")
위 코드를 보면 topics 이라는 리스트에 3개의 딕셔너리를 넣고 각각의 정보들을 달리 했다.
그 후 ol 태그에 for문으로 topics의 title을 li태그로 감싼 string을 하나씩 누적해서 담아주고 원래 리스트가 있던 부분을 ol변수로 바꾸어준다.
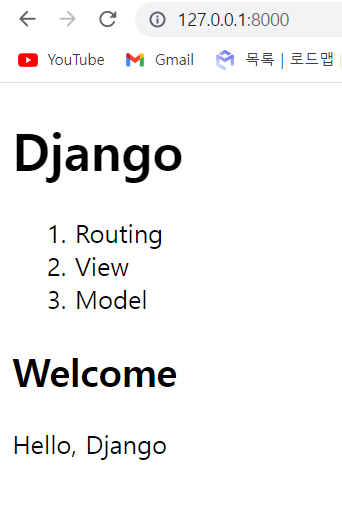
그렇게 했을 때 출력화면은 아래와 같이 이전과 다른 점이 없다.
이제 a태그로 링크를 달아주고 Read 함수에서 각자 고유의 파라미터를 처리하게 해보자.
아래처럼 코드를 수정한다.
from django.shortcuts import render,HttpResponse

topics=[
    {'id':1, 'title':'Routing','body':'Rounting is ...'}
    ,
    {'id':2, 'title':'View','body':'View is ...'}
    ,
    {'id':3, 'title':'Model','body':'Model is ...'}
]

# Create your views here.
def index(request):
    global topics
    ol=''

    for topic in topics:
        ol += f"<li><a href='/read/{topic['id']}'>{topic['title']}</a></li>"
    return HttpResponse(f'''<!DOCTYPE html>
<html lang="en">
<head>
    <meta charset="UTF-8">
    <meta http-equiv="X-UA-Compatible" content="IE=edge">
    <meta name="viewport" content="width=device-width, initial-scale=1.0">
    <title>Document</title>
</head>
<body>
    <h1>Django</h1>
    <ol>
        {ol}
    </ol>
    <h2>Welcome</h2>
    Hello, Django
</body>
</html>''')
def create(request):
    return HttpResponse("Create!")
def read(request,id):
    return HttpResponse(f"Read!{id}")
위 코드에서 a태그로 /read 페이지로 이동하게 하고 고유의 파라미터를 딕셔너리 마다의 id로 설정한다.
그렇게 되면 아래처럼 각 리스트는 클릭이 가능하게 바뀌고
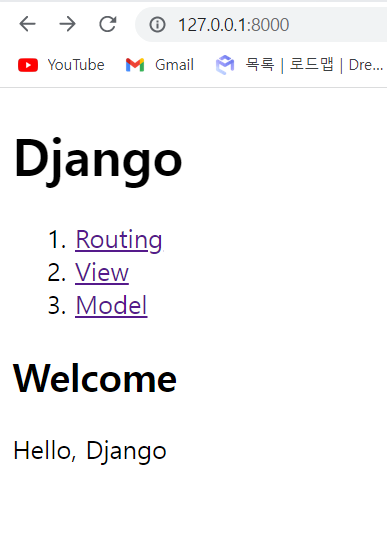
아래처럼 각 리스트는 고유의 페이지로 이동시킨다.

그런데 index페이지에 있는 Html코드는 동적이지 않고 정적이고 index 안에 있는 것이 좀 지저분하게 느껴진다.
또한 이 코드를 read같은 다른 페이지에서 사용하고 싶다면 중복이 되어 코드가 너저분 해질 것이기 때문에 HtmlTemplate라는 이름의 함수를 만들어 아까의 로직이 첨가된 Html 코드를 리턴하는 과정을 넣어줄 것이다.
아래 코드를 보자.
from django.shortcuts import render, HttpResponse

topics = [
    {'id': 1, 'title': 'Routing', 'body': 'Rounting is ...'},
    {'id': 2, 'title': 'View', 'body': 'View is ...'},
    {'id': 3, 'title': 'Model', 'body': 'Model is ...'}
]


def HtmlTemplate():
    global topics
    ol = ''

    for topic in topics:
        ol += f"<li><a href='/read/{topic['id']}'>{topic['title']}</a></li>"
    return f'''<!DOCTYPE html>
<html lang="en">
<head>
    <meta charset="UTF-8">
    <meta http-equiv="X-UA-Compatible" content="IE=edge">
    <meta name="viewport" content="width=device-width, initial-scale=1.0">
    <title>Document</title>
</head>
<body>
    <h1>Django</h1>
    <ol>
        {ol}
    </ol>
    <h2>Welcome</h2>
    Hello, Django
</body>
</html>'''

# Create your views here.


def index(request):
    return HttpResponse(HtmlTemplate())


def create(request):
    return HttpResponse("Create!")


def read(request, id):
    return HttpResponse(f"Read!{id}")
위처럼 index함수에는 return HttpResponse(HtmlTemplate()) 라는 코드 한 줄만 있는 데도 아까와 똑같은 출력을 보여준다.
여기서 h2태그 부분을 각자 고유의 정보로 바꾸어주고 싶다면 함수에서 매개변수를 받으면 된다.
아래 코드를 보자.
from django.shortcuts import render, HttpResponse
topics = [
{'id': 1, 'title': 'Routing', 'body': 'Rounting is ...'},
{'id': 2, 'title': 'View', 'body': 'View is ...'},
{'id': 3, 'title': 'Model', 'body': 'Model is ...'}
]
def HtmlTemplate(article):
global topics
ol = ''
for topic in topics:
ol += f"<li><a href='/read/{topic['id']}'>{topic['title']}</a></li>"
return f'''<!DOCTYPE html>
<html lang="en">
<head>
<meta charset="UTF-8">
<meta http-equiv="X-UA-Compatible" content="IE=edge">
<meta name="viewport" content="width=device-width, initial-scale=1.0">
<title>Document</title>
</head>
<body>
<h1>Django</h1>
<ol>
{ol}
</ol>
{article}
</body>
</html>'''
# Create your views here.
def index(request):
article=''' <h2>Welcome</h2>
Hello, Django'''
return HttpResponse(HtmlTemplate(article))
def create(request):
return HttpResponse("Create!")
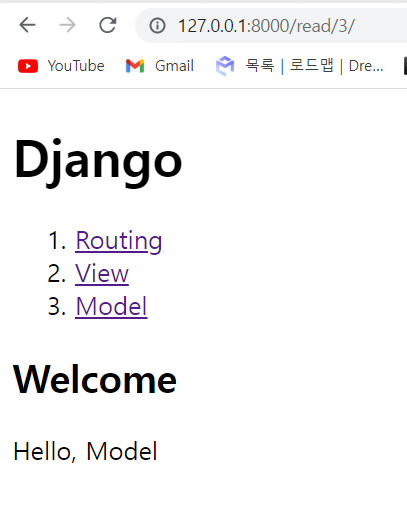
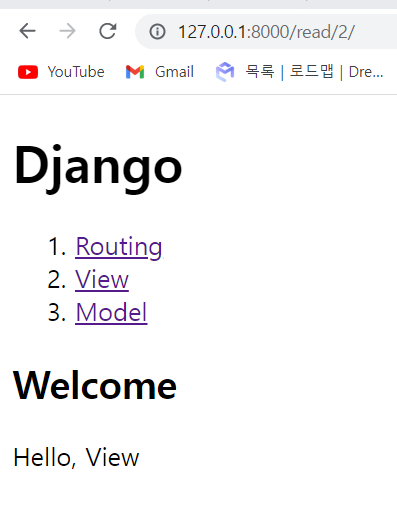
def read(request, id):
article=''
global topics
for topic in topics:
if topic['id'] == int(id):
article=f'''<h2>Welcome</h2>
Hello, {topic['title']}'''
return HttpResponse(HtmlTemplate(article))위 코드를 보면 HtmlTemplate 함수에서는 article이라는 변수를 매개변수로 사용하고 index페이지에서는 article의 요소를 고정으로 보내주지만 read페이지 에서는 파라미터에 따라서 각기 다른 title을 출력하게 된다.
아래는 출력 화면이다.
각 페이지마다 다른 파라미터에 의하여 각기 다른 화면을 출력한다.
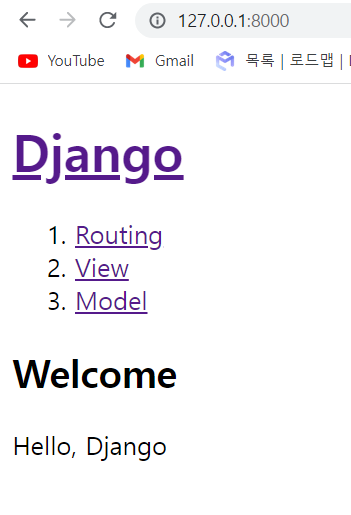
마지막으로 Django h1 부분에 a태그를 추가하고 링크를 /인 메인페이지로 이동하게 설정하면 아래와 같이 Django를 클릭했을 때 메인페이지로 이동하게 할 수 있다.