백엔드와 통신하기!!
인스타그램 클론 코딩한것에 백엔드와 fetch 함수를 이용하여 통신해 보았다!!
Flow 🏳🌈
- 회원가입하기
- 로그인 후 token localStorage 에 저장하기
- 게시물 작성하기
- 작성한 게시물 보여주기
- 작성한 게시물에서 댓글 작성하기
- 댓글 삭제하기
이렇게 Flow로 정리해보니 많은 기능을 구현한것 같다!!
🔑 회원가입 & 로그인
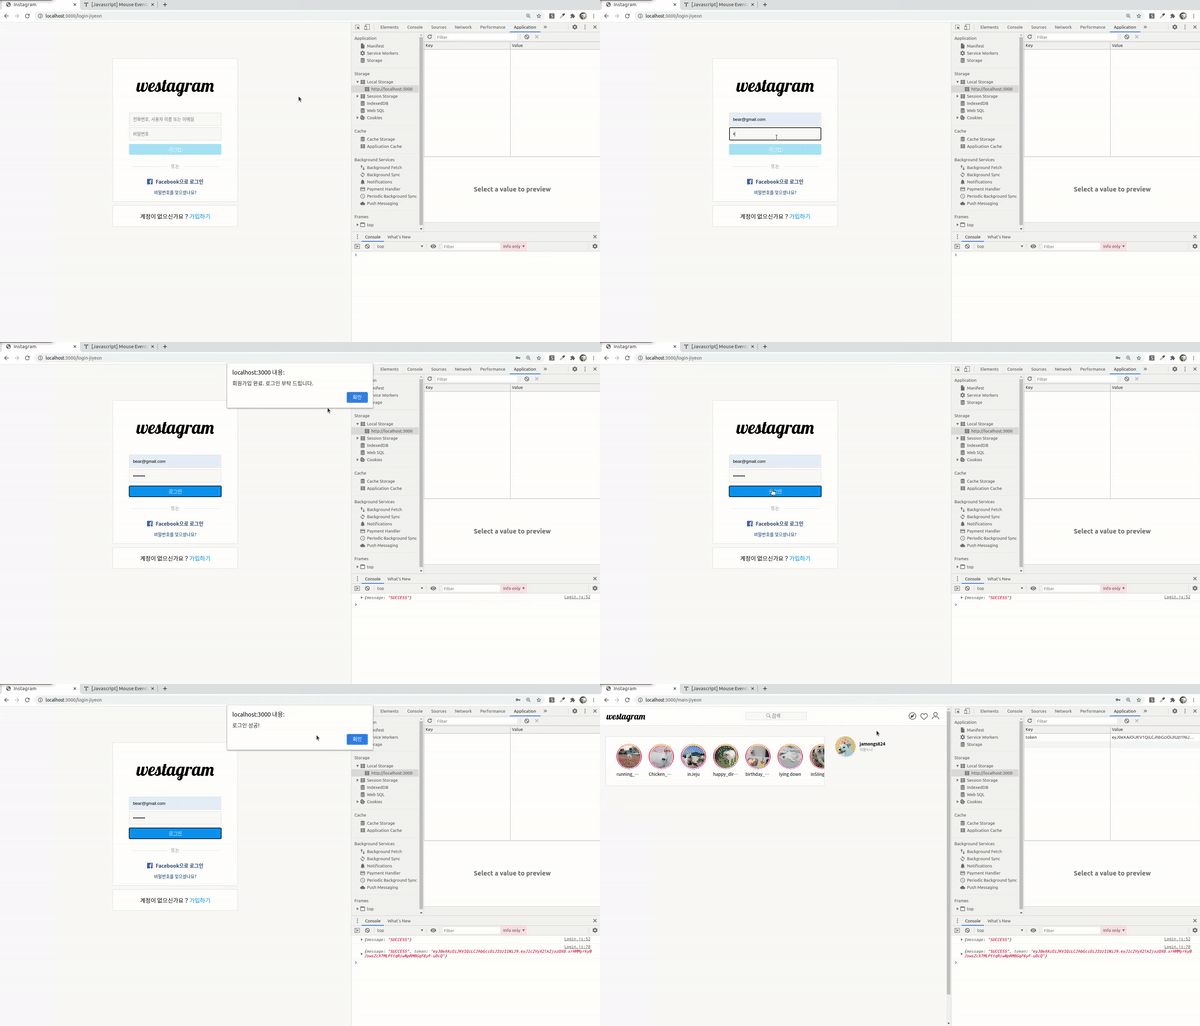
기존에 클론 코딩을 로그인 페이지에서만 진행했기 때문에 로그인 페이지에서 회원가입과 로그인 둘다 진행
FrontEnd 👓💻

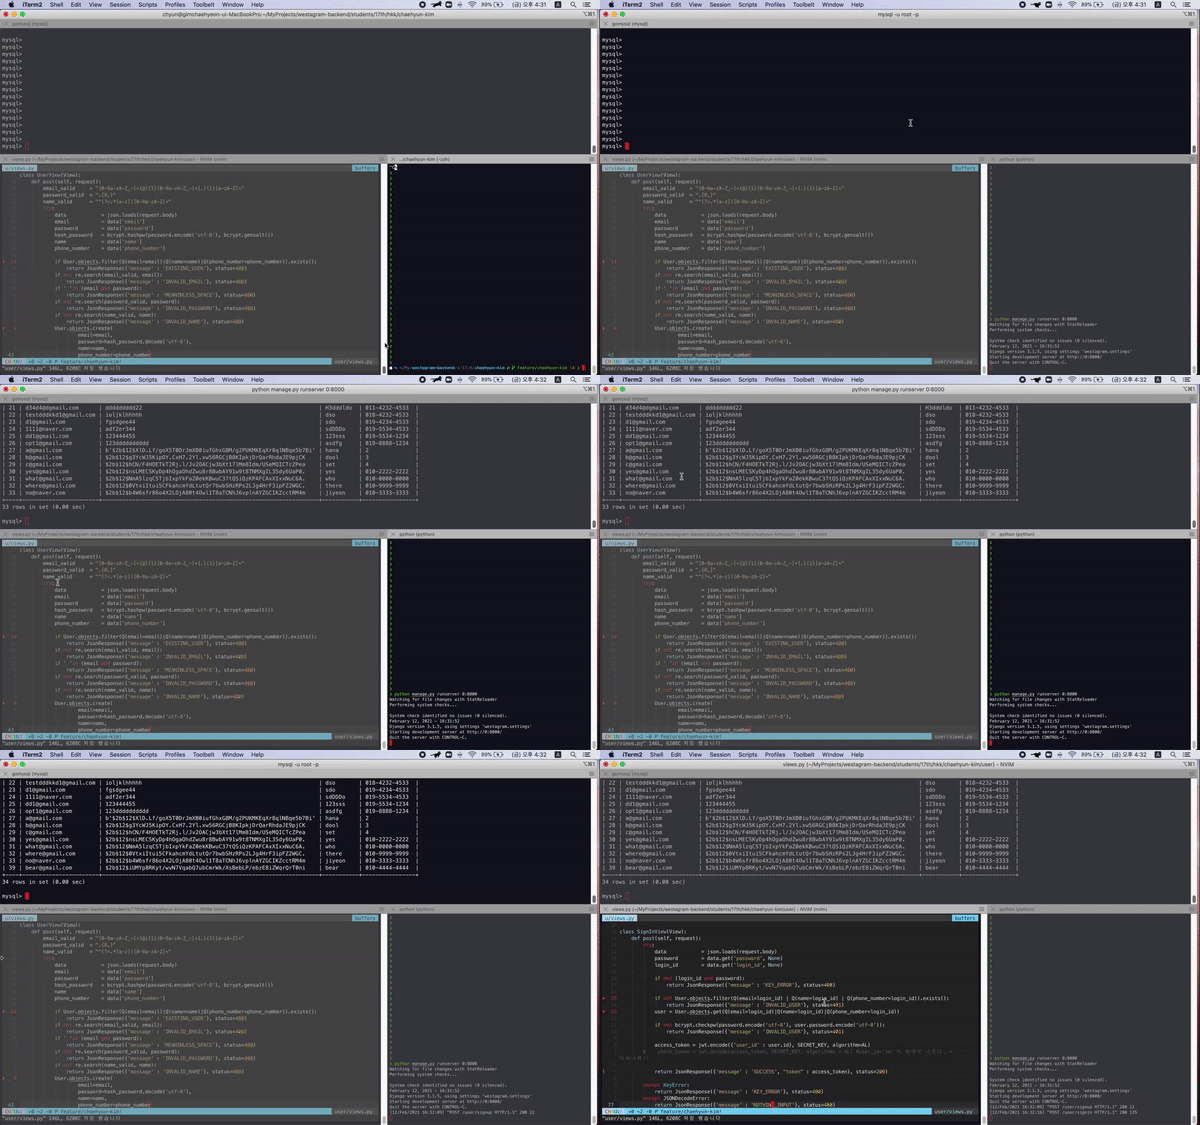
BackEnd 📤📥

회원 가입
- 회원가입 페이지가 따로 없기때문에 로그인페이지에서 구현하기 위해 "name"과 "phone" 부분은 하드코딩으로 처리하였습니다.
- 백엔드에 문제없이 들어갈 경우 alert로 "회원가입 완료" 를 보여주었습니다.
  goToSignUp = (event) => {
    event.preventDefault();
    const { idValue, pwValue } = this.state;
    const btnCondition = idValue.includes("@") && pwValue.length > 6;

    if (btnCondition) {
      fetch("http://192.168.43.198:8000/user/signup", {
        method: "POST",
        body: JSON.stringify({
          email: idValue,
          password: pwValue,
          name: 'bear',
          phone_number:"010-1111-1111"
        }),
      })
      .then((response) => response.json())
      .then((result) => {
        console.log(result);
        if (result.message === "SUCCESS") {
          alert("회원가입 완료. 로그인 부탁 드립니다.");
        } else {
          alert("회원가입이나 비밀번호 확인이 필요합니다.");
        }
      });
    }
  };
로그인
- 로그인시, 회원가입이 되어 있는 user라면 alert에 "로그인 성공!"이라고 보여줍니다.
- 그리고
localStorage에 백엔드로부터 전달받은 token을 저장하고 Main 페이지로 들어갑니다.
  goToMain = () => {
    const { idValue, pwValue } = this.state;
    const btnCondition = idValue.includes("@") && pwValue.length > 6;

    if (btnCondition) {
      fetch("http://192.168.43.198:8000/user/signin", {
        method: "POST",
        body: JSON.stringify({
          login_id: idValue,
          password: pwValue,
        }),
      })
      .then((response) => response.json())
      .then((result) => {
        console.log(result);
        if (result.message === "SUCCESS") {
          alert("로그인 성공!");
          localStorage.setItem("token", result.token);
          this.props.history.push("/main-jiyeon");
        } else {
          alert("회원가입이나 비밀번호 확인이 필요합니다.");
        }
      });
    }
  }
💬 🔑 게시물 올리기 & 댓글 추가, 삭제하기
FrontEnd 👓💻

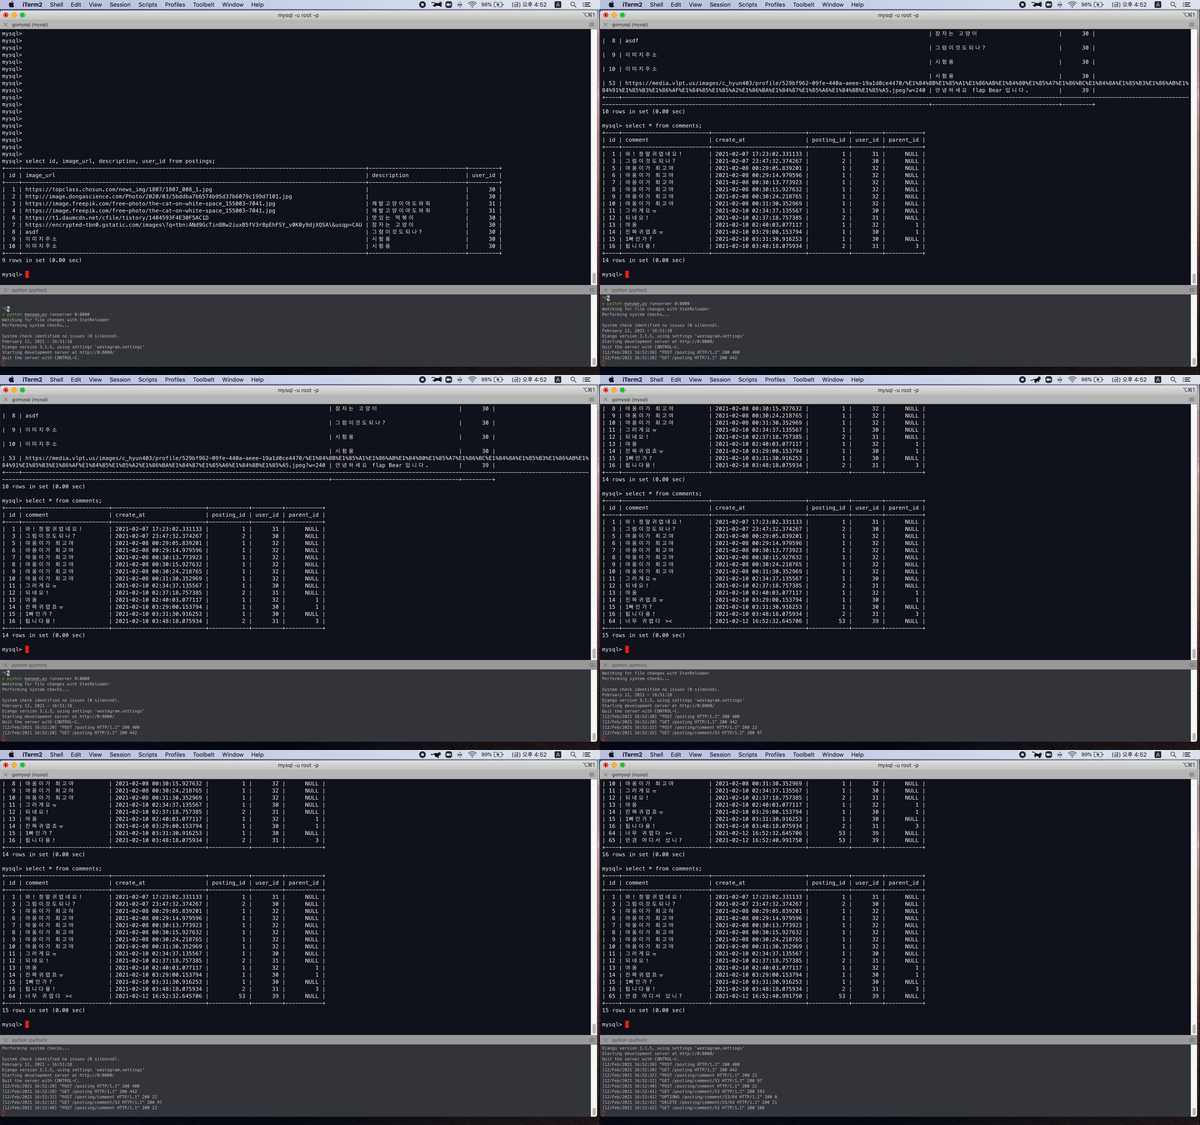
BackEnd 📥📤

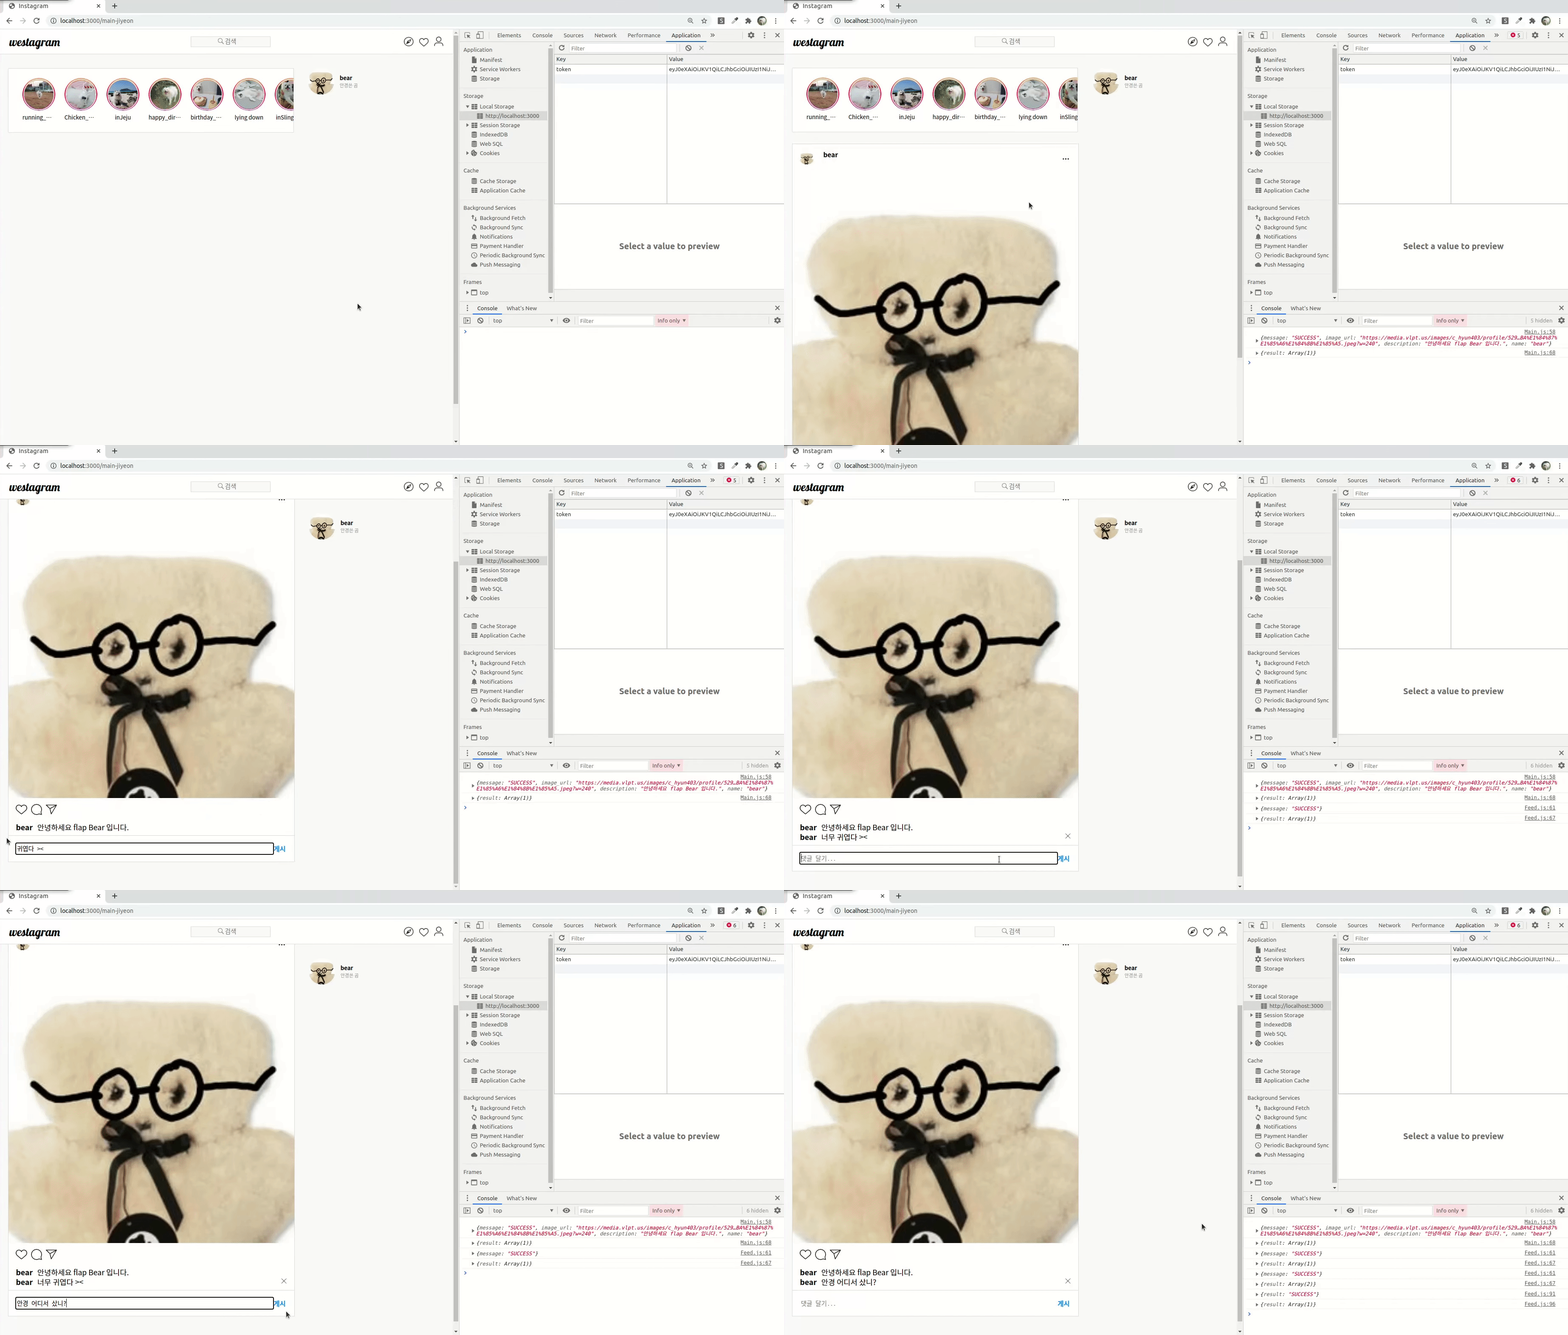
게시물 올리기
- 게시물을 올리기위해
body에 image_url과 게시물 내용을 담고,header에는 로그인할때 받았던token을 담아서 백엔드로 보냅니다.
이때header에 전달한 token을 통해 백엔드에서 user정보를 확인하고 유효한 유저인지 확인합니다. - 백엔드로부터 성공으로 메세지를 전달받으면
GETmethod를 통해 서버에 저장된 유저이름, image_url과 게시물 내용이 담긴 list를 받고 map 함수를 통해 게시물을 보여줍니다.
  posting = (event) => {
    event.preventDefault();

    let token = localStorage.getItem('token');
    fetch("http://192.168.43.198:8000/posting", {
      method: 'POST',
      headers: {
        Authorization: token
      },
      body: JSON.stringify({
        image_url: "image-url",
        description: "안녕하세요 flap Bear 입니다.",
      }),
    })
      .then((response) => response.json())
      .then((result) => {
        console.log(result);
        if (result.message === "SUCCESS") {
          fetch("http://192.168.43.198:8000/posting", {
            method: 'get',
            headers: {
              Authorization: token
            },
          })
          .then((res) => res.json())
          .then((data) => {
            console.log(data);
            this.setState({
              feedData: data.result
            })
          alert("GET 성공")
        });
    } else {
      alert("GET 실패")
    }
  });
  }
댓글 추가➕
- 댓글을 추가시 해당 게시물의 id값을
body에 넣어서 같이 보내주었다. - 'POST' method가 성공 시, 'GET' method를 통해 해당 게시물의 id를 url 마지막에 넣어주고 댓글의 List를 받아 map함수를 돌려 댓글을 보여줍니다.
게시물의 id값을 url끝에 넣어줄때 이상하게 id값이 변수로 들어가지않아서 하드코딩하였다...
handleCommentAdd = (event) => {
    event.preventDefault();
    const { commentInput, commentData } = this.state;
    if (commentInput.length) {
    let token = localStorage.getItem('token');
    fetch("http://192.168.43.198:8000/posting/comment", {
      method: 'POST',
      headers: {
        Authorization: token
      },
      body: JSON.stringify({
        posting_id: this.props.id,
        comment:commentInput
      }),
    })
      .then((response) => response.json())
      .then((result) => {
        console.log(result);
        if (result.message === "SUCCESS") {
          fetch("http://192.168.43.198:8000/posting/comment/53")
          .then((res) => res.json())
          .then((data) => {
            console.log(data);
            this.setState({
              commentData: data.result,
              commentInput: ''
            })
        });
    } else {
      alert("GET 실패")
    }
  });
  }
  };
댓글 삭제하기➖
- 'DELETE' method를 사용하여 추가한 댓글을 삭제할때는 body에 해당 게시글과 댓글의 id를 넣는게 아닌 url에 해당 게시글과 댓글의 id를 순서대로 넣어주었다.
- 댓글이 삭제되면 해당 게시글의 id값을 url에 넣어 'GET' method를 통해 댓글 list를 받았다.
댓글 추가와 마찬가지로 url에 들어가는 id값은 하드코딩하였다....
  handleCommentDelete = () => {
    const { commentInput, commentData } = this.state;
    let token = localStorage.getItem('token');
    fetch("http://192.168.43.198:8000/posting/comment/53/64", {
      method: 'DELETE',
      headers: {
        Authorization: token
      }
    })
      .then((response) => response.json())
      .then((result) => {
        console.log(result);
        if (result.result === "SUCCESS") {
          fetch("http://192.168.43.198:8000/posting/comment/53")
          .then((res) => res.json())
          .then((data) => {
            console.log(data);
            this.setState({
              commentData: data.result,
            })
        });
    } else {
      alert("GET 실패")
    }
  });
  };
💭 느낀점
- 실제 mockdata를 이용하여 구현하였던 것이 백엔드와 통신할때 이런식으로 바뀐다는게 너무 신기했다!!
- 처음부터 key값이나 message를 맞추고 클론코딩을 시작한게 아닌 만나서 key값이나 다른 변수등을 수정해야했는데 그 과정에서 서로간의 오타를 찾는게 너무 웃겼다ㅋㅋㅋ
- 하루안에 할수있는 통신을 다해봐야해서 하드코딩이 많이 들어갔는데 나중에 프로젝트를 들어갈때는 이런일이 없게 좀더 자바스크립트 능력을 키워야겠다는 생각이 많이 들었다ㅠㅠㅠㅠ
- 프론트에서 안되는 부분을 찾기위해서 계속해서 몇십번 데이터가 백엔드의 서버에 쌓였지만 백엔드 분이 열심히 삭제해주셔서 블로그 gif 파일에서는 그런 데이터없이 잘 나와서 기분이 좋다ㅎㅎㅎ
그리고 제일가는건 실시간으로 서로 코드를 고치면서 커뮤니케이션힌 이 작업이 프로젝트에는 의미가 없을지여라도 굉장히 신기하고 좋은 작업이었던거 같다!!!ㅎㅎㅎㅎ

지연님 ㅠㅠㅠㅠ 정말 수고 많았어요 이때!!!! 덕분에 좋은 공부가 됐습니닿ㅎㅎ 이걸로 프론트와 통신하는 느낌 알수있었어요! 화이팅화이팅!
백엔드 분이 열심히 삭제해주셔서ㅋㅋㅋㅋㅋㅋㅋ