비동기
-
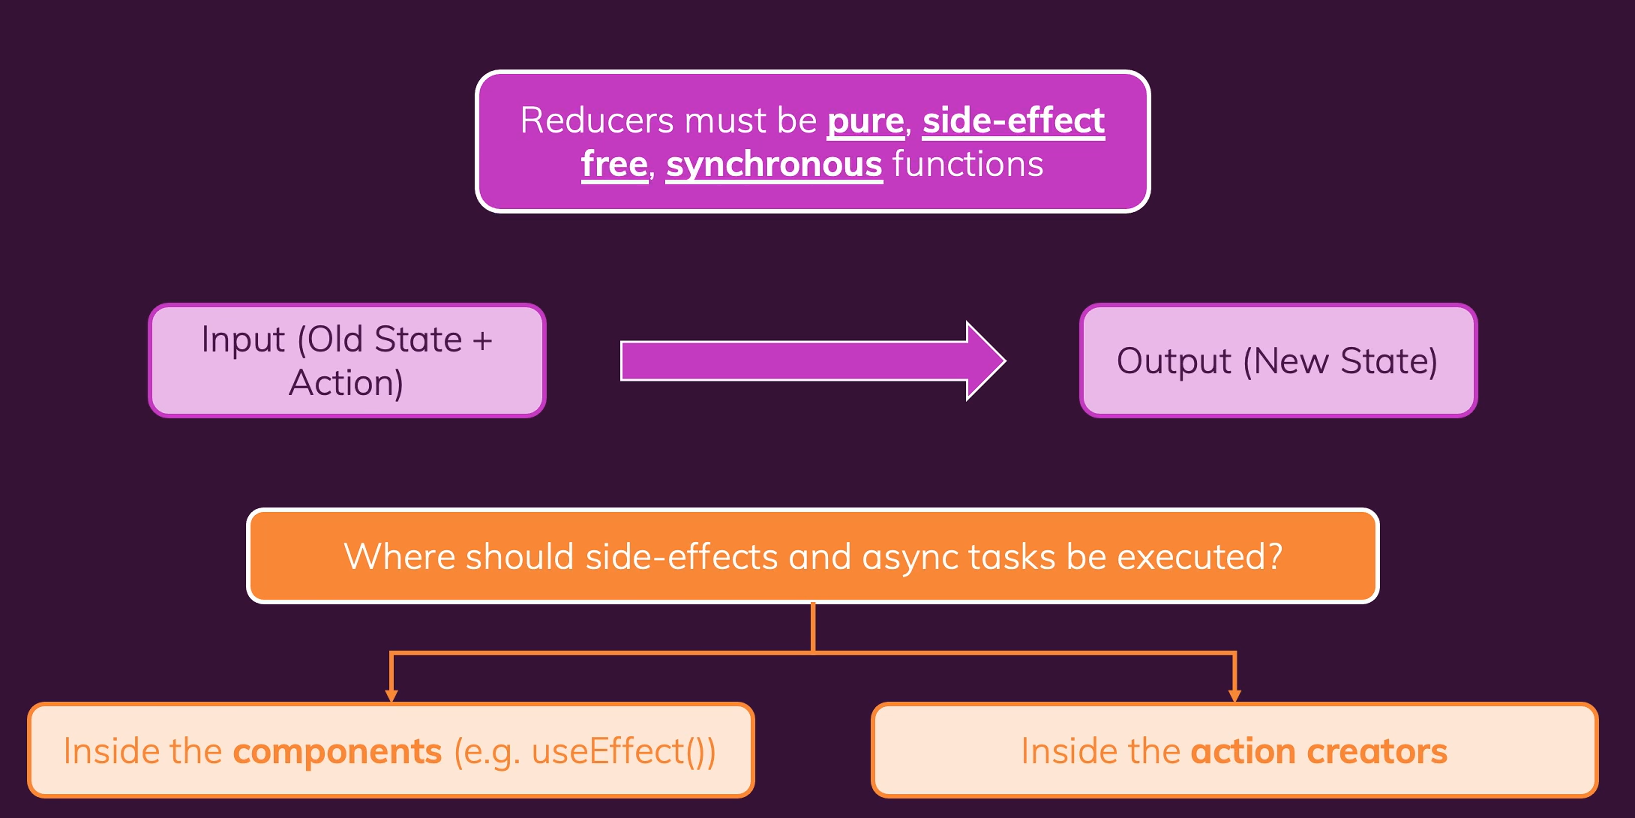
우리가 사용하는 리듀서 함수는 반드시 순수 함수여야 하며 sideEffect가 없고 동기여야 한다.
이는 useReducer 훅도 마찬가지 이다. -
같은 input이라면 항상 같은 값이 return되고 이를 중간에 가로채는 비동기코드, sideEffect는 없다.
이런 코드들은 리듀서 함수가 될수 없고 되어서도 안 된다. -
그렇다면 HTTP request와 같은 sideEffect가 포함된 dispatch 함수들은 어떻게 작업을 해야할까?
정답은 2가지 위치에 둘 수 있다.
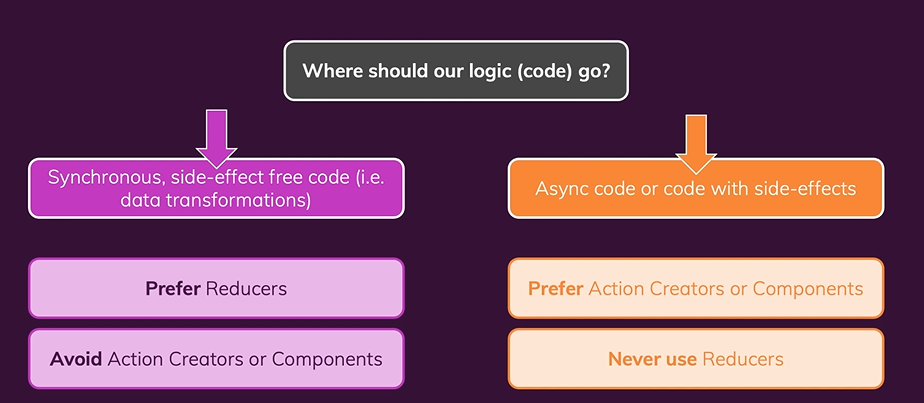
1-1. 기존에 하던대로 component안에 useEffect 훅을 이용하여 사용 => fat reducer code를 갖게됨.
1-2. RTK action이 아닌 action creator를 사용 => action creator는 action creator의 일부로 sideEffect와 비동기 작업을 실행할 수 있다 => 이는 리듀서 함수를 바꾸지 않고도 가능하다.
2-1. useReducer를 사용하지 않고 컴포넌트나 action creators 안에 async(fetch 등)코드를 넣는다. => 그 이유는 리듀서 함수에는 sideEffect가 없어야 하기 때문이다. => fat component code를 갖게됨 => 해당 action creator 로직이 필요한 모든 컴포넌트에 방대한 양의 코드를 욱여넣어야함.
즉, ruder와 별개로 독립적으로 useEffect를 이용하여 async 코드를 구현한다. 이때 여기에 의존성으로 reducer의 state를 가져온다.
- 그렇다면 이 sideEffect와 async는 어디서 실행되어야할까? 1. 컴포넌트 내부에서 useEffect훅을 사용하여 2. action creators를 사용하여 우선 1번부터 알아보자
1. Components 내부에서
                             							...

import Layout from "./components/Layout/Layout";

function App() {
  const showCart = useSelector((state) => state.ui.cartIsVisible);
  const cart = useSelector(state=>state.cart);

  useEffect(()=>{
    fetch("https://reat-test-c0f23-default-rtdb.asia-southeast1.firebasedatabase.app/cart.json",{
      method:"PUT", body:JSON.stringify(cart),
  });
  }, [cart]);

...- 하지만 위 코드처럼 만 둔다면 페이시를 로드할 때마다 계속 request 될 것이다. 왜? load할 때마다 cart가 계속하여 state가 최신화 되니까
그래서 1. useEffect에 async를 넣어줄 것. 2. useEffect의 결과값을 Action을 사용하여 넣어줄 것.
예제 코드
import etc
let isInitial = true;
function App() {
const dispatch = useDispatch();
const showCart = useSelector((state) => state.ui.cartIsVisible);
const cart = useSelector(state => state.cart);
const notification = useSelector(state => state.ui.notification);
useEffect(() => {
const sendCartData = async () => {
dispatch(uiActions.showNotification({
status: "pending",
title: "Sending...",
message: "Sending cart data..."
}));
const response = await fetch("라우터 URL", {
method: "PUT", body: JSON.stringify(cart),
});
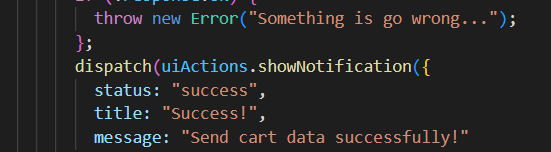
if (!response.ok) {
throw new Error("Something is go wrong...");
};
dispatch(uiActions.showNotification({
status: "success",
title: "Success!",
message: "Send cart data successfully!"
}));
};
if (isInitial) {
isInitial = false;
return;
}
sendCartData().catch(error => {
dispatch(uiActions.showNotification({
status: "error",
title: "Error!",
message: "Send cart data failed!"
}));
});
}, [cart, dispatch]);
return (
<여러 컴포넌트>
{notification && <Notification
status={notification.status}
title={notification.title}
message={notification.message} />}
</여러 컴포넌트>
);
}
export default App;
2. Action creators
- 사실 action creators는 앞서 conponents에서 유사하게 사용하였다.
-
우리는 RTK를 통해 자동으로 action creators를 가져와서 dispatch 함수를 통해 action object를 생성하였는데 그게 바로 자동을 생성되는 action creators고 지금 부터 해볼 것은 우리가 만드는 action creators이다. 이를 소위
thunks라 부른다. -
thunck는 다른 작업이 완료될 때까지 작업을 지연시키는 단순한 함수이다.
즉, 우리는 immediately하게 action 객체를 반환하지 않는 action creators를 thunk를 사용해 만드는 것이다.
이는 task(another function => returns action)를 반환한다.
1. 특정 슬라이스 파일 밑에 thunk(사용자지정 action creator) 만들기
export const sendCartData = (cart) => {
  return async (dispatch) => {
    // 1. ui로 사용자에게 현재 상태 알리기
    dispatch(
      uiActions.showNotification({
        status: "pending",
        title: "Sending...",
        message: "Sending cart data..."
      }));
    // 2. 실제 서버에 갔다 오는 함수 선언 코드 => 입력만 하기 때문에 여기서 추가 적인 .then()는 없음
    const sendRequest = async () => {
      const response = await fetch("router URL", {
        method: "PUT", body: JSON.stringify(cart),
      });
      if (!response.ok) {
        throw new Error("Something is go wrong...");
      };
    }
    // 3. 위에 async로 갔다온 data의 응답값을 토대로 다음 로직 실행
    try {
      await sendRequest();
      dispatch(uiActions.showNotification({
        status: "success",
        title: "Success!",
        message: "Send cart data successfully!"
      }));
    } catch (error) {
      dispatch(uiActions.showNotification({
        status: "error",
        title: "Error!",
        message: "Send cart data failed!"
      }));
    }
  };
};- 해당 method를 export하여 다른 컴포넌트에서도 가져다 쓸 수 있도록 하였다.
- return은 앞서 말 했듯 어떠한 state 객체를 반환하는 것이 아닌 다음 action을 지시하는 함수(dispatch)를 반환한다.
- async로 순서대로 작업해야할 코드들을 작성한다.
const sendCartData = (data) => {
	return {type:"automatically generated id code", payload:...};
};- 원래 위 코드처럼 RTK가 알아서 자동으로 작업해주는 것을 우리가 직접 작업한 것이다.
2. 해당 컴포넌트에서 import하여 쓰기
useEffect(() => {
  // 최초 실행 시 http request하는 것을 막는 코드
  if (isInitial) {
    isInitial = false;
    return;
  }
  // 우리가 작업한 thunk action creators를 실행하는 코드
  dispatch(sendCartData(cart));
}, [cart, dispatch]);
하지만 역시 slice 파일에 너무 많은 코드가 몰려 있으면 유지보수가 힘들기 때문에 action creator부분과 slice 부분을 나눈 깔끔한 코드 예제는 다음 포스팅을 참고하면 된다.