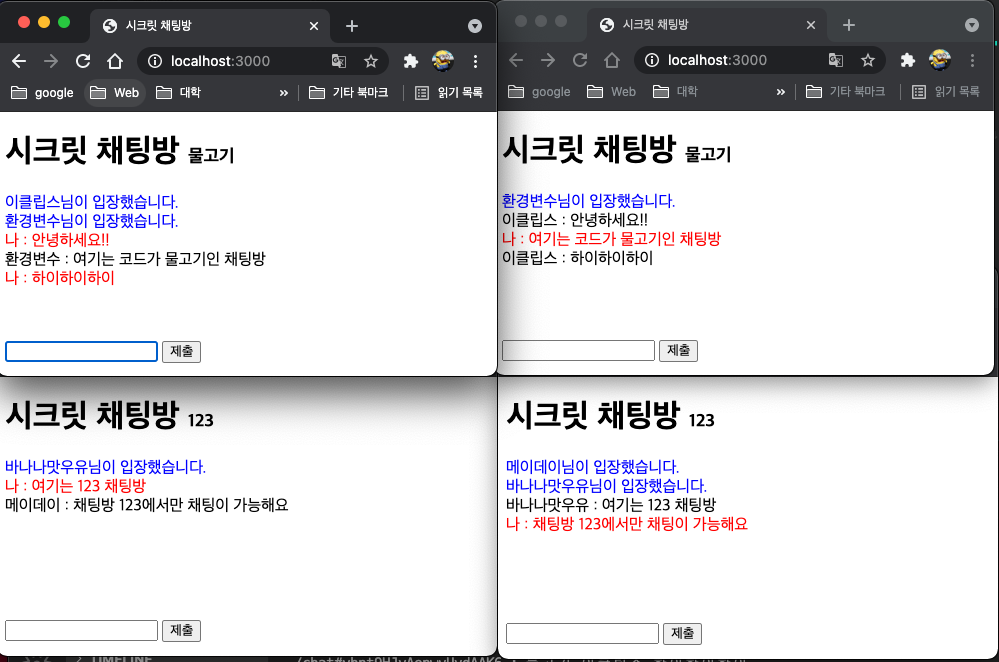
NestJS와 socket.io로 채팅 서버 만드는 코드입니다.
깃허브 주소: https://github.com/sanchoco/NestJS_Chat
0. 설치
nest new nest-chat
cd nest-chat
npm i -s @nestjs/websockets @nestjs/platform-socket.io @nestjs/platform-express path
npm i -D @types/socket.ionest-chat이란 이름으로 새 프로젝트를 생성합니다.- 필요한 모듈을 npm 인스톨러로 설치합니다.
devDependency로 socket.io를 설치합니다.
1. 프로젝트 세팅
nest g ga ChatChat라는 이름으로 게이트웨이를 만듭니다.
2. main.ts 수정
  app.enableCors();
app.useStaticAssets(join(__dirname, '..', 'static'));- bootstrap 안에 cors와 static 폴더를 설정하는 코드를 추가합니다.
3. 게이트웨이 파일 수정
chat.gateway.ts
import {
  ConnectedSocket,
  MessageBody,
  SubscribeMessage,
  WebSocketGateway,
  WebSocketServer,
} from '@nestjs/websockets';


@WebSocketGateway(81, { namespace: 'chat' })
export class ChatGateway {
  @WebSocketServer()
  server;

  wsClients = [];

  @SubscribeMessage('hihi')
  connectSomeone(@MessageBody() data: string, @ConnectedSocket() client) {
    const [nickname, room] = data;
    console.log(`${nickname}님이 코드: ${room}방에 접속했습니다.`);
    const comeOn = `${nickname}님이 입장했습니다.`;
    this.server.emit('comeOn' + room, comeOn);
    this.wsClients.push(client);
  }

  private broadcast(event, client, message: any) {
    for (let c of this.wsClients) {
      if (client.id == c.id)
        continue;
      c.emit(event, message);
    }
  }

  @SubscribeMessage('send')
  sendMessage(@MessageBody() data: string, @ConnectedSocket() client) {
    const [room, nickname, message] = data;
    console.log(`${client.id} : ${data}`);
    this.broadcast(room, client, [nickname, message]);
  }
}
- 게이트웨이 파일이 웹소켓을 사용할 수 있도록 위와 같이 수정합니다.
4. 모듈 파일 수정
app.module.ts
providers: [AppService, ChatGateway]- app.module.ts 파일의
providers부분에ChatGateway를 추가합니다.
5. index.html 파일 생성
- static폴더 안에 index.html을 생성하고 아래 코드를 추가합니다.
<!DOCTYPE html>
<html lang="en">
	<head>
		<meta charset="UTF-8" />
		<meta http-equiv="X-UA-Compatible" content="IE=edge" />
		<meta name="viewport" content="width=device-width, initial-scale=1.0" />
		<title>시크릿 채팅방</title>
		<!-- jQuery -->
		<script
			src="https://code.jquery.com/jquery-3.6.0.js"
			integrity="sha256-H+K7U5CnXl1h5ywQfKtSj8PCmoN9aaq30gDh27Xc0jk="
			crossorigin="anonymous"
		></script>
		<!-- socket.io -->
		<script src="http://localhost:81/socket.io/socket.io.js"></script>
		<script>
			const socket = io('http://localhost:81/chat');
			const nickname = prompt('닉네임을 알려주세요.');
			const room = prompt('입장할 방의 코드를 적어주세요.');
			if (!(nickname && room)) {
				alert('다시 입력해주세요.')
				window.location.reload();
			}
			socket.emit('hihi', nickname, room);

			socket.on('connect', () => {
				/* 누군가 채팅침 */
				socket.on(room, (data) => {
					$('#chatList').append(`<div>${data[0]} : ${data[1]}</div>`);
				});
				/* 누군가 입장 */
				socket.on('comeOn' + room, (comeOn) => {
					$('#chatList').append(`<div style="color:blue;">${comeOn}</div>`);
				});
			});

			function msg_send() {
				/* 메시지 전송 */
				let message = $('#msg').val();
				socket.emit('send', room, nickname, message);
				$('#msg').val('');
				$('#chatList').append(`<div style="color:red;">나 : ${message}</div>`);
			}

			$(document).ready(() => {
				$('#room').text(`${room}`)
			})
		</script>
	</head>
	<body>
		<h1>시크릿 채팅방 <span id="room" style="font-size: large;"></span></h1>

		<div id="chatList">

		</div>

		<div id="sendMessage" style="position: fixed; bottom: 5%;">
			<input type="text" id="msg" onKeyPress="if( event.keyCode==13 ){msg_send();}" />
			<button onclick="msg_send()">제출</button>
		</div>
	</body>
</html>

백엔드 개발을 공부하고 있습니다.