Spring Boot Download
Spring 홈페이지에서 스프링 프로젝트 개발을 위해서 필요한 Software 들을 구성하고 다운로드 한다.
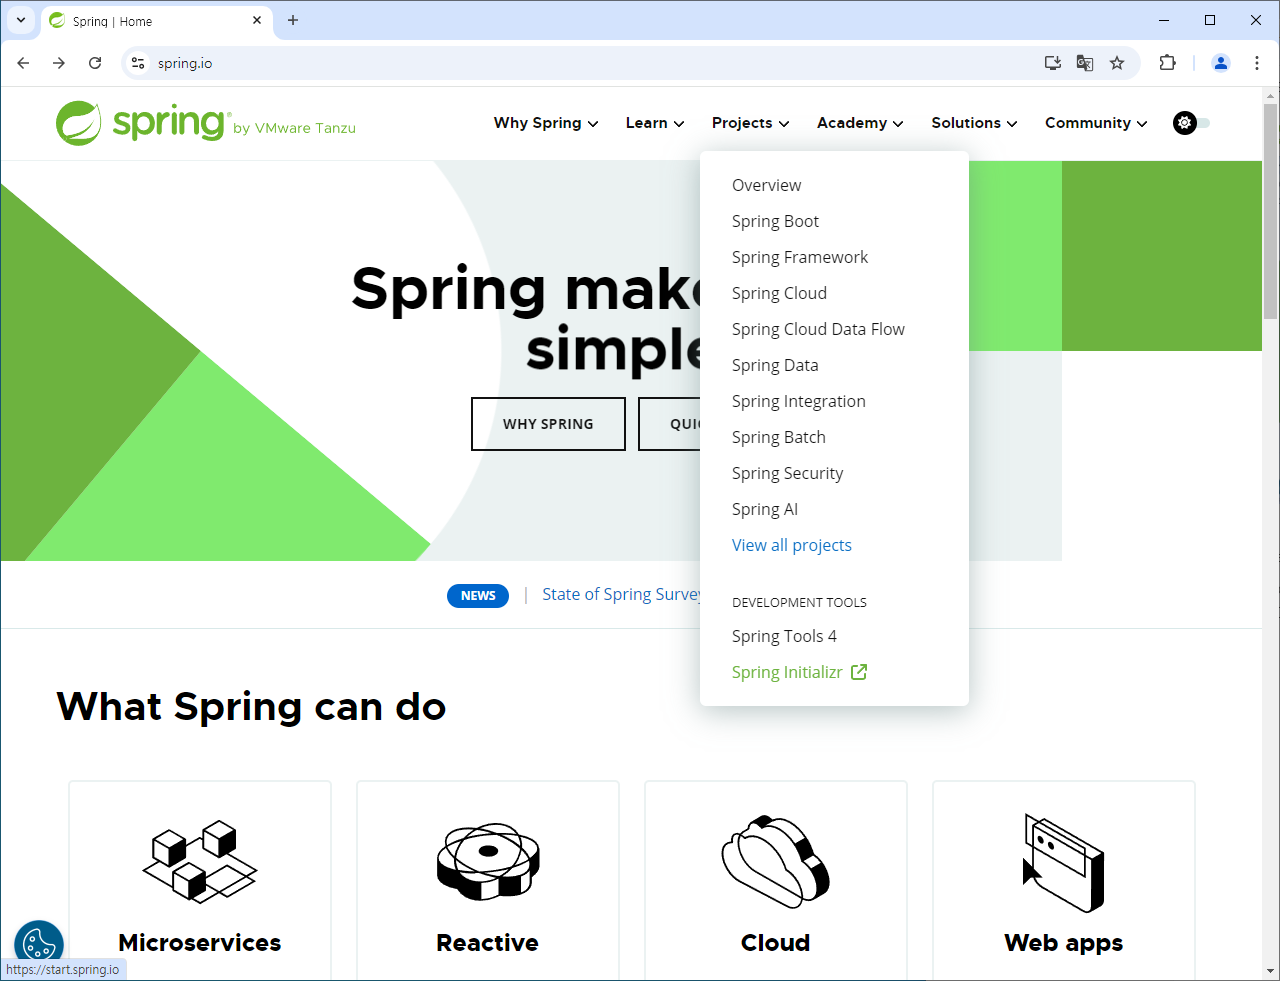
Spring 홈페이지 > Project > Spring Initializr

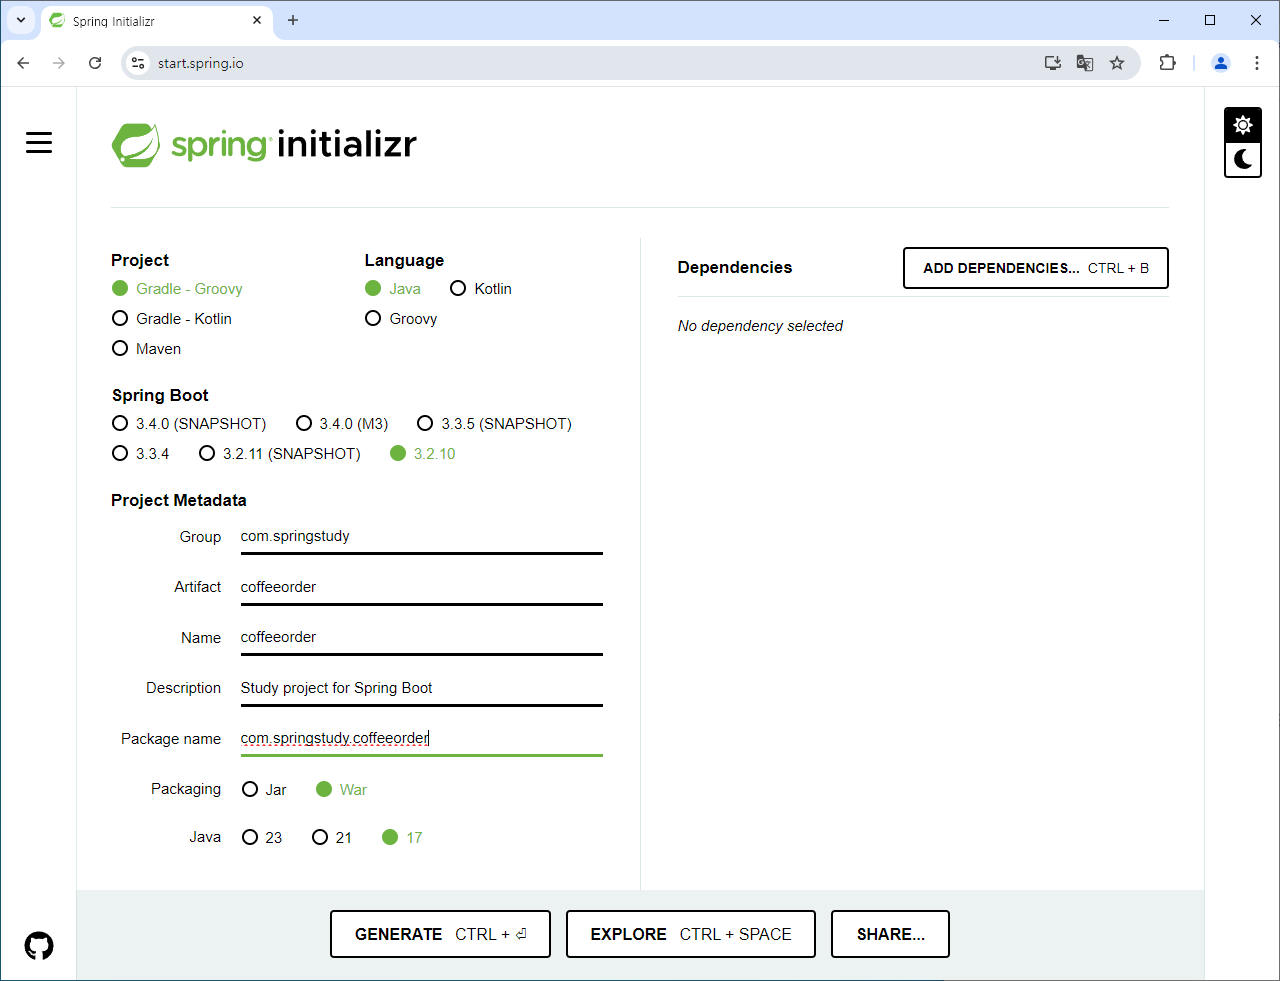
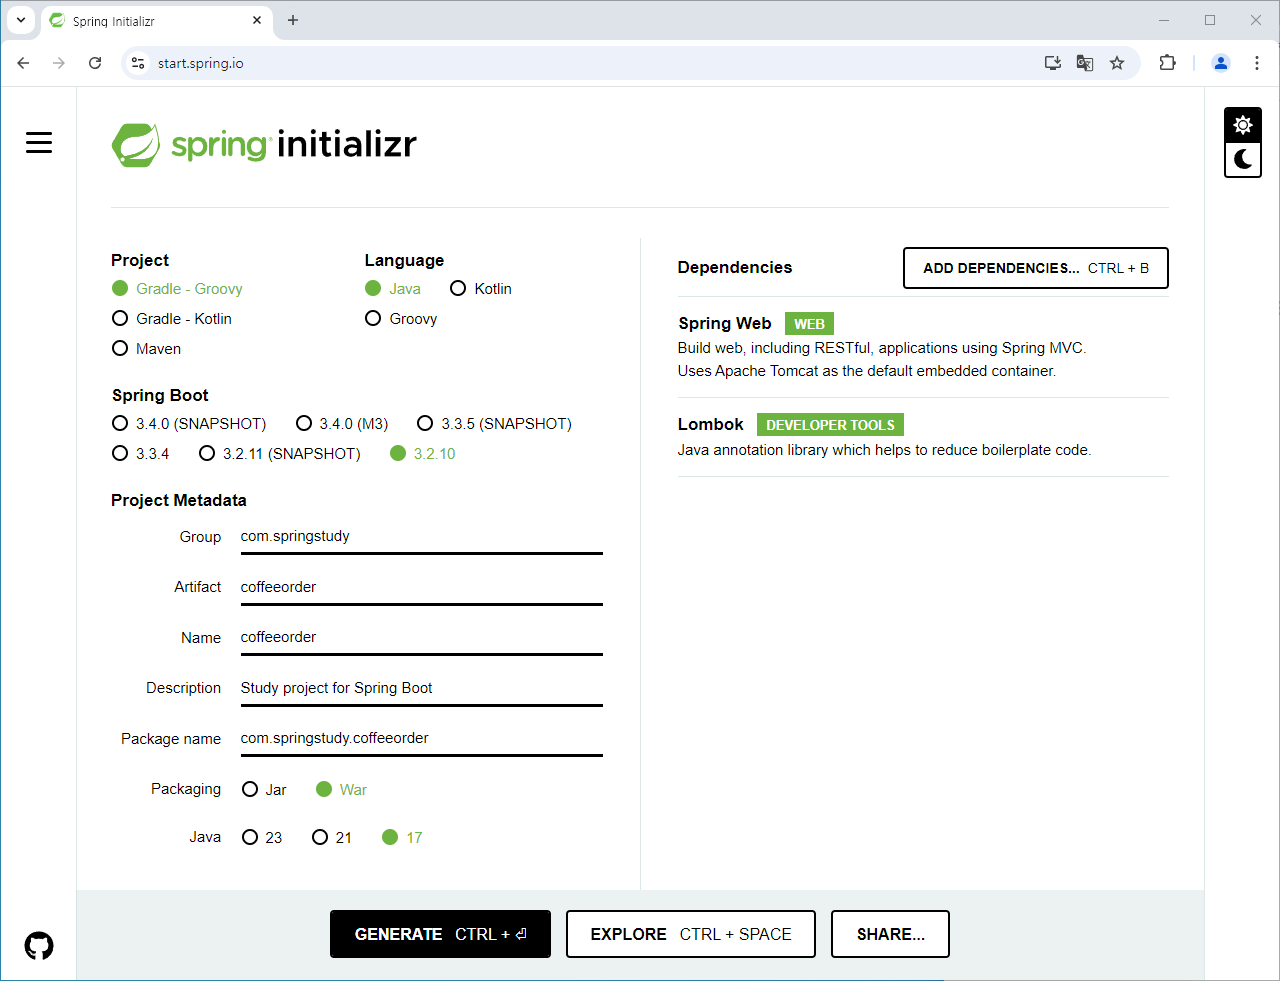
아래와 같이 스프링 프로젝트 생성을 위한 기본 정보를 입력한다. Artifact를 입력하면 Name과 Package Name은 자동으로 입력이 된다.
Project: Gradle-Groovy
Language: Java
Spring Boot: 3.2.10
Project Metadata
	Group: com.springstudy
	Artifact: coffeeorder
	Description: Study project for Spring Boot
	Package name: com.springstudy.coffeeorder
	Packaging: War
	Java: 17
Project는 빌드도구를 선택하는 것이다. 다수 블로그 글들에서는 Maven에서 Gradle로 Gradle은 Groovy에서 Kotlin을 사용하는 것으로 추세가 전환되고 있다고 한다. 구글 트랜드를 보면 Maven이 아직은 대세로 보인다.
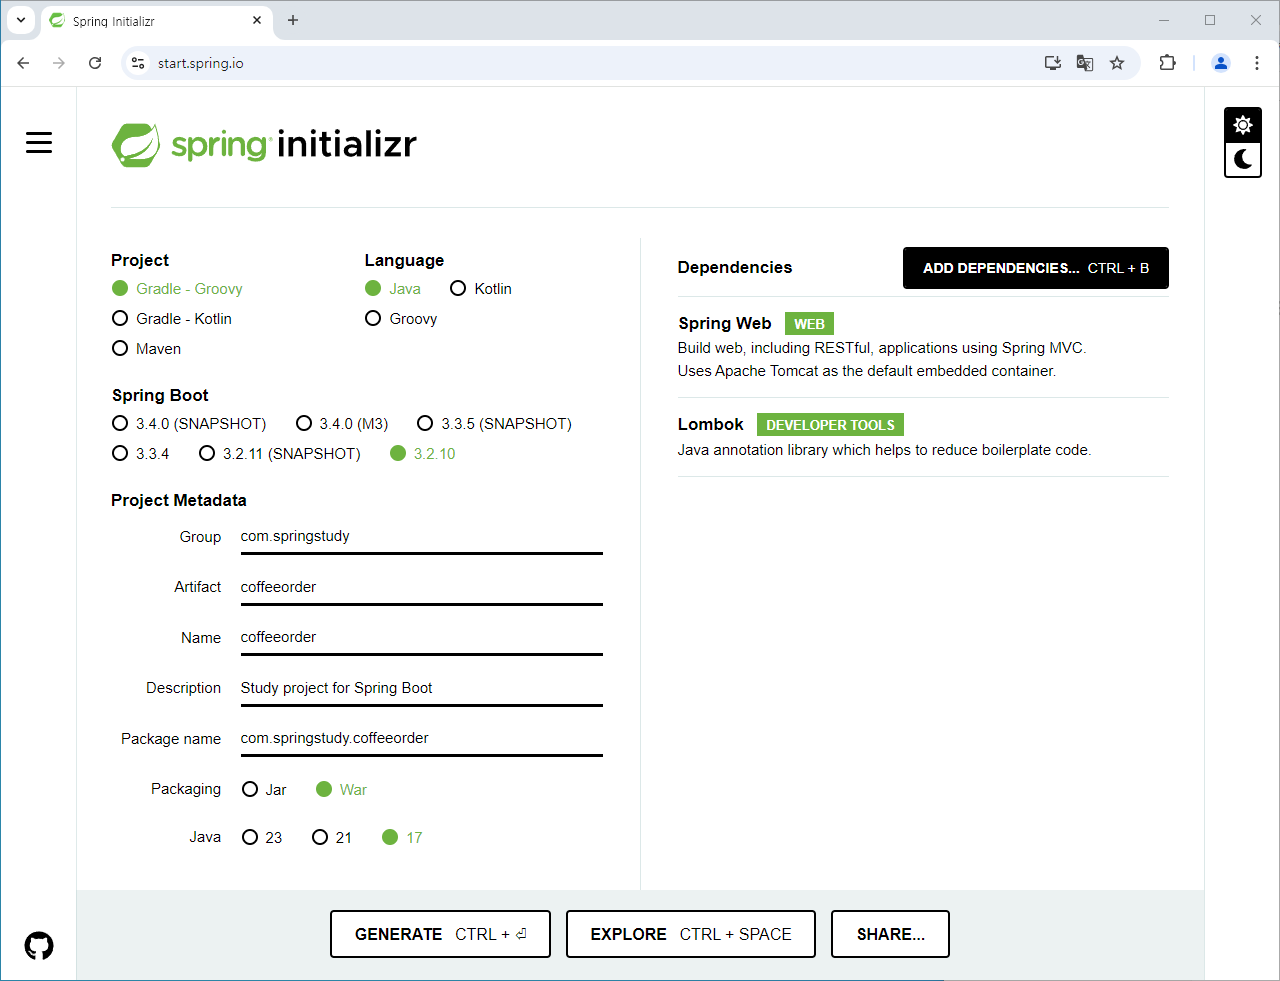
 ### Add Dependencies를 통해 개발에 필요한 Software구성을 한다.
본 프로젝트에서 Spring Web과 Lombok을 추가하도록 한다.
### Add Dependencies를 통해 개발에 필요한 Software구성을 한다.
본 프로젝트에서 Spring Web과 Lombok을 추가하도록 한다.
 여기까지 진행 후 화면 하단의 GENERATE 버튼을 클릭하여 위에서 구성한 스프링 프로젝트를 다운로드 받는다.(zip파일로 제공됨)
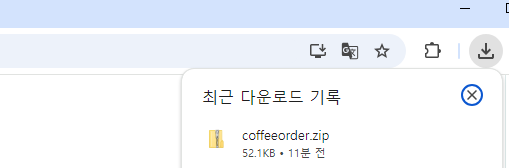
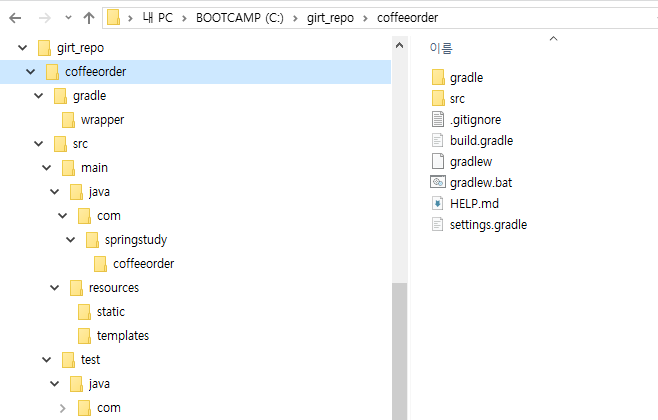
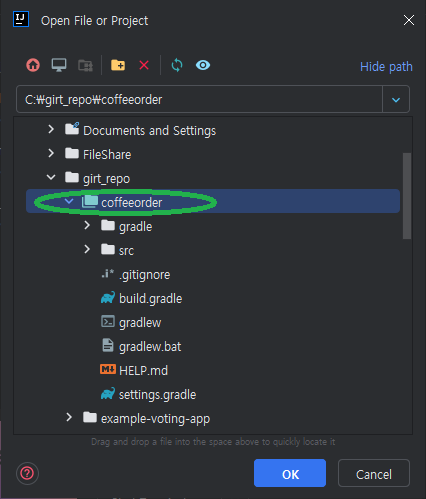
다운로드 zip파일을 작업 폴더에 압축을 풀어준다.
인텔리J 등록
인텔리J -> Project -> Open
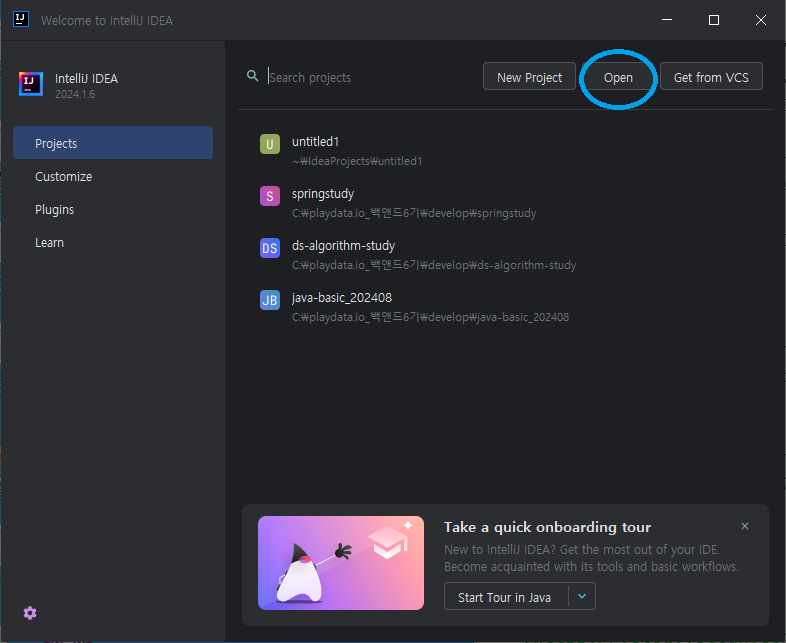
압축풀어둔 폴더를 선택한다.
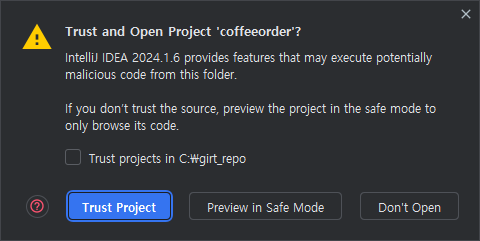
Trust Project 선택
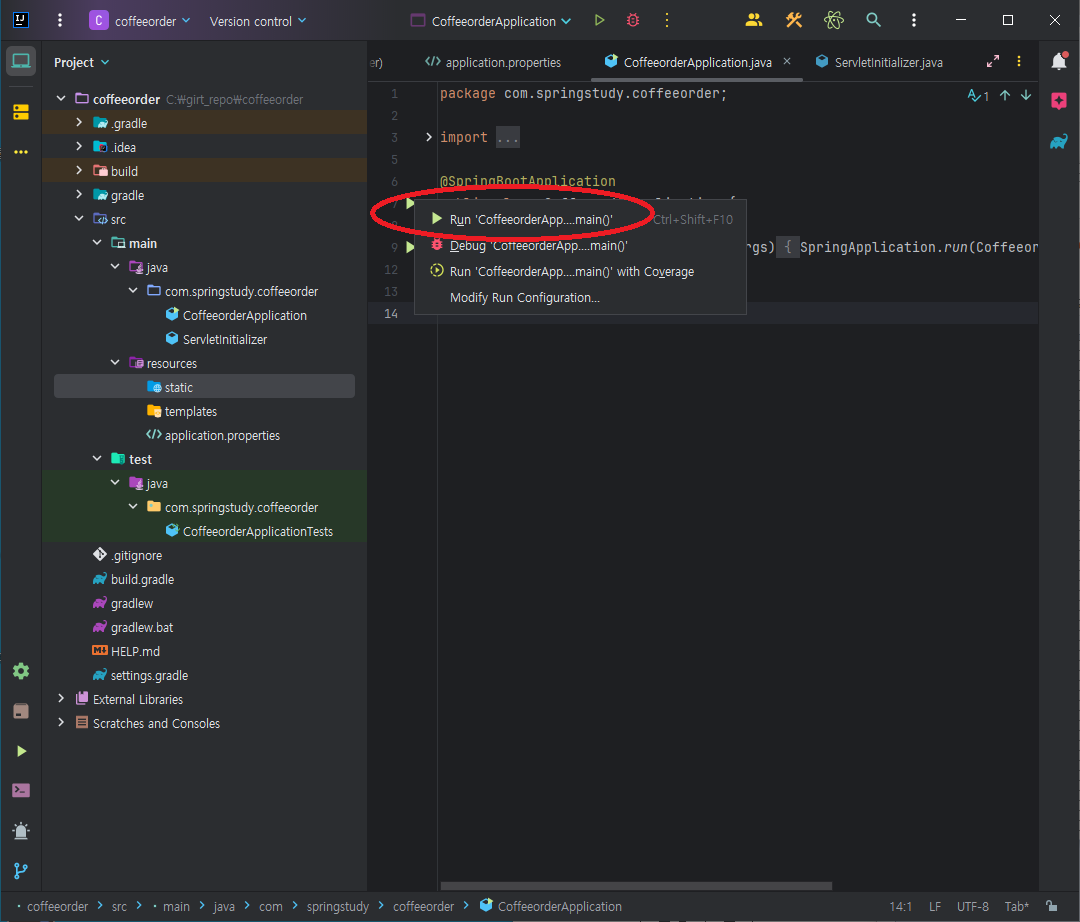
인텔리J 등록 완료

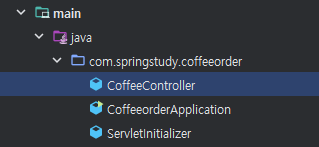
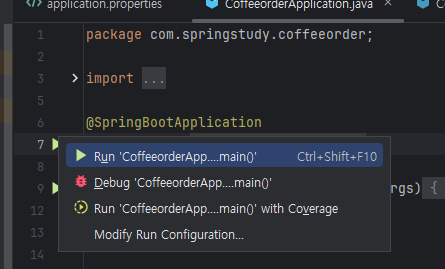
src/main/java/com.springstudy.coffeeorder/CoffeeorderApplication 클래스 파일에 Main Function이 있다.
CoffeeorderApplication 클래스를 실행시키면 스프링 내장 Tomcat이 실행이 된다.
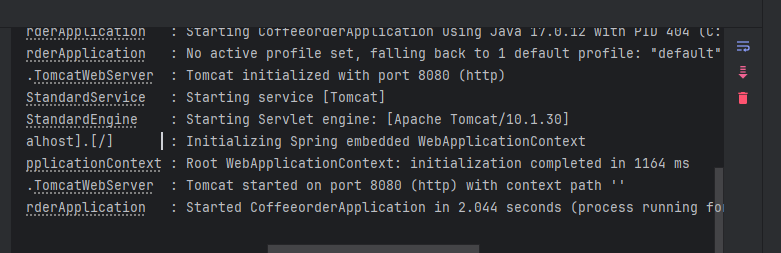
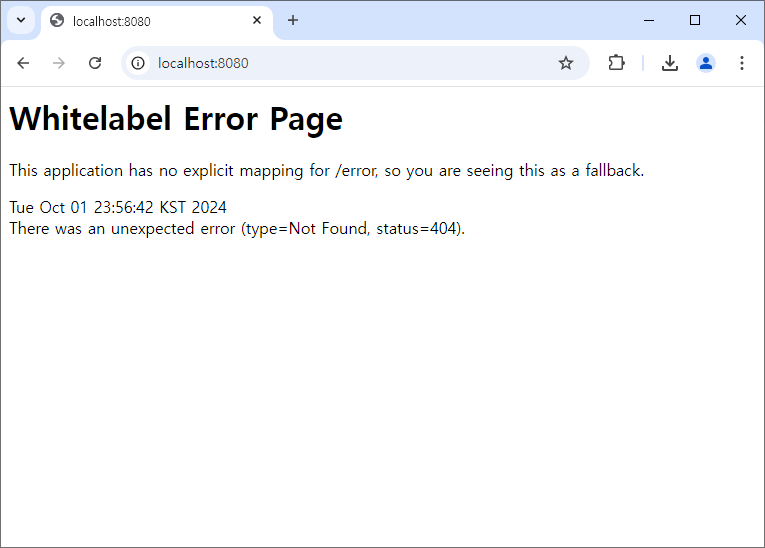
웹브라우저 주소에 localhost:8080을 입력하면 아래와 같이 출력되면 정상이다. Error Page가 나오는 것은 아직 개발을 하지 않아 보여줄 Web Page가 지정되지 않아 출력되는 것이다.
View Resolver에 알려줄 prefix/suffix 설정을 applicaiton.properties 파일에 아래와 같이 등록한다.
# jsp view resolver setting
spring.mvc.view.prefix=/WEB-INF/views/
spring.mvc.view.suffix=.jsp
JSP를 사용할 수 있도록 build.gradle 파일에 JSP 사용을 위한 Dependencies 설정을 추가한다.

// spring boot에서 jsp를 사용하기 위한 설정
implementation 'org.apache.tomcat.embed:tomcat-embed-jasper'
implementation 'jakarta.servlet:jakarta.servlet-api'
implementation 'jakarta.servlet.jsp.jstl:jakarta.servlet.jsp.jstl-api'
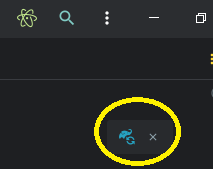
implementation 'org.glassfish.web:jakarta.servlet.jsp.jstl'설정을 추가했으면, 아래 그림과 같이 코끼리 아이콘을 클릭하여 Dependencies를 적용한다. 적용하면 관련 SW가 다운로드 된다.
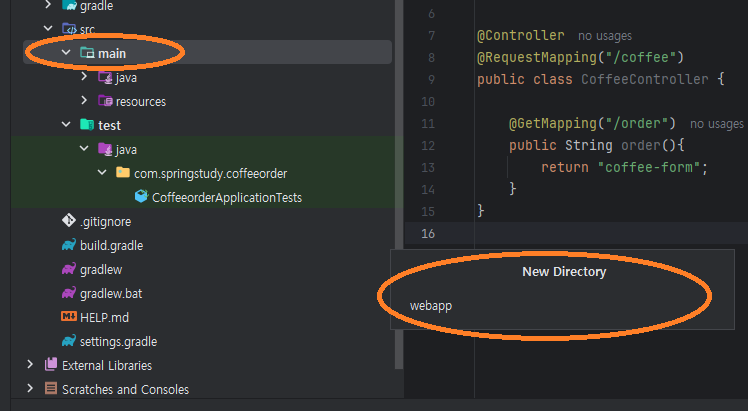
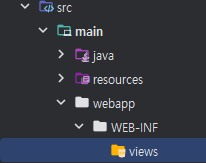
View Resolver 설정에 등록한 것과 같이 JSP 웹페이지를 등록할 수 있게 src/main 폴더 하위에 webapp/WEB-INF/views 폴더를 생성한다.
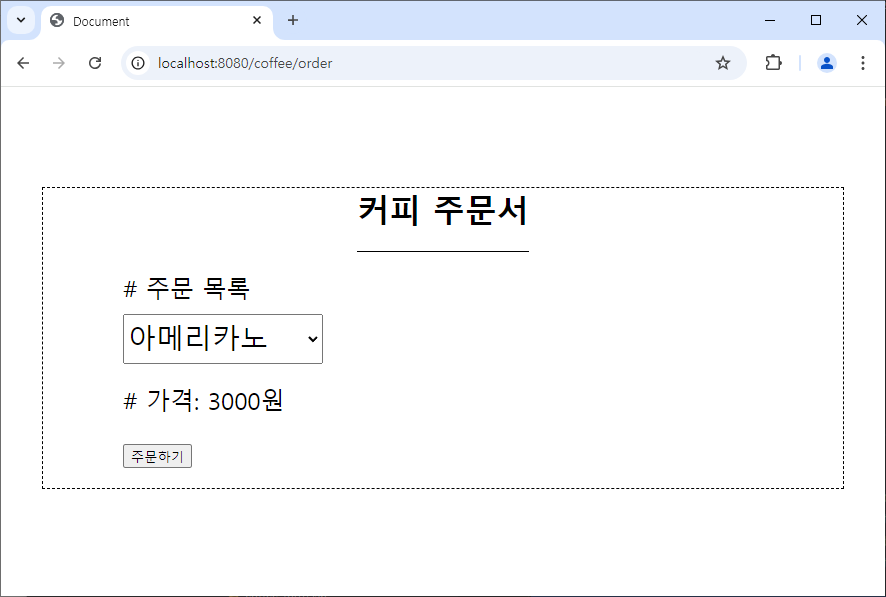
폴더에 View 역할을 위한 웹페이지 JSP(Java Servlet Page) 파일을 구성한다. JSP파일 요청을 받으면 Servlet으로 변환하여 클라이언트 웹브라우저로 응답을 전달한다. coffeeorder 프로젝트에서 사용하는 jsp 파일 2개 이며,아래와 같다.
커피를 선택하면 가격이 선택된 커피의 가격으로 변경시켜주는 것은 Form의 이벤트(e) 변경을 감지하는 Java Script코드로 작성되어 있다.
- coffee-form.jsp
<@--
<%@ page contentType="text/html;charset=UTF-8" language="java" %>
<%@ taglib prefix="c" uri="http://java.sun.com/jsp/jstl/core"%>
<!DOCTYPE html>
<html lang="ko">
<head>
    <meta charset="UTF-8">
    <meta name="viewport" content="width=device-width, initial-scale=1.0">
    <title>Document</title>
     <style>
            label {
                display: block;
                margin-bottom: 20px;
            }
            .wrap {
                width: 800px;
                margin: 100px auto;
                border: 1px dashed #000;
            }
            .wrap h1 {
                margin: 0 auto;
                padding-bottom: 20px;
                width: fit-content;
                border-bottom: 1px solid #000;
            }
            .wrap .menu {
                font-size: 24px;
                width: 80%;
                margin: 20px auto;
            }
            .wrap .menu select {
                width: 200px;
                height: 50px;
                font-size: 28px;
                margin-top: 10px;
            }
            .clearfix::after {
                content: '';
                display: block;
                clear: both;
            }
        </style>
</head>
<body>
    <div class="wrap">
        <h1>커피 주문서</h1>
        <div class="menu">
            <form action="/coffee/result" method="post">
                <label>
                    # 주문 목록 <br>
                    <select id="menu-sel" name="menu">
                        <option value="americano">아메리카노</option>
                        <option value="cafeLatte">카페라떼</option>
                        <option value="macchiato">카라멜 마끼아또</option>
                    </select>
                </label>
                <label class="price"># 가격: <span class="price-value">3000</span>원</label>
                <!-- 화면에 렌더링은 안되지만 서버로 보낼 수 있음 -->
                <input id="price-tag" type="hidden" name="price" value="3000">

                <label>
                    <button type="submit">주문하기</button>
                </label>
            </form>

        </div>
    </div>
    <script>
        const coffePrice = {
            americano: 3000,
            cafeLatte: 4500,
            macchiato: 5000
        };

        // change : input이나 select태그의 값이 변했을 때
        const $menu = document.getElementById('menu-sel');
        $menu.onchange = e => {
            // 커피를 선택하면 가격이 변해야 함!
			console.log(coffePrice[e.target.value]);
            const price = coffePrice[e.target.value]
            document.querySelector('.price-value').textContent = price;
            const $priceTag = document.getElementById('price-tag');
            $priceTag.value = price;
        };
    </script>
</body>
</html>- coffee-result.jsp
<%@ page contentType="text/html;charset=UTF-8" language="java" %> <%@ taglib
prefix="c" uri="http://java.sun.com/jsp/jstl/core"%>
<!DOCTYPE html>
<html lang="ko">
<head>
<meta charset="UTF-8" />
<meta name="viewport" content="width=device-width, initial-scale=1.0" />
<title>Document</title>
</head>
<body>
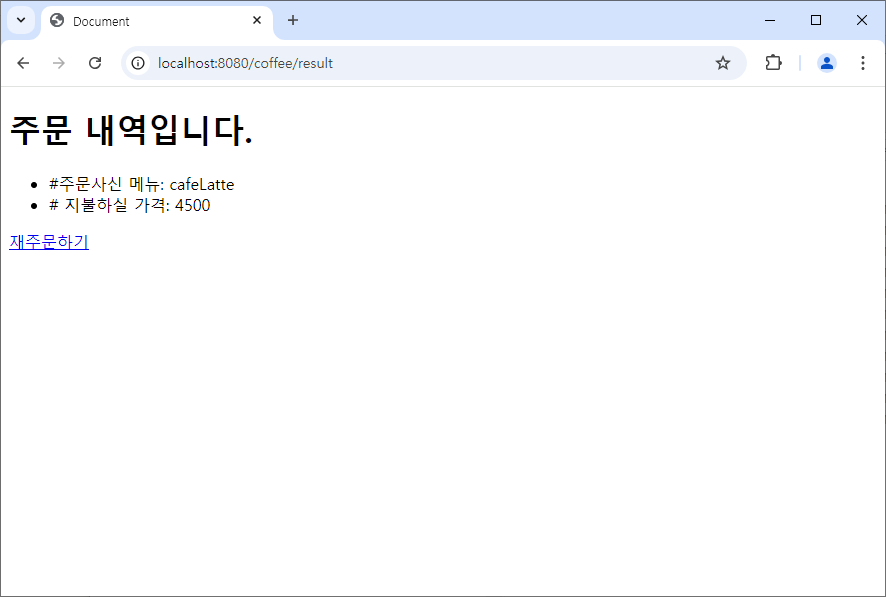
<h1>주문 내역입니다.</h1>
<ul>
<li>#주문사신 메뉴: ${mmm}</li>
<li># 지불하실 가격: ${ppp}</li>
</ul>
<a href="coffee/order">재주문하기</a>
</body>
</html>Controller 작성
그럼 지금부터 코드를 추가하여 스프링의 첫 발을 내디뎌 보도록 하자!!!
CoffeeController 클래스 파일을 생성한후 아래와 같이 Coffee 메뉴 주문 화면을 처리할 수 있도록 Spring Java Code를 작성한다.
@Controller, @RequestMapping, @GetMapping
package com.springstudy.coffeeorder;

import org.springframework.stereotype.Controller;
import org.springframework.web.bind.annotation.GetMapping;
import org.springframework.web.bind.annotation.RequestMapping;

@Controller
@RequestMapping("/coffee")
public class CoffeeController {

    @GetMapping("/order")
    public String order(){
        return "coffee-form";
    }
}
main 클래스를 실행하여 커피주문 화면 coffee-form.jsp 요청에 대한 응답을 브라우저를 이용하여 확인한다.
주소: localhost:8080/coffee/order
주문에 대한 결과를 처리할 수 있는 메소드를 CoffeeController에 추가한다.
@PostMapping, @RequestParam, Model
    @PostMapping("/result")
    public String result(@RequestParam String menu,
                         @RequestParam int price,
                         Model model) {
        model.addAttribute("mmm", menu);
        model.addAttribute("ppp", price);

        return "coffee-result";
    }
웹브라우저에서 주문하기 버튼을 클릭하여 주문결과를 확인한다.