
1. Code Style
1-1. 개요
- Code Style이란 뭘까?
보통 회사나 오픈 소스에서 특수한 Code Style을 설정한다.
Android Studio에서는 Kotlin의 default Code Style로 Kotlin Style Guide가 적용되어 있다.
Default Code Style을 따르지 않고, 별개로 설정해 줄 필요성에 대해 holy와 논의해보아야 할 것 같다.
별개로 어떤 항목들이 Code Style에 포함되는지 숙지해두면 좋겠다.
1-2. Kotlin Style Guide
2. Android Lint
2-1. 개요
- Android Lint란?
Android Lint는 안드로이드 코드에서 dependency나 resource등의 부분에 대해 정적 분석을 해주는 도구이다. 이를 통해 코드의 구조적 결함을 발견하고 해결할 수 있다.

2-2. Lint의 사용
- lint 설정하기
lint.xml파일을 작성하여 warning을 제한하거나, warning의 severity 레벨을 설정할 수 있다.lint.xml파일은 프로젝트의 root directory에 위치시켜야 한다.lint.xml파일의 예시는 다음과 같다. 기본 설정된 lint를 이용할 때는 작성하지 않아도 된다.
<?xml version="1.0" encoding="UTF-8"?>
<lint>
    <!-- Disable the IconMissingDensityFolder check in this project -->
    <issue id="IconMissingDensityFolder" severity="ignore" />

    <!-- Ignore the ObsoleteLayoutParam issue in the specified files -->
    <issue id="ObsoleteLayoutParam">
        <ignore path="res/layout/activation.xml" />
        <ignore path="res/layout-xlarge/activation.xml" />
    </issue>

    <!-- Ignore the UselessLeaf issue in the specified file -->
    <issue id="UselessLeaf">
        <ignore path="res/layout/main.xml" />
    </issue>

    <!-- Change the severity of hardcoded strings to "error" -->
    <issue id="HardcodedText" severity="error" />
</lint>- Android Lint의 실행 - (1) 터미널에서
작성한 코드를 검사하려면 터미널에서 다음과 같은 코드를 실행한다.
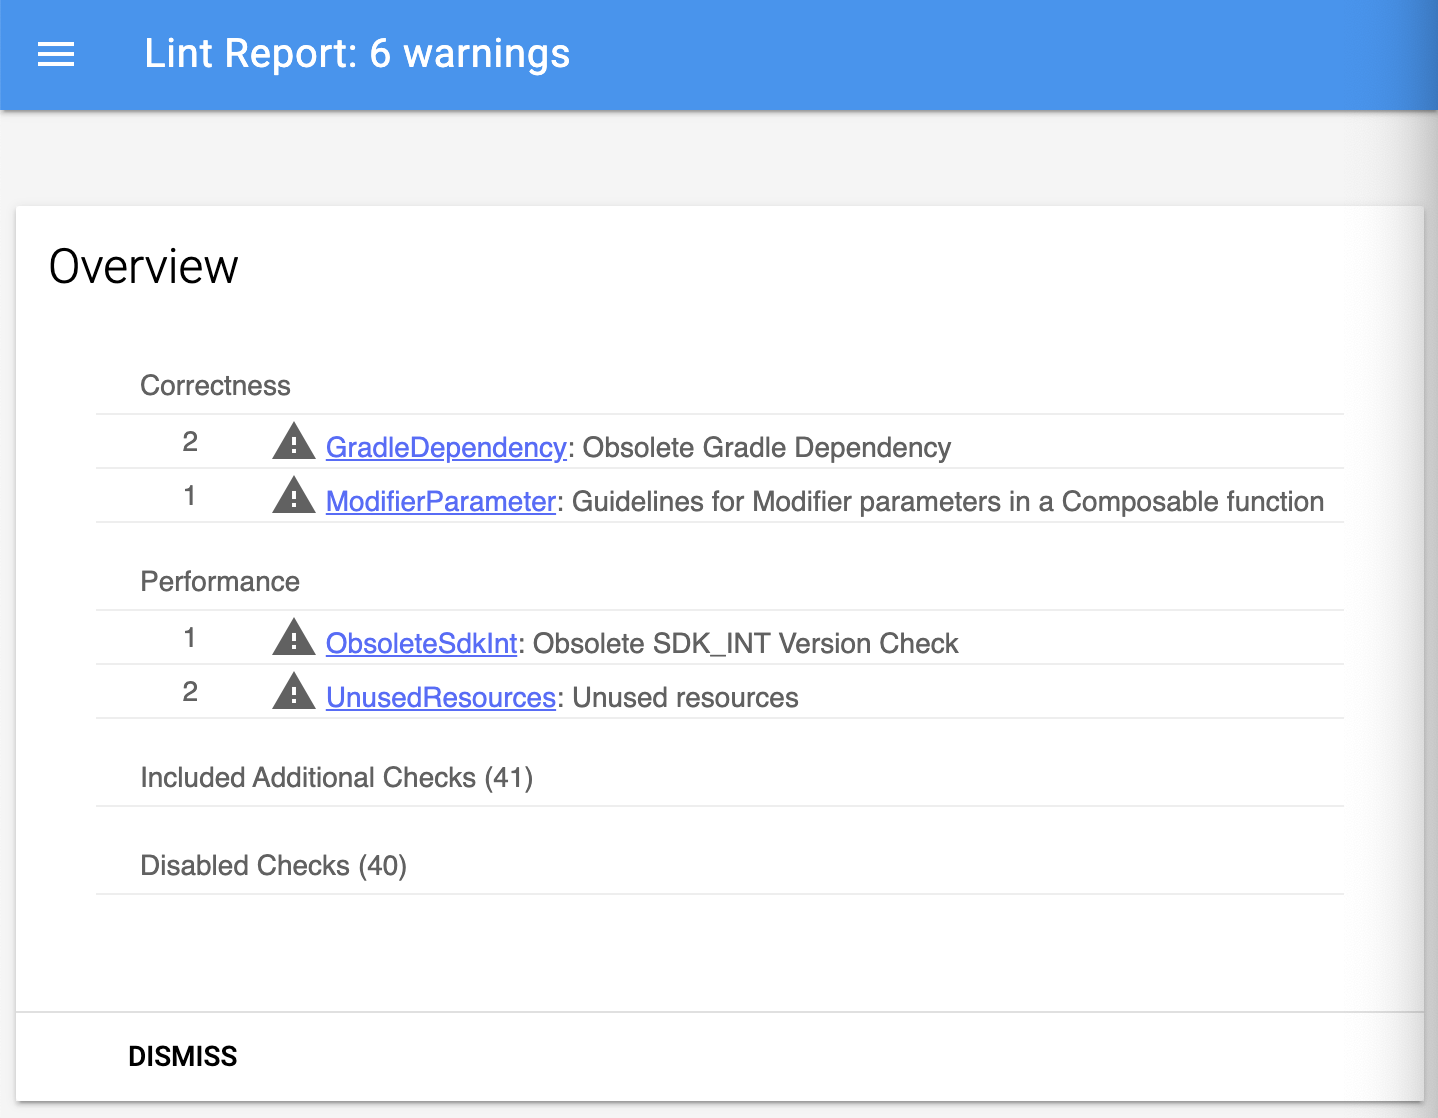
검사가 끝나면 HTML파일로 검사 결과를 보고해준다.
./gradlew lint
./gradlew lintDebug
./gradlew lintRealeaselint: 기본 lint 실행lintRelease: build variants가 있는 경우에 이용.
아래와 같이 터미널에 나타난다.

링크를 클릭하면 다음과 같이 Lint Report를 볼 수 있다.
- Android Lint의 실행 - (2) Inspection의 실행
설정한 lint를 실행시키려면 다음과 같이 한다.
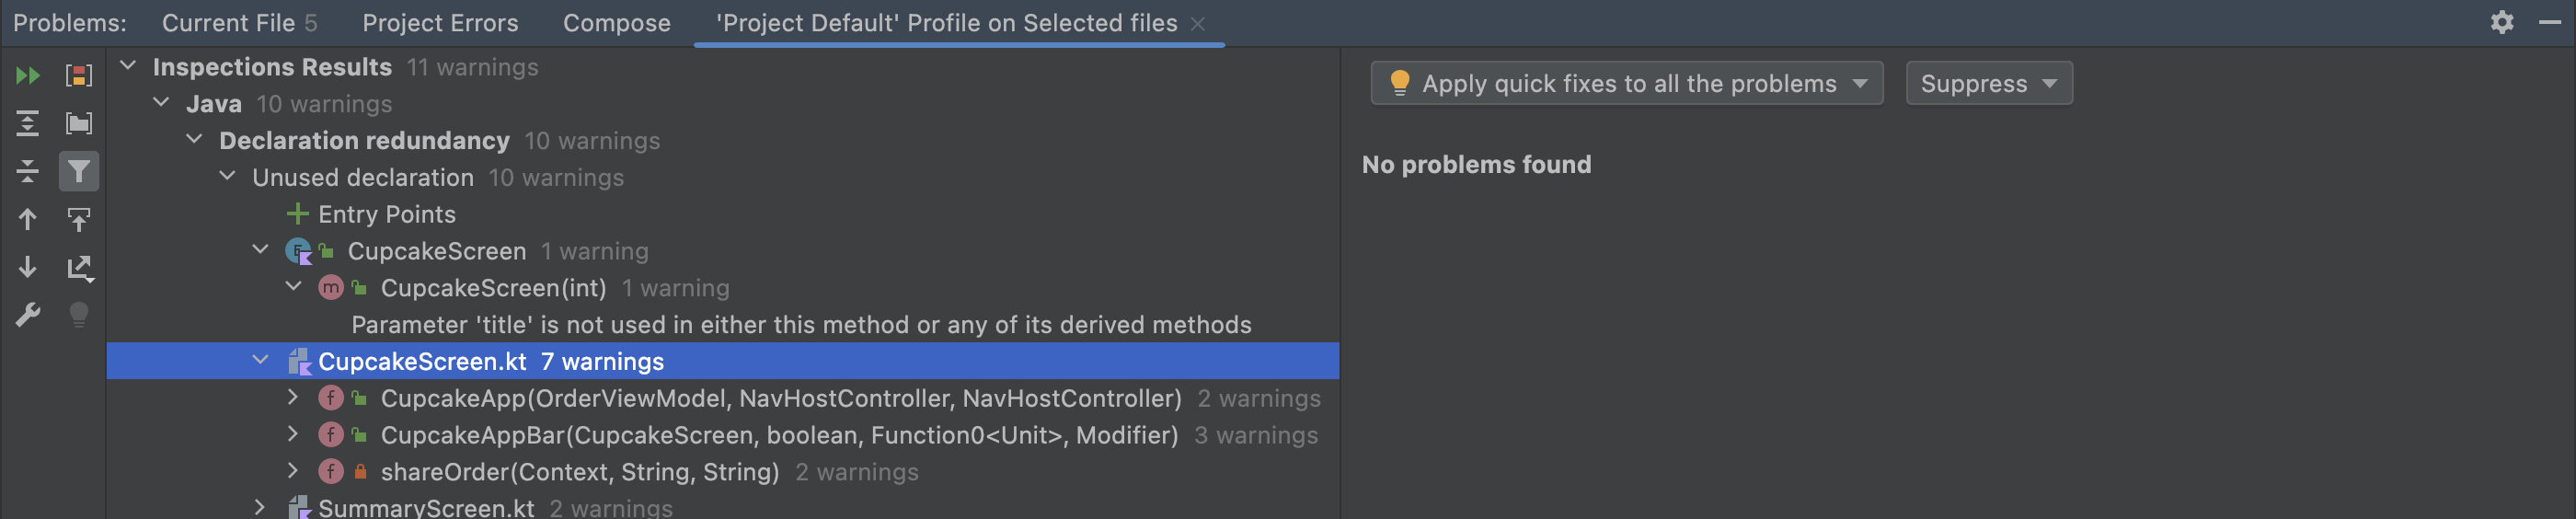
상단 메뉴에서 Code > Inspect Code로 들어가서 Inspection Scope (lint할 범위)와 Inspection profile(설정한 lint 내용)을 정한 후 실행시킨다.
아래와 같이 Problem에 표시된다.
2-3. ktlint와 detekt는 뭘까?
-
Android Lint
Android Lint는 앱 실행 또는 테스트케이스 작성 없이 코드의 구조적 품질 문제를 감지하고 수정이 가능하다. 만약 안드로이드 스튜디오를 사용할 경우 앱을 빌드할 때마다 Lint 검사가 기본적으로 실행된다. -
ktlint
ktlint를 사용하면 코틀린 스타일 가이드에 맞게 코드를 다듬어 줄 수 있다. -
detekt
detekt는 코드 포맷팅을 해주기보다 잠재적 버그를 찾아주고 코드 복잡성, 성능 저하 포인트를 집어준다.
3. ktlint
3-1. 개요
- ktlint 도입
spotless와 ktlint의 차이는 무엇이고 우리 프로젝트에서는 어떤 툴을 선택해야 하는지 고민해보았다.
ktlint는 위에서 말했듯이 Android Kotlin Style Guide와 Kotlin coding convention에 따라서 Coding Convention을 준수하는지 확인해주는 개발 도구이다. 코딩 컨벤션을 준수하고 있지 않은 코드가 있으면 빌드나 커밋이 불가능하도록 설정할 수 있다.
spotless는 코드 포맷터로 포맷팅 에러를 찾아주고, 고쳐준다. import 순서 정의, 사용하지 않는 import 제거 등 다양한 옵션을 사용할 수 있고, 적용 범위를 조정할 수 있다.
도토링에서는 ktlint만 사용하기로 하였다.
REFERENCE
1. 만화경 Android App 설정하고 개발하기 | 우아한 형제들 기술 블로그
2. Kotlin Style Guide | Android Developers
3. square/java-code-styles | Github
4. Improve your code with lint checks | Android Developers

Android Developer
레퍼런스 너무 깔끔하게 정리해두셨네요~ 현지님 블로그는 정말 읽기 편하고 정리가 잘되어 있는 것 같아요! 항상 응원해요 ㅎㅎ