org.springframework.validation.Validator
에플리케이션에서 사용하는 객체 검증용 인터페이스.
1. 특징
- 어떠한 계층과도 관계가 없다. => 모든 계층(웹, 서비스, 데이터)에서 사용해도 좋다.
- 구현체 중 하나로, JSR-303(Bean Validation 1.0)과 JSR-349)Bean Validation 1.1)을 지원한다. (LocalValidatorFactoryBean)
- DataBinder에 들어가 바인딩 할 때 같이 사용되기도 한다.
2. 인터페이스
- boolean supports(Class clazz): 어떤 타입의 객체를 검증할 때 사용할 것인지 결정함
- void validate(Object obj, Errors e) : 실제 검증 로직을 이 안에서 구현
- 구현할 때 ValidationUtils 사용하여 편리 함.
3. 스프링 부트 2.0.5 이상 버전을 사용할 때
- LocalValidatorFactoryBean 빈으로 자동 등록
- JSR-380(Bean Validation 2.0.1) 구현체로 hibernate-validator 사용.
- https://beanvalidation.org/
4. Validator 사용법 (오래된 방법)
- Event.java
public class Event {

    Integer id;

    String title;

    public Integer getId() {
        return id;
    }

    public void setId(Integer id) {
        this.id = id;
    }

    public String getTitle() {
        return title;
    }

    public void setTitle(String title) {
        this.title = title;
    }
}- EventValidator.java
public class EventValidator implements Validator {
    @Override
    public boolean supports(Class<?> aClass) {
        return Event.class.equals(aClass);
    }

    @Override
    public void validate(Object o, Errors errors) {
        ValidationUtils.rejectIfEmptyOrWhitespace(errors, "title", "notempty", "Empty title is not allowed");
    }
}
- AppRunner.java
@Component
public class AppRunner implements ApplicationRunner {
@Autowired
ApplicationContext resourceLoader;
@Override
public void run(ApplicationArguments args) throws Exception {
Event event = new Event();
EventValidator eventValidator = new EventValidator();
Errors errors = new BeanPropertyBindingResult(event, "event");
eventValidator.validate(event, errors);
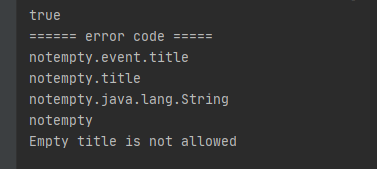
System.out.println(errors.hasErrors());
errors.getAllErrors().forEach(e ->{
System.out.println("====== error code =====");
Arrays.stream(e.getCodes()).forEach(System.out::println);
System.out.println(e.getDefaultMessage());
});
}
}#실행결과
2. 좀 더 발전된(?) 사용방법
-
Validator를 직접 사용, 간단한 validate 로직에서 EventValidator를 직접 구현할 필요가 없으며, 어노테이션으로 대체가 가능함.
-
복잡한 validate 로직의 경우에는 Validator를 직접 구현하면 됨.
-
Event.java
public class Event {

    Integer id;

    @NotEmpty
    String title;

    @NotNull @Min(0)
    Integer limit;

    @Email
    String email;

    public Integer getId() {
        return id;
    }

    public void setId(Integer id) {
        this.id = id;
    }

    public String getTitle() {
        return title;
    }

    public void setTitle(String title) {
        this.title = title;
    }

    public Integer getLimit() {
        return limit;
    }

    public void setLimit(Integer limit) {
        this.limit = limit;
    }

    public String getEmail() {
        return email;
    }

    public void setEmail(String email) {
        this.email = email;
    }
}- AppRunner.java
@Component
public class AppRunner implements ApplicationRunner {

    @Autowired
    Validator validator;

    @Override
    public void run(ApplicationArguments args) throws Exception {
        System.out.println(validator.getClass());

        Event event = new Event();
        event.setLimit(-1);
        event.setEmail("aaaa22");

        Errors errors = new BeanPropertyBindingResult(event, "event");

        validator.validate(event, errors);

        System.out.println(errors.hasErrors());

        errors.getAllErrors().forEach(e ->{
            System.out.println("====== error code =====");
            Arrays.stream(e.getCodes()).forEach(System.out::println);
            System.out.println(e.getDefaultMessage());
        });
    }
}
~~