SoundPool
공식문서
오디오 사운드를 재생하고 관리하는 class
너무 길이가 길면 불가능하다
어플에 효과음 넣기
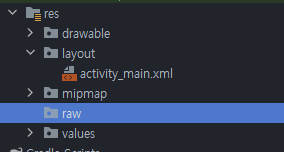
위처럼 리소스 폴더 안에 new resouce 폴더의 이름을 raw로 해서 새로 만들어 주자
그다음에 효과음 파일들을 넣어준다 !
MainActvity.kt
class MainActivity : AppCompatActivity() {

    private val remainMinutesTextView: TextView by lazy {
        findViewById(R.id.txt_remainMinutes)
    }
    private val seekBar: SeekBar by lazy {
        findViewById(R.id.seekBar)
    }
    private val remainSecondsTextView: TextView by lazy {
        findViewById(R.id.txt_remainSeconds)
    }
    private var currentCountDownTimer: CountDownTimer? = null

    private val soundPool = SoundPool.Builder().build()

    private var tickingSoundId: Int? = null
    private var bellSoundId: Int? = null

    override fun onCreate(savedInstanceState: Bundle?) {
        super.onCreate(savedInstanceState)
        setContentView(R.layout.activity_main)

        bindViews()
        initSounds()
    }

    override fun onResume() {
        super.onResume()
        soundPool.autoResume()

    }

    override fun onPause() {
        super.onPause()

        soundPool.autoPause()
    }

    override fun onDestroy() {
        super.onDestroy()
        soundPool.release()
    }

    private fun bindViews() {
        seekBar.setOnSeekBarChangeListener(
            object : SeekBar.OnSeekBarChangeListener {

                override fun onProgressChanged(
                    seekBar: SeekBar?,
                    progress: Int,
                    fromUser: Boolean
                ) {
                    if (fromUser) {
                        updateRemainTime(progress * 60 * 1000L)
                    }
                }

                override fun onStartTrackingTouch(seekBar: SeekBar?) {
                    currentCountDownTimer?.cancel()
                    currentCountDownTimer = null
                }

                override fun onStopTrackingTouch(seekBar: SeekBar?) {
                    seekBar ?: return //seekBar가 null일경우에 끝낸다 //앨비스 오퍼레이터
                    startCountDown()
                }
            }
        )
    }

    private fun createCountDownTimer(initialMillis: Long): CountDownTimer =
        object : CountDownTimer(initialMillis, 1000L) {
            override fun onTick(millisUntilFinished: Long) {
                updateRemainTime(millisUntilFinished)
                updateSeekBar(millisUntilFinished)
            }

            override fun onFinish() {
                completeCountDown()

            }
        }
    private fun completeCountDown(){
        updateRemainTime(0)
        updateSeekBar(0)
        soundPool.autoPause()
        bellSoundId?.let { soundId ->
            soundPool.play(soundId, 1F, 1F, 0, 0, 1F)
        }
    }
    private fun startCountDown(){
        currentCountDownTimer =
            createCountDownTimer(seekBar.progress * 60 * 1000L) //밀리세컨드로 변환
        currentCountDownTimer?.start()

        tickingSoundId?.let { soundId ->
            soundPool.play(soundId, 1F, 1F, 0, 0 - 1, 1F)
        }
    }

    private fun initSounds() {
        tickingSoundId = soundPool.load(this, R.raw.timer_ticking, 1)
        bellSoundId = soundPool.load(this, R.raw.timer_bell, 1)

    }

    @SuppressLint("SetTextI18n")
    private fun updateRemainTime(remainMillis: Long) {
        val remainSeconds = remainMillis / 1000

        remainMinutesTextView.text = "%02d".format(remainSeconds / 60)
        remainSecondsTextView.text = "%02d".format(remainSeconds % 60)
    }

    private fun updateSeekBar(remainMillis: Long) {
        seekBar.progress = (remainMillis / 1000 / 60).toInt() //분으로 변환
    }


}
private val soundPool = SoundPool.Builder().build()
private var tickingSoundId: Int? = null
private var bellSoundId: Int? = nullsoundPool과 사운드 id를 지정해줄 변수들을 선언한다
사운드 지정과 재생하기
private fun initSounds() {
tickingSoundId = soundPool.load(this, R.raw.timer_ticking, 1)
bellSoundId = soundPool.load(this, R.raw.timer_bell, 1)
}소리를 불러오는 함수를 만들어 준다.
위에서 선언한 soundPool을 이용한다.
soundPool.load(this, R.raw.timer_ticking, 1)
여기서 1은 priority값을 지정하는건데 현재 하는 역할은 없지만 나중에 원할한 호환을 위해서 1로 지정해주는 좋다고 안드로이드에서 말한다.
사운드를 load하는 사운드의 ID를 return 한다.
soundPool의 사운드를 재생하기 위해서는 play(soundID, leftVolume, rightVolume, priority, loop, rate) 을 사용한다.
loop은 얼마나 반복하는지 지정하는 것인데 -1이면 loop forever이다(끝날때 까지 무한반복)
tickingSoundId?.let{ soundId->
soundPool.play(soundId, 1F, 1F, 0,0-1,1F)
}이는 tickingSoundId가 null이 아니면 let으로 줄여서 soundId로 해당값을 전달하는 방식이다.
null이 아닐경우에만 안의 메서드가 실행되는 형태
텍스트위에서 따로 처리를 안해주면 사운드는 디바이스에서 가지고있는 사운드에서 재생하는거기 때문에 앱을 꺼도 계속 소리가 날수가 있다.
따라서 앱이 꺼지면 소리도 꺼지게 하는 처리가 필요하다.
lifecycle
onResume과 onPause를 사용한다!
onPause()
액티비티 화면이 가려질때
soundPool 에는 Pause와 autoPause가 있는데
Pause는 재생되는 특정 사운드의 id값을 입력해서 pause하는 거고 autoPause는 어떤 사운드에 관계없이 모두 pause시킨다.
onResume()
액티비티 화면이 나타날때
soundPool.autoResume()을 사용해서 사운드를 다시 resume시킨다.
onDestory()
액티비티가 종료될때
사운드를 사용하지 안을때
soundPool.release() 를 사용해서 soundPool에 있던 리소스들을 해제 시킬수 있다.
createCountDownTimer - onFinish()
타이머가 끝이나면 원래 있던 사운드를 pause시키고
위와 같은 방법으로 타이머가 끝났다는 bellsound를 let을 이용해서 실행시켜준다.
어플 완성도 높이기
앱에 색 입히기 themes
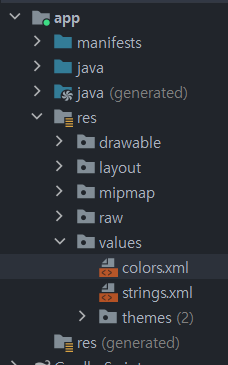
value의 colors 파일에서 포모도르 색깔을 지정해준다.
<color name ="pomodoro_red">#FFD32F2F</color>색을 추가!!
이색을 activity_main.xml의 background color로 지정하면 어플을 실행시키면 기존의 윈도우가 흰색이기때문에 흰색이 보였다가 뽀모도로 색으로 보인다.
따라서! 윈도우 background를 변경하는게 보기 깔끔하다.
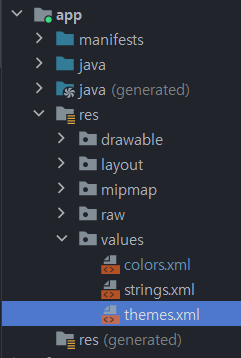
themes(night).xml은 삭제해주었다. themes에
<item name ="android:windowBackground">@color/pomodoro_red</item> 윈도우 background의 색을 지정!
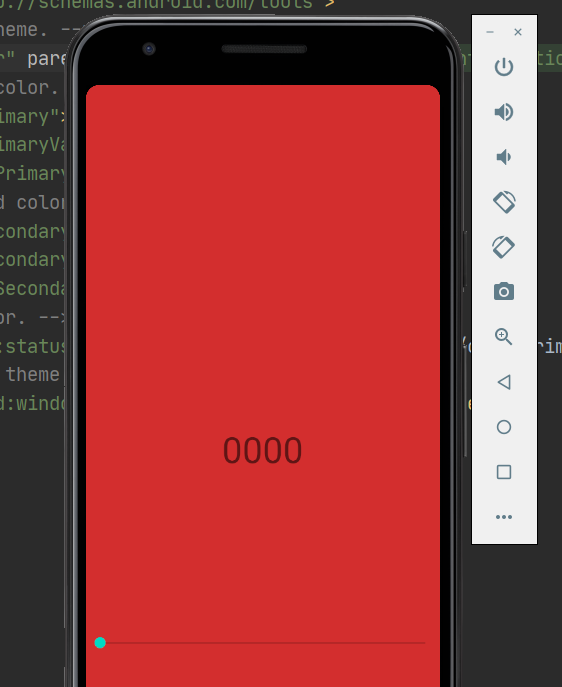
이렇게 지정하고 앱을 실행하면 시작부터 빨간화면으로 시작한다.!!!
style name="Theme.Timer" parent="Theme.MaterialComponents.DayNight.DarkActionBar">그리고 이 DarkActionBar를 NoActionBar로 바꿔서 앱 실행시 상단의 ActionBar를 없에버릴수있다.
또한 statusBar의 Color도 바꿔줄수 있다.
layout 변경
layout을 이쁘게 변경해보자!
현재 보여주는 분과 초를 꾸며준다. 둘의 사이즈와 색깔을 다르게 하고 textStyle을 bold로 바꿔준다.
app:layout_constraintBaseline_toBaselineOf="@id/txt_remainMinutes"초 textView에 값을 이렇게 주면 분의 밑줄과 정렬된다!!
그리고 t분의 00을 00'로 바꾸어주고 MainActivity.kt에서도
remainMinutesTextView.text = "%02d'".format(remainSeconds / 60)%02d -> %02d' 으로 바꾸어준다.
seekbar 꾸미기
다중 밀도의 기기등을 지원하는 vector이미지를 생성해서 seekerbar를 꾸며준다.
간단한 icon을 만들때 유용하고 초기에 loading할때 cpu를 많이 쓴다.
따라서 최대 200x200dp 사이즈로 만드는것이 좋고 그 이상은 밀도별로 이미지를 나눠서 프로젝트에 넣는걸 추천한다
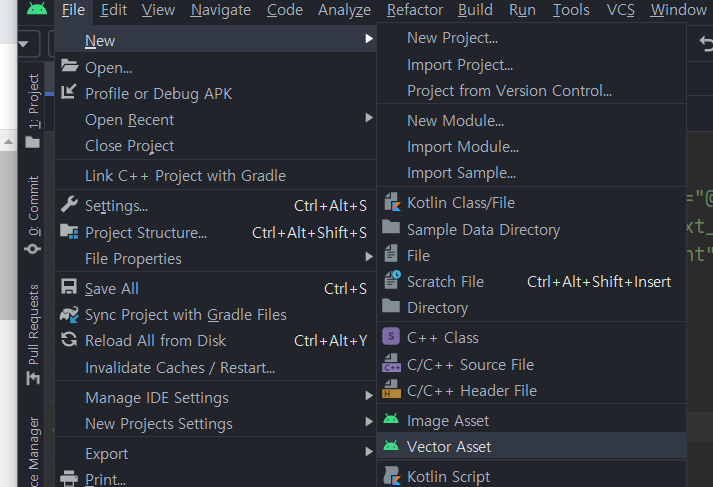
저기 위치에 Vector Asset을 눌러서 생성하면 된다!
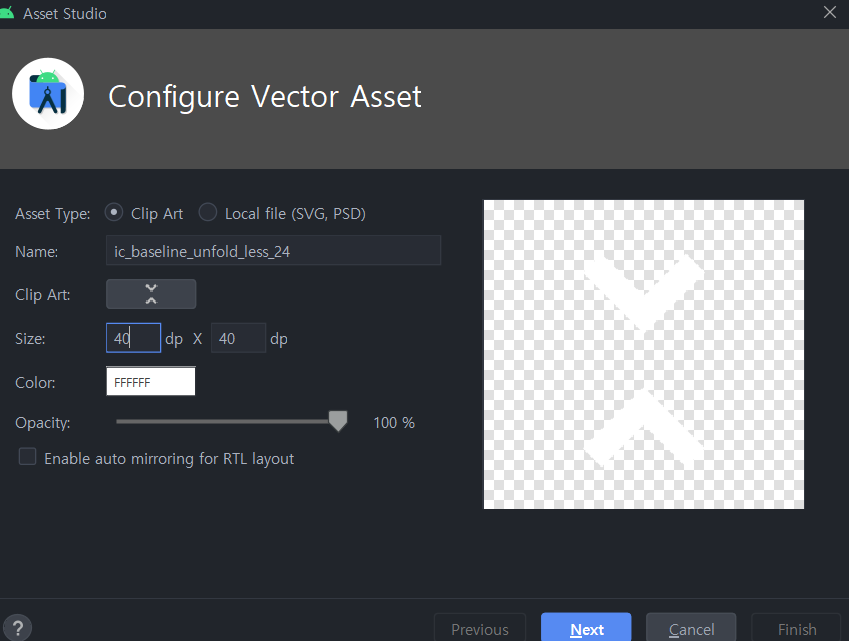
클립아트에서 unfold_less를 찾아서 선택하고 사이즈와 색깔을 지정해주고 생성하면 drawable 폴더에추가된다.
이 이미지를 seekBar의 thumb으로 지정해주면 아이콘이 바뀐다!
android:progressDrawable="@color/transparent"color에 투명한 색을 지정해주고 seekbar의 progress를 투명하게 바꿔준다.
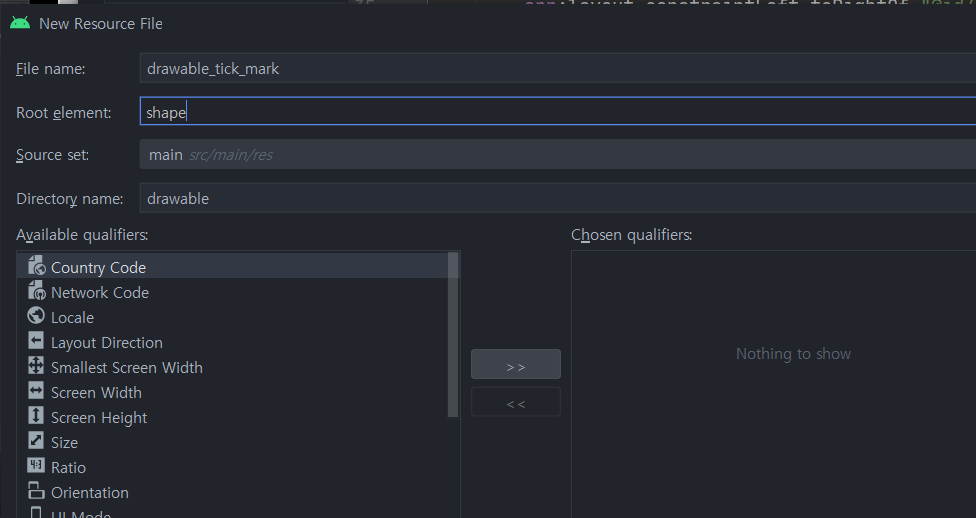
seekbar에 눈금을 추가 한다! tickMark를 이용 drawable로 지정한다.
shape를 만들어준다
<?xml version="1.0" encoding="utf-8"?>
<shape xmlns:android="http://schemas.android.com/apk/res/android"
android:shape="rectangle">
<solid android:color="@color/white"/>
<size android:width="2dp" android:height="5dp"/>
</shape>눈금을 직사각형 모양으로 색깔은 흰색으로 한다.
android:tickMark="@drawable/drawable_tick_mark"를 이용해서 각각의 위치마다 사각형이 그려지게 된다.
이미지 넣어주기
ImageView를 이용해서 토마토 꼭지를 추가해준다.
위와 동일하게 vector 이미지를 생성해주는데
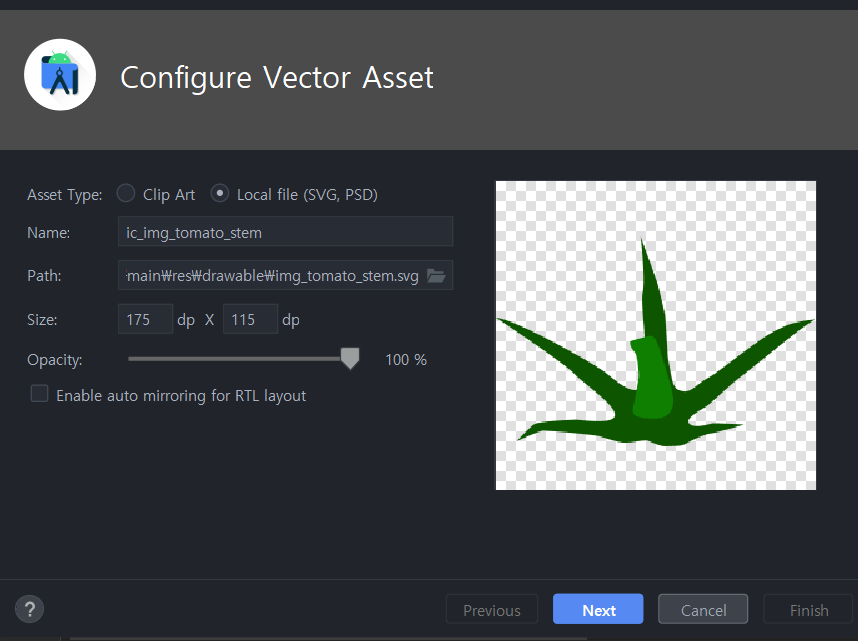
local file을 선택한뒤 원하는 벡터이미지 파일을 선택해서 추가해준다.
<ImageView
android:layout_width="wrap_content"
android:layout_height="wrap_content"
android:src="@drawable/ic_img_tomato_stem"
app:layout_constraintBottom_toTopOf="@id/txt_remainMinutes"
app:layout_constraintLeft_toLeftOf="parent"
app:layout_constraintRight_toRightOf="parent"
app:layout_constraintTop_toTopOf="parent" />현재 0초가 되고 티킹 사운드가 계속 울리는 문제가 있다!
그렇기 때문에 seekbar의 progress가 0이 될때를 수정해준다.
MainActivity.kt
class MainActivity : AppCompatActivity() {
private val remainMinutesTextView: TextView by lazy {
findViewById(R.id.txt_remainMinutes)
}
private val seekBar: SeekBar by lazy {
findViewById(R.id.seekBar)
}
private val remainSecondsTextView: TextView by lazy {
findViewById(R.id.txt_remainSeconds)
}
private var currentCountDownTimer: CountDownTimer? = null
private val soundPool = SoundPool.Builder().build()

private var tickingSoundId: Int? = null
private var bellSoundId: Int? = null
override fun onCreate(savedInstanceState: Bundle?) {
super.onCreate(savedInstanceState)
setContentView(R.layout.activity_main)
bindViews()
initSounds()
}
override fun onResume() {
super.onResume()
soundPool.autoResume()
}
override fun onPause() {
super.onPause()
soundPool.autoPause()
}
override fun onDestroy() {
super.onDestroy()
soundPool.release()
}
private fun bindViews() {
seekBar.setOnSeekBarChangeListener(
object : SeekBar.OnSeekBarChangeListener {
override fun onProgressChanged(
seekBar: SeekBar?,
progress: Int,
fromUser: Boolean
) {
if (fromUser) {
updateRemainTime(progress * 60 * 1000L)
}
}
override fun onStartTrackingTouch(seekBar: SeekBar?) {
stopCountDown()
}
override fun onStopTrackingTouch(seekBar: SeekBar?) {
seekBar ?: return //seekBar가 null일경우에 끝낸다 //앨비스 오퍼레이터
if(seekBar.progress==0){
stopCountDown()
}
else {
startCountDown()
}
}
}
)
}
private fun stopCountDown(){
currentCountDownTimer?.cancel()
currentCountDownTimer =null
soundPool.autoPause()
}
private fun createCountDownTimer(initialMillis: Long): CountDownTimer =
object : CountDownTimer(initialMillis, 1000L) {
override fun onTick(millisUntilFinished: Long) {
updateRemainTime(millisUntilFinished)
updateSeekBar(millisUntilFinished)
}
override fun onFinish() {
completeCountDown()
}
}
private fun completeCountDown(){
updateRemainTime(0)
updateSeekBar(0)
soundPool.autoPause()
bellSoundId?.let { soundId ->
soundPool.play(soundId, 1F, 1F, 0, 0, 1F)
}
}
private fun startCountDown(){
currentCountDownTimer =
createCountDownTimer(seekBar.progress * 60 * 1000L) //밀리세컨드로 변환
currentCountDownTimer?.start()
tickingSoundId?.let { soundId ->
soundPool.play(soundId, 1F, 1F, 0, 0 - 1, 1F)
}
}
    private fun initSounds() {
        tickingSoundId = soundPool.load(this, R.raw.timer_ticking, 1)
        bellSoundId = soundPool.load(this, R.raw.timer_bell, 1)

    }
@SuppressLint("SetTextI18n")
private fun updateRemainTime(remainMillis: Long) {
val remainSeconds = remainMillis / 1000
remainMinutesTextView.text = "%02d'".format(remainSeconds / 60)
remainSecondsTextView.text = "%02d".format(remainSeconds % 60)
}
private fun updateSeekBar(remainMillis: Long) {
seekBar.progress = (remainMillis / 1000 / 60).toInt() //분으로 변환
}
}activity_main.xml
<?xml version="1.0" encoding="utf-8"?>
<androidx.constraintlayout.widget.ConstraintLayout xmlns:android="http://schemas.android.com/apk/res/android"
    xmlns:app="http://schemas.android.com/apk/res-auto"
    xmlns:tools="http://schemas.android.com/tools"
    android:layout_width="match_parent"
    android:layout_height="match_parent"
    android:background="@color/pomodoro_red"
    tools:context=".MainActivity">

    <ImageView
        android:layout_width="wrap_content"
        android:layout_height="wrap_content"
        android:src="@drawable/ic_img_tomato_stem"
        app:layout_constraintBottom_toTopOf="@id/txt_remainMinutes"
        app:layout_constraintLeft_toLeftOf="parent"
        app:layout_constraintRight_toRightOf="parent"
        app:layout_constraintTop_toTopOf="parent"
        tools:ignore="ContentDescription" />

    <TextView
        android:id="@+id/txt_remainMinutes"
        android:layout_width="wrap_content"
        android:layout_height="wrap_content"
        android:text="00"
        android:textColor="@color/white"
        android:textSize="120sp"
        android:textStyle="bold"
        app:layout_constraintBottom_toBottomOf="parent"
        app:layout_constraintHorizontal_chainStyle="packed"
        app:layout_constraintLeft_toLeftOf="parent"

        app:layout_constraintRight_toLeftOf="@id/txt_remainSeconds"
        app:layout_constraintTop_toTopOf="parent"
        tools:ignore="HardcodedText" />

    <TextView
        android:id="@+id/txt_remainSeconds"
        android:layout_width="wrap_content"
        android:layout_height="wrap_content"
        android:text="00'"
        android:textColor="@color/white"
        android:textSize="70sp"
        android:textStyle="bold"
        app:layout_constraintBaseline_toBaselineOf="@id/txt_remainMinutes"
        app:layout_constraintLeft_toRightOf="@id/txt_remainMinutes"
        app:layout_constraintRight_toRightOf="parent"

        tools:ignore="HardcodedText" />

    <SeekBar
        android:id="@+id/seekBar"
        android:layout_width="0dp"
        android:layout_height="wrap_content"
        android:layout_marginHorizontal="20dp"
        android:max="60"
        android:progressDrawable="@color/transparent"
        android:thumb="@drawable/ic_baseline_unfold_less_24"
        android:tickMark="@drawable/drawable_tick_mark"
        app:layout_constraintBottom_toBottomOf="parent"
        app:layout_constraintLeft_toLeftOf="parent"
        app:layout_constraintRight_toRightOf="parent"
        app:layout_constraintTop_toBottomOf="@id/txt_remainMinutes" />

</androidx.constraintlayout.widget.ConstraintLayout>
이렇게 어플이 완성되었다 !!
소리도 잘멈추고 잘된다
새로 배우게 된것
soundPool
private val soundPool = SoundPool.Builder().build()

private var tickingSoundId: Int? = null
private var bellSoundId: Int? = null
위와 같이 soundPool을 빌드 할수있다.
tickingSoundId = soundPool.load(this, R.raw.timer_ticking, 1)soundPool.load를 사용해서 소리를 불러온다.
play(soundID, leftVolume, rightVolume, priority, loop, rate)사운드를 재생하기 위해 soundPool.play를 사용
lifecycle
onPause() onResume() onDestory() onFinish()등등
다양한 상황에서 응용할줄 알아야된다!
seekBar
seekBar의 thumb - 표시 바
android:progressDrawable=""progress바 색깔 지정
android:tickMark="@drawable/drawable_tick_mark"눈금 모양 지정
다음에 이어서,,,