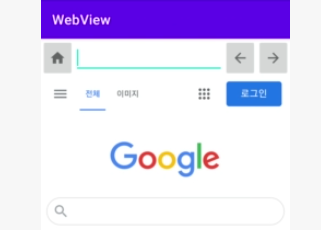
앱으로 만드는 브라우저 창 !
- 웹사이트를 불러온다.
- 뒤로가기 앞으로 가기 기능
- 홈버튼을 눌러 홈으로 이동
- 웹사이트의 로딩 정도 확인
4가지 기능이 있다고 한다.
WebView를 사용해본다고 한다
UI 만들기
clip Art를 이용해서 아이콘들을 생성해준다.
Edit text의 input type
어떤한 input type을 keyboard로 입력할지 정해준다.
전화번호, 날짜, 숫자, 등등 여러가지가 있다!
이번 프로젝트에선 url 이기때문에 textUri사용!
android:inputType="textUri"
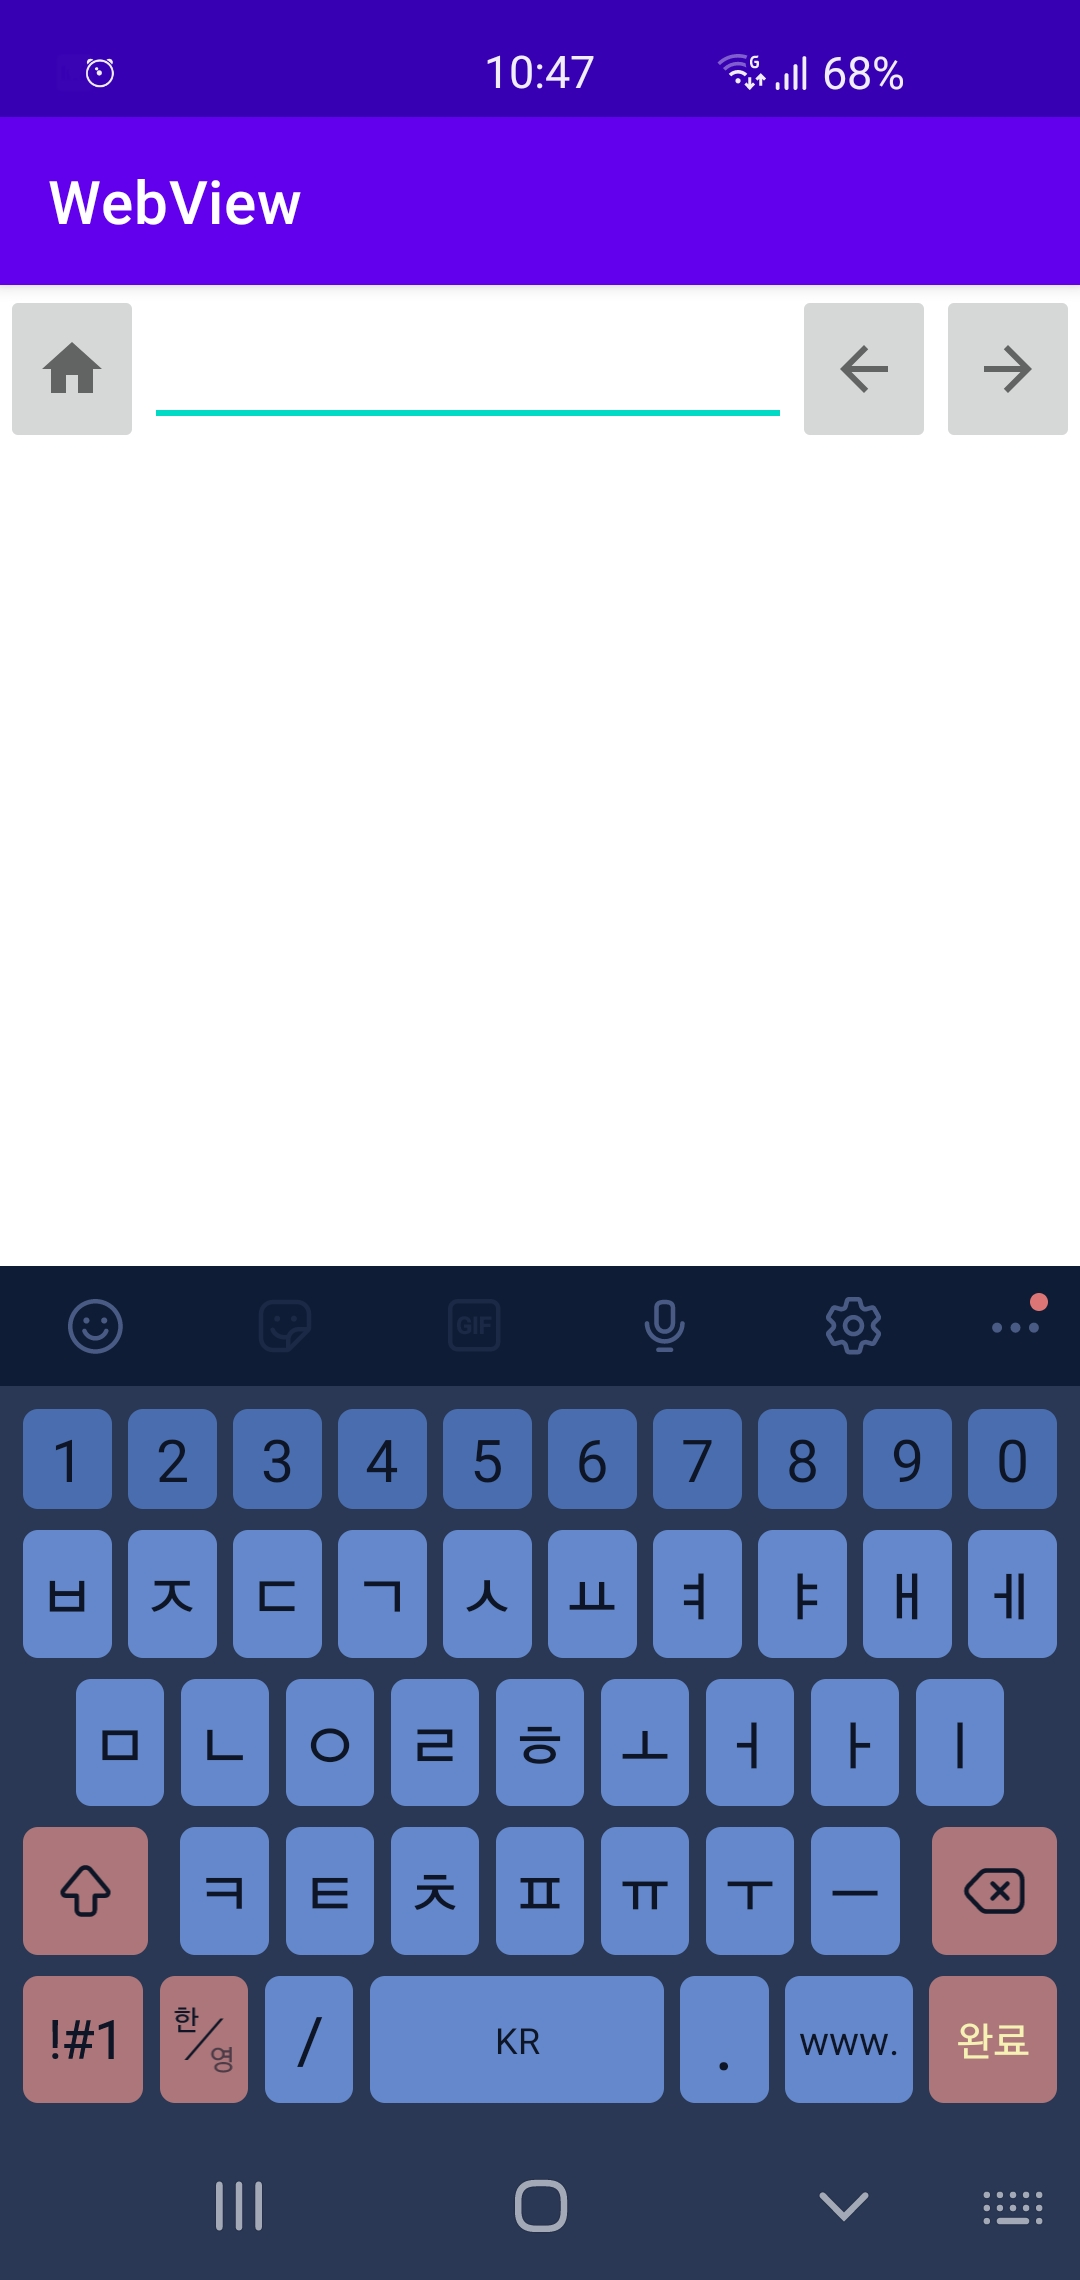
textUri를 사용하면 위와같이 키보드 형식이 '/'와 www.과 같이 Url을 입력하기 쉽게 나온다.
<androidx.constraintlayout.widget.ConstraintLayout xmlns:android="http://schemas.android.com/apk/res/android"
    xmlns:app="http://schemas.android.com/apk/res-auto"
    xmlns:tools="http://schemas.android.com/tools"
    android:layout_width="match_parent"
    android:layout_height="match_parent"
    tools:context=".MainActivity">

    <androidx.constraintlayout.widget.ConstraintLayout
        android:id="@+id/toolbar"
        android:layout_width="0dp"
        android:layout_height="?attr/actionBarSize"
        app:layout_constraintLeft_toLeftOf="parent"
        app:layout_constraintRight_toRightOf="parent"
        app:layout_constraintTop_toTopOf="parent">

        <ImageButton
            android:id="@+id/btn_home"
            android:layout_width="wrap_content"
            android:layout_height="0dp"
            android:src="@drawable/ic_home"
            app:layout_constraintBottom_toBottomOf="parent"
            app:layout_constraintLeft_toLeftOf="parent"
            app:layout_constraintTop_toTopOf="parent"
            tools:ignore="ContentDescription" />

        <ImageButton
            android:id="@+id/btn_forward"
            android:layout_width="wrap_content"
            android:layout_height="0dp"
            android:src="@drawable/ic_forward"
            app:layout_constraintBottom_toBottomOf="parent"
            app:layout_constraintRight_toRightOf="parent"
            app:layout_constraintTop_toTopOf="parent"
            tools:ignore="ContentDescription" />

        <ImageButton
            android:id="@+id/btn_back"
            android:layout_width="wrap_content"
            android:layout_height="0dp"
            android:src="@drawable/ic_back"
            app:layout_constraintBottom_toBottomOf="parent"
            app:layout_constraintRight_toLeftOf="@id/btn_forward"
            app:layout_constraintTop_toTopOf="parent"
            tools:ignore="ContentDescription" />

        <EditText
            android:id="@+id/addressBar"
            android:layout_width="0dp"
            android:layout_height="wrap_content"
            android:importantForAutofill="no"
            android:inputType="textUri"
            app:layout_constraintBottom_toBottomOf="parent"
            app:layout_constraintLeft_toRightOf="@id/btn_home"
            app:layout_constraintRight_toLeftOf="@id/btn_back"
            app:layout_constraintTop_toTopOf="parent"
            tools:ignore="LabelFor" />
    </androidx.constraintlayout.widget.ConstraintLayout>
    <WebView
        android:id="@+id/webView"
        android:layout_width="0dp"
        android:layout_height="0dp"
        app:layout_constraintLeft_toLeftOf="parent"
        app:layout_constraintRight_toRightOf="parent"
        app:layout_constraintBottom_toBottomOf="parent"
        app:layout_constraintTop_toBottomOf="@id/toolbar"
        />

</androidx.constraintlayout.widget.ConstraintLayout>
위와 같은 코드로 짠다!
WebView 요소가 있는지 처음알았다!
URL 로딩 기능
url을 로딩하려면 인터넷 권한이 있어야한다!
AndroidManifest.xml에 명시해주자.
<uses-permission android:name="android.permission.INTERNET"/ > 로 선언! (/> 붙여써야된다)
initView()
초기화면으로 google 홈페이지를 띄울려고 해본다!
private val webView: WebView by lazy{
    findViewById(R.id.webView)
}
프로퍼티로 정의해준다!
webView.loadUrl("url주소")
를 이용해서 웹뷰에 주소를 load해줄 수있다.
webView.loadUrl("http://www.google.com") 이처럼 그냥 load 해주면
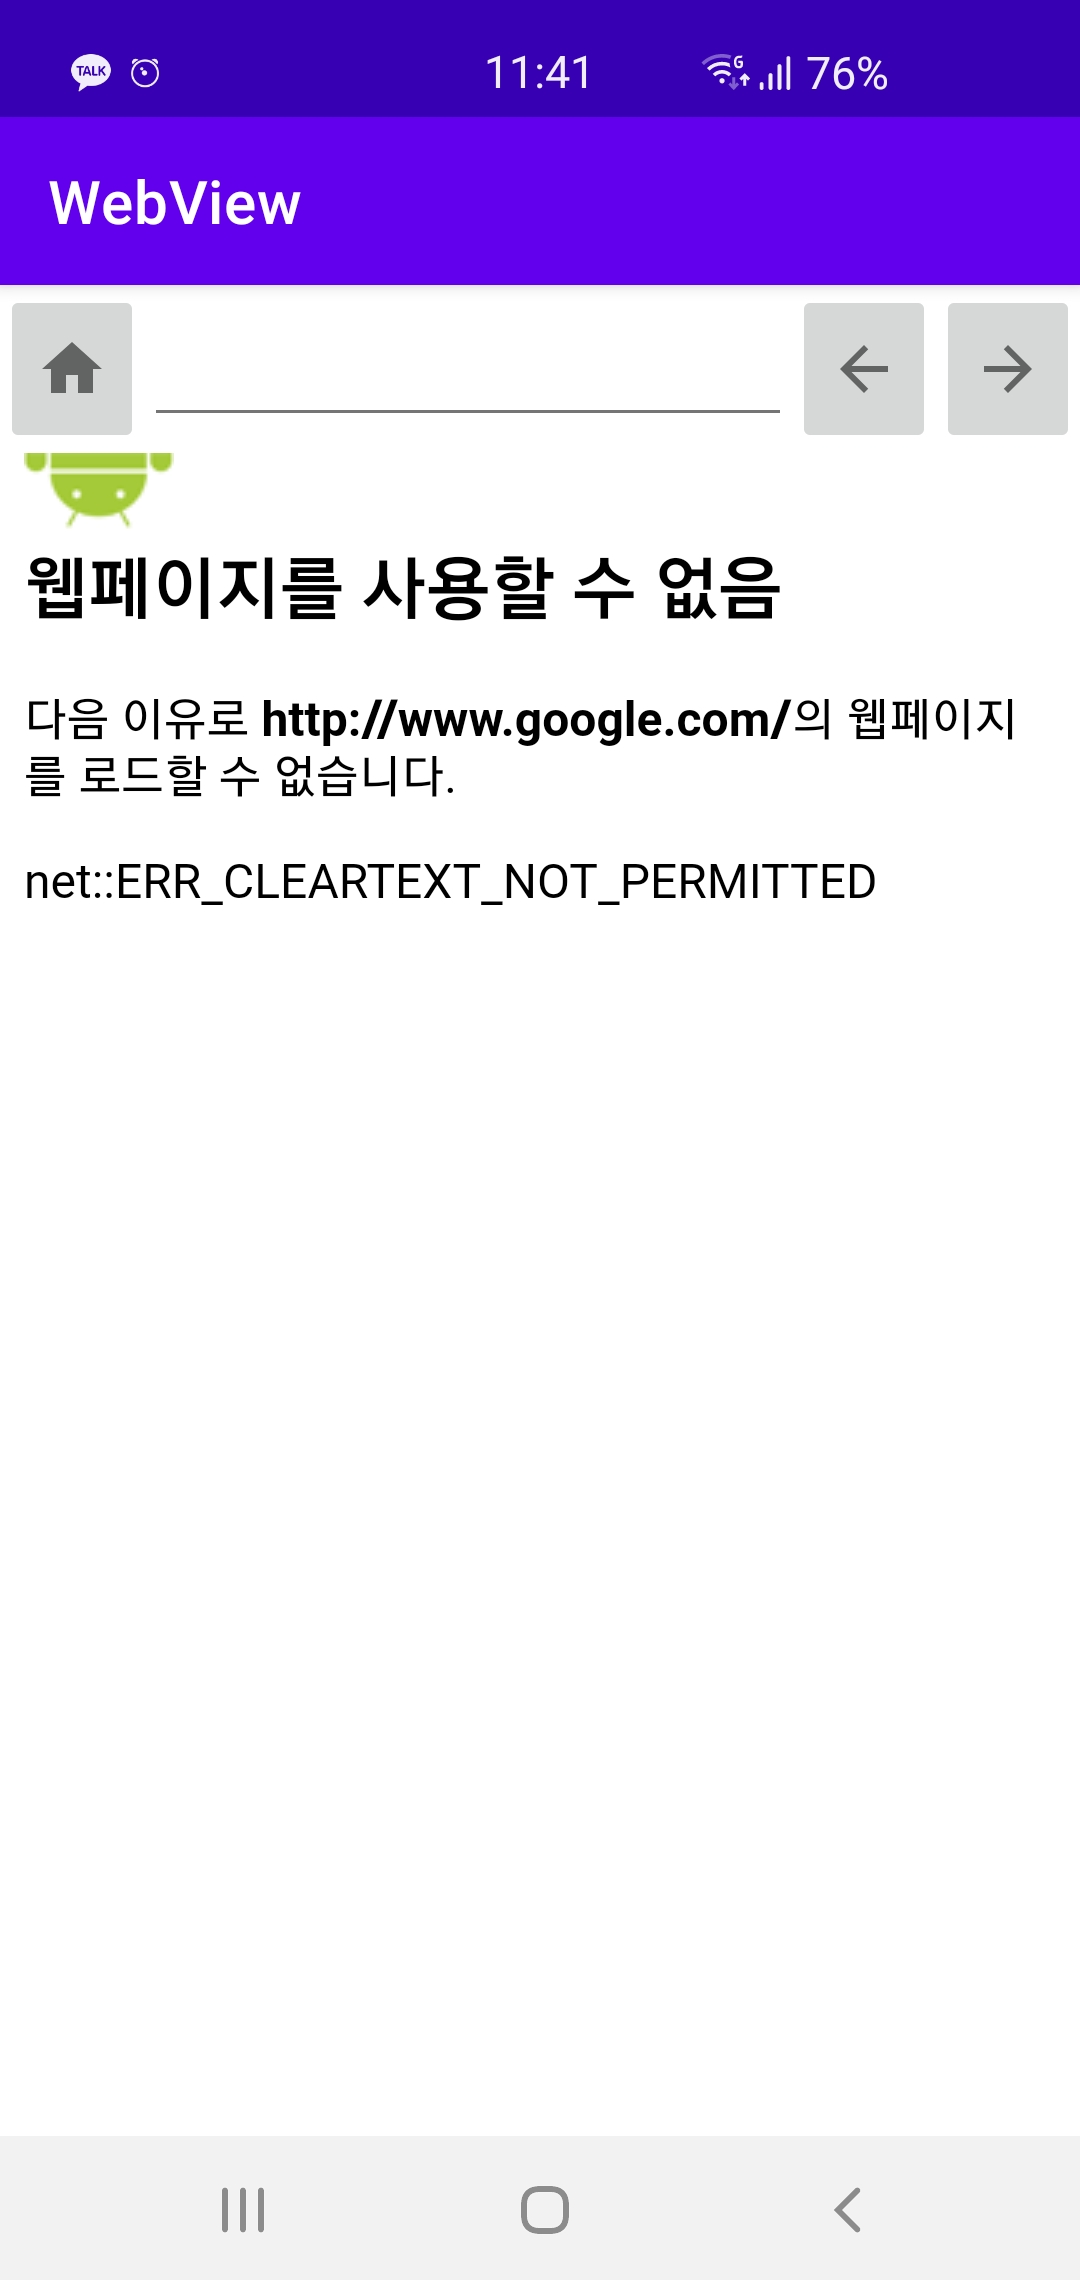
이처럼 에러가 뜬다! 이는 보안관련된 에러로 https 프로토콜을 사용하지 않아서 뜨는 에러이다!!
manifest 파일에 application 부분에
android:usesCleartextTraffic="true"
이걸 추가해주면 오류는 생기지 않지만 실행하게 되면 구글의 default 페이지 즉 https url 페이지로 이동하게 된다. (외부 웹브라우저가 실행된다)
이때 !
webView.webViewClient = WebViewClient()
를 initViews() 함수에서 사용해주면 다른 웹뷰로 넘어가지 않는다.
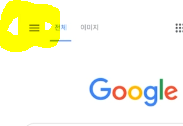
이때!! 저기 사이드바 버튼을 눌러도 화면이 나오지 않는데 이유는 JS를 보안상의 이유로 지원하지 않기 때문이라고 한다!
webView.settings.javaScriptEnabled = true
이 문제는 javaScriptEnabled값을 true로 줘서 해결할 수 있다. 보안상의 이슈가 있을수도있다
    private fun initViews(){
        webView.webViewClient = WebViewClient()
        webView.settings.javaScriptEnabled = true
        webView.loadUrl("http://www.google.com")
    }
initViews()에서 webView를 3번이나 접근하기 때문에
apply 라는 scope함수를 이용해서 간단하게 작성할 수 있다 !!
  private fun initViews(){
      webView.apply {
          webViewClient = WebViewClient()
          settings.javaScriptEnabled = true
          loadUrl("http://www.google.com")
      }

  }
apply를 사용하면 webView가 this로 전달된다! 깔끔하게 코딩 가능!
주소창 기능 만들기
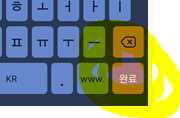
키보드의 action버튼이 눌려있을때 주소창의 주소로 이동하는 기능을 만들어 본다!
imeOptions
위의 입력 방법 유형 지정에 나와있는 imeOptions!
키보드 작업 버튼을 지정하려면 android:imeOptions 속성을 "actionSend" 또는 "actionSearch" 같은 작업 값과 함께 사용합니다.
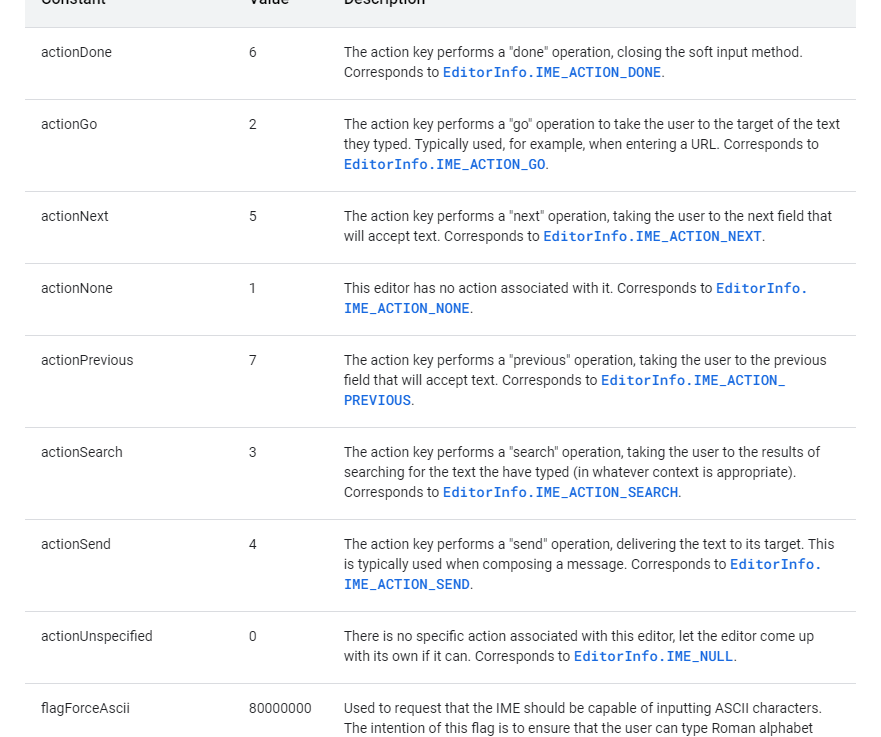
공식문서에서 보여주듯이 다양한 옵션들이 있다.
url 이동에서는 actionDone - value 6을 사용하자!
activity_main.xml에서 addressBar에
android:imeOptions="actionDone"
를 추가하면 적용!
bindViews()
addressBar에 url를 입력하고 위에서 설정해둔 IME_ACTION_DONE이 실행되면 어떤 작업을 할지
setOnEditorActionListener로 지정해준다.
setOnEditorActionListener
action이 수행되었을때 (action 버튼이눌렸을때) event가 발생할때 사용
3개의 파라미터 사용
1. view - 여기선 addressBar
2. actionId - 어떤 id에서 action이 발생하는지! 여기선 actionDone으로 imeOptions을 설정해놨기 때문에 actionDone의 id이다.
3. 이 event가 눌러졌는지 터치를 땠는지를 나타낸다. 사용하지는 않음!
return 값으로 true/false 가있다.
true - 이 event는 끝나서 더이상 핸들링이 필요없다
false - 이 event는 끝나지 않아서 다른쪽에서도 이 action을 소비할 수 있다.
위에서 설정한 actionDone의 action을 소비해서 키보드를 닫는것이기 때문에 false를 반환해야된다고 한다.
보통 키보드를 내리고싶으면 false를 반환! 이런식으로 많이쓰인다.
  private fun bindViews(){
      addressBar.setOnEditorActionListener { v, actionId, event ->
          if(actionId ==EditorInfo.IME_ACTION_DONE){
              webView.loadUrl(v.text.toString())
          }
          return@setOnEditorActionListener false
      }

  }
따라서 위와같이 함수를 작성하면 addressBar에 주소를 입력하고 키보드에 있는 완료버튼을 누르면 키보드는 개려가고 입력한 url로 이동한다!!!
결과화면
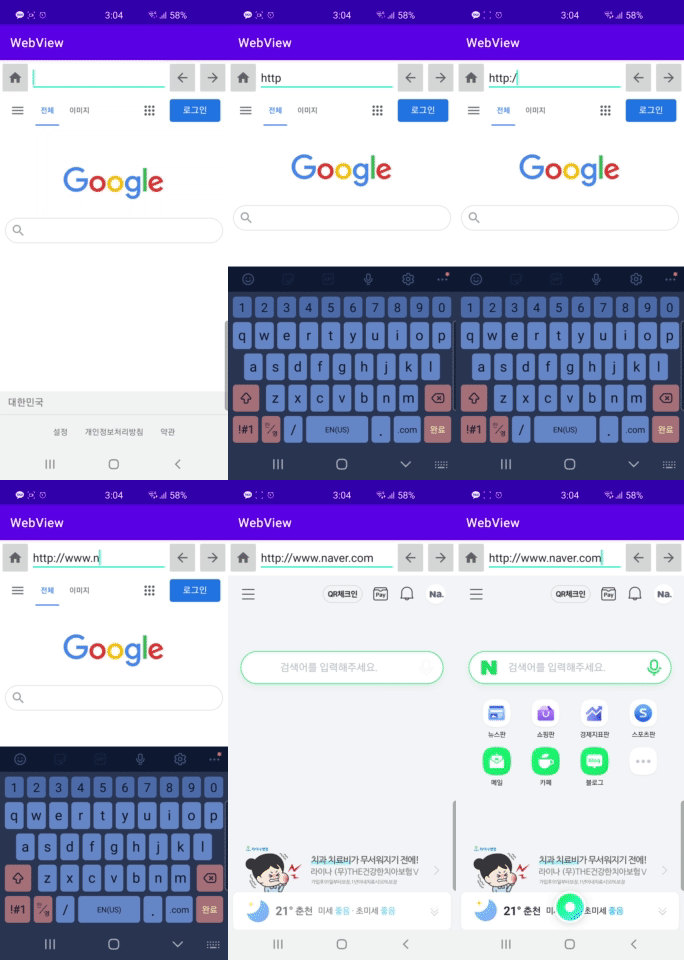
위와같이 url을 입력하고 완료를 누르면 키보드가 내려가고 잘 이동한다!!!
새로 배운것
android:inputType="textUri"
inputType에도 url을 쓰기 편한 inputType이 있다~
WebView
xml에 webView자체를 넣을수 있다!
물론 사용하려면 인터넷 권한을 선언해줘야한다.
webView.loadUrl("url주소")
위와같이 주소 불러오기가 가능하다.
   webView.webViewClient = WebViewClient()
   webView.settings.javaScriptEnabled = true
JS기능을 온전히 이용하고 http로 주소를 불러왔을때 다른 웹뷰앱으로 전환되지 않으려고 선언한다.
imeOptions
키보드의 action 버튼이 눌러졌을때 어떠한 반응이 있을지 정할수 있다.
android:imeOptions="actionDone"
xml 파일에서이와 같이 지정가능
이 action에 대해서 setOnEditorActionListener를 사용해서 action버튼이 눌렀을때 무엇을 할지, imeOptions의 return 값을 true / false로 지정해서 키보드를 닫을지 닫지 않을지 (actionDone 옵션에서는 그렇다) 정할 수 있다.!
ㅡㅡㅡㅡㅡㅡㅡㅡㅡㅡㅡㅡㅡㅡㅡㅡㅡㅡㅡㅡㅡㅡ
다음에 이어서!!!
강의는 오랜만에 다시 들은거 같다. 진짜 간단한 토이프로젝트를 구글 플레이 스토어에 등록해 봤는데 나중에 어느정도 규모있는 프로젝트를 올릴때 정리해서 올려봐야겠다!
