
스웨거를 적용하면서 만난 문제들을 정리해본다!
스웨거 적용하기
- 사용한 버전은 아래와 같다.
implementation("org.springdoc:springdoc-openapi-starter-webmvc-ui:2.5.0")- swagger는 코드에 설정이 들어간다는 단점이 존재한다. 이 단점을 상쇄하리만큼 큰 장점이 있는데, 바로 코드를 작성하기만 하면 자동으로 명세를 만들어준다는 것이다.
스웨거 기본 설정
@Configuration
@RequiredArgsConstructor
public class SpringDocConfiguration {

  private final ApplicationContext applicationContext;

  @Bean
  public OpenAPI customOpenAPI() {
    return new OpenAPI()
        .info(new Info().title("Ggorangjirang API").version("1.0.0").description("API description"));
  }

  @Bean
  public GroupedOpenApi api() {
    return GroupedOpenApi.builder()
        .group("Ggorangjirang")
        .pathsToMatch("/**")
        .build();
}- 사실 위와 같은 설정을 하지 않더라도 {domain}/swagger-ui/index.html 경로에 들어가면 자동으로 만들어진 API 명세를 볼 수 있다.
/**모든 경로를 기준으로 API가 만들어진다. pathsToMatch를 이용해 노출한 엔드포인트를 설정할 수 있다.
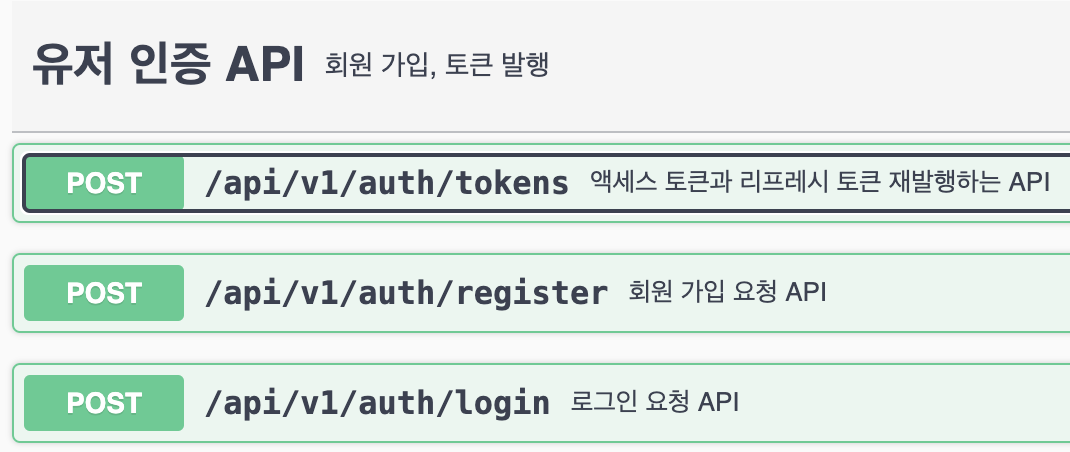
@Tag(name = "유저 인증 API", description = "회원 가입, 토큰 발행, 로그인")
@Operation(summary = "회원 가입 요청 API")
@ApiResponses(
    value = {
      @ApiResponse(responseCode = "204", description = "로그인 성공"),
      @ApiResponse(responseCode = "P1", description = "400, 파라미터가 비어 있거나 NULL인 경우"),
      @ApiResponse(responseCode = "U4", description = "400, 이메일이 중복된 경우"),
      @ApiResponse(responseCode = "U5", description = "401, 패스워드가 일치하지 않는 경우"),
      @ApiResponse(responseCode = "U6", description = "400, 패스워드가 4자리 미만인 경우"),
    })
@PostMapping("/api/v1/auth/register")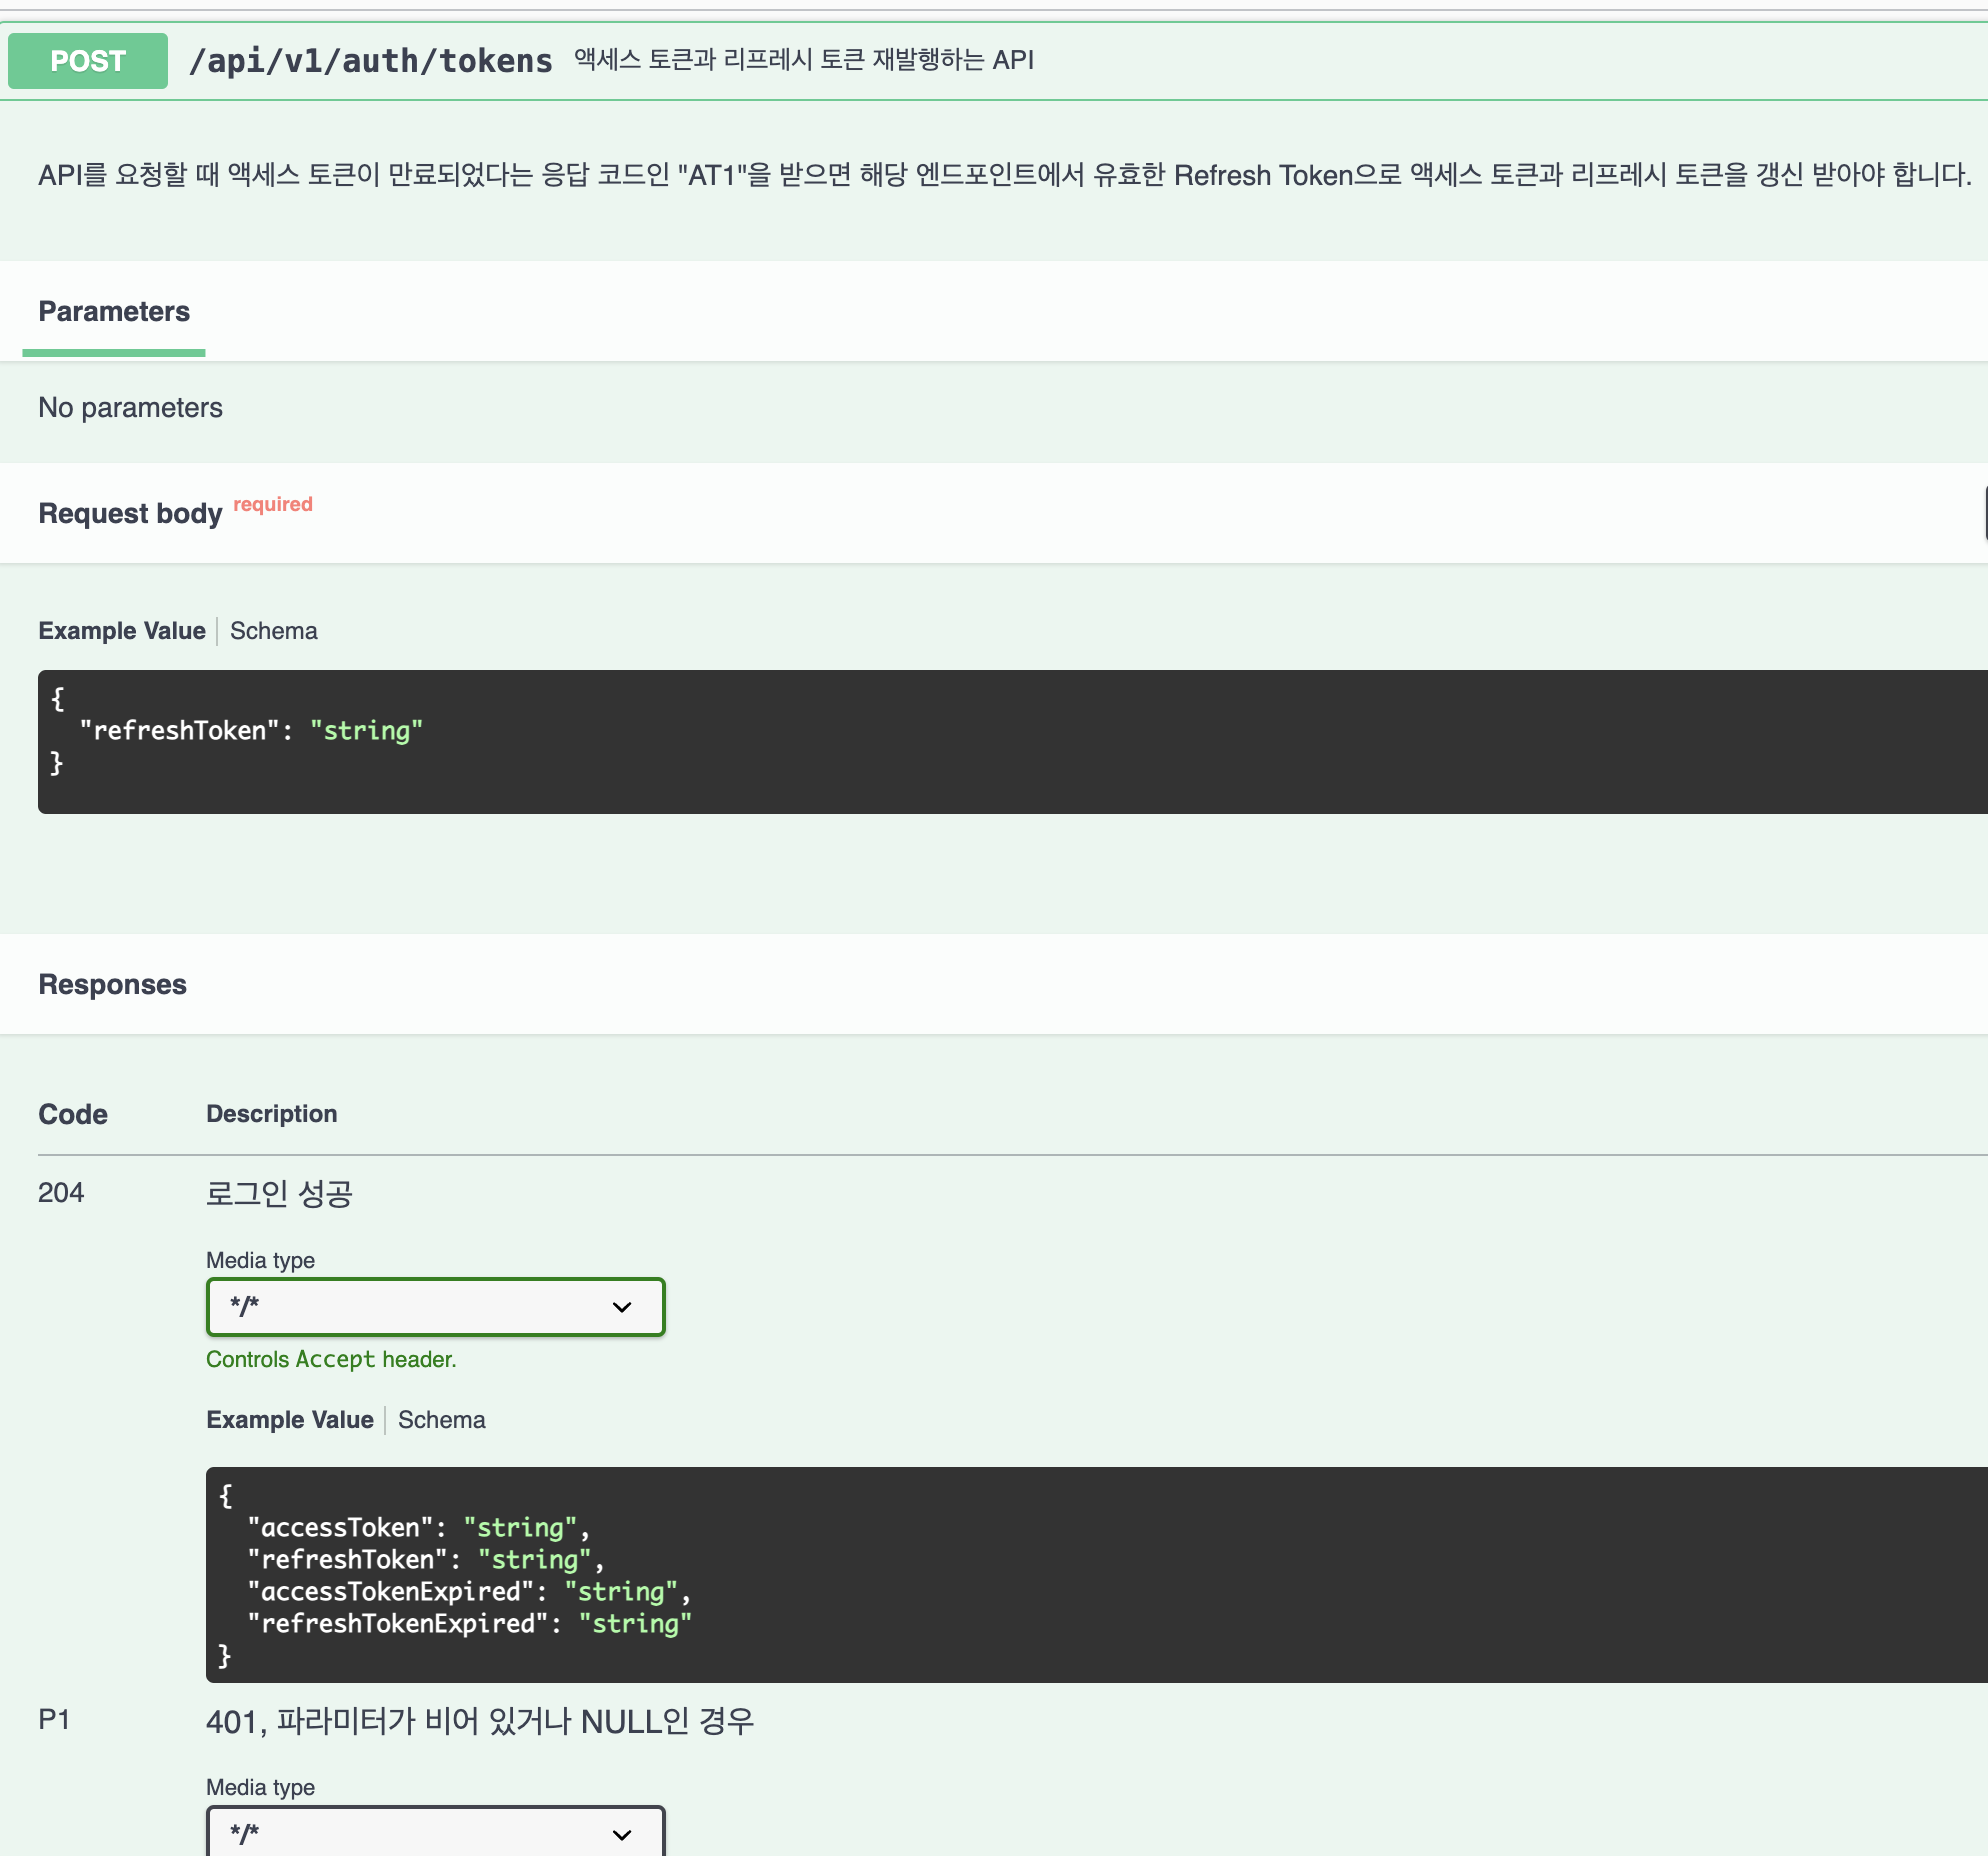
- Tag를 통해서 API를 특정 엔드포인트로 묶을 수 있고, description으로 설명을 할 수 있다.
- Operation으로 해당 엔드포인트에 대한 설명 및 반환 코드에 대해 설명을 붙일 수 있다. 개인적으로 위의 설정만으로도 중요 사항을 표현하기에 충분했다.
만났던 문제들
1. Nginx 및 Spring Security Filter 통과하지 못하는 문제
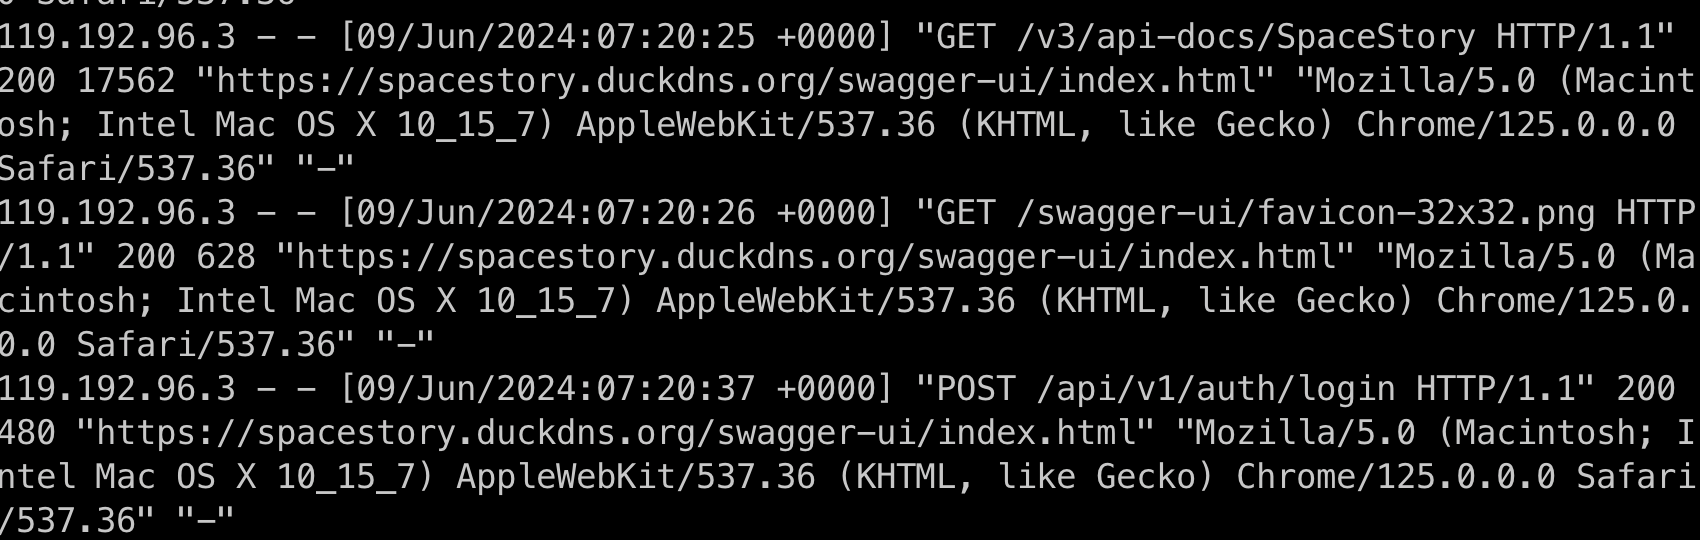
- Nginx 로그를 보면 두 개의 엔드포인트가 호출되는 것을 볼 수 있다. 하나는 api 명세 화면을 보여주기 위해 js, css 등의 파일을 불러오며, 다른 엔드포인트는 api를 호출한 결과를 json 타입으로 가져온다.
"/swagger-ui/**",
"/v3/api-docs/**")- nginx에서 reverse proxy를 사용하고 있다면 해당 엔드포인트에 라우팅 설정을 추가하고, 스프링 시큐리티에서도 해당 엔드포인트가 통과할 수 있게 설정한다.
location ~ ^/(swagger-ui|v3) {
	proxy_pass http://spring-app:8080;
}http.authorizeHttpRequests(
(auth) ->
auth.requestMatchers(
"/swagger-ui/**",
"/v3/api-docs/**")
.permitAll()2. HTTPS로 전송했지만 HTTP로 응답하는 문제

- 현재 reverse_proxy를 통해 http로 spring-app에 전송을 하고 있고, 스프링 app은 http로 응답하기 때문에 최신 브라우저에서는 https 요청이 http로 응답했다고 에러를 발생시키는 것이다.
- 다양한 해결 방법이 있겠지만, Spring App에서 swagger url을 https로 등록해주고 여기로 응답하게 하면 https 요청이 https로 응답하게할 수 있다. 아래와 같은 간단한 설정만으로 가능하다.
@OpenAPIDefinition(servers = {
        @Server(url = "https://ggorangjirang.duckdns.org", description = "GRJR"),
        @Server(url = "http://localhost:8080", description = "local server")
})- localhost:8080 url도 추가한 이유는 로컬에서 테스트할 때 응답 주소를 https://ggorangjirang.duckdns.org로 하게 되면 cors 에러가 발생한다. 그 이유는 요청하는 곳과 응답받는 곳이 도메인이 달라 다른 출처로 보기 때문이다.
3. Swagger API 테스트할 때 헤더 보내기(토큰)
- 스웨거는 기본적으로 요청을 보낼 때 헤더에 토큰을 포함해서 보내지 못한다. 별도의 설정이 필요한데, 위에서 언급한 기본 설정 파일에 추가할 수 있다.
@Configuration
public class SpringDocConfiguration {

  @Bean
  public OpenAPI customOpenAPI() {
    return new OpenAPI()
        .info(new Info().title("Ggorangjirang API").version("1.0.0").description("API description"))
        .addSecurityItem(new SecurityRequirement().addList("bearer"))
        .components(
            new io.swagger.v3.oas.models.Components()
                .addSecuritySchemes(
                    "bearer",
                    new SecurityScheme()
                        .name("Authorization")
                        .type(SecurityScheme.Type.HTTP)
                        .scheme("bearer")
                        .bearerFormat("JWT")
                        .in(SecurityScheme.In.HEADER)
                        .description(
                            "JWT Authorization header using the Bearer scheme. Example: \"Authorization: Bearer {token}\"")));
}- HTTP 타입을 선택하게 되면 기본적으로 bearer 접두사가 붙게된다. 해당 접두사가 붙지 않길 원한다 API 타입을 사용할 수 있다.
        .addSecurityItem(new SecurityRequirement().addList("AccessTokenKey"))
        .components(
            new io.swagger.v3.oas.models.Components()
                .addSecuritySchemes(
                    "AccessTokenKey",
                    new SecurityScheme()
                        .type(SecurityScheme.Type.APIKEY)
                        .in(SecurityScheme.In.HEADER)
                        .description();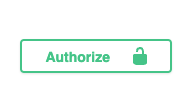
- 위를 적용하면 우측 상단에 버튼이 생기고 클릭해서 헤더 토큰값을 붙여넣을 수 있다!
4. Swagger Spring Security Filter 엔드포인트 적용
- 로그인은 spring security filter에서 처리한다. 그런데, security filter에서 처리되다보니 Swagger에서 해당 엔드포인트를 인식하지 못했다.
- https://springdoc.org/faq.html 공식문서를 보면 간단히
springdoc.show-login-endpoint=true설정만으로 해당 엔드포인트를 노출시킬 수 있다. 하지만, 별도의 커스텀이 되지 않는다. - 태그를 달고, 설명과 에러 코드를 제공하고 싶었기에
package org.springdoc.core.configuration;; 에 구현되어 있는 springSecurityLoginEndpointCustomiser를 커스터마이징해야 한다.
  @Lazy(false)
  @Configuration(
    proxyBeanMethods = false
  )
  @ConditionalOnClass({Filter.class})
  class SpringSecurityLoginEndpointConfiguration {
    SpringSecurityLoginEndpointConfiguration() {
    }

    @Bean
    @ConditionalOnProperty({"springdoc.show-login-endpoint"})
    @Lazy(false)
OpenApiCustomizer springSecurityLoginEndpointCustomiser(ApplicationContext applicationContext) { ... }- 위
OpenApiCustomizer springSecurityLoginEndpointCustomiser() {}커스텀하여 빈을 만들어둔 후에 아래와 같이 설정에 추가하면 로그인 필터 앤드포인트가 스웨거에 노출된다.
  private final ApplicationContext applicationContext;

  @Bean
  public GroupedOpenApi api() {
    return GroupedOpenApi.builder()
        .group("Ggorangjirang")
        .pathsToMatch("/**")
        .addOpenApiCustomizer(springSecurityLoginEndpointCustomiser())
        .build();
  }
참고 자료

꾸준하게