프로젝트명 : MyFragment2
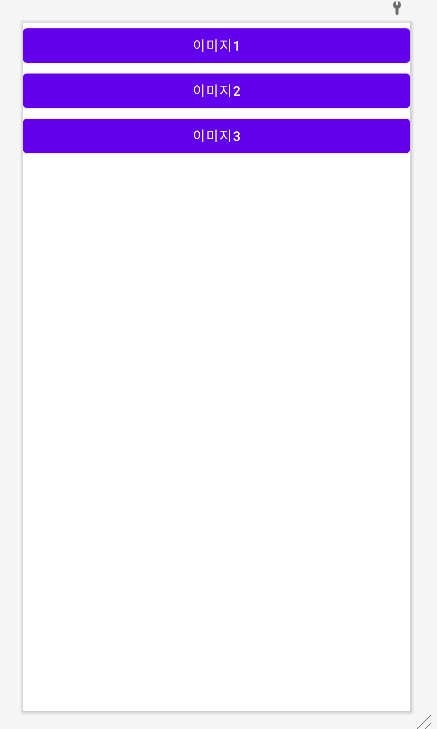
layout 폴더에 fragment_list.mxl 파일을 만들고 버튼 3개를 넣어준다
그리고 fragment_view.xml을 만들어서 ImageView를 넣어준다.
package com.example.myfragment2;

import android.os.Bundle;
import android.view.LayoutInflater;
import android.view.View;
import android.view.ViewGroup;
import android.widget.Button;

import androidx.annotation.NonNull;
import androidx.annotation.Nullable;
import androidx.fragment.app.Fragment;

public class ListFragment extends Fragment {

    //인플레이션 하기 위한 메소드
    @Nullable
    @Override
    public View onCreateView(@NonNull LayoutInflater inflater, @Nullable ViewGroup container, @Nullable Bundle savedInstanceState) {

        ViewGroup rootView = (ViewGroup) inflater.inflate(R.layout.fragment_list,container,false);

        Button button = (Button) rootView.findViewById(R.id.button4);
        button.setOnClickListener(new View.OnClickListener() {
            @Override
            public void onClick(View view) {

            }
        });

        Button button2 = (Button) rootView.findViewById(R.id.button5);
        button.setOnClickListener(new View.OnClickListener() {
            @Override
            public void onClick(View view) {

            }
        });

        Button button3 = (Button) rootView.findViewById(R.id.button6);
        button.setOnClickListener(new View.OnClickListener() {
            @Override
            public void onClick(View view) {

            }
        });


        return super.onCreateView(inflater, container, savedInstanceState);
    }


}
ListFragment.java파일을 만들어준다.
package com.example.myfragment2;

import android.os.Bundle;
import android.view.LayoutInflater;
import android.view.View;
import android.view.ViewGroup;
import android.widget.Button;
import android.widget.ImageView;

import androidx.annotation.NonNull;
import androidx.annotation.Nullable;
import androidx.fragment.app.Fragment;

public class ViewerFragment extends Fragment {

    //인플레이션 하기 위한 메소드
    @Nullable
    @Override
    public View onCreateView(@NonNull LayoutInflater inflater, @Nullable ViewGroup container, @Nullable Bundle savedInstanceState) {

        ViewGroup rootView = (ViewGroup) inflater.inflate(R.layout.fragment_viewer,container,false);

        ImageView imageView = (ImageView) rootView.findViewById(R.id.imageView);


        return super.onCreateView(inflater, container, savedInstanceState);
    }


}
복사해서 ViewrFragment.java도 만든다
각각 xml 파일을 인플레이션하고 버튼과 이미지를 findViewById로 찾아왔다.
ListFragment의 버튼 3개를 누르면 각 버튼에 해당하는 이미지를 ViewrFragment에서 보여주는 방식이다.
이렇게 하기 위해서는 액티비티를 통해 ListFragment에서 ViewerFragment에 접근해야 한다.
따라서 MainActivity.java에 메소드를 만들고 그 메소드를 프래그먼트에서 호출해야 한다.
public class ListFragment extends Fragment {

    MainActivity activity;

    @Override
    public void onAttach(@NonNull Context context) {
        super.onAttach(context);

        activity = (MainActivity) getActivity();
    }
그렇게 하기 위해서는 액티비티에 접근해야 한다.
따라서 onAttatch 메소드를 오버라이딩 하고 getActivity로 액티비티를 얻어놓는다.
package com.example.myfragment2;

import android.content.Context;
import android.os.Bundle;
import android.view.LayoutInflater;
import android.view.View;
import android.view.ViewGroup;
import android.widget.Button;

import androidx.annotation.NonNull;
import androidx.annotation.Nullable;
import androidx.fragment.app.Fragment;

public class ListFragment extends Fragment {

    MainActivity activity;

    @Override
    public void onAttach(@NonNull Context context) {
        super.onAttach(context);

        activity = (MainActivity) getActivity();
    }

    //인플레이션 하기 위한 메소드
    @Nullable
    @Override
    public View onCreateView(@NonNull LayoutInflater inflater, @Nullable ViewGroup container, @Nullable Bundle savedInstanceState) {

        ViewGroup rootView = (ViewGroup) inflater.inflate(R.layout.fragment_list,container,false);

        Button button = (Button) rootView.findViewById(R.id.button4);
        button.setOnClickListener(new View.OnClickListener() {
            @Override
            public void onClick(View view) {

                activity.onImageChange(0);

            }
        });

        Button button2 = (Button) rootView.findViewById(R.id.button5);
        button.setOnClickListener(new View.OnClickListener() {
            @Override
            public void onClick(View view) {

                activity.onImageChange(1);
            }
        });

        Button button3 = (Button) rootView.findViewById(R.id.button6);
        button.setOnClickListener(new View.OnClickListener() {
            @Override
            public void onClick(View view) {

                activity.onImageChange(2);
            }
        });


        return super.onCreateView(inflater, container, savedInstanceState);
    }


}
이렇게 버튼 리스너에서 MainActivity의 onImageChange 메소드를 호출할 수 있게된다.
MainActivity 화면에 프래그먼트 추가하기
<?xml version="1.0" encoding="utf-8"?>
<LinearLayout xmlns:android="http://schemas.android.com/apk/res/android"

    android:layout_width="match_parent"
    android:layout_height="match_parent"
    android:orientation="vertical"
    >

    <fragment
        android:layout_width="match_parent"
        android:layout_height="0dp"
        android:layout_weight="1"
        android:name="com.example.myfragment2.ListFragment"
        android:id="@+id/listFragment"
        />

    <fragment
        android:layout_width="match_parent"
        android:layout_height="0dp"
        android:layout_weight="1"
        android:name="com.example.myfragment2.ViewerFragment"
        android:id="@+id/viewerFragment"
        />


</LinearLayout>
xml 파일에 fragment 태그를 이용해서 추가한다.
name 속성의 값으로 프래그먼트 파일을 지정한다.
package com.example.myfragment2;

import androidx.appcompat.app.AppCompatActivity;
import androidx.fragment.app.FragmentManager;

import android.os.Bundle;

public class MainActivity extends AppCompatActivity {

   ListFragment fragment1;
   ViewerFragment fragment2;
   FragmentManager manager;

   @Override
   protected void onCreate(Bundle savedInstanceState) {
       super.onCreate(savedInstanceState);
       setContentView(R.layout.activity_main);

       manager = getSupportFragmentManager();


       fragment1 = (ListFragment) manager.findFragmentById(R.id.listFragment);
       fragment2 = (ViewerFragment) manager.findFragmentById(R.id.viewerFragment);

   }

   public void onImageChange(int index){


   }
}
xml 파일에 추가한 프래그먼트를 찾기 위해서는 먼저 FragmentManager 객체가 필요하다.
getSupportFragmentManager 메소드로 FragmentManager를 얻어와서 findFragmentById를 이용해서 인플레이션 된 프래그먼트를 java 파일에서 찾는다.
package com.example.myfragment2;

import android.media.Image;
import android.os.Bundle;
import android.view.LayoutInflater;
import android.view.View;
import android.view.ViewGroup;
import android.widget.Button;
import android.widget.ImageView;

import androidx.annotation.NonNull;
import androidx.annotation.Nullable;
import androidx.fragment.app.Fragment;

public class ViewerFragment extends Fragment {

    ImageView imageView;

    //인플레이션 하기 위한 메소드
    @Nullable
    @Override
    public View onCreateView(@NonNull LayoutInflater inflater, @Nullable ViewGroup container, @Nullable Bundle savedInstanceState) {

        ViewGroup rootView = (ViewGroup) inflater.inflate(R.layout.fragment_viewer,container,false);

        imageView = (ImageView) rootView.findViewById(R.id.imageView);


        return super.onCreateView(inflater, container, savedInstanceState);
    }

    public void setImage(int index){
        if (index==0){
            imageView.setImageResource(R.drawable.mj1);
        }
        else if (index==1){
            imageView.setImageResource(R.drawable.mj2);
        }
        else if (index==2){
            imageView.setImageResource(R.drawable.mj3);
        }
    }


}
ViewrFragment에 setImage 메소드를 만든다
index 값에 따라 imageView에 다른 이미지를 표시해준다.
정리
- ListFragment에서 getActivity로 액티비티를 얻어서 액티비티의
onImageChange 메소드를 호출한다. (인덱스에 값을 전달) - MainActivity에서는 전달받은 인덱스 값을 다시 인자로 전달해서 fragment2의 setImage 메소드를 호출한다.
- ViewrFragment의 setIamge 메소드는 인덱스에 따라 다른 이미지를 보여준다.
익숙해지면 굉장히 편리한 방식!
인터페이스를 이용하면 프래그먼트를 다른 액티비티에도 넣을 수 있다.
주의할점
VierFragment.java와 ListFragment.java의 onCreateView 메소드에서
xml파일을 인플레이션 해서 rootView 변수에 저장하는데 함수의 리턴값을 return rootView;로 지정해 줘야 한다.
리턴값을 그대로 놔두면 화면에 아무것도 표시되지 않는다.
이것 때문에 처음에 당황함
최종
MainActivity.java
package com.example.myfragment2;

import androidx.appcompat.app.AppCompatActivity;
import androidx.fragment.app.FragmentManager;

import android.os.Bundle;

public class MainActivity extends AppCompatActivity {

    ListFragment fragment1;
    ViewerFragment fragment2;
    FragmentManager manager;

    @Override
    protected void onCreate(Bundle savedInstanceState) {
        super.onCreate(savedInstanceState);
        setContentView(R.layout.activity_main);

        manager = getSupportFragmentManager();


        fragment1 = (ListFragment) manager.findFragmentById(R.id.listFragment);
        fragment2 = (ViewerFragment) manager.findFragmentById(R.id.viewerFragment);

    }

    public void onImageChange(int index){
        fragment2.setImage(index);

    }
}
activity_main.xml
<?xml version="1.0" encoding="utf-8"?>
<LinearLayout xmlns:android="http://schemas.android.com/apk/res/android"

    android:layout_width="match_parent"
    android:layout_height="match_parent"
    android:orientation="vertical"
    >

    <fragment
        android:layout_width="match_parent"
        android:layout_height="0dp"
        android:layout_weight="1"
        android:name="com.example.myfragment2.ListFragment"
        android:id="@+id/listFragment"
        />

    <fragment
        android:layout_width="match_parent"
        android:layout_height="0dp"
        android:layout_weight="1"
        android:name="com.example.myfragment2.ViewerFragment"
        android:id="@+id/viewerFragment"
        />


</LinearLayout>
ViewrFragment.java
package com.example.myfragment2;

import android.media.Image;
import android.os.Bundle;
import android.view.LayoutInflater;
import android.view.View;
import android.view.ViewGroup;
import android.widget.Button;
import android.widget.ImageView;

import androidx.annotation.NonNull;
import androidx.annotation.Nullable;
import androidx.fragment.app.Fragment;

public class ViewerFragment extends Fragment {

    ImageView imageView;

    //인플레이션 하기 위한 메소드
    @Nullable
    @Override
    public View onCreateView(@NonNull LayoutInflater inflater, @Nullable ViewGroup container, @Nullable Bundle savedInstanceState) {

        ViewGroup rootView = (ViewGroup) inflater.inflate(R.layout.fragment_viewer,container,false);

        imageView = (ImageView) rootView.findViewById(R.id.imageView);


        return rootView;
    }

    public void setImage(int index){
        if (index==0){
            imageView.setImageResource(R.drawable.mj1);
        }
        else if (index==1){
            imageView.setImageResource(R.drawable.mj2);
        }
        else if (index==2){
            imageView.setImageResource(R.drawable.mj3);
        }
    }


}
fragment_viewr.xml
<?xml version="1.0" encoding="utf-8"?>
<LinearLayout xmlns:android="http://schemas.android.com/apk/res/android"
    android:layout_width="match_parent"
    android:layout_height="match_parent"
    android:orientation="vertical"
    >

    <ImageView
        android:id="@+id/imageView"
        android:layout_width="match_parent"
        android:layout_height="wrap_content"
        android:src="@drawable/mj1"/>


</LinearLayout>
ListFragment.java
package com.example.myfragment2;

import android.content.Context;
import android.os.Bundle;
import android.view.LayoutInflater;
import android.view.View;
import android.view.ViewGroup;
import android.widget.Button;

import androidx.annotation.NonNull;
import androidx.annotation.Nullable;
import androidx.fragment.app.Fragment;

public class ListFragment extends Fragment {

    MainActivity activity;

    @Override
    public void onAttach(@NonNull Context context) {
        super.onAttach(context);

        activity = (MainActivity) getActivity();
    }

    //인플레이션 하기 위한 메소드
    @Nullable
    @Override
    public View onCreateView(@NonNull LayoutInflater inflater, @Nullable ViewGroup container, @Nullable Bundle savedInstanceState) {

        ViewGroup rootView = (ViewGroup) inflater.inflate(R.layout.fragment_list,container,false);

        Button button = (Button) rootView.findViewById(R.id.button4);
        button.setOnClickListener(new View.OnClickListener() {
            @Override
            public void onClick(View view) {

                activity.onImageChange(0);

            }
        });

        Button button2 = (Button) rootView.findViewById(R.id.button5);
        button2.setOnClickListener(new View.OnClickListener() {
            @Override
            public void onClick(View view) {

                activity.onImageChange(1);
            }
        });

        Button button3 = (Button) rootView.findViewById(R.id.button6);
        button3.setOnClickListener(new View.OnClickListener() {
            @Override
            public void onClick(View view) {

                activity.onImageChange(2);
            }
        });


        return rootView;
    }


}
fragment_list.xml
<?xml version="1.0" encoding="utf-8"?>
<LinearLayout xmlns:android="http://schemas.android.com/apk/res/android"

    android:layout_width="match_parent"
    android:layout_height="match_parent"
    android:orientation="vertical"
    >


    <Button
        android:id="@+id/button4"
        android:layout_width="match_parent"
        android:layout_height="wrap_content"
        android:text="이미지1" />

    <Button
        android:id="@+id/button5"
        android:layout_width="match_parent"
        android:layout_height="wrap_content"
        android:text="이미지2" />

    <Button
        android:id="@+id/button6"
        android:layout_width="match_parent"
        android:layout_height="wrap_content"
        android:text="이미지3" />
</LinearLayout>- 리스트프래그먼트에서 버튼 클릭 -> 액티비티의 메소드 호출 -> 뷰어프래그먼트의 메소드 호출 -> 이미지 변경
