Three.js 에는 두 가지 타입의 camera가 있습니다.
- orthographic camera
- perspective camera
이번 포스트에서는 기초적인 내용만 건들여보겠습니다.
Three.js는 VR gear 또는 3D glass를 사용했을 때 보여지는 Scene 만들어내는 camera들도 지원한다고 합니다. 하지만 이 포스트에서는 소개하지않겠습니다.
아래 인용 글을 읽어보시면 도움이 되실 것 같습니다.
If you're looking for simple VR cameras, you can
use THREE.StereoCamera to create 3D scenes that are rendered side to side (standard stereo effect), use a parallel barrier (as 3DS provides), or provide an anaglyph effect where the different views are rendered in different colors. Alternatively, Three.js has some experimental support for the WebVR standard, which is supported by a number of browsers (for more info, see https://webvr.info/developers/). To use this, not that much needs to change. You just set renderer.vr.enabled = true; and Three.js will handle the rest. The Three.js website has a couple of examples where this property and some other features of Three.js support for WebVR are demonstrated: https://threejs.org/examples/.
지금부터는 표준 perspective 와 orthographic cameras에만 집중해보겠습니다. 두 camera의 차이를 설명하는 최고의 방법은 다음 예제를 보는 것입니다.
Orthographic camera versus Perspective camera
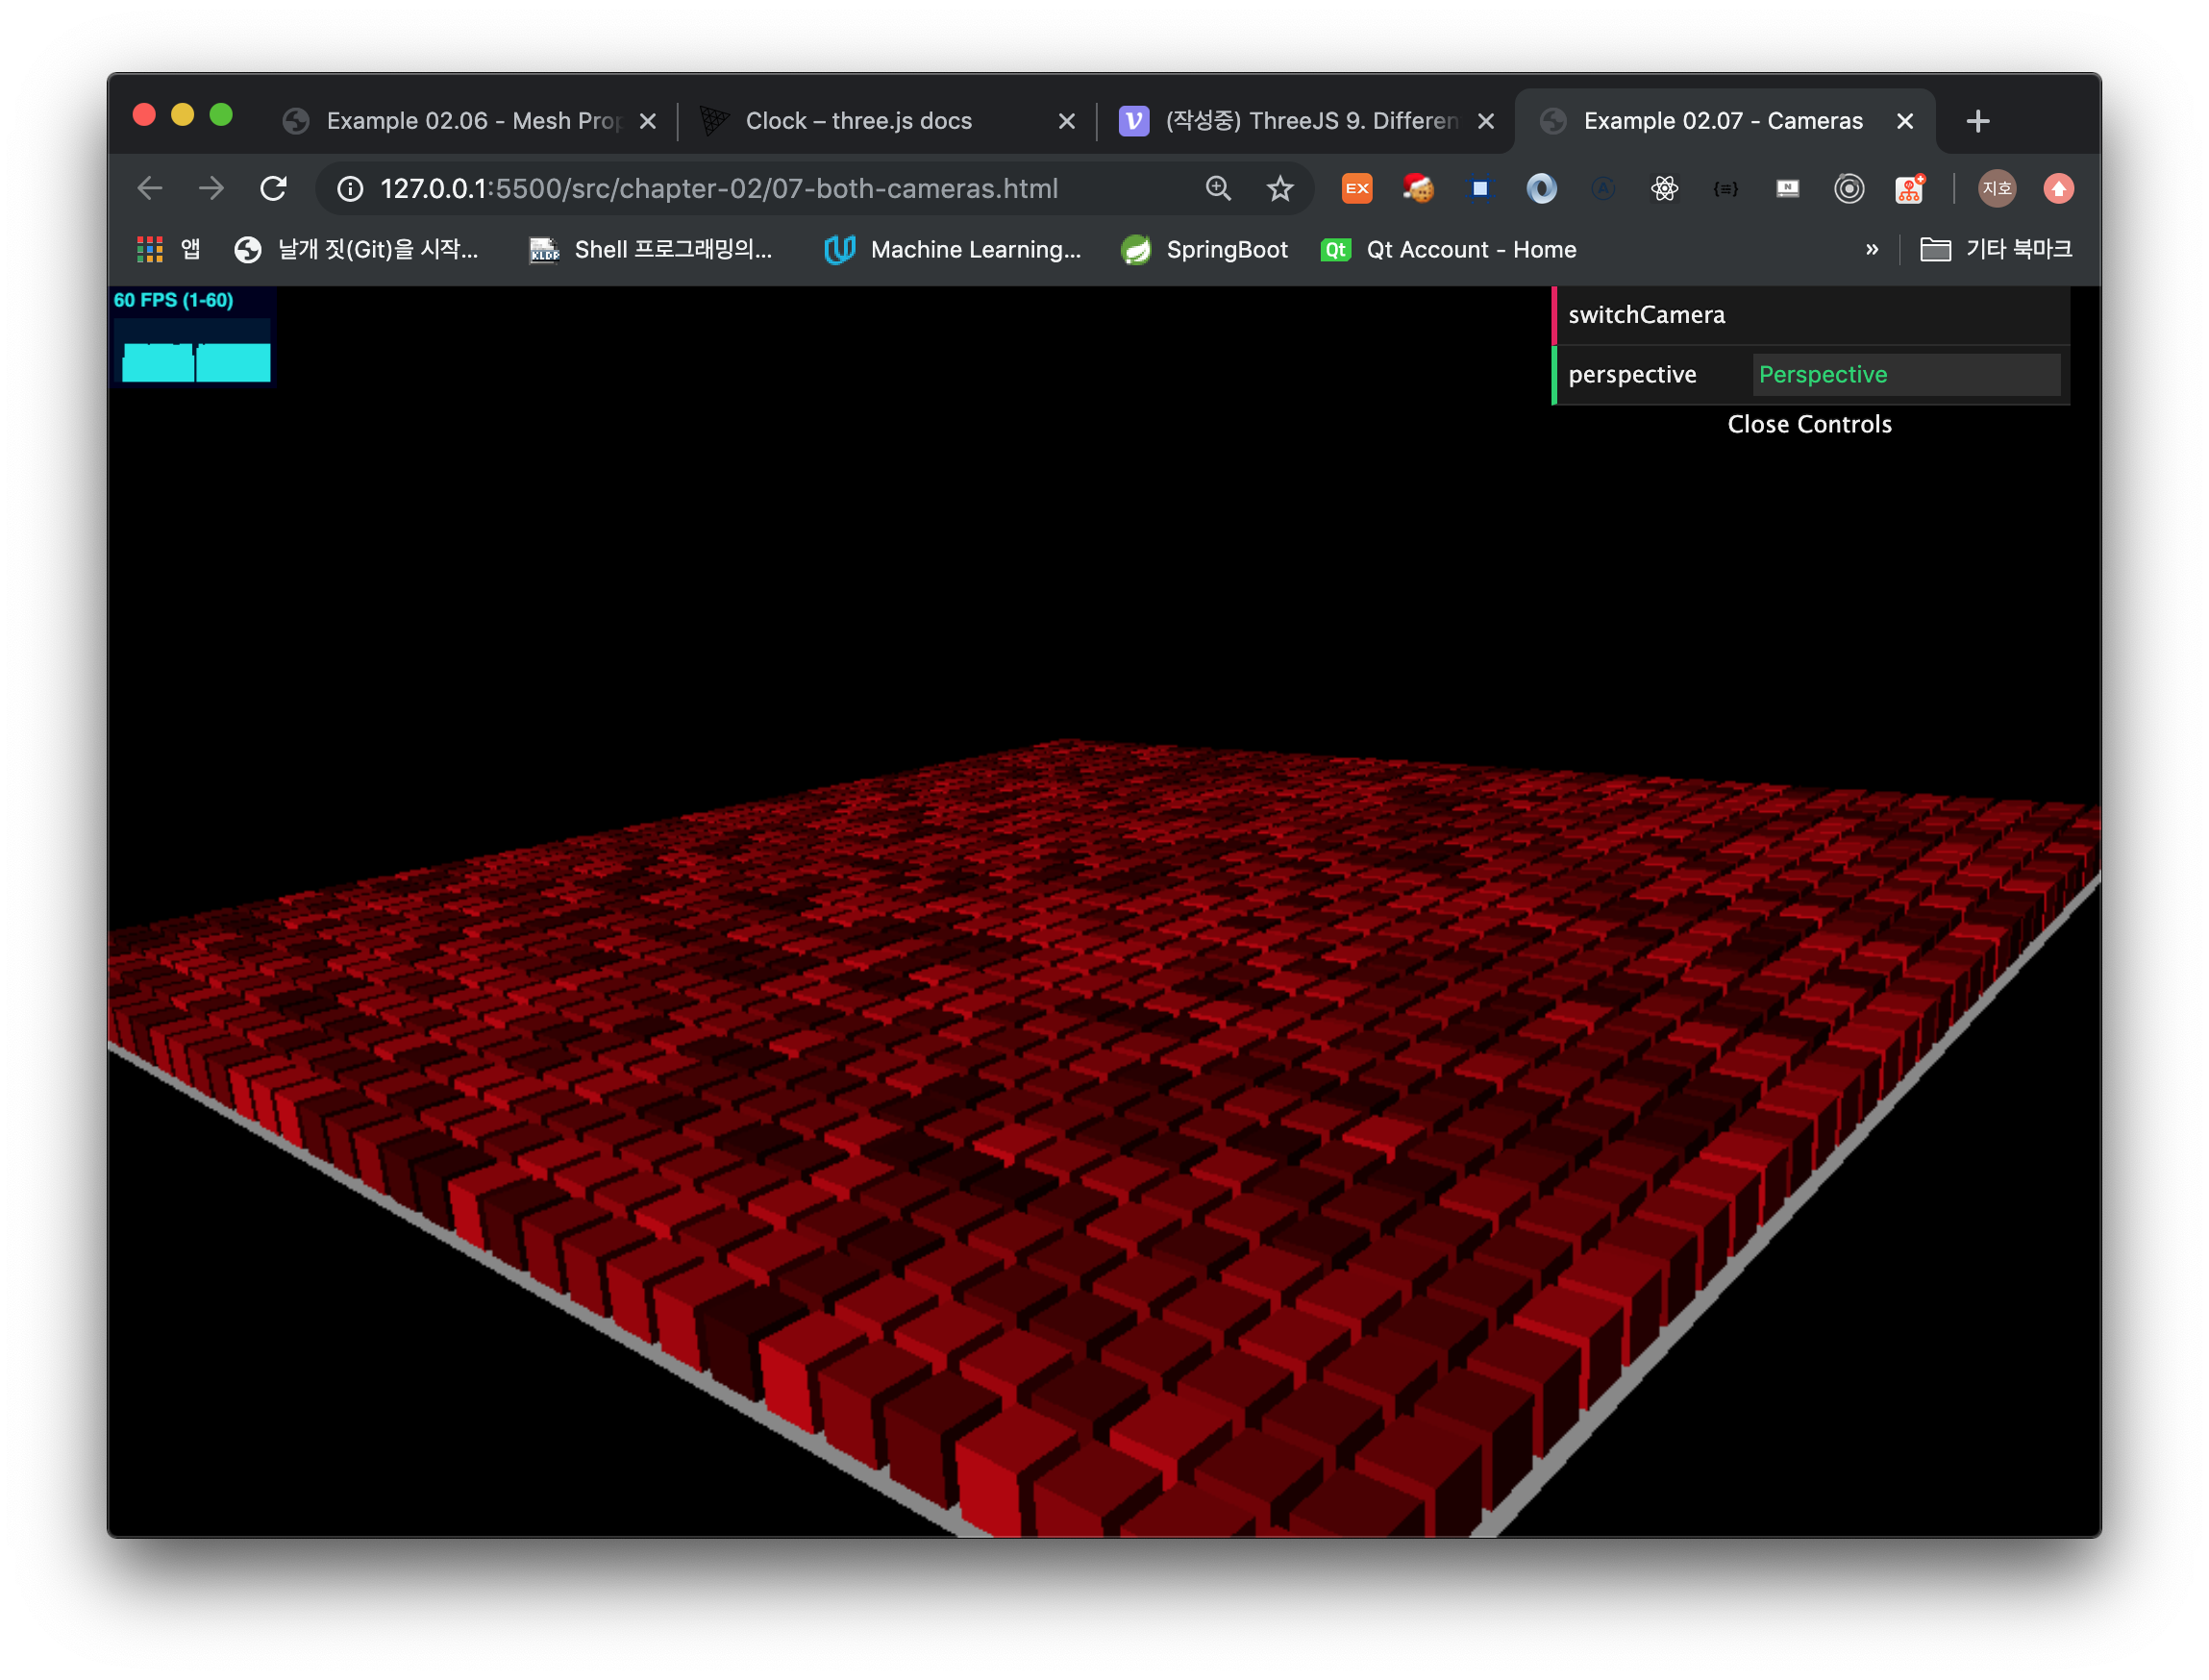
Perspective camera example
Orthographic camera example
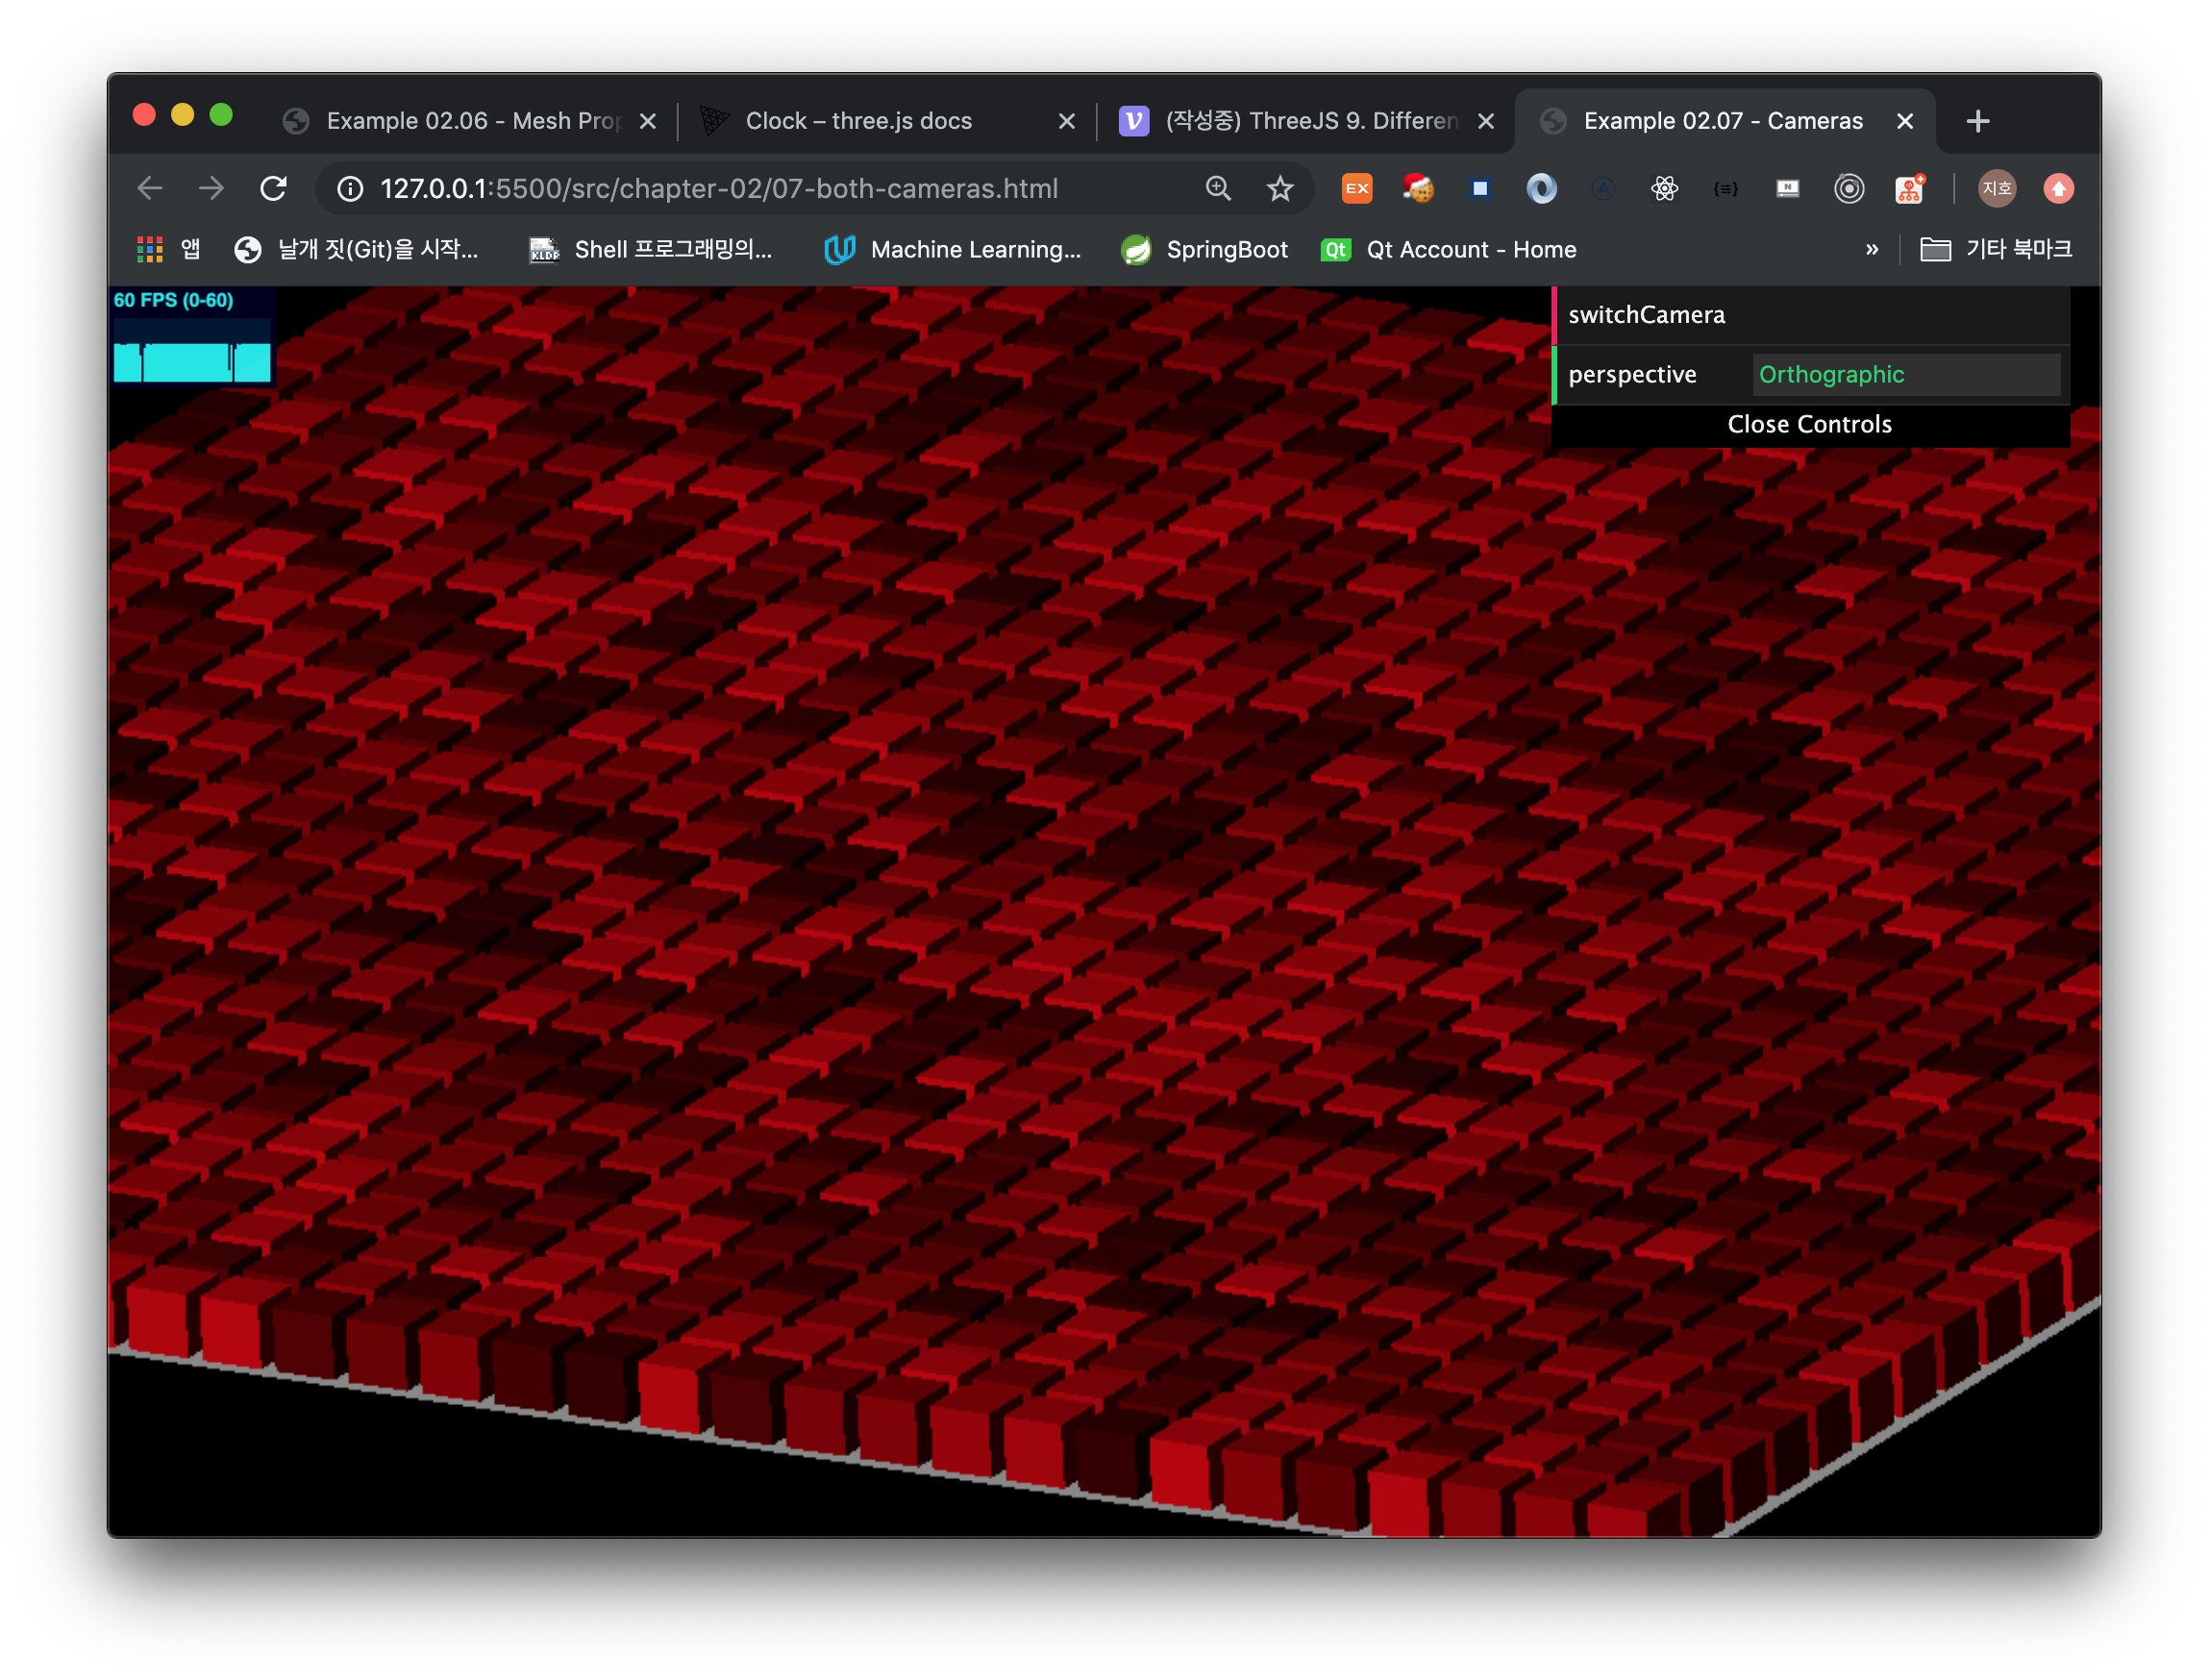
차이가 느껴지시나요? Perspective camera는 자연스럽게보이는 카메라입니다.위 사진에서 보이는 것처럼 멀리있는 것은 더 작게 보이게됩니다. (원근감)
하지만 Orthographic camera로 바꿀 경우, 모든 큐브는 같은 크기로 렌더링됩니다. object와 camera사이의 거리는 신경쓰지않게됩니다.
Orthographic camera는 종종 2D게임에 사용된다고 합니다.
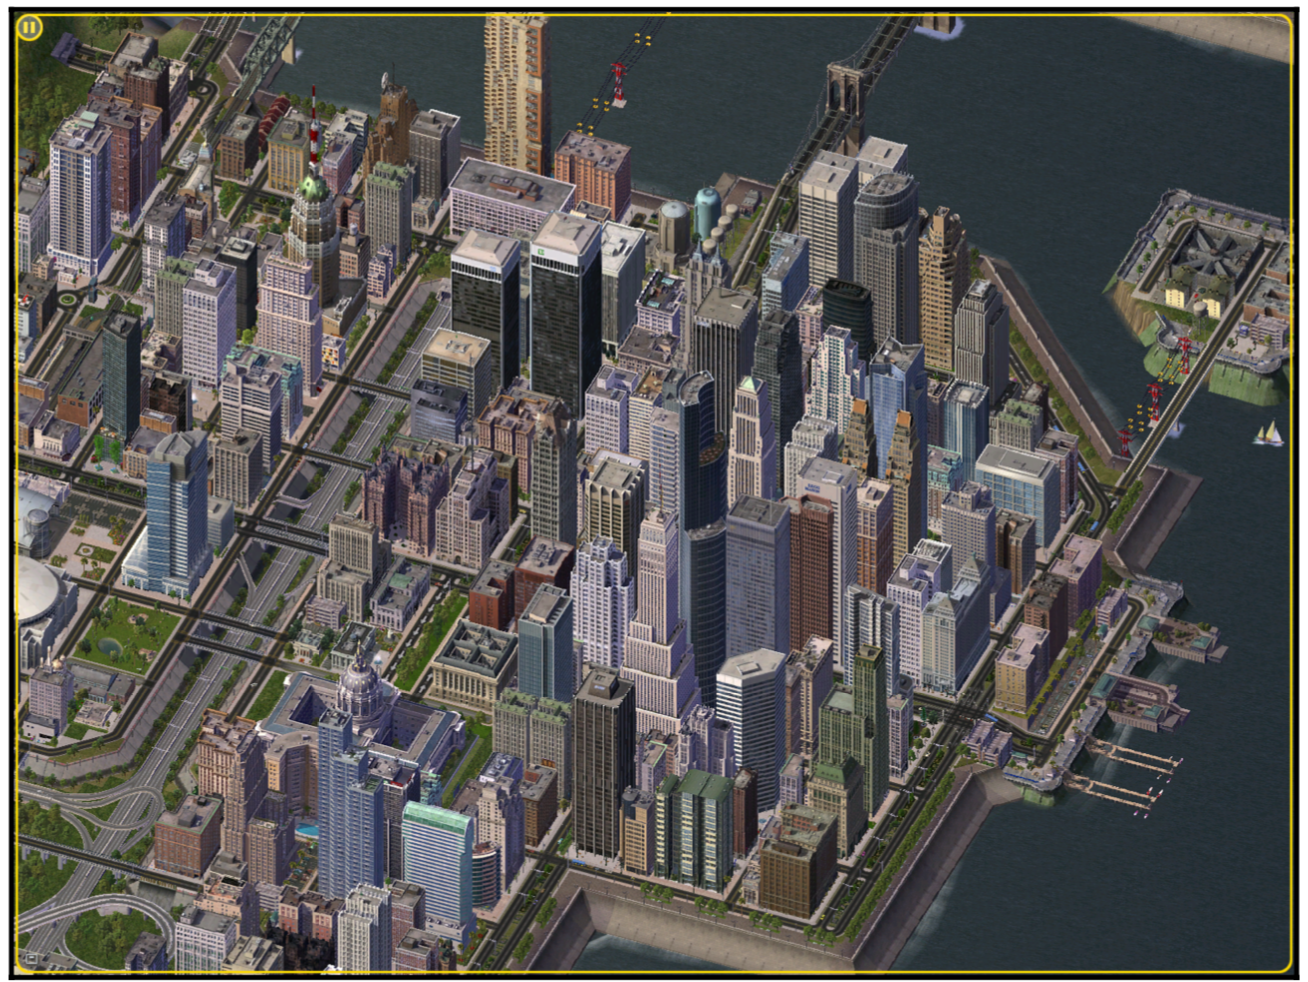
앞으로의 예제에서는 Perspective Camera를 대부분 사용할 것입니다. 그것이 현실세계와 더 유사하기때문이죠.
위 예제에서의 카메라 전환 콜백함수를 살펴보겠습니다.
this.switchCamera = function () {
  if (camera instanceof THREE.PerspectiveCamera) {
    camera = new THREE.OrthographicCamera(window.innerWidth / -16, window.innerWidth / 16, window.innerHeight / 16, window.innerHeight / -16, -200, 500);
    camera.position.x = 120;
    camera.position.y = 60;
    camera.position.z = 180;
    camera.lookAt(scene.position);
    trackballControls = initTrackballControls(camera, renderer);
    this.perspective = "Orthographic";
  } else {
    camera = new THREE.PerspectiveCamera(45, window.innerWidth / window.innerHeight, 0.1, 1000);
    camera.position.x = 120;
    camera.position.y = 60;
    camera.position.z = 180;
    camera.lookAt(scene.position);
    trackballControls = initTrackballControls(camera, renderer);
    this.perspective = "Perspective";
  }
};
위 코드를 보면 지금까지 해왔던 camera설정과 다른 것을 볼 수 있습니다. 먼저 PerspectiveCamera가 가지는 arguments를 정리해보겠습니다.
Perscpective Camera arguments
fov
Field Of View (FOV)는 카메라의 위치에서 보여지는 Scene의 특정부분입니다. 예를들어 사람은 거의 180도의 FOV를 가지고 있습니다. 반면에 특별한 새들은 거의 360도에 가까운 FOV를 가지고 있습니다. 하지만 일반적인 컴퓨터 스크린은 저희의 시각을 완벽히 가득채우지 않기 때문에 거의 더 작은 값을 선택하곤 합니다.
aspect
aspect ratio는 우리가 output을 렌더링하는 수평 사이즈와 수직 사이즈의 비율입니다. 우리의 경우, 우리는 전체 window를 사용하기 때문에 window.innerWidth / window.innerHeight 를 사용하는 것이 적절하겠습니다. aspect ratio는 horizontal FOV 와 vertical FOV의 차이를 결정합니다.
Good default : window.innerWidth / window.innerHeight
near
near 값은 Threejs가 렌더링해야한느 Scene과 얼마나 가까이 있는지를 의미합니다.
Normally, we set this to a very small value to directly render everything from the position of the camera
far
far 값은 카메라의 위치에서부터 얼마나 멀리까지 볼수 있는지를 정의합니다.만약 이 값을 너무 적게 한다면 scene이 렌더링 되지않을 수도 있습니다. 또 이 값이 너무 큰 경우, 렌더링 성능에 영향을 줄것입니다.
Good default: 1000
zoom
zoom 속성 값은 우리가 zoom in, zoom out기능을 가능하게 합니다. 이 값이 1보다 작아지면 scene으로부터 zoom out이 되고 이 값이 1보다 커지면 zoom in이 됩니다. 만약 이값이 음수가 될 경우, 화면이 위 아래가 뒤집어질 것입니다.
Good default: 1
아래 그림은 위 property에 대한 직관을 얻게하는데 도움을 줄 것 입니다.
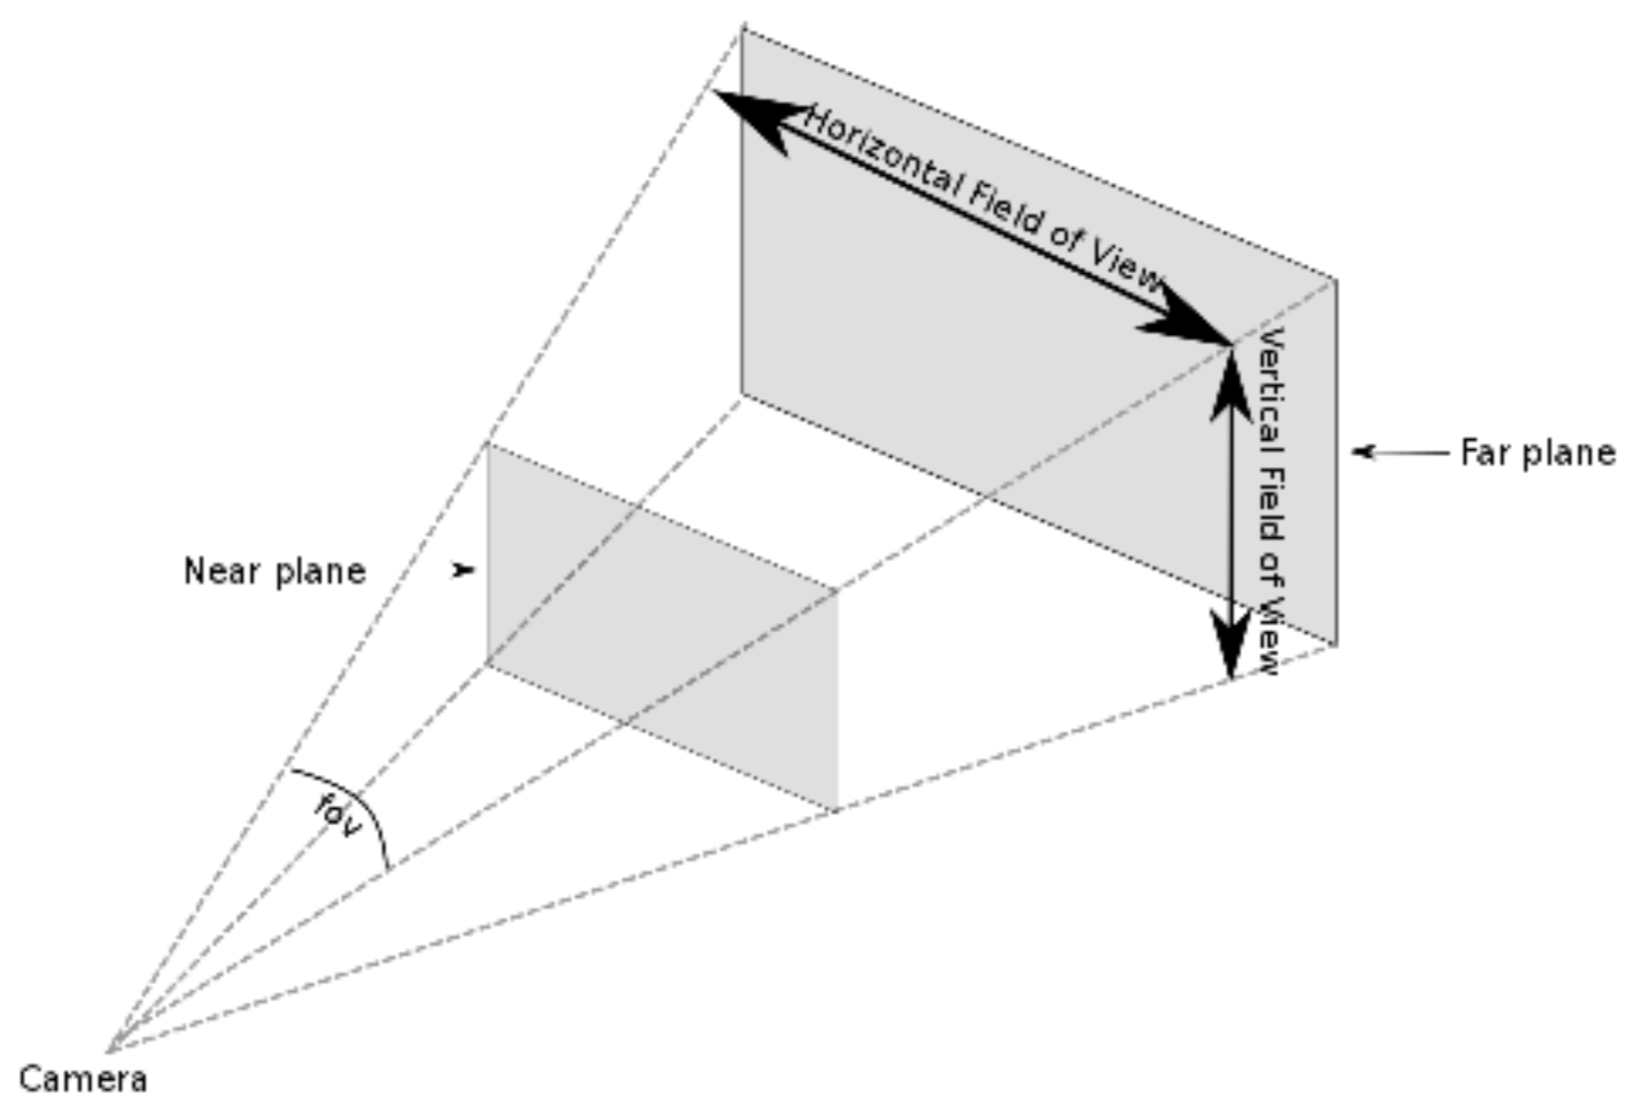
camera 의 fov에 의해서 horizontal FOV가 결정될 것이고 aspect ratios 값에 의해 자연스럽게 vertical FOV도 결정됩니다. 그리고 near값에 의해 near plane의 위치가 결정되고 far값에 의해 far plane의 값이 결정됩니다. 결과적으로 near plane과 far plane의 사이 공간이 렌더링될 것입니다.
Orthographic Camera arguments
orthographic camera를 설정하는 인자는 많이 다릅니다. 우리가 어떤 fov를 가지는지, aspect 값이 무엇인지는 상관이 없습니다. 왜냐하면 모든 모든 object 들이 같은 사이즈를 가지기 때문입니다. orthograpic camera를 정의할 때, 우리는 렌더링할 때 필요한 cuboid area 이라는 것을 정의합니다. orthograpic camera는 이것을 반영해서 나타내는 프로퍼티를 가집니다.
(cuboid는 직육면체의 공간을 나타낸다고 생각하면 될 것 같습니다.)
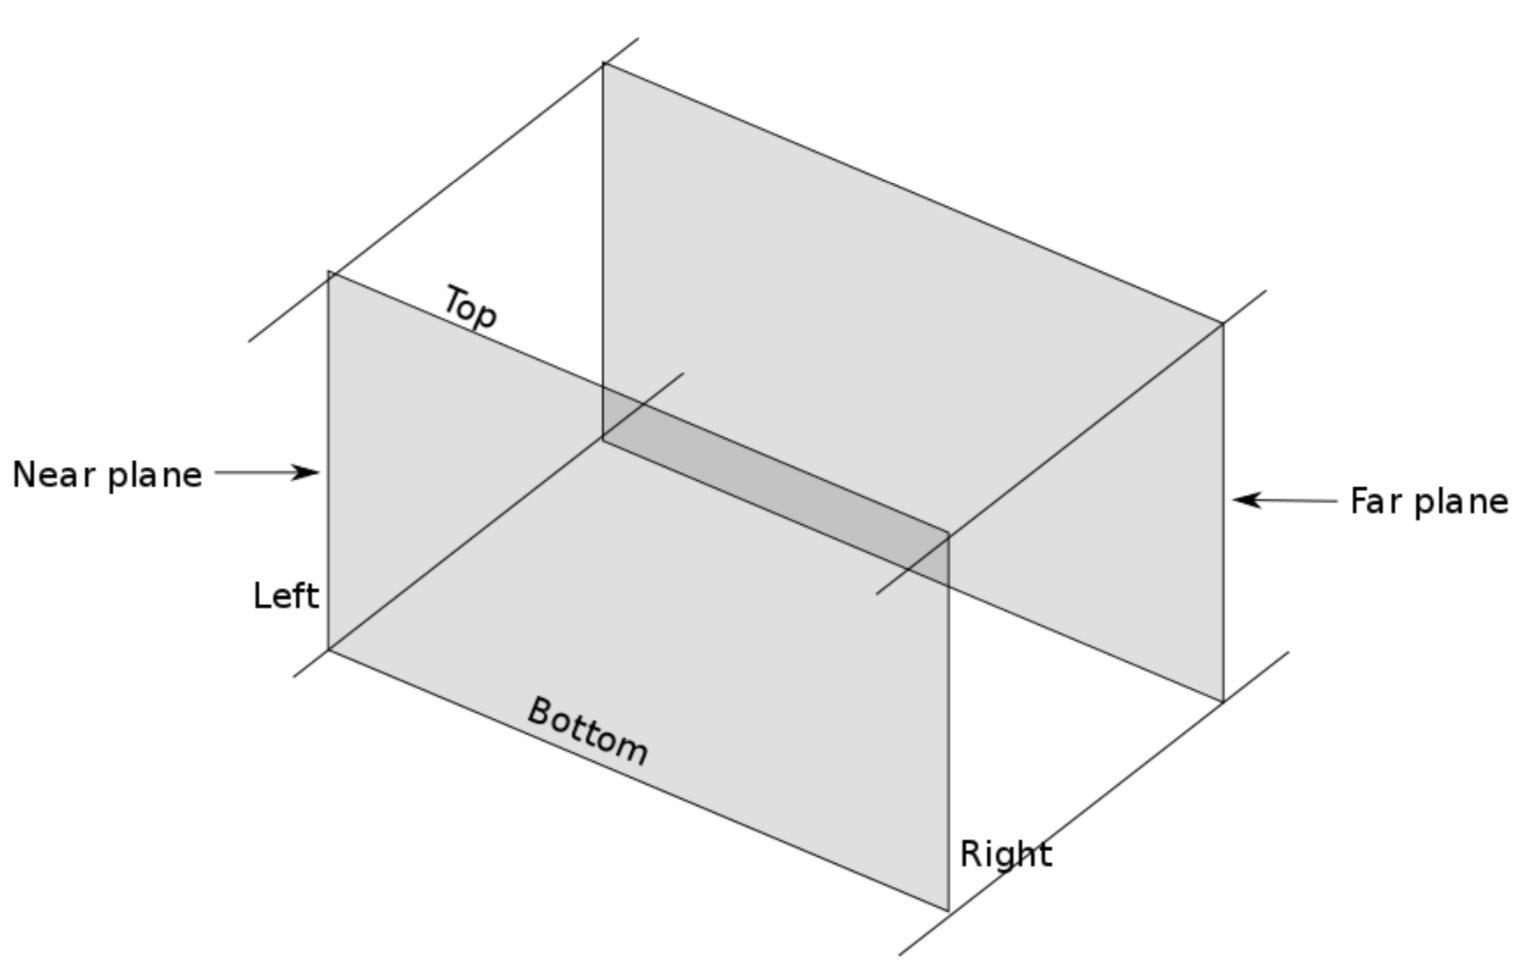
left
Camera frustum left plane. 즉, Frustum 의 왼쪽 평명을 나타냅니다.
http://learnwebgl.brown37.net/08_projections/projections_perspective.html
https://threejs.org/docs/#api/en/cameras/OrthographicCamera
https://en.wikipedia.org/wiki/Viewing_frustum
글로 설명하기 어려울 개념이라 조금더 공부하고 기록하자
right
top
bottom
far
perspective camera와 동일합니다.
near
perspective camera와 동일합니다.
zoom
perspective camera와 동일합니다.
