DBT ( Data build tool )
DBT란?
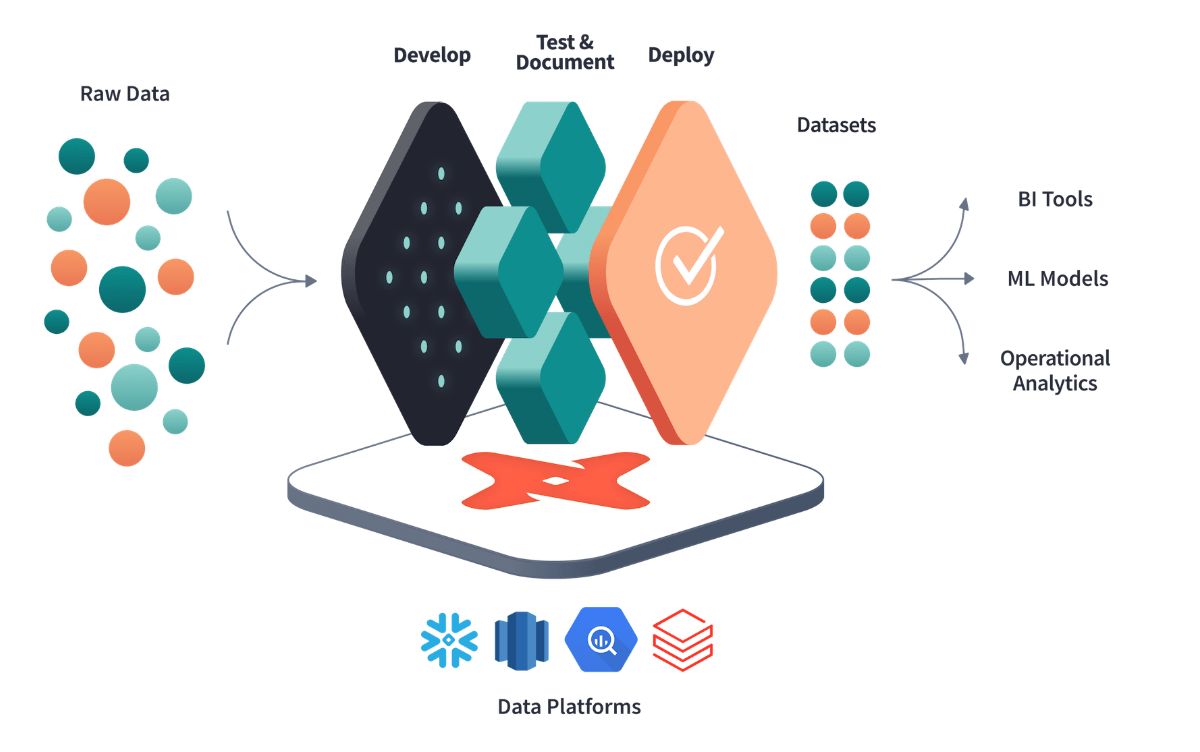
DBT는 데이터 가공에 있어 Transformation에 집중된 Workflow 를 제공해주는 도구.
DBT 의 특징
- Git을 통한 버전관리가 가능하고 팀에서 협력하여 작업을 할 수가 있다.
- dbt는 select 문을 작성함으로써 모듈화된 SQL 모델을 만들 수 있다. dbt 에서는 이러한 select 문을 table, view 로 변환해서 만들어주는 역할을 한다.
- 데이터 계보를 통해 데이터의 흐름을 시각화하여, 데이터 버전관리 및 의존성 파악 문제를 해결한다.
- 사용자는 SQL만 알아도 쉽게 이용할 수 있고 yaml 파일만 이용하면 어떤 테이블이든 테스트, 문서화등의 작업을 쉽게 할 수 있다.
- proudction 이전에 test model을 통해 테스트를 진행해 볼 수있다.
- SQL Test block을 통한 test case
{% test not_null(model, column_name) %} select * from {{ model }} where {{ column_name }} is null {% endtest %} - yml 파일에 generic test를 이용한 test 를 만들 수 있다.
version: 2

models:
  - name: orders
    columns:
      - name: order_id
        tests:
          - unique
          - not_null
      - name: status
        tests:
          - accepted_values:
              values: ['placed', 'shipped', 'completed', 'returned']
      - name: customer_id
        tests:
          - relationships:
              to: ref('customers')
              field: id
- SQL Test block을 통한 test case
DBT 사용법
DBT Cloud
DBT를 편리하게 사용하기 위해서 웹 IDE를 제공해주는 서비스이다. DBT CLI를 통해 할 수 있는 모든 기능을 할 수가 있고 job기능을 이용해서 Ingestion 파이프라인을 구축할 수도 있다.
하지만 무료플랜으로는 하나의 계정만 사용이 가능하다. 팀이 같이 사용하기 위해서는 인당 달에 50달러를 사용해야한다.
DBT CLI
DBT 에서 제공하는 모든 기능을 사용할 수 있지만, 실제 production 운영을 하기위해서는 많은 부분들을 수동으로 세팅 해주어야하는 단점이 있다. 하지만 무료라는점…
모든 DA 들에게 Cloud 계정을 주기에는 금전적인 부담이 있기 때문에 CLI 셋팅을 하고 DA들의 진입장벽을 낮추기 위한 가이드라인을 잘 작성해주기로 결정.
1. DBT 설치
pip 를 이용하여 dbt 를 설치할 수 있다. 사용하는 방식에 맞게 package를 설치할 수 있는데 우선 기본적으로 core package를 다운 받는다. 어떤 data warehouse를 사용하느냐에 따라서 추가 package를 받으면 된다. ( 버전은 상황에 맞게 사용하면 된다. )
pip install dbt-core==1.2.0
##
# dbt-postgres
##
RUN python -m pip install dbt-postgres==1.2.0

##
# dbt-bigquery
##
RUN python -m pip install dbt-bigquery==1.2.0

##
# dbt-databrick
##
RUN python -m pip install dbt-databrick==1.2.0

##
# dbt-snowflake
##
RUN python -m pip install dbt-snowflake==1.2.0

##
# dbt-redshift
##
RUN python -m pip install dbt-redshift==1.2.0
설치가 완료되고 나면 dbt cli를 사용할 수 있다.
dbt --version

Core:
  - installed: 1.2.0
  - latest:    1.2.0 - Up to date!

Plugins:
  - bigquery: 1.2.0 - Up to date!
2. 초기 project 구성 및 Profile 설정
dbt 를 사용하기 위해서 우선 profile을 작성해주어야한다.
profile이란 어떤 warehouse에 connection을 맺을지에 대한 configuration 값을 정리해놓은 yml파일이다. 설정한 값은 default로 따로 sql 파일에서 jinja template 을 이용하여 정의해줄 수 있다. {{ config(database=”something”, schema=”something”) }}
dbt의 project를 처음 만들게 될 때 dbt init cli 를 사용할 수 있는데 해당 명령어를 사용하면 기본 구조를 만들어준다.
dbt init 코드 예시
(env) (base) ➜ dbt-init-test dbt init
08:30:42  Running with dbt=1.2.0
08:30:42  Creating dbt configuration folder at /Users/mason/.dbt
Enter a name for your project (letters, digits, underscore): dbt_test
Which database would you like to use?
[1] bigquery

(Don't see the one you want? https://docs.getdbt.com/docs/available-adapters)

Enter a number: 1
[1] oauth
[2] service_account
Desired authentication method option (enter a number): 2
keyfile (/path/to/bigquery/keyfile.json): .
project (GCP project id): tech-dbt-test
dataset (the name of your dbt dataset): test_1
threads (1 or more): 1
job_execution_timeout_seconds [300]:
[1] US
[2] EU
Desired location option (enter a number): 1
08:31:58  Profile dbt_test written to /Users/mason/.dbt/profiles.yml using target's profile_template.yml and your supplied values. Run 'dbt debug' to validate the connection.
08:31:58
Your new dbt project "dbt_test" was created!

For more information on how to configure the profiles.yml file,
please consult the dbt documentation here:

  https://docs.getdbt.com/docs/configure-your-profile

One more thing:

Need help? Don't hesitate to reach out to us via GitHub issues or on Slack:

  https://community.getdbt.com/

Happy modeling!
모든 입력을 마치고 나면 현재 경로에 project directory가 형성되게 되고 profile 은
~/.dbt/profile.json 경로로 .json 파일이 형성되게 된다.
profile.json 예시
dbt_test: # profile 이름
  outputs:
    dev:
      dataset: test_1
      job_execution_timeout_seconds: 300
      job_retries: 1
      keyfile: .
      location: US
      method: service-account
      priority: interactive
      project: tech-dbt-test
      threads: 1
      type: bigquery
# 추가 될 수 있는 target 의 예시
#    prod:
#      dataset: test_1
#      job_execution_timeout_seconds: 300
#      job_retries: 1
#      keyfile: "${{ env_var('GOOGLE_KEYFILE_PATH', ''}}"  env_var를 이용하여 환경변수값을 사용할 수도 있다.
#      location: US
#      method: service-account
#      priority: interactive
#      project: tech-dbt-prod
#      threads: 1
#      type: bigquery
target: dev- target: 어떤 환경에서 사용을 할 것인가에 대한 설정이라 보면 된다. default로 dev가 설정되고 하나의 profile에 여러개의 target을 추가할 수 있다. target은 추후에 sql 문을 작성할 때 jinja 문법을 이용하여 target 별로 가져오는 source table을 변경하는 방식으로 사용될 수 있다. target 설정은
dbt run --target dev와 같은 방식으로 할 수 있다.version: 2 sources: - name: source_name database: | {%- if target.name == "dev" -%} raw_dev {%- elif target.name == "qa" -%} raw_qa {%- elif target.name == "prod" -%} raw_prod {%- else -%} invalid_database {%- endif -%} schema: source_schema - outputs: 해당 profile 의 target 별 DW의 configuration 값을 저장한 것이라 보면 된다. 각 configuration의 값들은 DW 에 의존적이기 때문에 따로 공식문서에서 찾아서 본인에게 맞게 설정하면 된다.
이외에도 다양한 config 값들을 정의할 수 있다.
Config 값 예시
config:
  send_anonymous_usage_stats: <true | false>
  use_colors: <true | false>
  partial_parse: <true | false>
  printer_width: <integer>
  write_json: <true | false>
  warn_error: <true | false>
  log_format: <true | false>
  debug: <true | false>
  version_check: <true | false>
  fail_fast: <true | false>
  use_experimental_parser: <true | false>
  static_parser: <true | false>
본인의 상황에 맞게 config 값들을 설정해주면 된다.
3. DBT directory structure
더 다양한 폴더 구조를 이용할 수 있지만 dbt init으로 생성된 default에 대해서만 정리해보면 아래 folder tree 로 나타낼 수 있다.
folder 구조 예시
├── analyses
├── models
|		└── example
|       ├── my_first_dbt_model.sql
|       ├── my_second_dbt_model.sql
|       └── schema.yml
├── seeds
├── data
├── macros
├── tests
├── snapshots
├── .gitignore
├── README.md
└── dbt_project.yml- analyses : dbt model로 만들어서 관리되기 보다는 좀 더 분석적인 데이터에 가깝다면 해당 폴더에 sql 문을 작성해서 관리할 수 있다. 이렇게 되면 sql 문을 compiled 까지 시키나 execute하지 않아서 table로 만들어지지는 않는다. 하지만 {{ ref() }} jinja 패턴을 이용하여 사용할 수 있다.
- models: select 문을 저장한 sql file이라 볼 수 있다. 만들어진 sql 문들은 dbt run을 돌릴 때
create view as,create table as로 wrapping 되게 된다. - seeds: csv, json 파일과 같은 소스파일을 그대로 이용하고 싶을 때 seeds 폴더에 저장하여 사용할 수 있다.
- macros: 다른 언어에서 함수를 사용하듯 sql 문을 저장하여서 다른 model에서 함수처럼 사용할 수 있도록 해놓은 것
{% macro cents_to_dollars(column_name, precision=2) %}
    ({{ column_name }} / 100)::numeric(16, {{ precision }})
{% endmacro %}
select id as payment_id, {{ cents_to_dollars('amount') }} as amount_usd, ... from app_data.payments - tests: source, seed, snapshot 등 모든 table 에 대해서 테스트를 진행하기 위한 sql 문을 가지고 있는 폴더. 개인이 select문을 만들어서 테스트 할 수도 있지만 generic test block을 사용하여 테스트 할 수도 있다.
테스트를 진행했을 때 1개이상의 row가 나온다면 fail 처리가 된다.{% test not_null(model, column_name) %} select * from {{ model }} where {{ column_name }} is null {% endtest %}
- snapshots: 특정 unique key 에 대하여 어떻게 변했는지에 대한 값이 궁금할 때 snapshot block을 이용하여 확인할 수 있다. snapshot sql 을 첫 실행하게 되면 dbt_valid_from, dbt_valid_to column이 생기고 연결한 timestamp column의 값이 dbt_valid_from에 입력되게 된다. 그 후 진행되는 run에서는 row 들을 비교하여 변경된 값에 대하여 dbt_valid_to 가 입력되고 다음 status 변경은 다른 row ( dbt가 해당 row 정보를 바탕으로 새로 만든 )에서 체크되게 된다.
- dbt_project.yml : 모든 dbt project들이 공통으로 가지고 있어야하는 yaml 파일로 해당 project에 대한 config 값을 가지고 있다.
기본적으로 주석이 달려있어 이해하기 어렵지 않다. 그중에서 models 에 +materialized: view로 정의된 부분을 볼 수 있는데 해당 파라미터를 통해서 해당 model folder에 있는 sql 파일을 만들 때 default로 view를 할지, table을 할지 선택할 수 있다. 추가적으로 incremental이란 옵션이 있는데 해당 옵션은 해당 table의 timestamp 값을 기준으로 append 하는 방식으로 row를 insert 하는 방식이다. name 은 내가 지정하고자 하는 프로젝트 폴더의 이름을 넣어주면 된다.# Name your project! Project names should contain only lowercase characters # and underscores. A good package name should reflect your organization's # name or the intended use of these models name: 'test_dbt' version: '1.0.0' config-version: 2 # This setting configures which "profile" dbt uses for this project. profile: 'test_dbt' # These configurations specify where dbt should look for different types of files. # The `model-paths` config, for example, states that models in this project can be # found in the "models/" directory. You probably won't need to change these! model-paths: ["models"] analysis-paths: ["analyses"] test-paths: ["tests"] seed-paths: ["seeds"] macro-paths: ["macros"] snapshot-paths: ["snapshots"] target-path: "target" # directory which will store compiled SQL files clean-targets: # directories to be removed by `dbt clean` - "target" - "dbt_packages" # Configuring models # Full documentation: https://docs.getdbt.com/docs/configuring-models # In this example config, we tell dbt to build all models in the example/ directory # as tables. These settings can be overridden in the individual model files # using the `{{ config(...) }}` macro. models: test_dbt: # Config indicated by + and applies to all files under models/example/ example: +materialized: view
4. dbt cli 사용
아래 cli 를 사용할 때 따로 옵션을 주지 않으면 ~/.dbt/profile.json path로 profile을 찾게 된다. 또한 project도 현재 directory를 기준으로 dbt_project.yml파일을 찾게된다. 혹시 따로 profile을 관리하거나 project dir을 따로 지정해주고 싶다면 --profiles-dir [path] , —-project-dir [path] 옵션으로 설정이 가능하다.
- dbt deps : repo의 package.yml 파일 내부에 정의되어 있는 package 들을 dbt_pckages 폴더를 만들어 프로젝트들을 import하게 한다.
packages:
  - package: dbt-labs/dbt_utils
    version: 0.7.1
  - package: tailsdotcom/dbt_artifacts
    version: 0.5.0-a1
    install-prerelease: true
  - package: dbt-labs/codegen
    version: 0.4.0
  - package: calogica/dbt_expectations
    version: 0.4.1
  - git: https://github.com/dbt-labs/dbt-audit-helper.git
    revision: 0.4.0
  - git: "https://github.com/dbt-labs/dbt-labs-experimental-features" # git URL
    subdirectory: "materialized-views" # name of subdirectory containing `dbt_project.yml`
    revision: 0.0.1
  - package: dbt-labs/snowplow
    version: 0.13.0
import 된 project의 model들도 사용할 수 있게 된다. cross project가 가능.
- dbt compile: model, tests, analyses 에 있는 sql 문들은 executable하게 바꿔준다. 이를 통해 compiled 된 sql을 따로 사용해 볼 수도 있고 analysis의 sql문을 분석해볼 수도 있다.
- 변환전 repo의 sql 파일
with source as ( {#- Normally we would select from the table here, but we are using seeds to load our data in this project #} select * from {{ ref('raw_customer') }} ), renamed as ( select id as customer_id, first_name, last_name from source ) select * from renamed - 변환 후 sql 파일
with source as (
    select * from `tech-dbt-test`.`test_1`.`raw_customer`

),

renamed as (

    select
        id as customer_id,
        first_name,
        last_name

    from source

)

select * from renamed
- 변환전 repo의 sql 파일
- dbt debug : 디버그 정보를 보여주고 dbt configuration 의 Path를 찍어준다.
- dbt run: compiled 된 sql문을 실행하여 target database 에 table, view, incremantal model, ephemeral model ( 실제 table이 만들어지지는 않음 ) 등을 만들게 된다. dbt compile을 진행하지 않아도 알아서 compile을 진행하여 실행한다.
—-full-refresh기능을 통해 incremantal model을 처음부터 다시 쌓을 수 있게 설정도 가능. - dbt test: tests 에 작성된 sql 문들을 모두 테스트 하여 결과물을 보여준다.
번외
Dbt 에서 bigquery에 어떤 방식으로 incremental model 을 load를 하는가?
해당 방식을 찾아본 이유는 Bigquery 에서의 과금문제 때문에 어떤 방식으로 이루어지는지 알아볼 필요가 있었다.
크게 두 가지 방식이 있다.
1. merge ( default )
2. insert_overwrite ( partition table에 사용하면 좋음 )
merge
merge statement 방식은 DW가 merge statement를 지원한다면 default로 적용되는 방식이다. bigquery 는 merege statement를 지원하기 때문에 default로 사용이되고 있음. 실제 코드를 보면 아래와 같다.
merge into {{ destination_table }} DEST
using ({{ model_sql }}) SRC
on SRC.{{ unique_key }} = DEST.{{ unique_key }}
when matched then update ...
when not matched then insert ...
기존에 있을 시 update, 새로운 row는 insert하는 방식이다.
incremental model을 만들 때는 기본적으로 unique_key값을 등록해주고 unique_key를 기준으로 어떤 조건을 걸어서 incremental을 진행할지 정해주면 된다.
{{
    config(
        materialized='incremental',
        unique_key='date_day'
    )
}}

select
    date_trunc('day', event_at) as date_day,
    count(distinct user_id) as daily_active_users

from raw_app_data.events


{% if is_incremental() %}

  -- this filter will only be applied on an incremental run
  where date_day >= (select max(date_day) from {{ this }})

{% endif %}

group by 1
insert_overwrite
임시테이블을 만들어 새로 partiion을 적용하여 overwrite하고 목적 테이블에 merge 하는 방식으로 진행된다.
/*
  Create a temporary table from the model SQL
*/
create temporary table {{ model_name }}__dbt_tmp as (
  {{ model_sql }}
);

/*
  If applicable, determine the partitions to overwrite by
  querying the temp table.
*/

declare dbt_partitions_for_replacement array<date>;
set (dbt_partitions_for_replacement) = (
    select as struct
        array_agg(distinct date(max_tstamp))
    from `my_project`.`my_dataset`.{{ model_name }}__dbt_tmp
);

/*
  Overwrite partitions in the destination table which match
  the partitions in the temporary table
*/
merge into {{ destination_table }} DEST
using {{ model_name }}__dbt_tmp SRC
on FALSE

when not matched by source and {{ partition_column }} in unnest(dbt_partitions_for_replacement)
then delete

when not matched then insert ...
incremental_strategy 는 yml, sql 에서 모두 설정이 가능하다
models:
  +incremental_strategy: "insert_overwrite"
{{
config(
materialized='incremental',
unique_key='date_day',
incremental_strategy='insert_override',
...
)
}}
select ...Reference

6개의 댓글


https://uofsdmedia.com/sysdata/how-stepper-motors-really-work-and-what-most-guides-leave-out/
https://rydellquick.se/wp-content/backups/nema-17-motor-17hs19-2004s-a-practical-guide-for-makers-and-engineers/
https://weolive.com/wp-content/backups/17hs4401-nema-17-why-this-compact-motor-keeps-showing-up-in-winning-builds/
https://putinbay.com/old-site/?p=14