API Gateway
Load Balancer
📌 Load Balancer란?

서버에 가해지는 부하(=로드)를 분산(=밸런싱)해주는 장치 또는 기술의 통칭
🔗 출처: 로드밸런서(Load Balancer)의 개념과 특징
📌 흐름
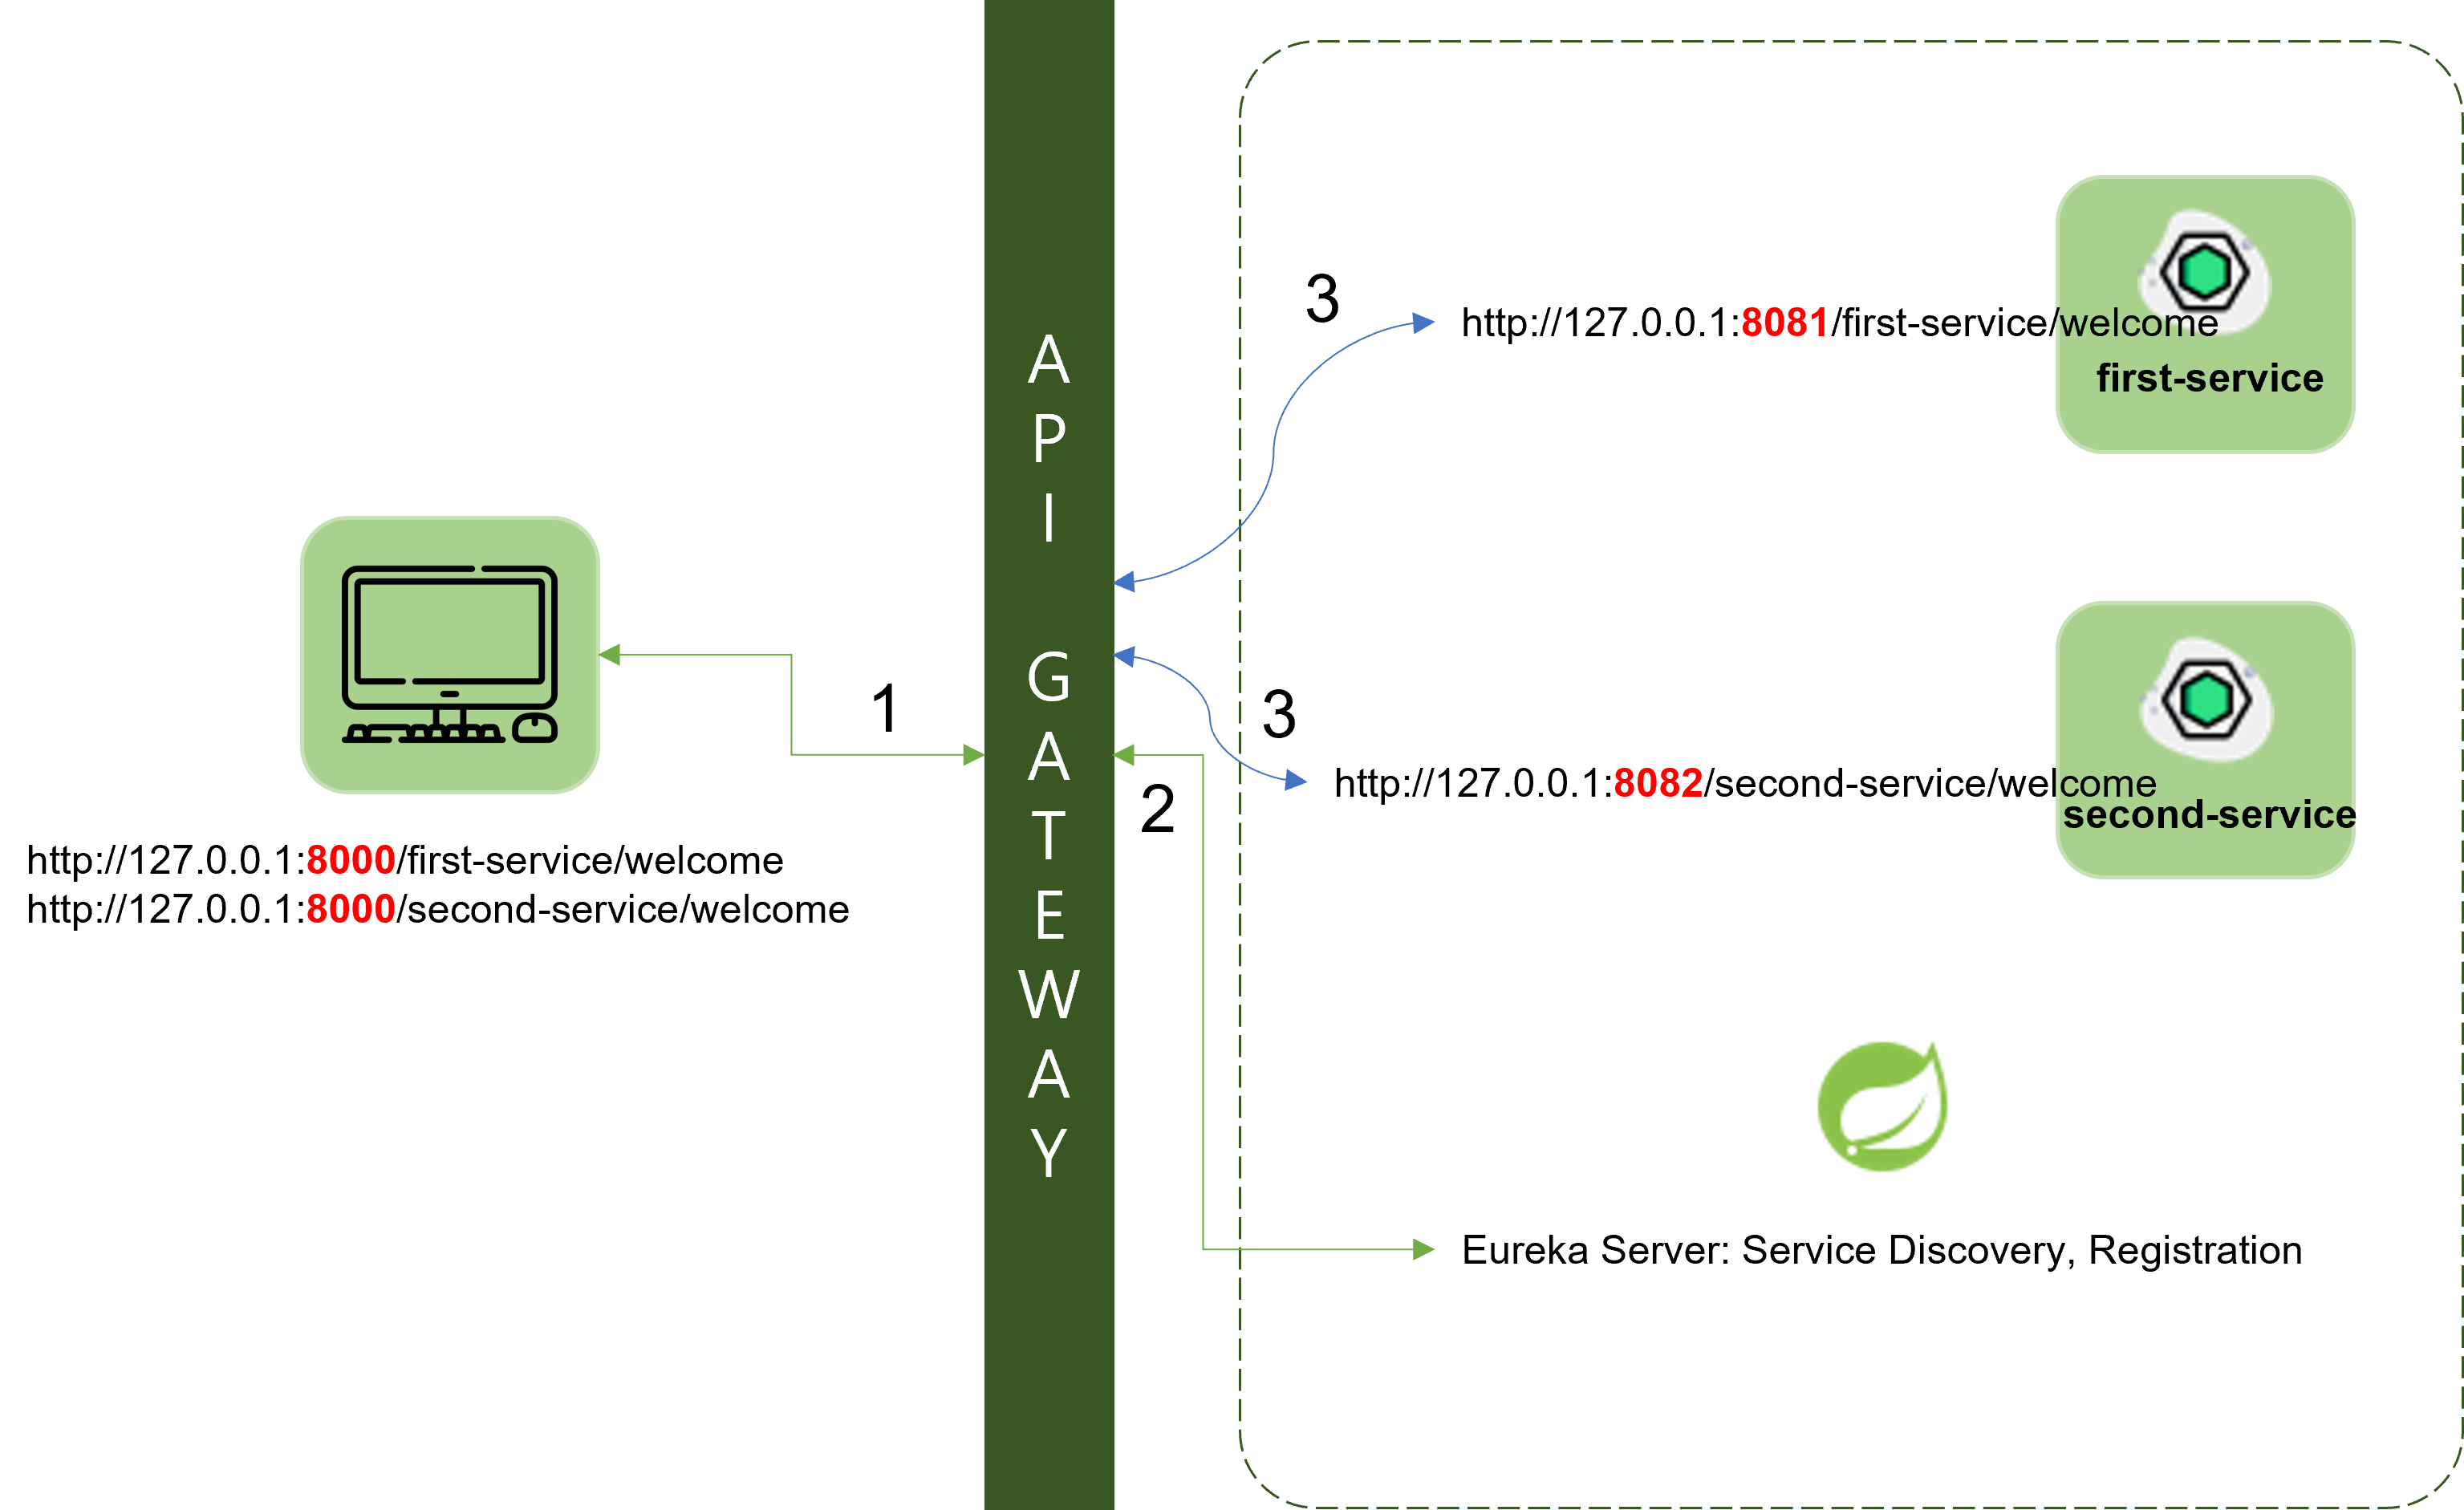
1. Client가 특정 서비스를 요청
2. API Gateway가 Client의 요청을 받아서 Eureka Server에서 해당 서비스의 위치 정보를 요청
3. Eureka Server가 API Gateway에게 서비스의 위치 정보 전달
4. API Gateway가 해당 위치 정보에 존재하는 서비스로 직접 포워딩
📌 소스코드
- pom.xml 추가
API Gateway, 각 서비스들이 모두Eureka-client가 등록되어 있는지 확인 필요
➡ 없으면 추가
<dependency>
  <groupId>org.springframework.cloud</groupId>
  <artifactId>spring-cloud-starter-netflix-eureka-client</artifactId>
</dependency>- application.yml 수정
➡ API Gateway, 각 서비스들 모두 동일하게 변경
eureka:
	client:
    	register-with-eureka: true
        fetch-registry: true
        service-url:
defaultZone: http://localhost:8761/eureka- API Gateway의 application.yml 수정
spring:
cloud:
gateway:
routes:
- id: first-service
uri: lb://FIRST-SERVICE
predicates:
- Path=/first-service/**
filters:
- CustomFilter
- id: second-service
uri: lb://SECOND-SERVICE
predicates:
- Path=/second-service/**
filters:
- name: CustomFilter
- name: LoggingFilter
args:
baseMessage: Hi, there.
preLogger: true
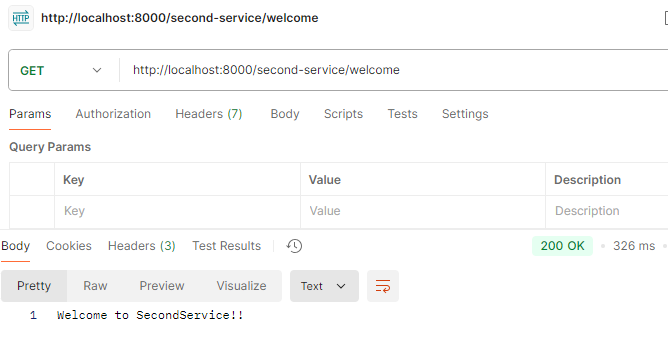
postLogger: true📌 실행결과
실행순서
- Eureka Server 실행
- Gateway, First-service, Second-service 순서로 실행
실행결과
- Eureka Server

- First-service
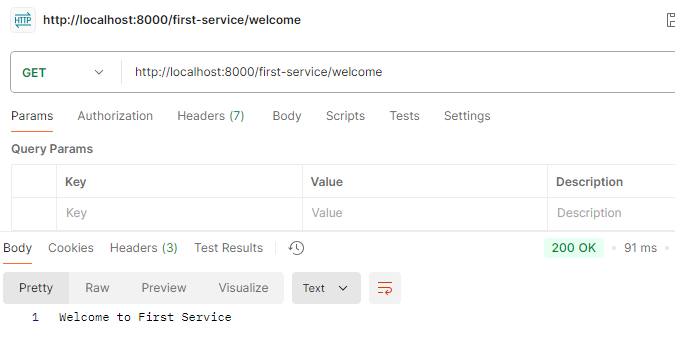
- Second-service
📌 동일 서비스 추가
기존의 First-service와 Second-service를 포트 번호만 다르게 한 채로 실행 시키고자 함. ➡ 총 4개의 서비스 기동
- 방법1 ✅
VM Options ➡ -Dsever.port=[다른포트] - 방법2
$mvn spring-boot:run -Dspring-boot.run.jvmArguments=’-Dserver.port=다른포트’ - 방법3
$mvn clean compile package
$java -jar -Dserver.port=다른포트 ./target/user-service-0.0.1-SNAPSHOT.jar
➡ 방법1을 통해 서비스 추가!
✅ 서비스 추가하기
1. Edit Configurations... 클릭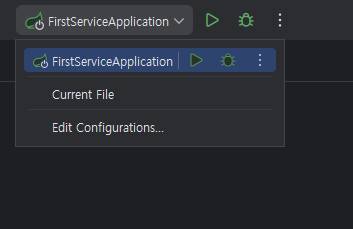
2. VM Options 설정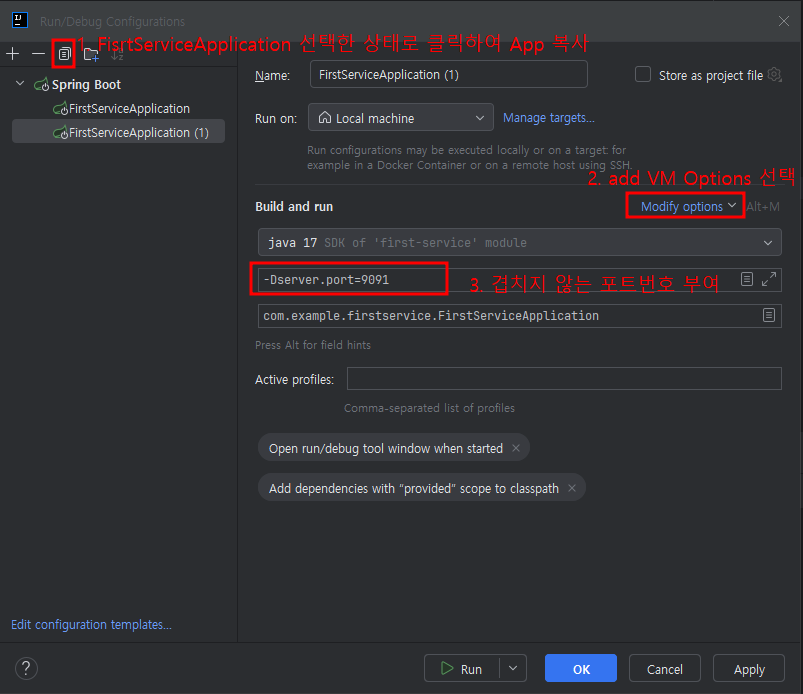
3. 실행결과
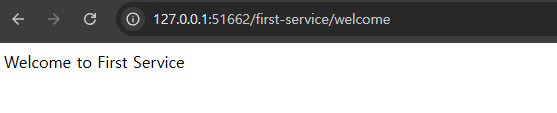
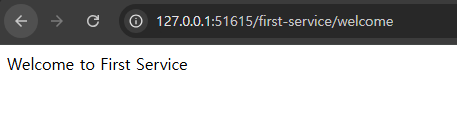
- First-service


- Second-service


- Eureka Server
 ➡ 같은 이름의 서비스가 두 개 등록되어 있어서, 어떤 포트의 서비스가 실행되었는지 알 수 없음
📌 랜덤 포트를 설정하여 서비스 구분하기
- 각 서비스의 application.yml 수정
server:
	port: 0 #random port
VM Options을 사용하여 추가한 서비스는 해당 VM Options 항목
(ex. -Dserver.port=9091)을 지우고 적용
- application.yml 설정 추가
eureka:
  client:
    fetch-registry: true
    register-with-eureka: true
    service-url:
      defaultZone: http://localhost:8761/eureka
  instance:
    instance-id: ${spring.application.name}:${spring.application.instance_id:${random.value}}
💡 설명
spring.application.name: application 이름
spring.application.instance_id: instance 아이디값
random.value: 랜덤 포트 값
📌 실행결과
- Eureka Server

- First-service (1)

- First-servie (2)

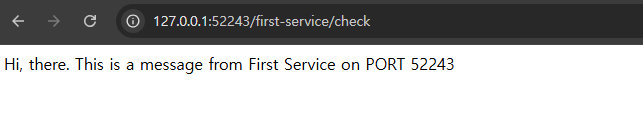
📌 몇 번 포트로 실행되었는지 확인
- FirstServiceController.java 수정
package com.example.firstservice;

import jakarta.servlet.http.HttpServletRequest;
import lombok.extern.slf4j.Slf4j;
import org.springframework.beans.factory.annotation.Autowired;
import org.springframework.core.env.Environment;
import org.springframework.web.bind.annotation.GetMapping;
import org.springframework.web.bind.annotation.RequestHeader;
import org.springframework.web.bind.annotation.RequestMapping;
import org.springframework.web.bind.annotation.RestController;

@RestController
@RequestMapping("/first-service")
@Slf4j
public class FirstServiceController {

    Environment env;

    @Autowired
    public FirstServiceController(Environment env) {
        this.env = env;
    }

    @GetMapping("/welcome")
    public String welcome() {
        return "Welcome to First Service";
    }

    @GetMapping("/message")
    public String message(@RequestHeader("first-request") String header) {
        log.info(header);
        return "Hello World in First Service";
    }

    @GetMapping("/check")
    public String check(HttpServletRequest request) {
        log.info("Server port = {}", request.getServerPort());
        return String.format("Hi, there. This is a message from First Service on PORT %s", env.getProperty("local.server.port"));
    }
}
💡 코드 설명
@AutowiredEnvironment 형식으로 직접 사용하는 방법이 아닌, 생성자를 통해 사용하도록 권장됨
➡FirstServiceController(Environment env)참고- 해당 코드를 통해, 생성자가 Bean에 의해 생성될 때 Environment 객체도 같이 생성됨
@Autowired: Spring Container에 등록된 Bean 중 타입이 일치하는 객체를 어노테이션 한 번으로 주입시켜 주는 어노테이션
(🔗 출처: [Spring]DI와 Autowired 확실히 알고 사용하기)
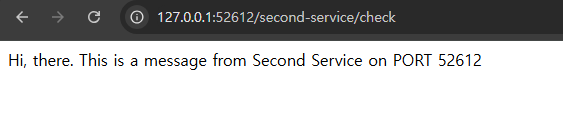
📌 실행결과
- First-service (1)

- First-servie (2)

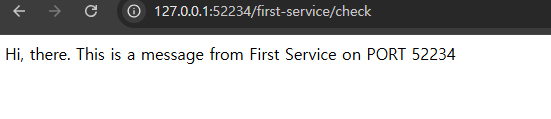
- Second-service (1)

- Second-service (2)

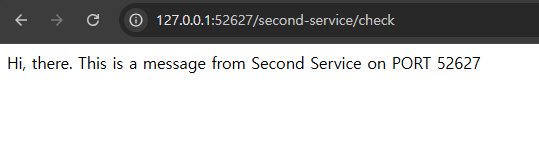 ⭐ 예시 캡쳐에는 없지만, First-service와 동일하게 모든 설정을 Second-service에도 적용하였음.

새싹 개발자