OAuth 2.0
OAuth2.0은 인증을 위한 표준 프로토콜의 한 종류
- 보안된 리소스에 액세스하기 위해 클라이언트에게 권한을 제공하는 프로세스를 단순화하는 프로토콜 중 한 방법
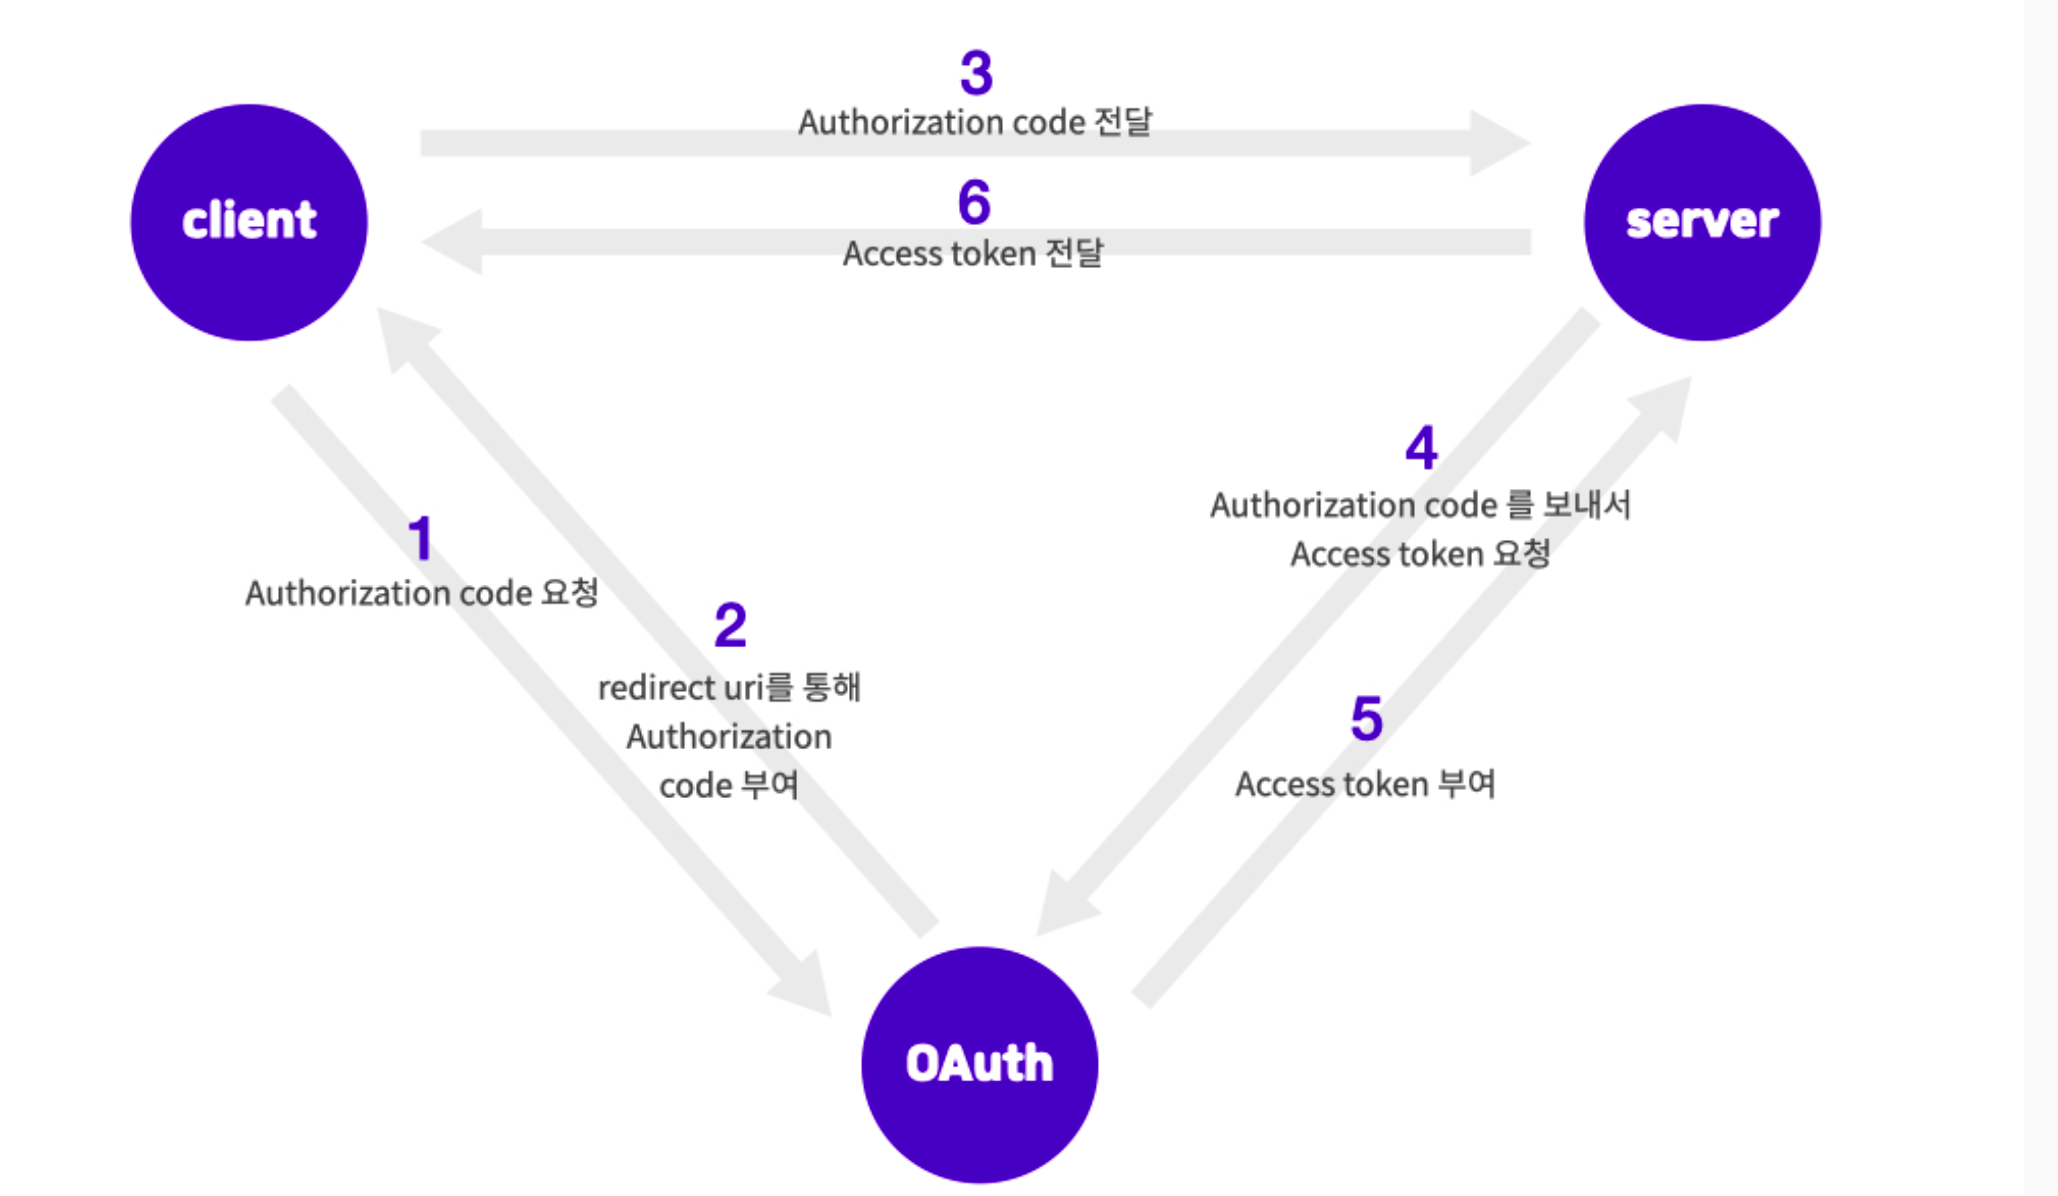
OAuth 2.0 흐름
- github, google 등에서 client 등록을 한다.
-github에 사용자 인증하기
    this.GITHUB_LOGIN_URL = `https://github.com/login/oauth/authorize?client_id=7d13eccd83ee6d5c12b4`
    // 사용자의 github id 요청
  }

  socialLoginHandler() {
    window.location.assign(this.GITHUB_LOGIN_URL)
}-
등록하면 client id, secret을 받아온다. (이 때, client id는 공유되어도 상관없지만 secret은 노출되어선 안되고 server에서만 관리한다. 이후 클라이언트에서 authorization code를 받아오면 서버는 갖고 있던 id, secret과 함께 authorization server에 요청하여 authorization token을 받아올 수 있다.)
-
client에서는 client 아이디를 이용해 사용자 인증(화면에 인증 요구 화면 띄워주기)을 하고 user가 인증 허용을 하면 authorization code와 함께 client url로 리다이렉션된다.
 componentDidMount() {
    const url = new URL(window.location.href)
    const authorizationCode = url.searchParams.get('code')
    if (authorizationCode) {
      // authorization server로부터 클라이언트로 리디렉션된 경우, authorization code가 함께 전달됩니다.
      // ex) http://localhost:3000/?code=5e52fb85d6a1ed46a51f
      this.getAccessToken(authorizationCode)
    }
}- client에서는 authorization code를 resource 서버로 보낸다.
async getAccessToken(authorizationCode) {
    // 받아온 authorization code로 다시 OAuth App에 요청해서 access token을 받을 수 있다.
    // access token은 보안 유지가 필요하기 때문에 클라이언트에서 직접 OAuth App에 요청을 하는 방법은 보안에 취약할 수 있다.
    // authorization code를 서버로 보내주고 서버에서 access token 요청을 하는 것이 적절

    // TODO: 서버의 /callback 엔드포인트로 authorization code를 보내주고 access token을 받아온다.
    // access token을 받아온 후
    //  - 로그인 상태를 true로 변경하고,
    //  - state에 access token을 저장

    const data = await axios.post('http://localhost:8080/callback',
      {
       authorizationCode: authorizationCode
      }
    )
    .then((res) => {

      return res.data
    })
    console.log(data.accessToken)
    this.setState({
      isLogin : true,
      accessToken : data.accessToken
    })
  }
- authorization code를 받은 서버는 인증 서버에 client id, secret, code를 보내 authorization token을 받아온다.
참고링크
module.exports = async (req, res) => {
//이제 authorization code를 이용해 access token을 발급받기 위한 post 요청을 보낸다.

  const data = await axios.post('https://github.com/login/oauth/access_token', {
    client_id: clientID,
    client_secret: clientSecret,
    code: req.body.authorizationCode
  })
  .then(res => res.data)
  .catch(err => console.log(err))

  console.log(data)
  res.status(200).send({ accessToken: data.access_token })
}
- 받아온 token을 다시 client(app)으로 보낸다.
- token을 받은 client는 token을 이용해 리소스에 대한 API 요청을 할 수 있다. 즉, 유저 정보 등을 얻어올 수 있다.
참고링크
async getGitHubUserInfo() {

    const userInfo = await axios.get('https://api.github.com/user', {
      headers: { authorization: `token ${this.props.accessToken}`, withCredential: true}
  })

    this.setState({
      userInfo: userInfo.data
    })
  }
용어
- resource owner: 액세스중인 리소스의 유저(김코딩)
- client: resource owner를 대신하여 보호된 리소스에 액세스하는 응용프로그램(app)
- resource server: client의 요청을 수락하고 응답할 수 있는 서버 (페이스북)
- authorization server: resource server가 엑세스 토큰을 발급받는 서버
- authorization grant: 클라이언트가 액세스 토큰을 얻을 때 사용하는 자격 증명
- authorization code: access token을 발급받기 전에 필요한 code
- access token: 보호된 리소스에 액세스하는데 사용되는 credentials
- scope: 주어진 액세스 토큰을 사용하여 액세스할 수 있는 리소스의 범위
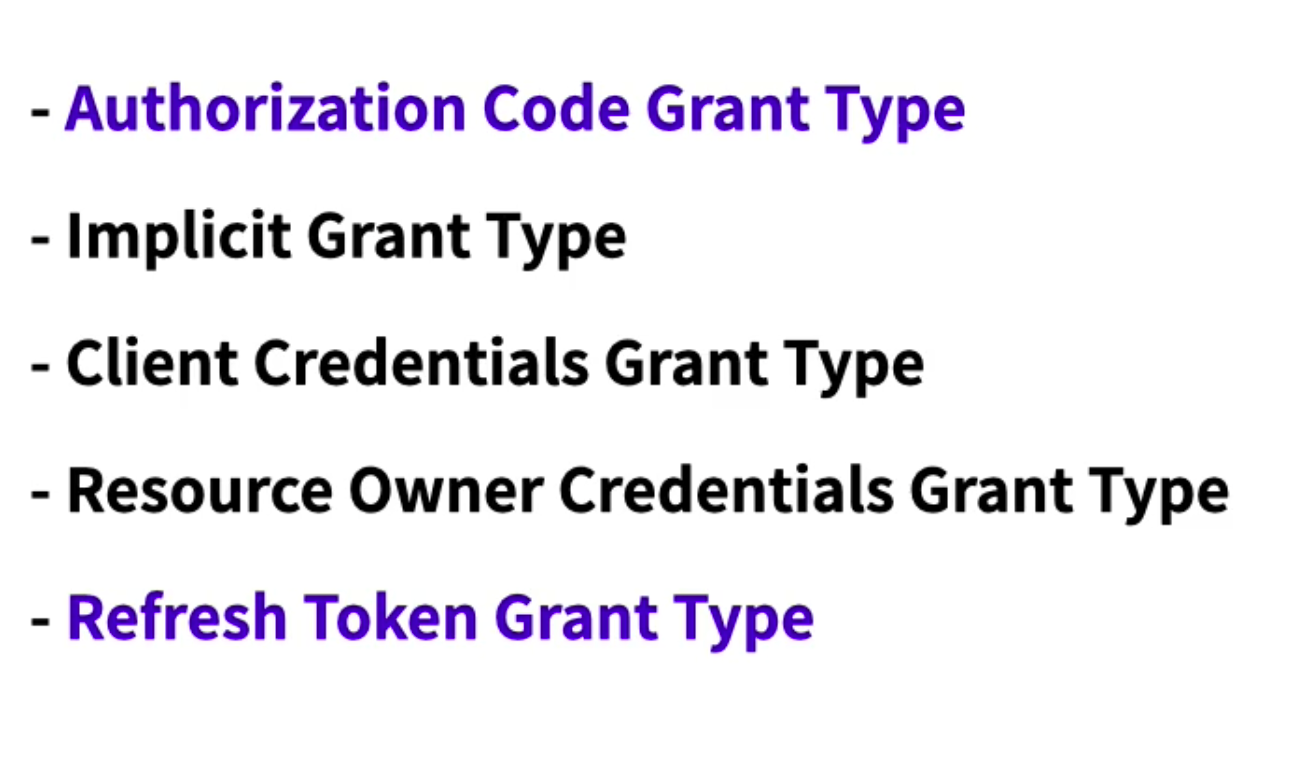
Grant type 종류
- Grant type: 클라이언트가 액세스 토큰을 얻는 방법

- 이 중
authorization code grant type과refresh token grant type만 알고 가자.
authorization code grant type
- 액세스 토큰을 받아오기 위해서 먼저 authorization code를 받아 액세스 토큰과 교환하는 방법
- authorization code 절차를 거치는 이유는 보안성 강화 목적
- 클라이언트에서는 authorization code만 받아오고 server에서 access token을 받아온다.
refresh token grant type
- 일정 기간 유효 시간이 지나서 만료된 액세스 토큰을 편리하게 다시 받아오기 위해 사용하는 방법
- 클라이언트는 refresh token을 통해서 authorization server에 새로운 액세스 토큰을 요청한다.
- 새로운 액세스 토큰을 반환받으면 이를 이용해 resource에 액세스 가능

