스프린트 mini node server 구현 과정 블로깅
- 클라이언트(브라우저)에는 서버에 자원을 요청하기 위해 fetch와 같이 HTTP 요청을 보내는 도구가 기본적으로 내장되어 있다.
- node.js 에서는 HTTP 요청을 보내거나, 응답 받을 수 있는 도구를 제공한다.
- HTTP 요청을 처리하고 응답을 보내주는 프로그램을 웹 서버(Web Server)라고 부른다.
HTTP 트랜잭션 해부 를 참고
1. 서버 생성
const http = require('http');
const PORT = '5000';
const ip = 'localhost';

const server = http.createServer((request, response) => {

})
- 모든 node 웹 서버 애플리케이션은
createServer를 이용하여 웹 서버 객체를 만들어야 한다. - 이 서버로 오는 HTTP 요청마다
createServer에 전달된 함수가 한 번씩 호출된다. - HTTP 요청이 서버에 오면 node가 트랜잭션을 다루려고
request와response객체를 전달하며 요청 핸들러 함수를 호출한다.
server.listen(PORT, ip, () => {
  console.log(`http server listen on ${ip}:${PORT}`);
});
//or
server.listen(PORT);- 요청을 실제로 처리하려면
listen메서드가server객체에서 호출되어야 한다. 대부분은 서버가 사용하고자 하는 포트 번호를listen에 전달하기만 하면 된다.
routing
routing?
- 경로를 찾아가게 하는 과정
routing protocol
- 찾아주는 규칙 사용하는 프로토콜
const defaultCorsHeader = {
  'Access-Control-Allow-Origin': '*',
  'Access-Control-Allow-Methods': 'GET, POST, PUT, DELETE, OPTIONS',
  'Access-Control-Allow-Headers': 'Content-Type, Accept',
  'Access-Control-Max-Age': 10
};
const server = http.createServer((request, response) => {
  if (request.method === 'OPTIONS') {
    // 1.OPTIONS 메소드가 오는 경우
    response.writeHead(200, defaultCorsHeader);
    response.end('hello mini-server sprints');
  }
  if (request.method === 'POST' && request.url === '/upper') {
 	// 2.POST 메소드와 end point가 /upper일 때
    let body = [];
    request.on('data', (chunk) => { //각 data 이벤트에서 발생시킨 청크는 Buffer다.
      body.push(chunk);//청크를 배열에 모아둔다.
    }).on('end', () => {
      body = Buffer.concat(body).toString();// end 이벤트에서 이어 붙인 다음 문자열로 만든다.
      response.writeHead(200, defaultCorsHeader);
      response.end(body.toUpperCase()); //response객체를 보낼 때 해당 데이터를 넣어 보낸다.
    });
  } else if (request.method === 'POST' && request.url === '/lower') {
   	// 3.POST 메소드와 end point가 /lower 때
     let body = [];
    request.on('data', (chunk) => {
      body.push(chunk);
    }).on('end', () => {
      body = Buffer.concat(body).toString();
      response.writeHead(200, defaultCorsHeader); //CORS
      response.end(body.toLowerCase());
    });
  } else {
    // 4.에러처리
    response.statusCode = 404;
    response.end();
  }
})- OPTIONS 메소드가 오는 경우
OPTIONS메소드로 요청이 오는 경우는 해당 요청이preflight request인 경우다. 이 요청을 받은 경우 서버는 요청 수락 여부를 결정한 뒤 접근 가능한 조건을 알려준다. 그러면 클라이언트는 서버에 요청을 할지 말지 결정한다.
2.3. POST 메소드와 end point가 /upper or /lower 일 때
- 클라이언트에서
POST+/upper로 요청을 한 경우다.request는ReadableStream인터페이스를 구현하고 있다. 스트림의'data'와'end'이벤트에 이벤트 리스너를 등록해서 데이터를 받을 수 있다.
- 에러처리
- 요청이 올바르게 되지 않은 경우
response객체에statusCode를 담고 응답을 보낸다.
CORS 적용해보기
-
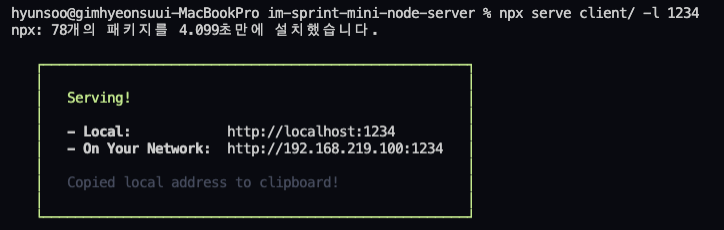
현재 작업하는 환경은 클라이언트와 서버 모두 로컬에서 이루어지고 있다. CORS를 적용해보기 위해 serve 유틸리티를 이용해 가상의 클라이언트를 만들고 CORS를 적용해본다.
-
$ npx serve client/ -l 1234로 가상의 클라이언트를 생성한다.
-
그 다음, 서버의
Access-Control-Allow-Origin을 클라이언트의 방금 만든 클라이언트로 지정한다. (해당 클라이언트만 서버에 접근 가능 여부를 판단하기 위함)
const defaultCorsHeader = {
  'Access-Control-Allow-Origin': 'http://localhost:1234',
  'Access-Control-Allow-Methods': 'GET, POST, PUT, DELETE, OPTIONS',
  'Access-Control-Allow-Headers': 'Content-Type, Accept',
  'Access-Control-Max-Age': 10
};-
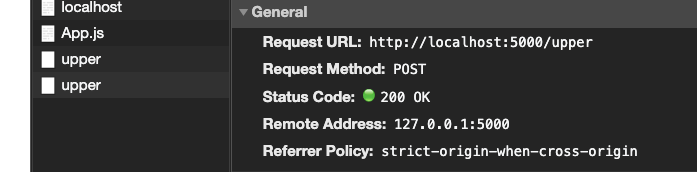
http://localhost:1234에 접속한 뒤,POST요청을 한 경우 된다면 CORS 적용이 잘 된 것.
-
위 사진은
preflight request이후POST요청까지 정상적으로 이루어진 경우다. -
만약 기존 클라이언트인
http://localhost:5000에 접속한 뒤,POST요청을 한 경우 에러가 발생해야 정상


-
예상한대로 에러가 발생한다. 에러의 내용을 보면 실제로 CORS policy 정책에 의해 막혔다고 나온다.
- 다음은
preflight request말고single request로 요청하도록 변경하는 작업을 해보겠다.
single request가 되기 위해선 여러 조건이 있는데 조건 중 하나인'Content-Type' : 'text/plain'으로 변경해 보겠다.
 post(path, body) {
    fetch(`http://localhost:5000/${path}`, {
      method: 'POST',
      body: JSON.stringify(body),
      headers: {
        'Content-Type': 'text/plain'
      }
    })
      .then(res => res.json())
      .then(res => {
        this.render(res);
      });
}- 위와 같이 변경하고 서버에 요청을 보낸 경우
OPTIONS요청은 건너뛰고POST요청이 바로 전달된다.
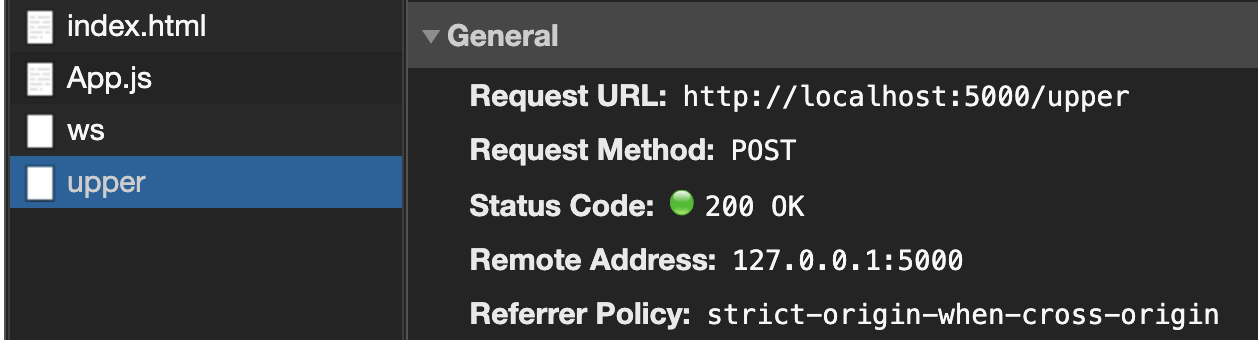
- 위 사진과 같이
/upper로POST요청이 하나만 간 것을 볼 수 있다.
궁금했던 점
preflight request를 보내서 서버에서 요청 가능 여부를 확인 한 뒤, 요청이 가능하다면POST요청을 하는데 이 때 응답 헤더에 CORS 관련 헤더를 붙여야 하는가?
예시 코드
const defaultCorsHeader = {
  'Access-Control-Allow-Origin': '*',
  'Access-Control-Allow-Methods': 'GET, POST, PUT, DELETE, OPTIONS',
  'Access-Control-Allow-Headers': 'Content-Type, Accept',
  'Access-Control-Max-Age': 10
};
if (request.method === 'POST' && request.url === '/upper') {
    //대문자로 응답을 돌려줘야 한다
    let body = [];
    request.on('data', (chunk) => {
      body.push(chunk);
    }).on('end', () => {
      body = Buffer.concat(body).toString();
      response.writeHead(200, defaultCorsHeader); // POST 요청에 대한 응답 헤더에 CORS 관련 헤더를 붙여주고 있다.
      response.end(body.toUpperCase());
    });
해결
CORS 관련 MDN에 보면 preflight request 를 한 경우 요청, 응답 코드를 볼 수 있다.
<preflight request>

OPTIONS /resources/post-here/ HTTP/1.1
Host: bar.other
User-Agent: Mozilla/5.0 (Macintosh; Intel Mac OS X 10.14; rv:71.0) Gecko/20100101 Firefox/71.0
Accept: text/html,application/xhtml+xml,application/xml;q=0.9,*/*;q=0.8
Accept-Language: en-us,en;q=0.5
Accept-Encoding: gzip,deflate
Connection: keep-alive
Origin: http://foo.example
Access-Control-Request-Method: POST
Access-Control-Request-Headers: X-PINGOTHER, Content-Type
Access-Control-Request-Method 헤더는 preflight request의 일부로, 실제 요청을 전송할 때 POST 메서드로 전송된다는 것을 알려줍니다. Access-Control-Request-Headers 헤더는 실제 요청을 전송 할 때 X-PINGOTHER 와 Content-Type 사용자 정의 헤더와 함께 전송된다는 것을 서버에 알려줍니다.
<preflight request 응답>

HTTP/1.1 204 No Content
Date: Mon, 01 Dec 2008 01:15:39 GMT
Server: Apache/2
Access-Control-Allow-Origin: https://foo.example
Access-Control-Allow-Methods: POST, GET, OPTIONS
Access-Control-Allow-Headers: X-PINGOTHER, Content-Type
Access-Control-Max-Age: 86400
서버는 Access-Control-Allow-Methods 로 응답하고 POST 와 GET 이 리소스를 쿼리하는데 유용한 메서드라고 가르쳐줍니다. 이 헤더는 Allow 응답 헤더와 유사하지만, 접근 제어 컨텍스트 내에서 엄격하게 사용됩니다.
또한 Access-Control-Allow-Headers 의 값을 "X-PINGOTHER, Content-Type" 으로 전송하여 실제 요청에 헤더를 사용할 수 있음을 확인합니다. Access-Control-Allow-Methods와 마찬가지로 Access-Control-Allow-Headers 는 쉼표로 구분된 허용 가능한 헤더 목록입니다.
Vary: Accept-Encoding, Origin
Keep-Alive: timeout=2, max=100
Connection: Keep-Alive<preflight request 완료 후 실제 요청>
POST /resources/post-here/ HTTP/1.1
Host: bar.other
User-Agent: Mozilla/5.0 (Macintosh; Intel Mac OS X 10.14; rv:71.0) Gecko/20100101 Firefox/71.0
Accept: text/html,application/xhtml+xml,application/xml;q=0.9,*/*;q=0.8
Accept-Language: en-us,en;q=0.5
Accept-Encoding: gzip,deflate
Connection: keep-alive
X-PINGOTHER: pingpong
Content-Type: text/xml; charset=UTF-8
Referer: https://foo.example/examples/preflightInvocation.html
Content-Length: 55
Origin: https://foo.example
Pragma: no-cache
Cache-Control: no-cache
<person><name>Arun</name></person>
<preflight request 완료 후 실제 요청에 대한 응답>
HTTP/1.1 200 OK
Date: Mon, 01 Dec 2008 01:15:40 GMT
Server: Apache/2Access-Control-Allow-Origin: https://foo.example
preflight request이후 POST 요청에 대한 응답 헤더에도 Origin이 추가되는 것을 볼 수 있다.
이처럼 다른 헤더는 포함시키지 않더라도Access-Control-Allow-Origin에 관한 코드는 응답 헤더에 넣어줘서 어느 Origin이 허용되는지 명시해줘야 한다.
Vary: Accept-Encoding, Origin
Content-Encoding: gzip
Content-Length: 235
Keep-Alive: timeout=2, max=99
Connection: Keep-Alive
Content-Type: text/plain

[Some GZIP'd payload]
정리하자면, preflight request를 통해 요청 가능 여부를 확인하더라도 실제 요청 응답 헤더엔 허용 Origin을 적어줘야 한다.

잘 봤습니다. 본문 포스트에서 npx serve client/ -1234가 아니라 npx serve client/ -l 1234 로 수정 부탁드릴게요
오타 발견했습니다