앞서 firebase storage를 이용한 이미지 업로드 처리 정리글을 올리면서 무료 사용가능 storage 용량을 toyproject 개발 중에 초과할 것으로 예상되었다.
대안으로 검색해보다가 google cloud storage를 알게되었고 google cloud 또한 처음 사용해 보지만 25년 4월까지 무료크레딧으로 이용이 가능하여 이번 프로젝트에 적합하다고 생각하였다.
그리하여 앞서 정리했던 기능을 그대로 google cloud로 변경해보았고 google cloud 경우 검색 시 정리가 잘된글이 많아 참고하기 좋았다.
버전정보
springboot : 3.3.3
java : 17
google cloud : 1.2.5
0. google cloud에서 새로운 프로젝트를 생성 후 설정
google cloud storage : https://console.cloud.google.com/
goole cloud에서 새로운 프로젝트 설정 후 cloud storage 새로운 버킷을 생성한다.
아래 url에 정리가 잘되어있어 참고하여 설정하였다.
- 설정 참고 url : https://padosol.tistory.com/66
홈페이지에서 설정이 끝나면 프로젝트에서 google cloud 설정을 해보자
1. Springboot gradle 설정
google cloud 관련 의존성을 추가한다.
implementation group: 'org.springframework.cloud', name: 'spring-cloud-gcp-starter', version: '1.2.5.RELEASE'
implementation group: 'org.springframework.cloud', name: 'spring-cloud-gcp-storage', version: '1.2.5.RELEASE'
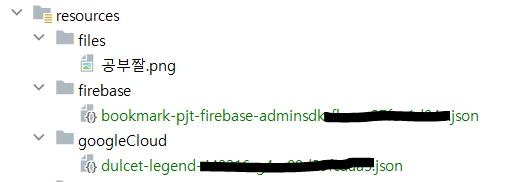
2. google cloud 키파일 프로젝트에 등록
프로젝트 설정 시 받았던 키파일을 내부 resouces 아래에 포함하였다.
(git사용 시 키파일이 올라가지않도록 필수로 꼭 gitignore파일에 등록해주기)
3. google cloud config 생성
프로젝트 실행 시 자동으로 google cloud 정보를 받아올수 있도록 config로 설정해준다.
GoogleCloudStorageConfig.java
@Bean
    public Storage storage() throws IOException {

        ClassPathResource resource = new ClassPathResource("키파일 내부경로");
        GoogleCredentials credentials = GoogleCredentials.fromStream(resource.getInputStream());
        String projectId = "키파일 내부 프로젝트id";
        return StorageOptions.newBuilder()
                .setProjectId(projectId)
                .setCredentials(credentials)
                .build()
                .getService();
    }
여기까지 Springboot에 google cloud 설정을 마쳤다.
그럼 이제 실제 내부로직을 추가해 이미지 업로드, 이미지 가져오는 기능을 추가해보자.
1. 이미지 업로드 기능 구현
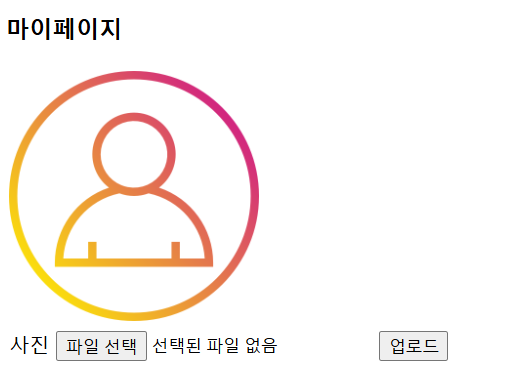
1. 화면 구성 (firebase storage와 동일)
이미지 업로드 화면 구성과 스크립트를 작성한다.
- ajax 결과에서 이미지가 정상적으로 업로드 되었는지 노출한다.
Mypage.html
 <table>
        <tr>
            <td colspan="2">
            	// 프로필 이미지 노출
                <img id ="myImage" src="업로드이후 url" style="width: 200px;height: 200px;">
            </td>
        </tr>
        <tr>
            <td colspan="2">
                <form id="uploadForm">
                    <label for="file">사진</label>
                    <input type="file" id="file" name="file" accept="image/*" required />
                    <button type="submit">업로드</button>
                </form>
            </td>
        </tr>
</table>

// 이미지 업로드 해당 스크립트
$('#uploadForm').on('submit', function(event) {
        var formData = new FormData();
        formData.append('file', $('#file')[0].files[0]);

        $.ajax({
            url: '/uploadImg',
            type: 'POST',
            async: false,
            data: formData,
            contentType: false,
            processData: false,
            success: function(response) {
                alert(response);
                location.href = "/newMyPage";
            },
            error: function(xhr, status, error) {
                alert(response);
            }
        });
    });
2. 내부 로직기능 - 이미지 업로드
- 사용목적이 프로필 이미지이므로 아이디 당 1개 이상일 필요가 없어서 파일명을 로그인아이디로 구성하고 업로드하는 로직으로 구현하였다. (아이디가 고유한 값이기 때문에)
- 이후 코드 주석은 이전 firebase storage 이용 코드이며 비교로 남겨두었다.
ImageController.java
- 해당 리턴으로 ajax alert창에 노출된다.
- 새로운 매서드 saveImgToGCS를 추가하였다.
@PostMapping("/uploadImg")
    public ResponseEntity<String> fileUpload(@RequestParam("file") MultipartFile multipartFile, HttpServletRequest request) throws IOException {
        HttpSession session = request.getSession();
        SessionVO sessionInfo = (SessionVO) session.getAttribute(SessionConst.SESSION_INFO);

        try{
            if (!multipartFile.isEmpty()) {
                //imageService.saveImg(multipartFile, sessionInfo.getId()); firebase storage
                imageService.saveImgToGCS(multipartFile, sessionInfo.getId());
            }
        }catch (Exception e){
            return ResponseEntity.status(500).body("파일 업로드 실패");
        }
        return ResponseEntity.ok("파일 업로드 성공");
    }
ImageSeviceImpl.java
- 위와 같은 설명으로 blobInfo 업로드 시 fileName에 loginId가 들어가게 된다.
- 📍firebase storage에서는 동일 이미지명 일 시 자동업데이트 처리가 되는것으로 보였지만 goolge cloud에서는 오류가 나는것 같아 기존 프로필이 존재할 시 먼저 삭제처리를 진행하는 로직을 추가하였다.
- 📍url에 특수문자(@)가 살짝 꼬여 힘들어 제외처리하고 저장하도록 수정하였다.
(이미지명에는 %40으로 변환되고, 생성된 url에서는 %2540으로 변환되어 불일치 문제)
@Transactional
    @Override
    public int saveImgToGCS(MultipartFile multipartFile, String loginId) throws Exception {

        String fileName = loginId.replace("@", "");
        String ext = multipartFile.getContentType(); // 파일의 형식 ex) JPG
        try{

            // 프로필이 존재할 경우 기존 프로필 삭제처리
            if(storage.get("toyproject", fileName) != null){
                storage.get("toyproject", fileName).delete();
            }

            // 이미지 신규 업로드
            BlobInfo blobInfo = storage.create(
                    BlobInfo.newBuilder("toyproject", fileName)
                            .setContentType(ext)
                            .build(),
                    multipartFile.getBytes()
            );

            if(blobInfo == null) throw new Exception();
        }catch (Exception e){
            e.getMessage();
            throw new Exception();
        }

        return 1;
    }
2. 내부 로직기능 - 이미지 가져오기
- 프로필이 저장되어 있지 않은 경우에는 Storage에 저장해놓은 default.png를 불러오도록 하였다.
- 마이페이지 접근 시 해당 메서드를 함께 호출하여 해당 url정보를 가져가도록 구성하고 html에서 img src로 노출하면 해당 이미지가 보이게 된다.
- 📍 cloud storage에서 제공하는 2가지 url중 인증된 url를 사용해야 업로드한 이미지로 정상적으로 보였다.
- 📍 공개된 url을 사용하니 업로드 해도 바뀐이미지로 안보이는 오류가 발생하였다.
ImageSeviceImpl.java
 @Override
    public String getImgUrlFromGCS(String loginId){
        String encodedURL = "";
        String fileName = loginId.replace("@", "");
        try{
            if(storage.get("toyproject", fileName) == null){
                // 이미지 없는 경우 디폴트 이미지로 노출
                return "https://storage.cloud.google.com/toyproject/default.png";
            }

            encodedURL = "https://storage.cloud.google.com/toyproject/"+fileName;

        }catch (Exception e){
            e.getMessage();
        }
        return encodedURL;
    }
마치며
이렇게 구성하면 앞서 글과 동일한 로직으로 firebase storage에서 google storage로 변경하여 사용할 수 있다. 회사에서는 AWS S3를 이용하여 이미지처리를 하고 있어서 다른 방법을 사용해 본적이 없었는데 이번 기회에 설정을 해보았다.