들어가기
앞 POST에서 사진의 주소를 뽑아보고, preview를 해 봤음.
이제는 실제로 cloudFlare에 Upload를 해 본다.
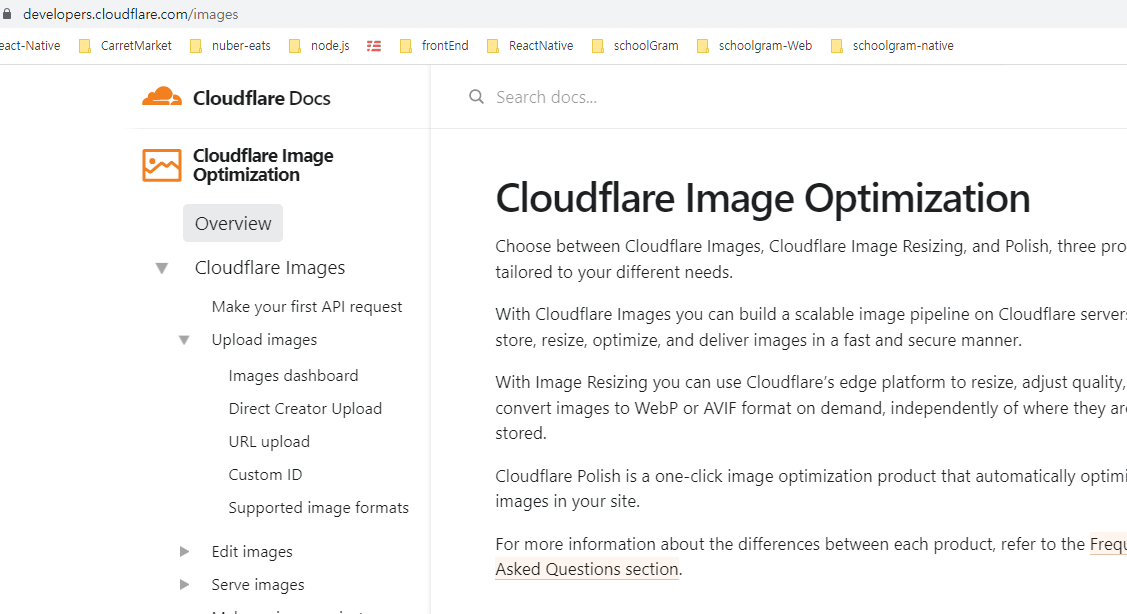
cloudFlare imageUpload중 Direct Creator Upload로 upload할 예정,
CF이미지 업로드 과정은.
1. client에서 업로드 할 파일이 있다고 말하면,
2. server에서 CF에 업로드 할 파일이 있다고 말함.
3. 그러면 CF에서 비어있는 URL을 보내줌(empty file URL) server에
4. 그러면, client에서 URL을 받아서 그 URL에 image upload함.
https://developers.cloudflare.com/images/cloudflare-images/upload-images/direct-creator-upload/
CF셋업 및 API키 얻기
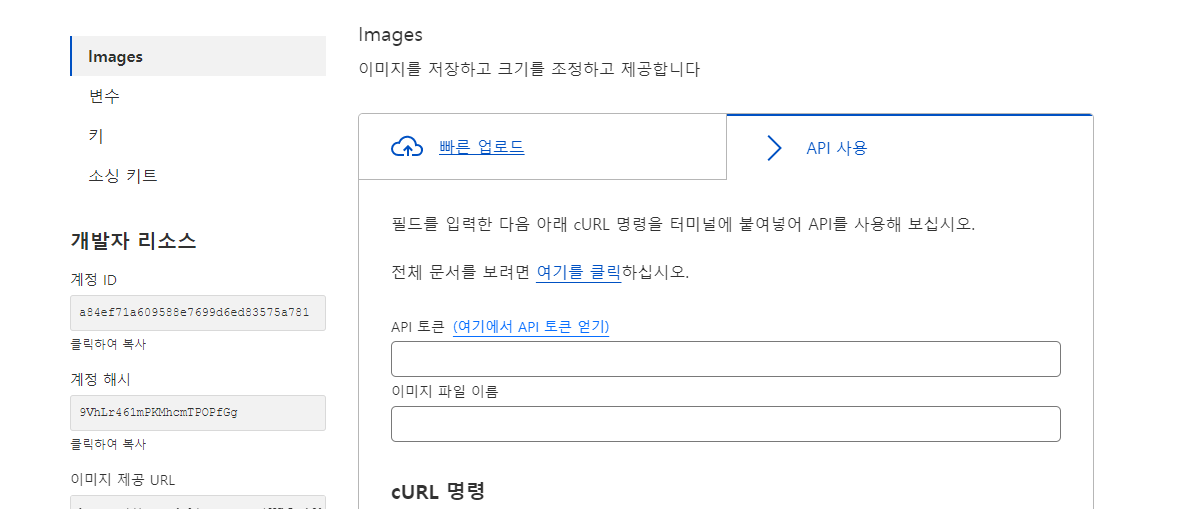
CF dashboard에서 API사용, API토큰(토큰얻기 클릭)
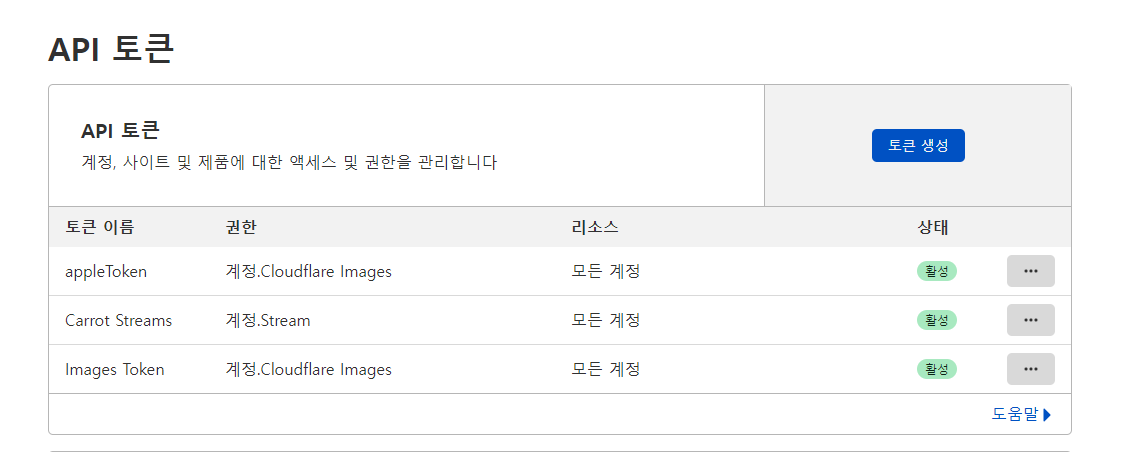
토큰생성 클릭
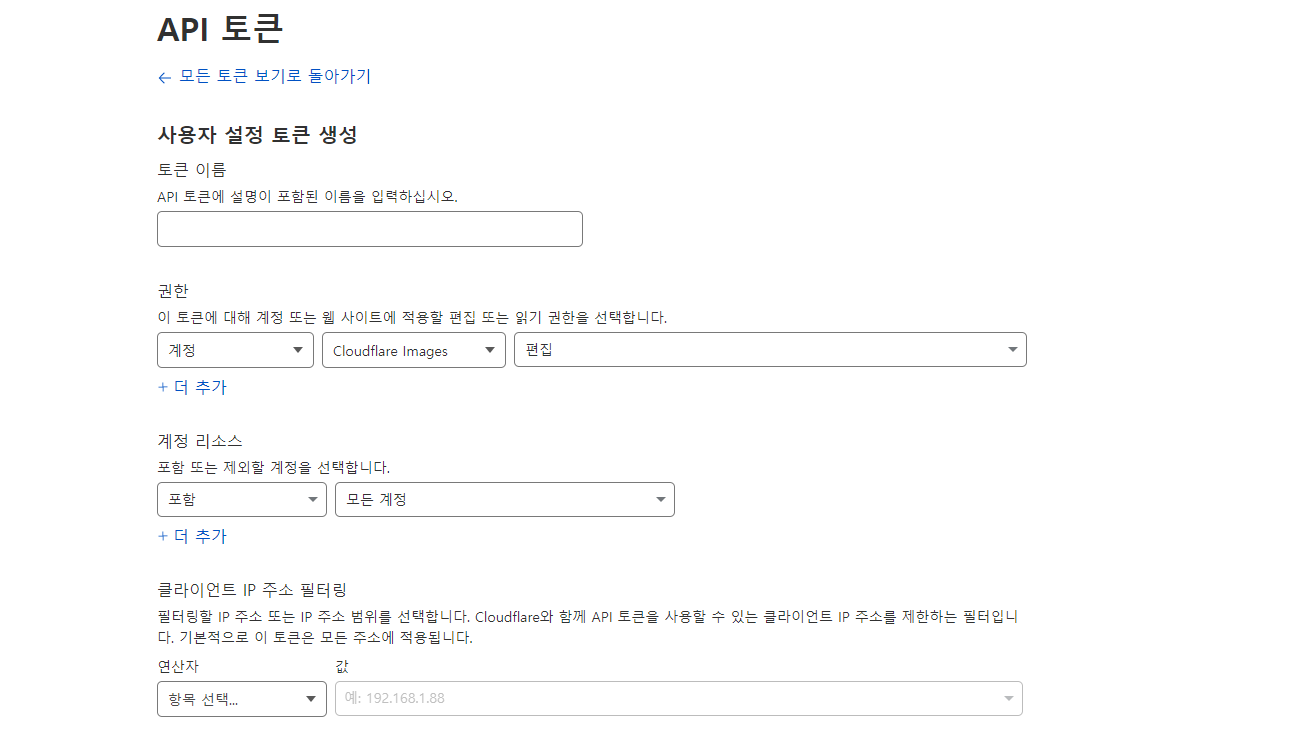
설정을 저렇게 하고, Token을 만들면 API Key를 얻음.
그리고,
API key와 대시보드의 Account Id(계정 ID)를 .env에 넣는다.
CF_TOKEN, CF_ID 로 ~
Next~
1.pages/api/files.ts
CF에 upload할 파일이 있으니, URL을 하나 보내주세요 라고 요청하는 API
import withHandler, { ResponseType } from '@libs/server/withHandler'
import { NextApiRequest, NextApiResponse } from 'next'

import { withApiSession } from '@libs/server/withSession'
import client from '@libs/server/client'

async function handler(
  req: NextApiRequest,
  res: NextApiResponse<ResponseType>
) {
  const response = await (
    await fetch(
      `https://api.cloudflare.com/client/v4/accounts/${process.env.CF_ID}/images/v2/direct_upload`,
      {
        method: 'POST',
        headers: {
          'Content-Type': 'application/json',
          Authorization: `Bearer ${process.env.CF_TOKEN}`,
        },
      }
    )
  ).json()
  ///await(await fetch~) 중복으로 한 이유는 먼저, fetch를 하고, fetch한
  ///data를 .json() 하기 위해서임. .json()을 해야 받은 data를 우리가 읽을 수 있게 됨.

  res.json({
    ok: true,
    ...response.result,
  })
}

export default withApiSession(
  withHandler({
    methods: ['GET'],
    handler,
  })
)
https://developers.cloudflare.com/images/cloudflare-images/upload-images/direct-creator-upload/
위 공식 문서로 들어가면 fetch시킬 주소가 나와있음. 버젼업 되면서, form이 생김.
<ACCOUNT_ID> 는 .env에 있는 나의 CF_ID
curl --request POST \
--url https://api.cloudflare.com/client/v4/accounts/<ACCOUNT_ID>/images/v2/direct_upload \
--header 'Authorization: Bearer <API_TOKEN>' \
--form 'requireSignedURLs=true' \
--form 'metadata={"key":"value"}'
이렇게 요청을 보내면(upload할 사진이 있으니 URL하나 주이소~)
{
"result": {
"id": "2cdc28f0-017a-49c4-9ed7-87056c83901",
"uploadURL": "https://upload.imagedelivery.net/2cdc28f0-017a-49c4-9ed7-87056c83901"
},
"result_info": null,
"success": true,
"errors": [],
"messages": []
}
이런 형태의 response를 받게됨.
2. pages/profile/edit.tsx
Upload 관련된 부분만 빼옴.
위에서 CF에 사진 Upload할 URL하나 주이소 요청을 하면,
response로 result:{id, uploadURL}을 받음.
여기서 필요한거는 uploadURL임. 여기로 image를 업로드할예쩡!
  const onValid = async ({ email, phone, name, avatar }: EditProfileForm) => {
    if (loading) return
    if (email === '' && phone === '' && name === '') {
      return setError('formErrors', {
        message: 'Email Or Phone number are required.',
      })
    }
    if (avatar && avatar.length > 0 && user) {
      const { uploadURL } = await (await fetch(`/api/files`)).json()
      ///api/files API호출해서 uploadURL를 받아옴.

      const form = new FormData()
      form.append('file', avatar[0], user?.id + '') ///form에 밑의 'file'에
                                                    ///넣은 avatar[0]파일을 가져옴
                                            ///user?.id 는 이 파일의 이름설정
      const {
        result: { id },
      } = await (
        await fetch(uploadURL, {
          method: 'POST',
          body: form,  ///위에서 만든 form(avatar[0] 이 담겨져 있음)을 body에 담아
                       ///uploadURL에 POST로 날려줌. 그리고 결과를 받아옴.
        })
      ).json()

      ///fetch(uploadURL)해서 위에서 받은 uploadURL에 form을 만들어서
      ///그 form에 avatar[0]을 넣어서 'POST' ,  body에는 form을 담아서
      ///uploadURL에 보내주고, 결과 result의 id를 받아옴.
      ///결과 id 를 통해 나중에 사진을 호출함.

      editProfile({
        email, //: email !== user?.email ? email : '',
        phone,
        name, //: phone !== user?.phone ? phone : '',
        avatarId: id, ///그리고 결과로 받아온 id를 avatarId에 담아서
                      ///useMutation인 editProfile에 넣어서 날려줌.
      })
    } else {
      editProfile({
        email, //: email !== user?.email ? email : '',
        phone,
        name, //: phone !== user?.phone ? phone : '',
      })
    }
  }
3. pages/api/users/me/index.ts
import withHandler, { ResponseType } from '@libs/server/withHandler'
import { NextApiRequest, NextApiResponse } from 'next'
import client from '../../../../libs/server/client'
import { withApiSession } from '@libs/server/withSession'

async function handler(
  req: NextApiRequest,
  res: NextApiResponse<ResponseType>
) {
  if (req.method === 'GET') {
    const profile = await client.user.findUnique({
      where: { id: req.session.user?.id },
    })
    res.json({
      ok: true,
      profile,
    })
  }
  if (req.method === 'POST') {
    const { user } = req.session
    const { email, phone, name, avatarId } = req.body
    const currentUser = await client.user.findUnique({
      where: {
        id: user?.id,
      },
    })
    if (email && email !== currentUser?.email) {
      const alreadyExists = Boolean(
        await client.user.findUnique({
          where: {
            email,
          },
          select: {
            id: true,
          },
        })
      )
      if (alreadyExists) {
        return res.json({ ok: false, error: 'Email already taken' })
      }
      await client.user.update({
        where: {
          id: user?.id,
        },
        data: {
          email,
        },
      })
      res.json({ ok: true })
    }
    if (phone && phone !== currentUser?.phone) {
      const alreadyExists = Boolean(
        await client.user.findUnique({
          where: {
            phone,
          },
          select: {
            id: true,
          },
        })
      )
      if (alreadyExists) {
        return res.json({ ok: false, error: 'Phone already taken' })
      }
      await client.user.update({
        where: {
          id: user?.id,
        },
        data: {
          phone,
        },
      })
      res.json({ ok: true })
    }
    if (name && name !== currentUser?.name) {
      const alreadyExists = Boolean(
        await client.user.findFirst({
          where: {
            name,
          },
          select: {
            id: true,
          },
        })
      )
      if (alreadyExists) {
        return res.json({ ok: false, error: 'Name already taken' })
      }
      await client.user.update({
        where: {
          id: user?.id,
        },
        data: {
          name,
        },
      })
      res.json({ ok: true })
    }
    if (avatarId) { ///CF에 요청을 해서 받은 uploadURL에 사진을 보내고 나서
                    ///받은 result: id인 avatarId를 avatar에 넣어줌.
      await client.user.update({
        where: {
          id: user?.id,
        },
        data: {
          avatar: avatarId,
        },
      }),
        res.json({ ok: true })
    }
  }
}

export default withApiSession(
  withHandler({
    methods: ['GET', 'POST'],
    handler,
  })
)
4. seeImage
CF dashboard에 보면, 맨 위의 사진 참고.
이미지제공 URL가 있음.
https://imagedelivery.net/9VhLr461mPKMhcmTPOPfGg/<image_id>/<variant_name>
이런 모양임,
<variant_name>은 기본적으로 public임.
하지만 CF에서 설정가능함.
4-1. profile/index.tsx
  <Layout hasTabBar title="나의 애플마켓">
      <div className="py-10 px-4">
        <div className="flex items-center space-x-5">
          {user?.avatar ? (
            <Image
              width={65}
              height={65}
              alt="Picture of the author"
              src={`https://imagedelivery.net/9VhLr461mPKMhcmTPOPfGg/${user?.avatar}/appleavatar`}
              ///image_id가 user.avatar에 담겨져 있음.
              ///뒷부분이 public이 아니고 appleavatar가 있는것은 CF에서 설정해준 것임.

              className=" bg-slate-400 rounded-full"
            />
          ) : (
            <div className="w-16 h-16 bg-slate-400 rounded-full" />
          )}
5. edit.tsx
전제 코드
import useMutation from '@libs/client/useMutation'
import useUser from '@libs/client/useUser'
import type { NextPage } from 'next'
import Image from 'next/image'
import { useRouter } from 'next/router'
import { useEffect, useState } from 'react'
import { useForm } from 'react-hook-form'
import Button from '../../components/button'
import Input from '../../components/input'
import Layout from '../../components/layout'

interface EditProfileForm {
  email?: string
  phone?: string
  name?: string
  avatar?: FileList
  formErrors?: string
}

interface EditProfileResponse {
  ok: boolean
  error?: string
}

const EditProfile: NextPage = () => {
  const { user } = useUser()
  const router = useRouter()
  const {
    register,
    setValue,
    handleSubmit,
    setError,
    formState: { errors },
    watch,
  } = useForm<EditProfileForm>()

  useEffect(() => {
    if (user?.name) setValue('name', user?.name)
    if (user?.email) setValue('email', user?.email)
    if (user?.phone) setValue('phone', user?.phone)
    if (user?.avatar)
      setAvatarPreview(
        `https://imagedelivery.net/9VhLr461mPKMhcmTPOPfGg/${user?.avatar}/appleavatar`
      )
  }, [user, setValue])

  const [editProfile, { data, loading }] =
    useMutation<EditProfileResponse>(`/api/users/me`)

  const onValid = async ({ email, phone, name, avatar }: EditProfileForm) => {
    if (loading) return
    if (email === '' && phone === '' && name === '') {
      return setError('formErrors', {
        message: 'Email Or Phone number are required.',
      })
    }
    if (avatar && avatar.length > 0 && user) {
      const { uploadURL } = await (await fetch(`/api/files`)).json()

      const form = new FormData()
      form.append('file', avatar[0], user?.id + '')
      const {
        result: { id },
      } = await (
        await fetch(uploadURL, {
          method: 'POST',
          body: form,
        })
      ).json()

      editProfile({
        email, //: email !== user?.email ? email : '',
        phone,
        name, //: phone !== user?.phone ? phone : '',
        avatarId: id,
      })
    } else {
      editProfile({
        email, //: email !== user?.email ? email : '',
        phone,
        name, //: phone !== user?.phone ? phone : '',
      })
    }
  }
  useEffect(() => {
    if (data && !data.ok && data.error) {
      setError('formErrors', { message: data.error })
    }
  }, [data, setError])
  useEffect(() => {
    if (data && data.ok) {
      router.push('/profile')
    }
  }, [data, router])
  const [avatarPreview, setAvatarPreview] = useState('')
  const avatar = watch('avatar')
  useEffect(() => {
    if (avatar && avatar.length > 0) {
      const file = avatar[0]
      setAvatarPreview(URL.createObjectURL(file))
    }
  }, [avatar])

  return (
    <Layout canGoBack title="Edit Profile">
      <form onSubmit={handleSubmit(onValid)} className="py-10 px-4 space-y-4">
        <div className="flex items-center space-x-3">
          {avatarPreview ? (
            <Image
              width={52}
              height={52}
              alt="Picture of the author"
              src={avatarPreview}
              className="w-14 h-14 rounded-full"
            />
          ) : (
            <div className="w-14 h-14 rounded-full bg-slate-400" />
          )}
          <label
            htmlFor="picture"
            className="cursor-pointer py-2 px-3 border border-gray-300 rounded-md shadow-sm text-sm font-medium focus:ring-2 focus:ring-offset-2 focus:ring-orange-500 text-gray-700"
          >
            Change
            <input
              {...register('avatar')}
              id="picture"
              type="file"
              className="hidden"
              accept="image/*"
            />
          </label>
        </div>
        <Input
          register={register('name')}
          required={false}
          label="Name"
          name="name"
          type="text"
        />
        <Input
          register={register('email')}
          required={false}
          label="Email"
          name="email"
          type="email"
        />
        <Input
          register={register('phone')}
          required={false}
          label="Phone Number"
          name="phone"
          type="number"
          kind="phone"
        />
        {errors.formErrors ? (
          <span className="my-2 text-red-500 font-bold block">
            {errors.formErrors?.message}
          </span>
        ) : null}
        <Button text={loading ? 'Loading' : 'Update Profile'} />
      </form>
    </Layout>
  )
}

export default EditProfile
사진업로드. 그리고 사진보기
1. api/files로 업로드 할 사진있으니 주소하나 주이소라고 fetch 날리면
2. uploadURL을 받아옴. 여기에 form=new FormData 로 file(avatar[0]) 넣어서
3. POST로 날림,
4. 그러면 결과로 id를 받음. 결과로 받은 id는 나중에 사진을 호출하는데 사용됨.
사진올리는건 항상 어렵다 ㅠㅠㅠ