create-restaurant와
add-dish를 구현해본다.
create-restaurant에서는 사진을 S3에 upload해본다.
backend에 upload API를 또한, 만들어 주어야한다.
오늘도 빠이팅하자
1. src/pages/owner/add-restaurant.tsx
import { gql, useApolloClient, useMutation } from '@apollo/client'
import React, { useState } from 'react'
import { useForm } from 'react-hook-form'
import { useNavigate } from 'react-router-dom'
import Button from '../../components/button'
import {
  CreateRestaurantMutation,
  CreateRestaurantMutationVariables,
} from '../../graphql/__generated__'
import { MY_RESTAURANTS_QUERY } from './my-restaurants'

const CREATE_RESTAURANT_MUTATION = gql`
  mutation createRestaurant($input: CreateRestaurantInput!) {
    createRestaurant(input: $input) {
      error
      ok
      restaurantId
    }
  }
`;
///server에서 createRestaurant mutation을 호출한다.
///server에서 restaurantId를 return하게 설정한다.

interface IFormProps {
  name: string
  address: string
  categoryName: string
  file: FileList
}
///file의 type은 FileList로 한다.

const AddRestaurant = () => {
  const navigate = useNavigate()
  ///restaurant가 만들어지면, myRestaurants page로
  ///redirect할 수 있게 navigate를 불러놓는다.

  const client = useApolloClient()
  ///Client 사용을 위해서 useApolloclient를 호출한다.

  const [imageUrl, setImageUrl] = useState('')
  ///사진은 S3에 upload한 후 return받은 url을 담을
  ///state(imageUrl)를 만들어 놓는다.

  const onCompleted = (data: CreateRestaurantMutation) => {
    const {
      createRestaurant: { ok, restaurantId },
    } = data
    ///createRestaurant mutation을 실행 완료 후,
    ///ok, restaurantId를 data로 받는다.

    if (ok) {
      const { file, name, categoryName, address } = getValues()
      ///refetchQueries가 아닌, cache update를 위해서,
      ///react-hook-form의 state를
      ///getValues()로 받아온다.

      setUploading(false)

      const queryResult = client.readQuery({ query: MY_RESTAURANTS_QUERY })
      ///먼저, cache를 update할 Query를 읽어들인다.
      ///restaurant를 create한 후, myRestaurants 페이지에
      ///create한 restaurant가 바로 화면에 뿌려지게 하기 위함.
      ///my-restaurants page에서 MY_RESTAURANTS_QUERY를
      ///export 해 주어야함.

      client.writeQuery({
        query: MY_RESTAURANTS_QUERY,
        data: {
          myRestaurants: {
            ...queryResult.myRestaurants,
            restaurants: [
              {
                address,
                category: {
                  name: categoryName,
                  __typename: 'Category',
                },
                coverImg: imageUrl,
                ///S3에 사진을 upload하고 return받은 url을
                ///imageUrl에 담아두었음.

                id: restaurantId,
                name,
                __typename: 'Restaurant',
              },
              ...queryResult.myRestaurants.restaurants,
            ],
          },
        },
      })
      ///cache update를 위한 코딩.
      ///cache의 모양을 보고 그대로 다시 write해줌.
      ///모양이 난해하니 잘 봐둘것.
      ///이게 어려우면 밑에서 refetchQuries를 하면 된다.

      navigate('/')
      ///cache update 후에 myRestaurants page로
      ///reDirect함.
    }
  }
  const [createRestaurantMutation, { loading, data }] = useMutation<
    CreateRestaurantMutation,
    CreateRestaurantMutationVariables
  >(CREATE_RESTAURANT_MUTATION, {
    onCompleted,
    // refetchQueries: [{ query: MY_RESTAURANTS_QUERY }],
  })
  ///createRestaurant Mutation 실행 코딩
  ///위에서 onCompleted에서 작성한 cache Update를 하기
  ///힘들면, refeetchQuries를 실행시키면 됨.
  ///cache Update를 하는 이유는 server에 API를 호출하는 것을
  ///한번이라도 줄일려고 고러는거임.

  const { handleSubmit, getValues, register, formState } = useForm<IFormProps>({
    mode: 'onChange',
  })
  ///react-hook-form
  ///mode는 onChange로~

  const [uploading, setUploading] = useState(false)
  ///restaurant가 만들어지는 동안을 uploading, setUploading
  ///으로 useState로 state를 설정해 놓는다.

  const onSubmit = async () => {
    try {
      setUploading(true)
      ///form의 button인 create restaurant버튼을 누르면,
      ///setUploading이 true가 되게 함.

      const { file, name, categoryName, address } = getValues()
      ///getValues로 form의 값들을 받아옴.

      const actualFile = file[0]
      ///front에서 파일을 choice해서 콘솔에 찍어보면,
      ///file[0]으로 찍힘.
      ///front에서 찍힌 사진을 actualFile에 담는다.

      const formBody = new FormData()
      formBody.append('file', actualFile)
      ///formBody를 만들어 formBody안에 'file'을 만들어
      ///choice한 actualFile을 넣는다.

      const { url } = await (
        await fetch('http://localhost:4000/uploads/', {
          method: 'POST',
          body: formBody,
        })
      ).json()
      ///backend에서 만든 uploads에
      ///POST방식으로 body에 formBody를 넣어서
      ///server로 파일을 날린다.
      ///그러면 server는 S3에 사진을 날리고,
      ///S3에서 url을 받아온다.
      ///server의 uploads는 아래에서 다룰예정~~

      setImageUrl(url)
      ///받아온 url을 setImageUrl애 담는다.

      createRestaurantMutation({
        variables: {
          input: {
            name,
            categoryName,
            address,
            coverImg: url,
          },
        },
      })
      ///createRestaurant mutation을 실행시킨다.
      ///variables는 위에서 받은것을 그대로 넣어주고,
      ///coverImg에는 S3에서 받은 url을 넣는다.
    } catch (e) {}
  }

  return (
    <div className="h-screen flex flex-col items-center justify-center ">
      <div className="w-full max-w-screen-sm flex flex-col px-5 items-center">
        <h4 className="w-full font-medium text-left text-3xl mb-5">
          Create Restaurant
        </h4>
        ///여기서 부터 reacr-hook-form
        <form
          onSubmit={handleSubmit(onSubmit)}
          className="grid gap-3 mt-5 mb-5 w-full"
        >
          <input
            {...register('name', { required: 'Name is required' })}
            className="input"
            placeholder="name"
            required
          />
			///식당 이름 name 입력
          <input
            {...register('address', { required: 'address is Required' })}
            className="input"
            placeholder="address"
            required
          />
          ///식당 address 입력
          <input
            {...register('categoryName', {
              required: 'categoryName is Required',
            })}
            className="input"
            placeholder="categoryName"
            required
          />
          ///식당 categoryName 입력
          <div>
            <input
              type="file"
              accept="image/*"
              {...register('file', { required: 'file is required' })}
            />
          </div>
          ///file(사진)을 upload하는 react-hook-form
          ///반드시 type은 file, ...register의 name은
          ///'file'로 해 주어야 한다.

          <Button loading={uploading} actionText="Create Restaurant" />
          ///loading에 위에서 만든 useState의 uploading을
          ///넣어줌.

        </form>
      </div>
    </div>
  )
}

export default AddRestaurant
2. src/uploads/uploads.modules.ts(server)
$nest g mo uploads
uploads 모듈을 먼저 만든다.
nestJS 공식문서도 확인해본다.
테스트를 하기 위해서는 insomnia를 이용하고,
path는 http://localhost:4000/uploads/를 사용해야한다.
insomnia에서 name은 반드시 file로
insomnia에서 header에는 Content-Type //// multipart/form-data
로 설정한다 !!!!!
npm i multer 를 알아둔다.
npm i aws-sdk (aws s3를 이용하기 위해 install함)
import * as AWS from 'aws-sdk'; 이렇게 import함.
import { Module } from '@nestjs/common';
import { UploadsController } from './uploads.controller';

@Module({
  controllers: [UploadsController],
})
export class UploadsModule {}
3. src/uploads/uploads.controller.ts(server)
import {
  Controller,
  Post,
  UseInterceptors,
  UploadedFile,
} from '@nestjs/common';
import { FileInterceptor } from '@nestjs/platform-express';
import * as AWS from 'aws-sdk';

const BUCKET_NAME = 'kimchieat1424';

@Controller('uploads')
export class UploadsController {
  @Post('')
  @UseInterceptors(FileInterceptor('file'))
  async uploadFile(@UploadedFile() file) {
    AWS.config.update({
      credentials: {
        accessKeyId: 'AKIAUDWXLV********',
        secretAccessKey: 'ff+pnYH79S5/snYng3f*******',
      },
      ///밑에서 AWS의 S3에서 만든 user의 accessKey와
      ///secretKey를 입력한다.
      ///.env에 만들어 놓는게 더 안전하다.
    });
    try {
      const objectName = `${Date.now() + file.originalname}`;
      await new AWS.S3()
        .putObject({
          Body: file.buffer,
          Bucket: BUCKET_NAME,
          Key: objectName,
          ACL: 'public-read',
        })
        .promise();
        ///Bucket 이름은 맨위에 설정하고, unique한 이름으로
        ///만들어야 한다.
        ///test는 insomnia를 활용한다.
        ///ACL은 upload한 image를 다 read할 수 있게 설정한것.

      const fileUrl = `https://${BUCKET_NAME}.s3.amazonaws.com/${objectName}`;
      return { url: fileUrl };
      ///S3에 사진을 upload한 후, return받는 사진 주소는
      ///fileUrl과 같다.
      ///사진을 올리고 나서는 url로 retern받는다.
      ///만약 bucket이 자동생성되지 않는다면,
      ///aws S3에 들어가서 위의 BUCKET_NAME과 같은 bucket을
      ///만들어준다.
      ///access가능하게 만들어 주어야함.

    } catch (e) {
      console.log(e);
      return null;
    }
  }
}
일단은 아래와 같이 upload로 만들어서 insomnia에서 한번
upload를 실행시키면, bucket이 생성된다.
그런 다음 위와 같이 upload를 없애면 된다.
//   const upload = await new AWS.S3()
//     .putObject({
//       Body:file.buffer,
//       Bucket:BUCKET_NAME,
//       key:`${Date.now()+file.originalname}`
//     })
//     .promise();
//     console.log(upload)
// }
server의 main.ts
main.ts(server)
import { NestFactory } from '@nestjs/core';
import { AppModule } from './app.module';
import { ValidationPipe } from '@nestjs/common';

async function bootstrap() {
  const app = await NestFactory.create(AppModule);
  app.useGlobalPipes(new ValidationPipe());
  app.enableCors();
  ///이거를 설정해 주어야 front에서 오는
  ///file 요청을 통과시킬 수 있음.

  await app.listen(4000);
}
bootstrap();
console.aws.amazon.com/iam/home#/users로 접속한다
혹은 aws console에 로그인해서 IAM 을 클릭하면 아래의 페이지로 이동한다.
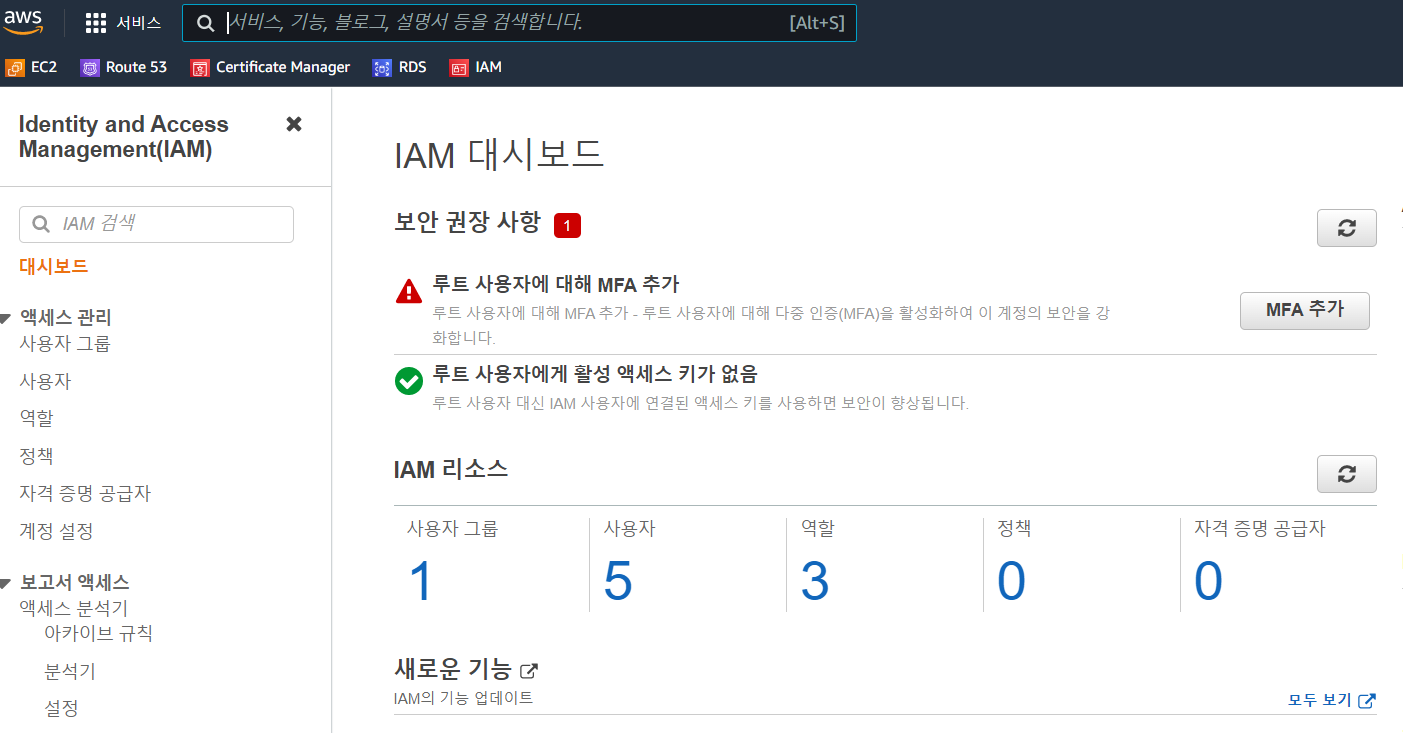
여기서 사용자(Users)를 클릭한다.
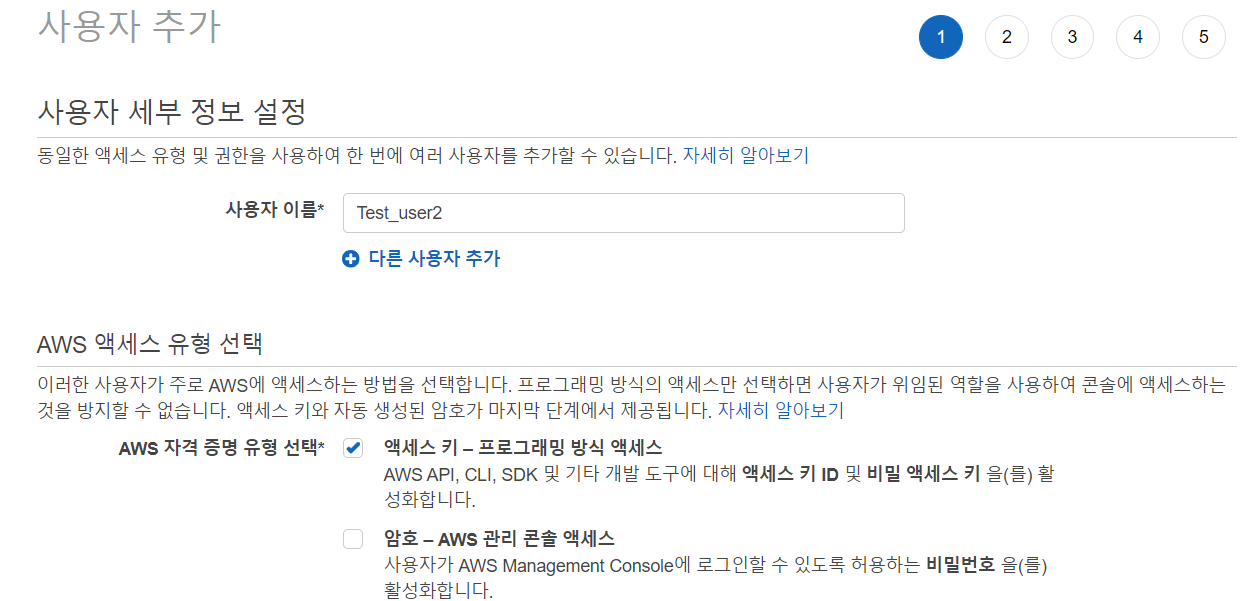
사용자 이름을 적고, 액세스 키를 체크한다.

S3를 찾아서 클릭하고, 권한 경계없이 User생성을 클릭한다.
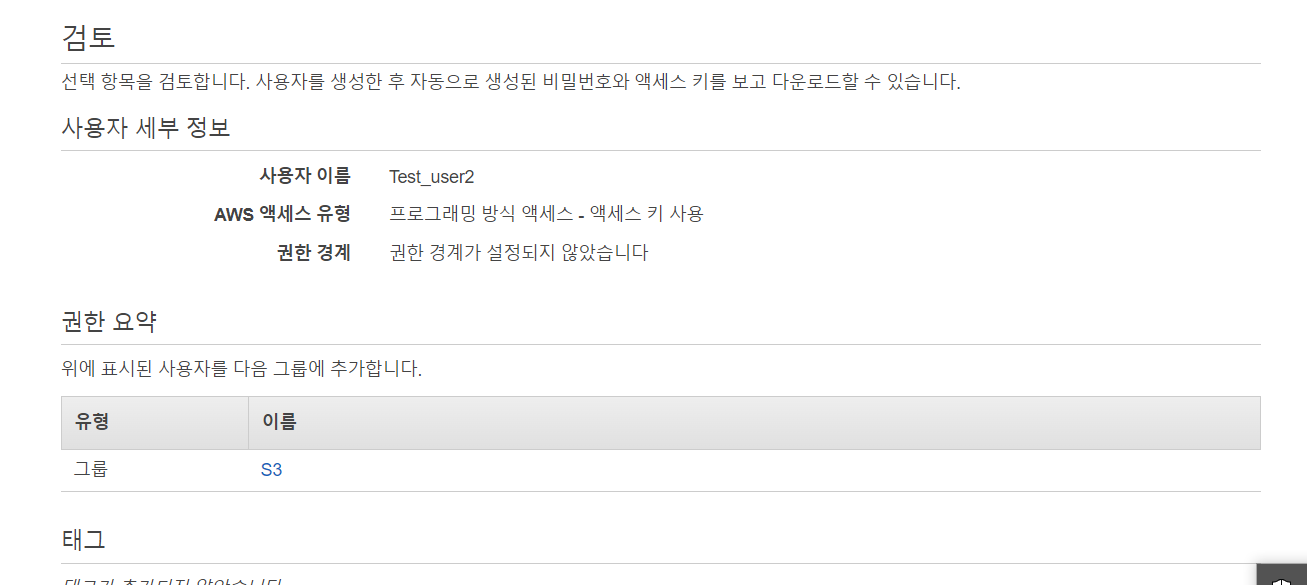
User가 만들어짐.
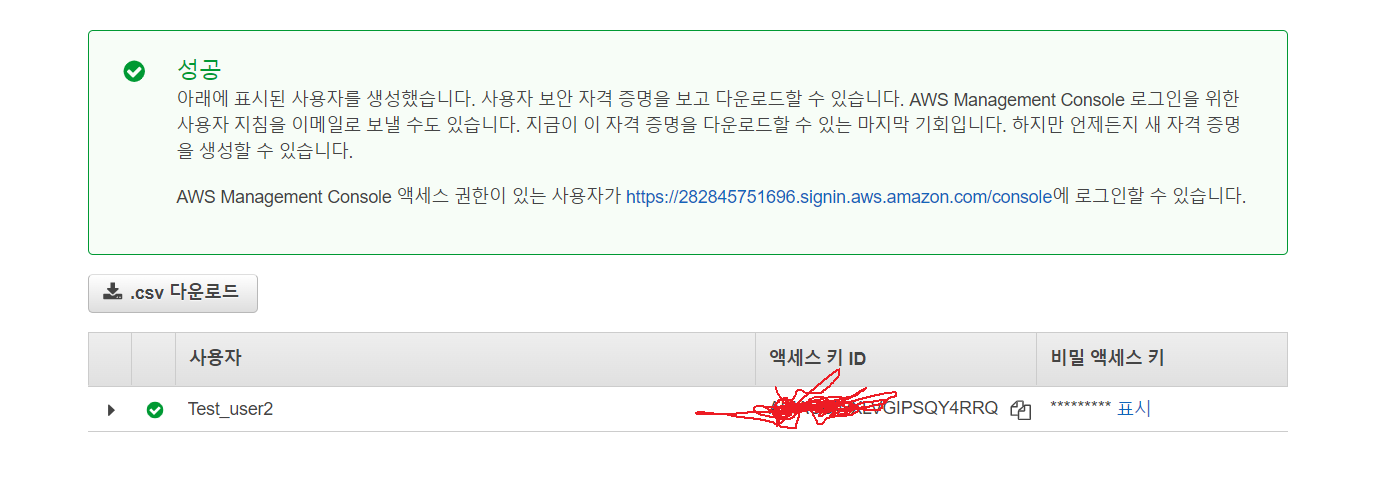
유저생성하면 액세스 키ID와 비밀액세스 키를 복사해서
.env에 넣는다.
한번밖에 안보여주니까 꼭 복사해서 넣어놓을것
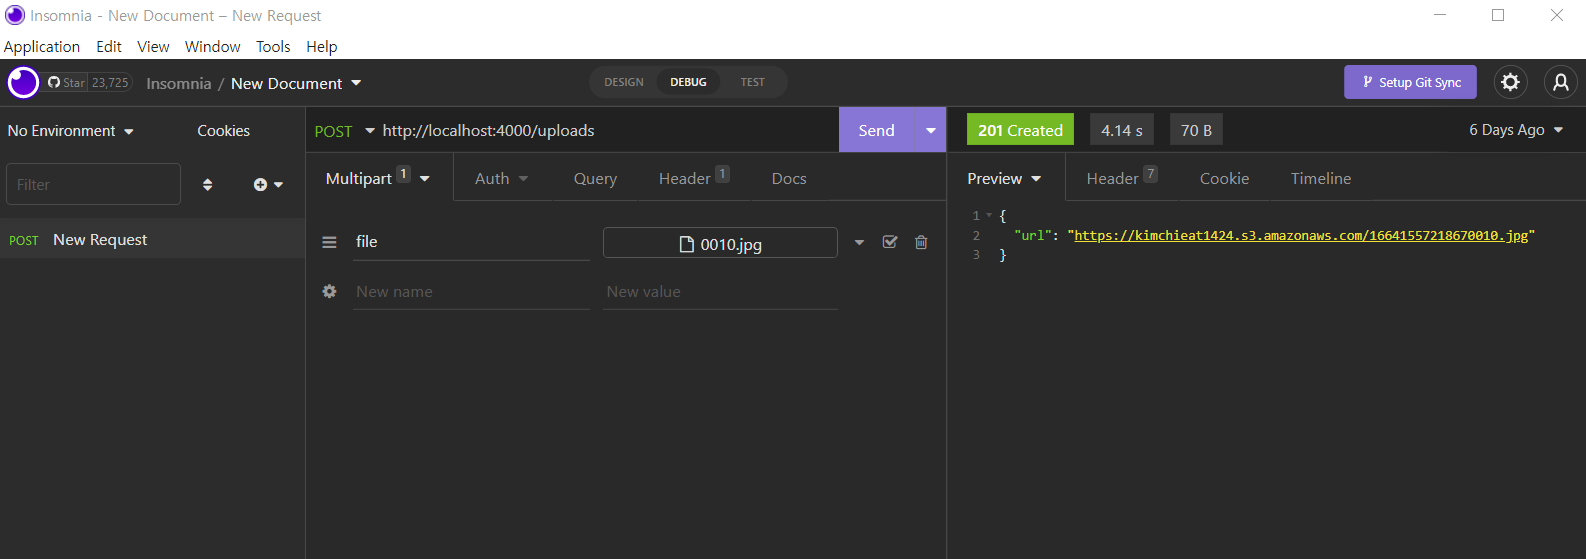
test하기 위해서 insomnia를 이용했을때, return받는 url임
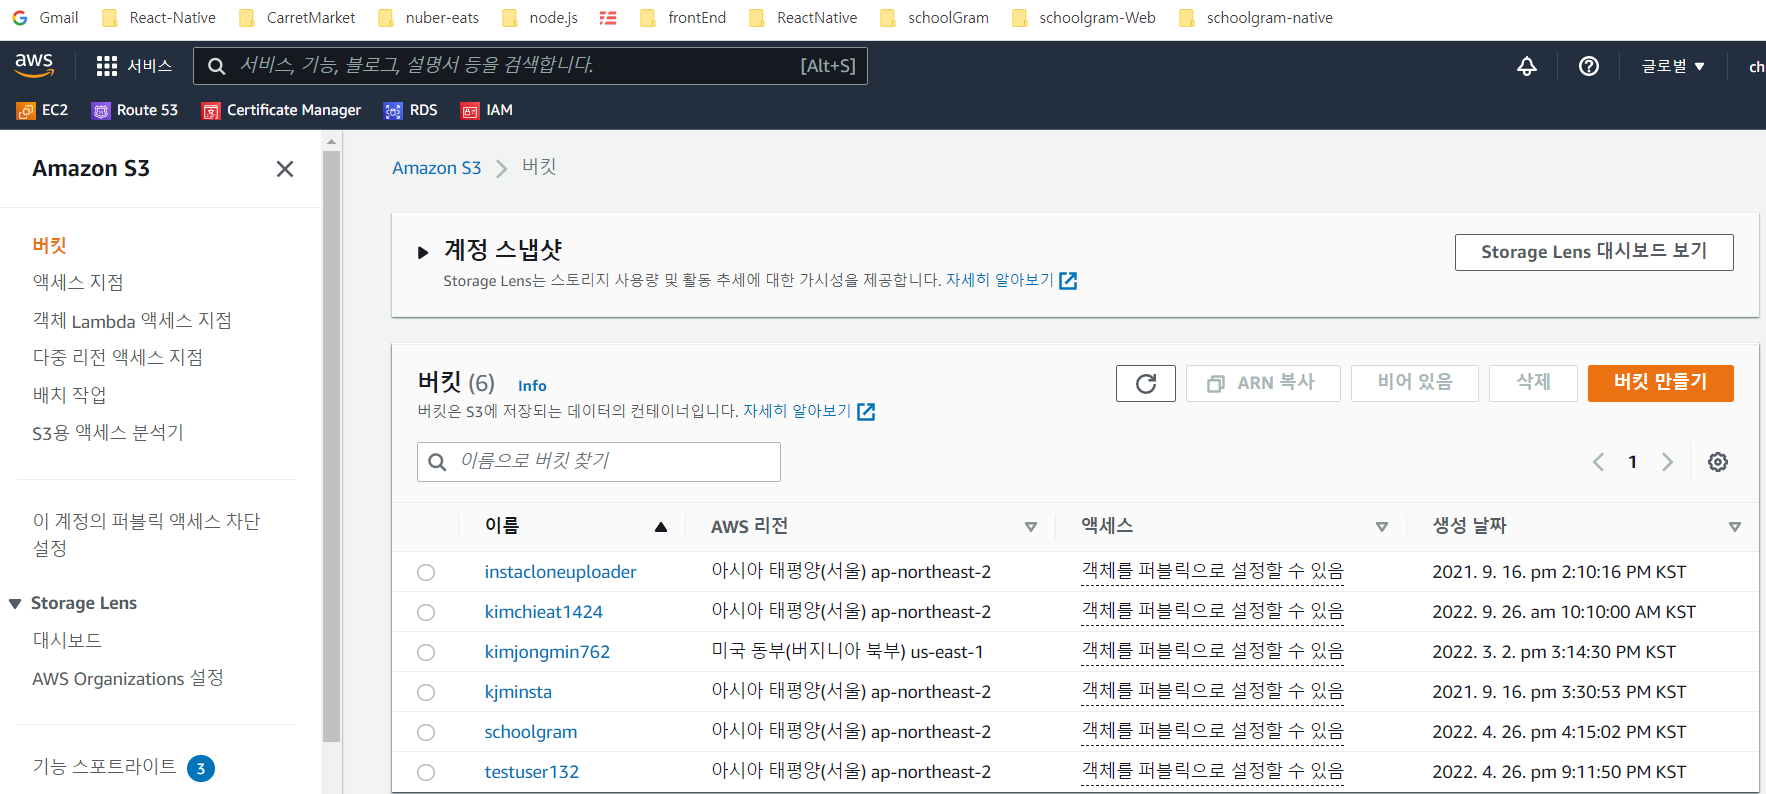
위와 같이 AWS S3에서 bucket이 만들어짐, 혹은 만들 수 있음.