1. 개발환경구성
Three.js 란?
웹에서 3차원 기능을 위한 JS라이브러리
개발 환경 구성
Visual Studio Code -> Three.js 라이브러리 다운로드 -> Live Server 설치
2. 기본 구성 요소와 코드
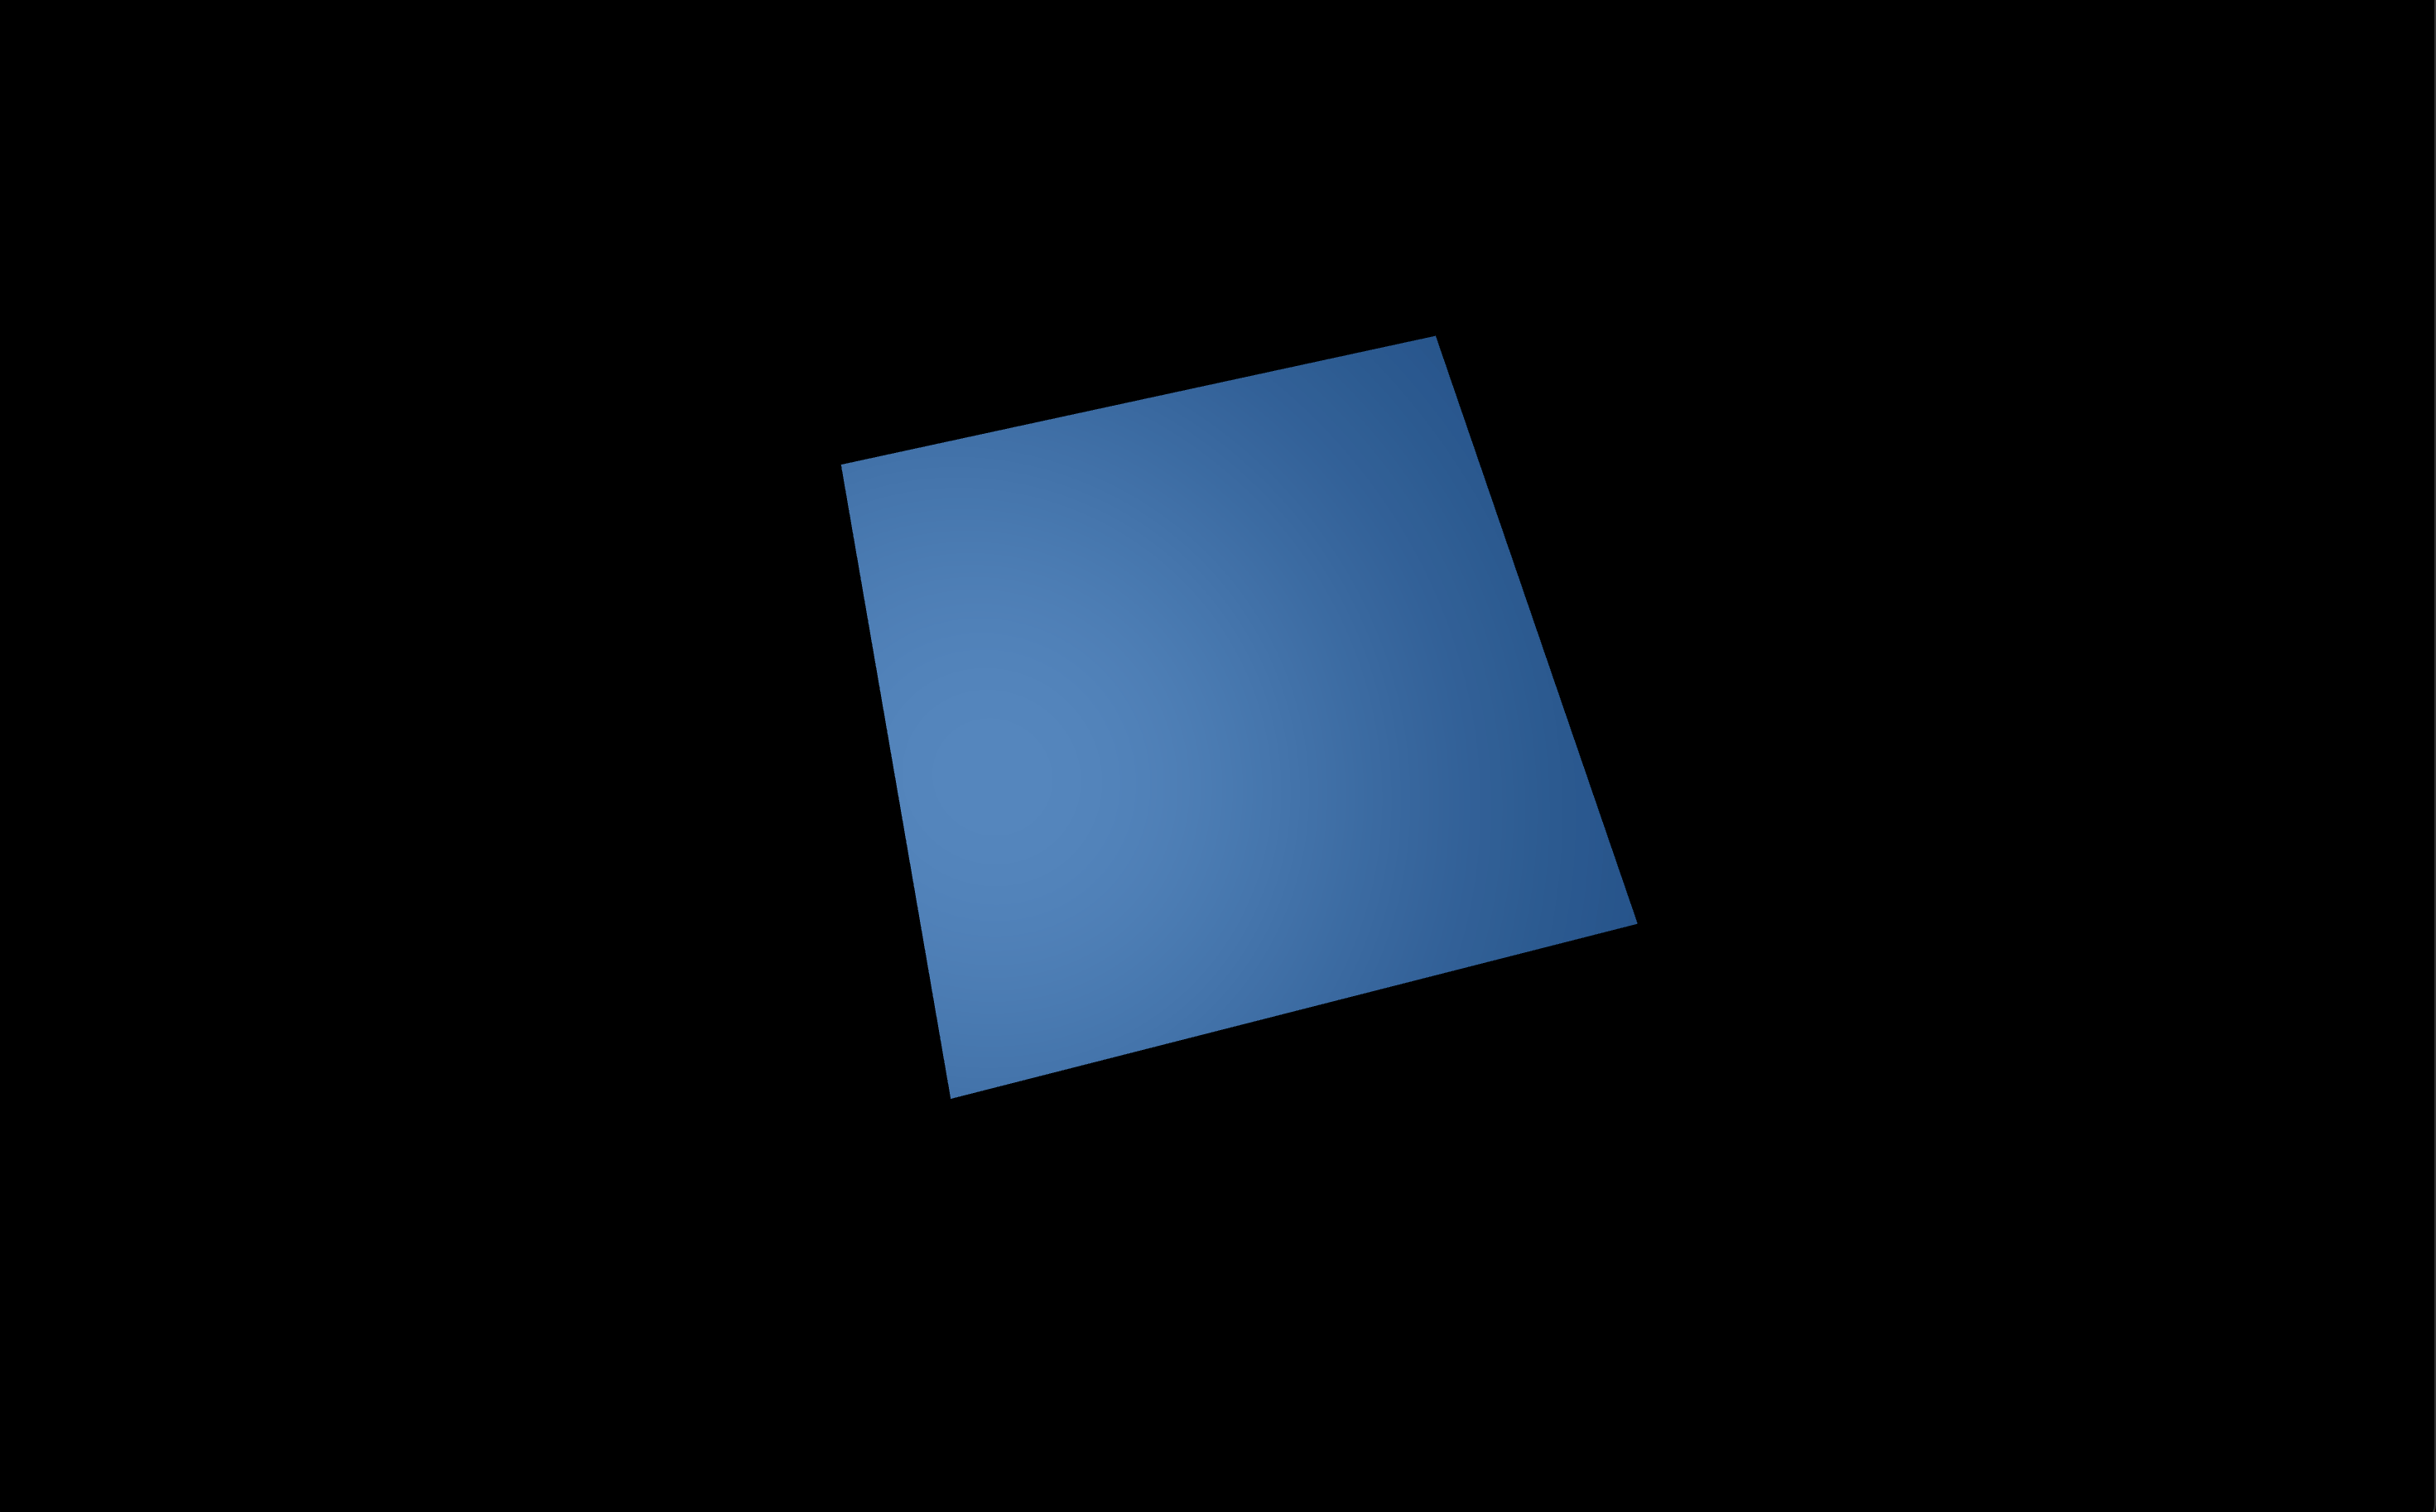
- 파란색 큐브가 회전하고 있는 예제
01.basic.html
<!DOCTYPE html>
<html>
<head>
  <meta name="viewport" content="width=device-width, inital-scale=1">
  <link rel="stylesheet" href="01-basic.css">
  <script type="module" src="01-basic.js" defer></script> //모듈타입으로 추가됨
</head>
<body>
  <div id="webgl-container"></div>
</body>
</html>- 01-basic.css 파일과 01-basic.js 파일을 포함하고 있음
- 01-basic.js 자바스크립트 파일은 모듈 타입으로 추가되어 있음
- three.js 라이브러리를 모듈버전으로 import 하기 위함
- defer 속성: 페이지 모두 로딩 된 후에 JS 실행 - id가 webgl-container인 div 요소 있음
- div요소에 three.js 라이브러리의 API를 이용해서 3차원 그래픽을 시각화 할수 있는 캔버스 요소 추가될 것임.
01.basic.css
* {
  outline: none;
  margin: 0;
}

body {
  overflow: hidden;
}

#webgl-container {
  position: absolute;
  top: 0;
  left: 0;
  width: 100%;
  height: 100%;
}- 전체 페이지 요소에 대해 outline을 제거, margin을 0으로 지정
- overflow: hidden; 스크롤바 생길 경우 해당 스크롤바 안보이게 처리해줌
- id가 webgl-container인 div 요소를 페이지에 꽉 차도록 스타일 지정
01.basic.js
import * as THREE from '../build/three.module.js';

class App {
  constructor() {}
}

window.onload = function() {
  new App();
}
import * as THREE from '../build/three.module.js';- three.js 라이브러리를 모듈 버전으로 import함
class App {
  constructor() {}
}- App이라는 이름의 클래스 정의
window.onload = function() {
  new App();
}- window.onload에서 App()클래스 실행해줌
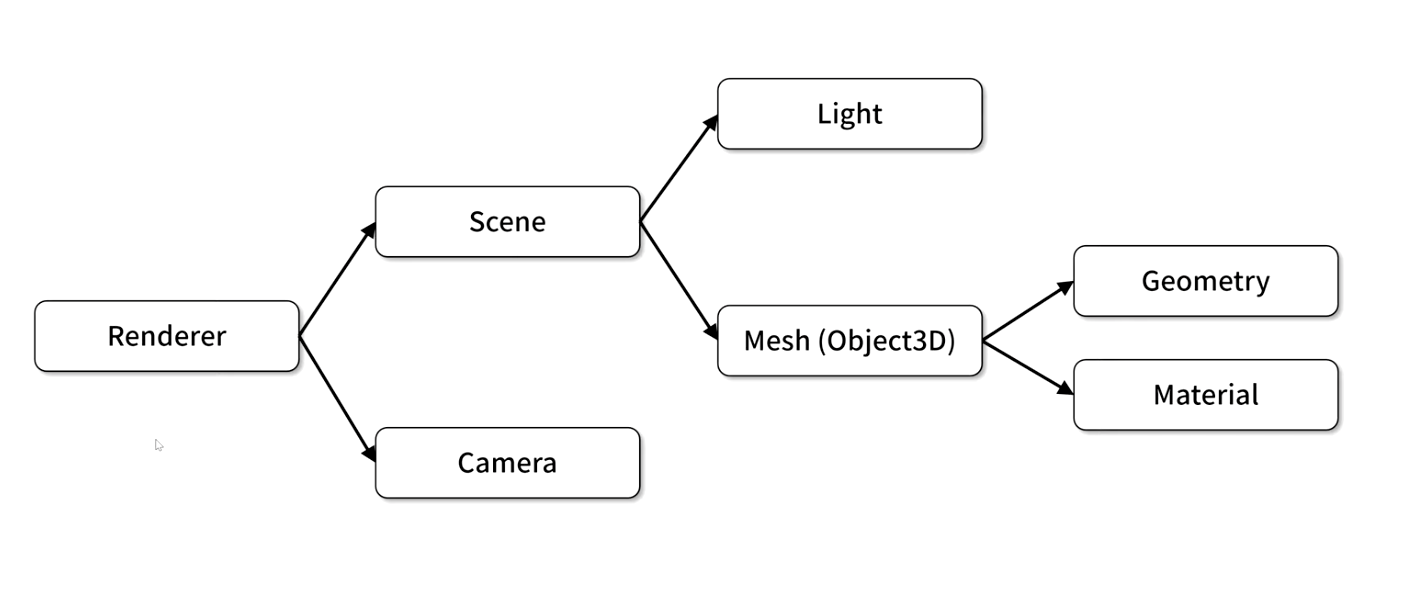
Three.js의 기본 구성 요소

1. Scene
- 3차원 객체로 구성됨, 장면
1-1. Light
- 3차원 형상이 화면상에 표시되려면 적절한 광원이 필요
1-2. Mesh
- Object3D의 파생 클래스
- 형상을 정의하는 Geometry와 색상 및 투명도를 정의하는 Material로 정의됨
- Renderer
- scene과 같은 장면을 모니터 같은 출력장치에 출력할 수 있도록 함(렌더링)
- Camera
- scene을 렌더링 할때는 어떤 시점에서 보느냐에 따라 다양한 모습으로 렌더링 될 수 있음
- 그 시점을 카메라로 정의함
- 앞으로 추가할 코드는 App클래스의 구현 코드
- App클래스의 생성자 코드를 다음과 같이 입력하자.
App 클래스의 constructor
class App {
  constructor() {
    // id가 webgl-container인 div 요소를 얻어와서 divContainer 상수에 저장해둠
    const divContainer = document.querySelector("#webgl-container");
    // divContainer를 클래스의 필드로 정의함
    // 필드로 정의한 이유는 divContainer를 this._divContainer로 다른 메서드에서 참조할수 있도록 하기 위함
    this._divContainer = divContainer;

    // renderer 객체 생성
    // three.js 라이브러리의 WebGL1Renderer 클래스로 생성 가능
    // 다양한 옵션 설정 가능 (antialias: true => 활성화시켜주면 3차원 장면이 렌더링 될때 오브젝트들의 경계선이 계단 현상 없이 부드럽게 표현됨)
    const renderer = new THREE.WebGL1Renderer({ antialias: true });
    //setPixelRatio 메서드 호출해 Pixel의 Ratio값 설정(window.devicePixelRatio로)
    renderer.setPixelRatio(window.devicePixelRatio);
    // domElement를 id가 webgl-container인 divContainer의 자식으로 추가함
    // renderer.domElement는 캔버스 타입의 돔 객체
    divContainer.appendChild(renderer.domElement);
    // renderer를 다른 메서드에서 참조할수 있도록 this._renderer로 정의함
    this._renderer = renderer;

    // scene 객체 생성
    // three.js 라이브러리의 Scene 클래스로 생성 가능
    const scene = new THREE.Scene();
    // scene 객체를 필드화 시켜서 app 클래스의 다른 메서드에서도 참조 가능하게 함
    this._scene = scene;


    /*아직 정의 안한 메서드, 일단 정의되어 있다고 가정하고 입력한 것임*/
    // 카메라 객체를 구성
    this._setupCamera();
    // light를 설정
    this._setupLight();
    // 3차원 모델 설정
    this._setupModel();

    // 창 크기가 변경되면 발생하는 onresize 이벤트
    // onresize 이벤트에 이 클래스의 resize method를 지정하고 있음
    // resize이벤트가 필요한 이유는 renderer나 camera는 창 크기가 변경될 때마다 크기에 맞게 속성 값을 재설정 해줘야함
    // resize이벤트에 resize 메서드를 지정할때 bind를 사용해서 지정함
    // -> resize 메서드 안에서 this가 가리키는 객체가 이벤트 객체가 아닌 이 app 클래스의 객체가 되도록 하기 위함
    window.onresize = this.resize.bind(this);
    // resize 메서드를 창크기 변경시 발생하는 resize이벤트와 상관없이 생성자에서 한번 무조건 호출해줌
    // 렌더러나 카메라의 속성을 창 크기에 맞게 설정해줌
    this.resize();

    // render 메서드를 requestAnimationFrame이라는 API에 넘겨줘서 호출하고 있음
    // render 메서드는 실제로 3차원 그래픽 장면을 만들어주는 method
    // 이 메서드를 requestAnimationFrame에 넘겨줘서 requestAnimationFrame은 적당한 시점에 또한 최대한 빠르게 이 render 메서드를 호출해줌
    // render 메서드를 bind를 통해서 넘겨주고 있음 -> render 메서드의 코드 안에서 사용되는 this가 이 app클래스의 객체를 가르키도록 하기 위함
    requestAnimationFrame(this.render.bind(this));
  }
}- _로 시작하는 필드와 메서드는 App 클래스 내부에서만 쓰이는 private 필드, 메서드라는 의미
- 자바스크립트에서는 클래스 정의할때 private 성격을 부여할 수 있는 기능이 없음
- 밑줄로 시작함으로써 개발자들간의 약속을 정한것임- 밑줄로 정의했으므로 app클래스 외부에서는 밑줄로 시작하는 field 또는 method 호출해서는 안됨
App클래스의 _setupCamera()
_setupCamera() {
    // three.js가 3차원 그래픽을 출력할 영역에 대한 가로,세로 크기를 얻어옴
    const width = this._divContainer.clientWidth;
    const height = this._divContainer.clientHeight;
    // 얻어온 크기로 카메라 객체를 생성함
    const camera = new THREE.PerspectiveCamera(
      75,
      width / height,
      0.1,
      100
    );
    camera.position.z=2;
    // 생성된 카메라 객체를 다른 메서드에서 사용할 수 있도록 this._camera라는 필드로 정의함
    this._camera = camera;
 }
App클래스의 _setupLight()
_setupLight() {
    // 광원 생성위해서는 광원의 색상과 세기값이 필요함
    const color = 0xffffff;
    const intensity = 1;
    // 광원 생성
    const light = new THREE.DirectionalLight(color, intensity);
    // 광원의 위치 세팅
    light.position.set(-1, 2, 4);
    // 생성한 광원을 scene 객체의 구성요소로 추가함
    this._scene.add(light);
 }
App클래스의 _setupModel()
파란색의 정육면체 mesh를 생성하는 코드
_setupModel() {
    // 정육면체 형상을 정의하기 위해 BoxGeometry 클래스를 이용해 geometry 객체 생성
    // BoxGeometry는 3개의 인자값을 갖는데, (가로, 세로, 깊이)
    const geometry = new THREE.BoxGeometry(1, 1, 1);
    // 파란색 계열의 재질을 생성하기 위함
    const material = new THREE.MeshPhongMaterial({color: 0x44a88});

    // geometry, material 객체를 통해서 Mesh가 생성됨
    // 생성한 mesh를 cube라는 상수에 담음
    const cube = new THREE.Mesh(geometry, material);

    // cube를 scene 객체의 구성요소로 추가
    this._scene.add(cube);
    // cube를 다른 메서드에서 참조할 수 있도록 this._cube로 필드화 해줌
    this._cube = cube;
 }
App클래스의 resize()
창 크기가 변경될 때 발생하는 이벤트를 통해 호출되는 resize 메서드
resize() {
    // this._divContainer 의 크기를 얻어옴
    // this._divContainer 는 id가 webgl-container인 div
    const width = this._divContainer.clientWidth;
    const height = this._divContainer.clientHeight;

    // 그 div 크기 얻어와서 카메라의 속성값 설정해줌
    this._camera.aspect = width / height;
    this._camera.updateProjectionMatrix();

    // 렌더러의 크기 설정해줌
    this._renderer.setSize(width, height);
}
App클래스의 render(time)
- time이라는 인자를 받음.
- 이 인자는 렌더링이 처음 시작된 이후 경과된 시간 값, 단위가 ms
- 이 time 인자를 scene의 애니메이션에 이용할 수 있음
render(time) {
    // 렌더러가 scene을 카메라의 시점을 이용해 렌더링 하라는 코드
    this._renderer.render(this._scene, this._camera);
    // update 메서드 안에서 속성값을 변경함(애니메이션 효과)
    this.update(time);
    // render 메서드가 무한으로 반복해서 호출될 수 있도록 함(적당한 시점에 최대한 빠르게)
    requestAnimationFrame(this.render.bind(this));
}
App클래스의 render(time)
- time이라는 인자를 받음.
- (render메서드에서 time이라는 인자를 전달해줌)
- requestAnimationFrame(this.render.bind(this)); 이 함수가 render함수에 time값을 전달해줌
update(time) {
    // 전달받은 time에 0.001을 곱해 ms단위를 s단위로 변환해줌
    time *= 0.001;
    // this._cubes: _setupModel에서 만들어둔 정육면체 mesh
    // 이 큐브의 x, y축의 회전값에 time값을 지정
    // 시간은 계속 변하니까 x, y축으로 큐브가 계속 회전함
    this._cube.rotation.x = time;
    this._cube.rotation.y = time;
}
01-basic.js 전체 코드
import * as THREE from '../build/three.module.js';

class App {
  constructor() {
    const divContainer = document.querySelector("#webgl-container");
    this._divContainer = divContainer;

    const renderer = new THREE.WebGL1Renderer({ antialias: true });
    renderer.setPixelRatio(window.devicePixelRatio);
    divContainer.appendChild(renderer.domElement);
    this._renderer = renderer;

    const scene = new THREE.Scene();
    this._scene = scene;

    this._setupCamera();
    this._setupLight();
    this._setupModel();

    window.onresize = this.resize.bind(this);
    this.resize();

    requestAnimationFrame(this.render.bind(this));
  }

  _setupCamera() {
    const width = this._divContainer.clientWidth;
    const height = this._divContainer.clientHeight;
    const camera = new THREE.PerspectiveCamera(
      75,
      width / height,
      0.1,
      100
    );
    camera.position.z=2;
    this._camera = camera;
  }

  _setupLight() {
    const color = 0xffffff;
    const intensity = 1;
    const light = new THREE.DirectionalLight(color, intensity);
    light.position.set(-1, 2, 4);
    this._scene.add(light);
  }

  _setupModel() {
    const geometry = new THREE.BoxGeometry(1, 1, 1);
    const material = new THREE.MeshPhongMaterial({color: 0x44a88});

    const cube = new THREE.Mesh(geometry, material);

    this._scene.add(cube);
    this._cube = cube;
  }

  resize() {
    const width = this._divContainer.clientWidth;
    const height = this._divContainer.clientHeight;

    this._camera.aspect = width / height;
    this._camera.updateProjectionMatrix();

    this._renderer.setSize(width, height);
  }

  render(time) {
    this._renderer.render(this._scene, this._camera);
    this.update(time);
    requestAnimationFrame(this.render.bind(this));
  }

  update(time) {
    time *= 0.001;
    this._cube.rotation.x = time;
    this._cube.rotation.y = time;
  }
}

window.onload = function() {
  new App();
}
실행 결과
- 실행할 웹페이지(html파일) 선택후 vscode 우측 하단 "Go Live" 버튼 클릭함
- 오류나면 웹페이지 개발자도구 열어서 확인해보기(단축키 F12)
성장하는 developer