Spring을 이용해 "Hello World" 출력하기
1. 프로젝트 생성
프로젝트 환경 설정
- Java: JDK 21 설치
- IDE: IntelliJ IDEA 설치
- 프로젝트 JDK 설정
Ctrl+Alt+Shift+S이동
Project SDK 를 설치한 JDK 버전으로 지정- Gradle JDK 설정
Ctrl+Alt+S이동
Build tools > Gradle
Build and run using:IntelliJ IDEA
Run tests using:IntelliJ IDEA
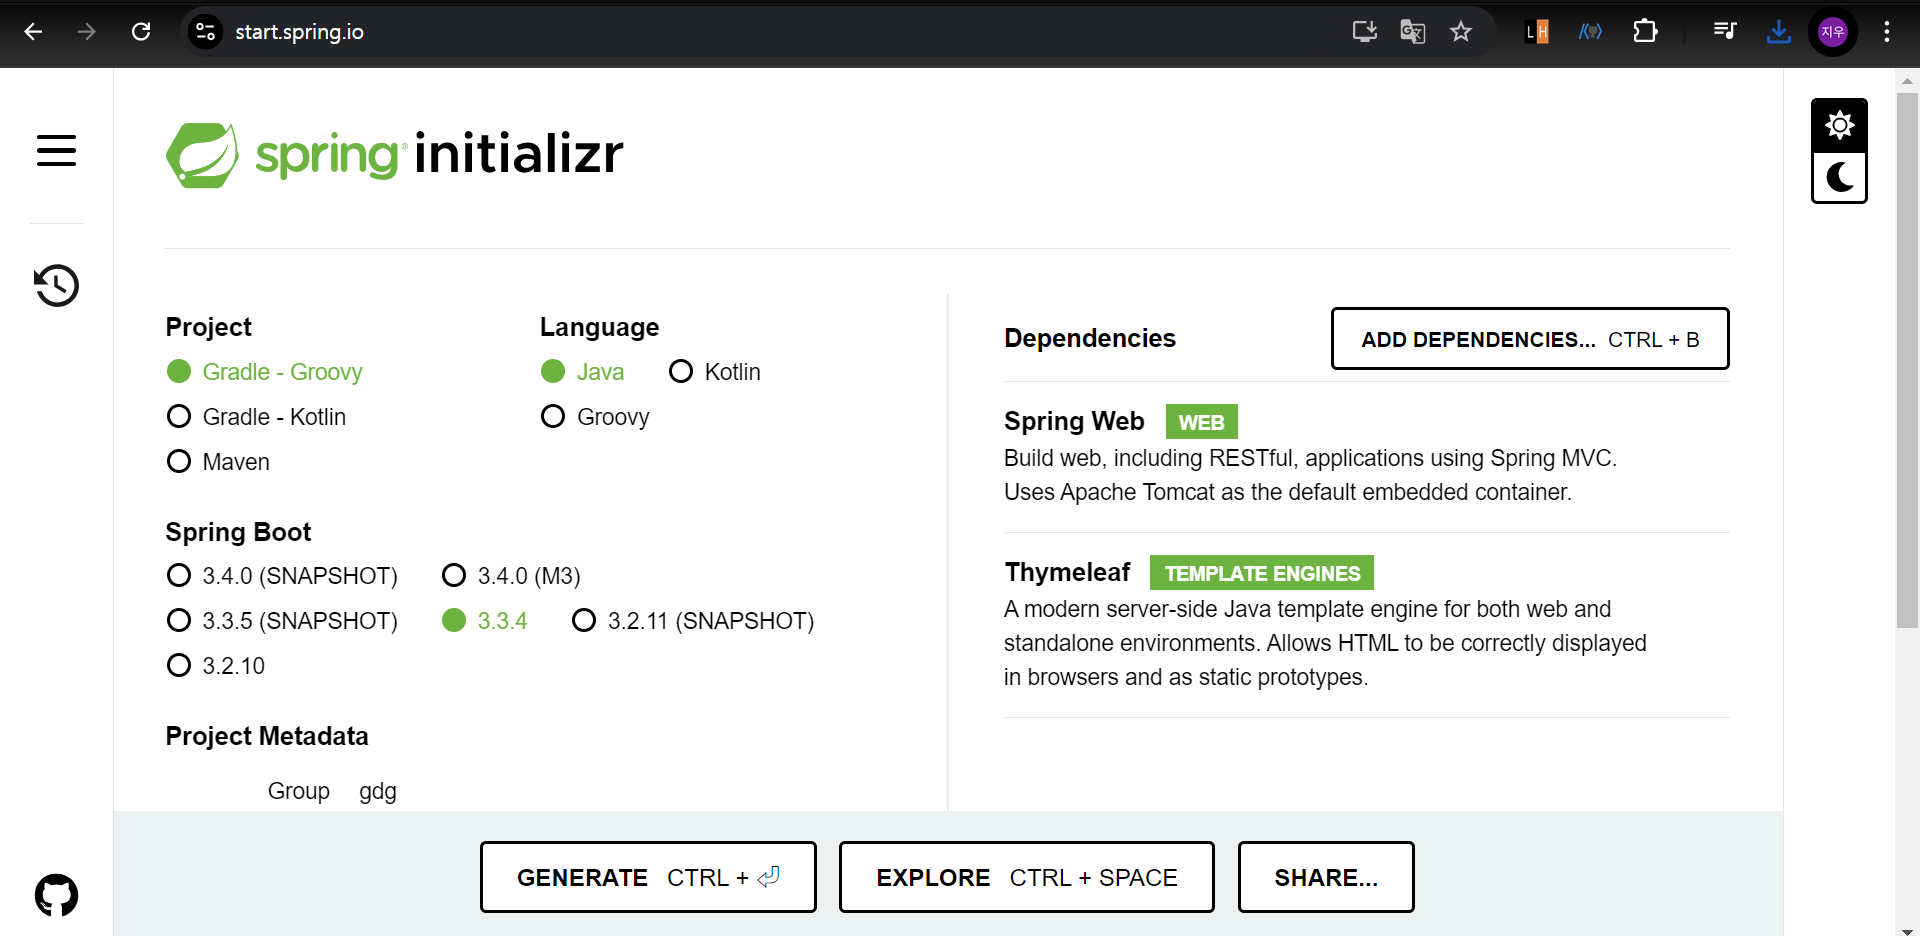
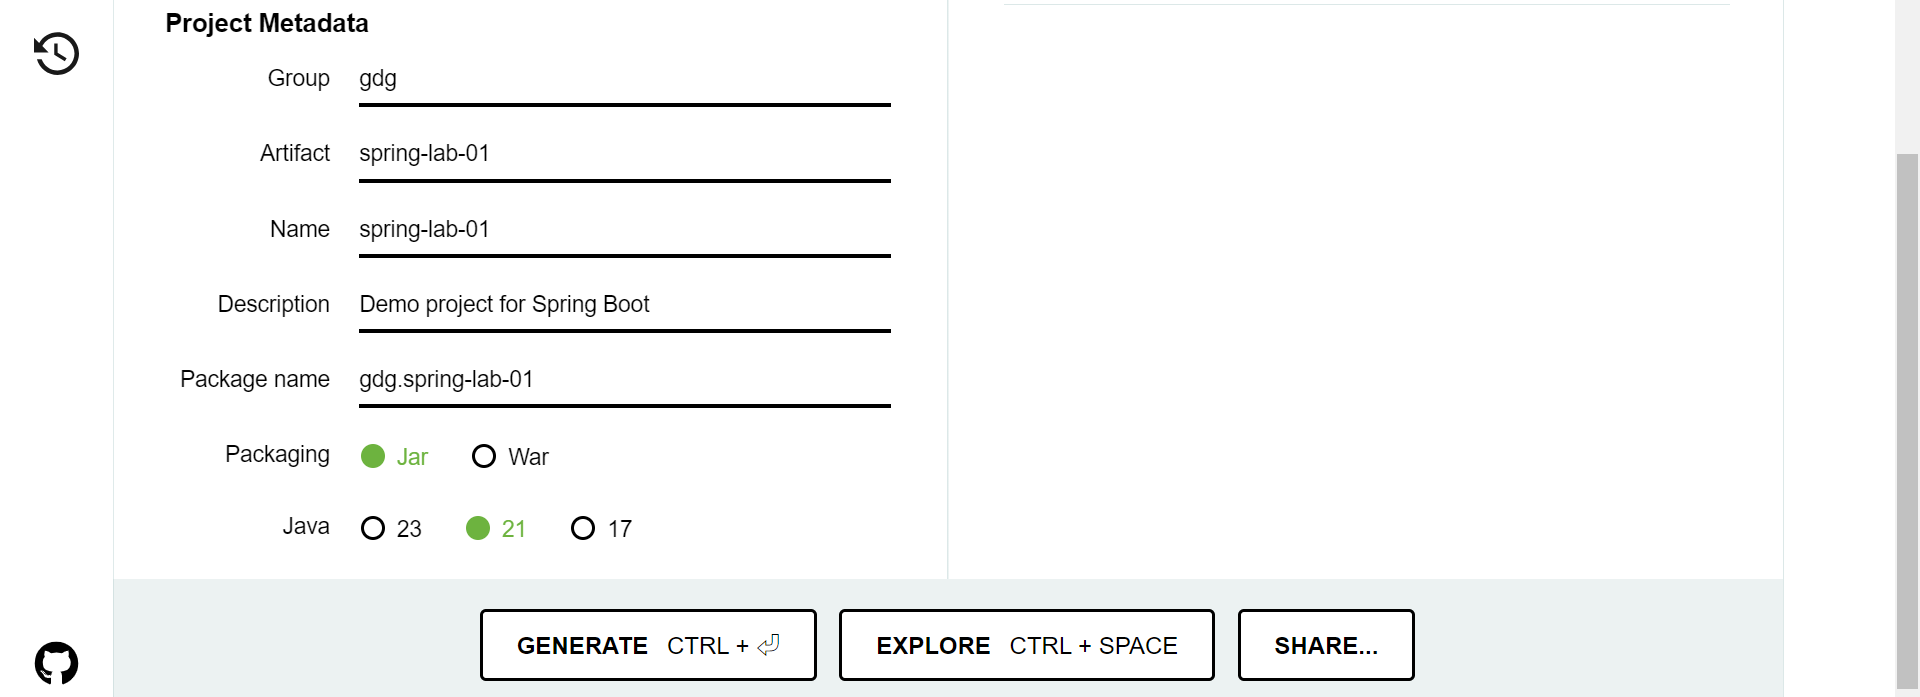
스프링 프로젝트 생성
- start.spring.io에서 필요한 옵션을 선택 후 Generate 버튼 클릭
- 생성된 zip 파일 다운로드 및 압축 해제
- 압축 해제한 프로젝트를 IntelliJ에서 열기:
\spring-lab-01\spring-lab-01\build.gradle파일을 열어 빌드 도구로 인식
2. 정적 페이지 생성
Spring Boot에서는 기본적으로 제공하는 welcome page 기능.
resources/static/index.html에 html 페이지를 작성하면/루트 경로로 접속할 때 기본적으로 표시된다.
resources/static/index.html
<!DOCTYPE HTML>
<html>
<head>
<title>Hello</title>
<meta http-equiv="Content-Type" content="text/html; charset=UTF-8" />
</head>
<body>
Hello! This is welcome page
<a href="/hello">hello</a>
</body>
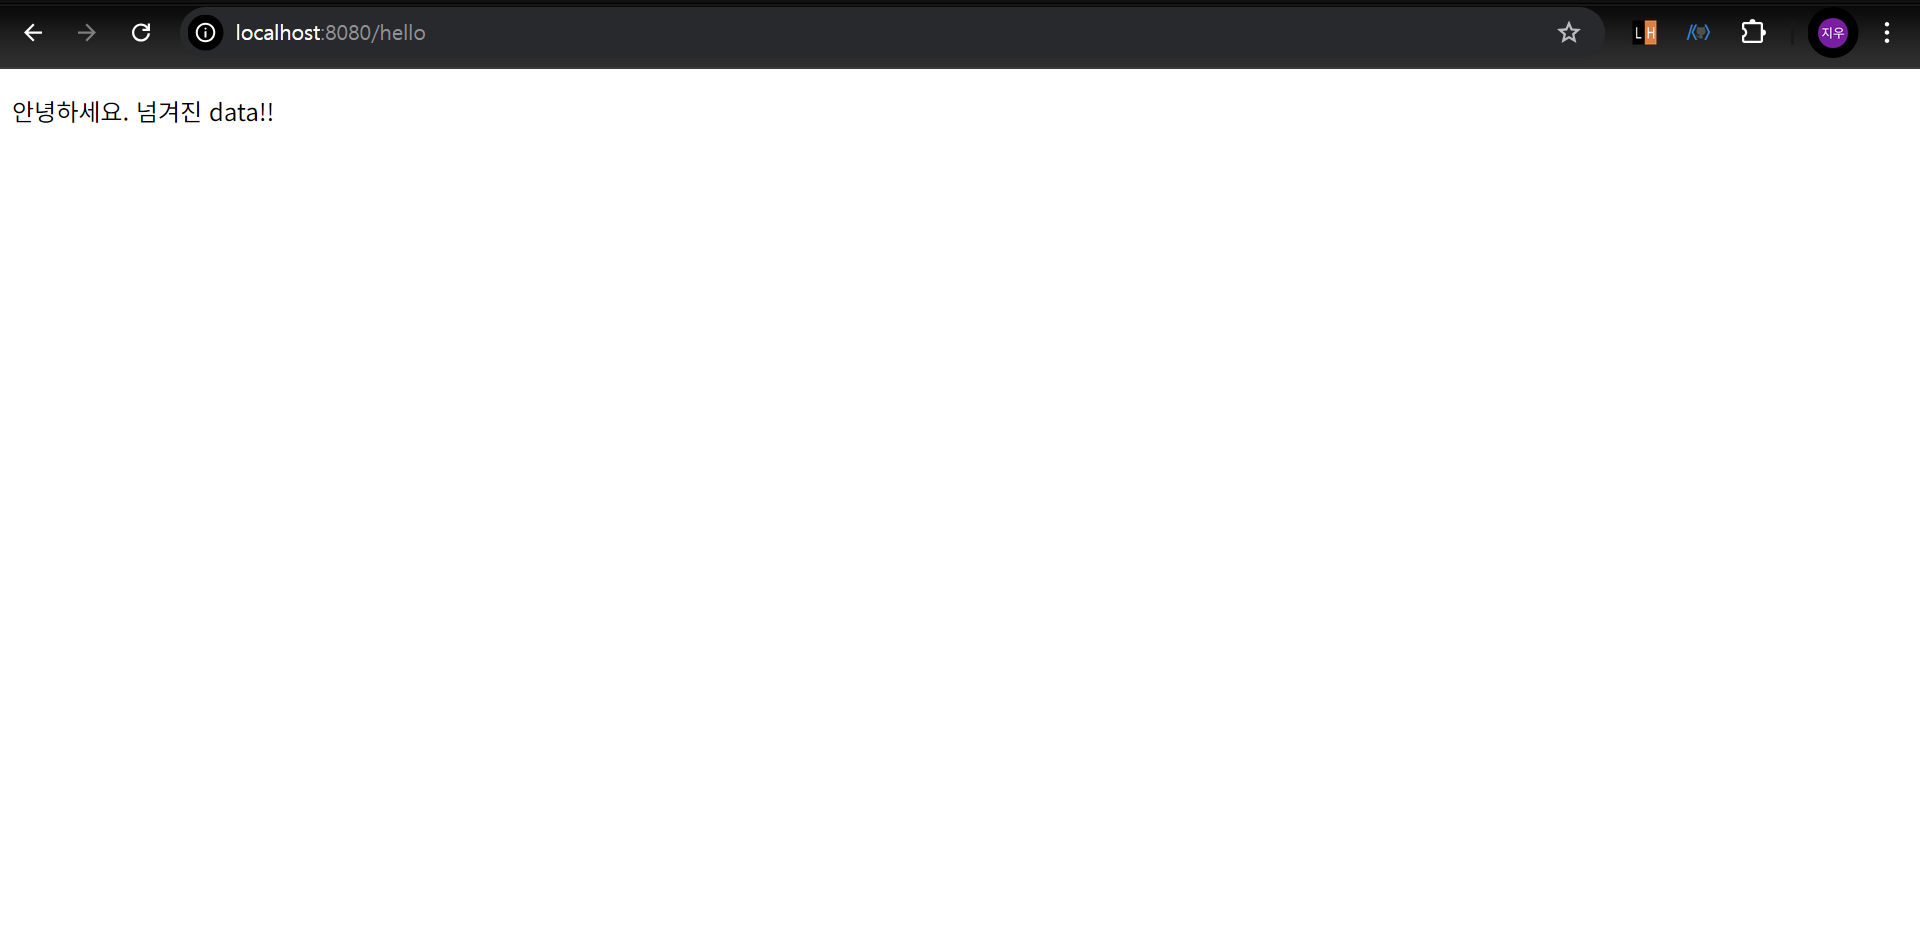
</html>이제 /hello 경로로 연결될 페이지를 Thymeleaf 템플릿 엔진을 이용해서 만들어보자.
3. Thymeleaf 템플릿 엔진
Thymeleaf
Spring에서 주로 사용되는 템플릿 엔진
서버에서 데이터를 받아 동적으로 HTML을 생성할 수 있도록 돕는 도구
Controller 설정
Controller는 Web application의 첫번째 진입점 사용자의 요청을 처리하고 그 결과를 뷰(View)에 전달하는 역할을 한다.
Controller 메서드에 전달된 데이터는 View에서 활용할 수 있도록 Model 객체를 통해 전달된다.
\src\main\java\{project_name}\controller\{controller_name}.java
package gdg.spring_lab_01.controller;

import org.springframework.stereotype.Controller;
import org.springframework.ui.Model;
import org.springframework.web.bind.annotation.GetMapping;

@Controller
public class HelloController {
    @GetMapping("hello")
    public String hello(Model model) {
        model.addAttribute("data", "넘겨진 data!!");
        return "hello"; // \templates\hello.html
    }
}- @Controller: 이 클래스가 웹 요청을 처리하는 컨트롤러임을 명시
- @GetMapping("hello"):
/hello경로로 GET(HTTP Method) 요청이 들어오면hello()메서드 실행 - Model: View에 데이터를 전달하기 위한 객체.
"data"라는 이름의 속성(attribute)에"넘겨진 data!!"라는 값을 담아 View에 전달 - return "hello":
templates/hello.html파일을 렌더링하여 응답으로 전송
HTML 템플릿
\src\main\resources\templates\{file_name}.html
<!DOCTYPE HTML>
<html xmlns:th="http://www.thymeleaf.org">
<head>
    <title>Hello</title>
    <meta http-equiv="Content-Type" content="text/html; charset=UTF-8" />
</head>
<body>
<p th:text="'안녕하세요. ' + ${data}" >안녕하세요. 손님</p>
</body>
</html>- th: Thymeleaf에서 HTML 요소의 텍스트 콘텐츠를 동적으로 설정할 때 사용되는 속성. 서버에서 전달받은
data값을 HTML에서 사용할 수 있게 해준다.
${data}: 컨트롤러에서 전달된data속성의 value값 모델(Model)을 통해 뷰(HTML)로 전달된 데이터를 템플릿 파일에서 사용할 때${}표현식 사용
4. 빌드 & 실행
cmd (Power Shell 말고)
gradlewgradlew buildcd build/libsdirjava -jar spring-lab-01-0.0.1-SNAPSHOT.jar- localhost:8080 접속
- 종료: ^c
정적으로 생성된 Welcome page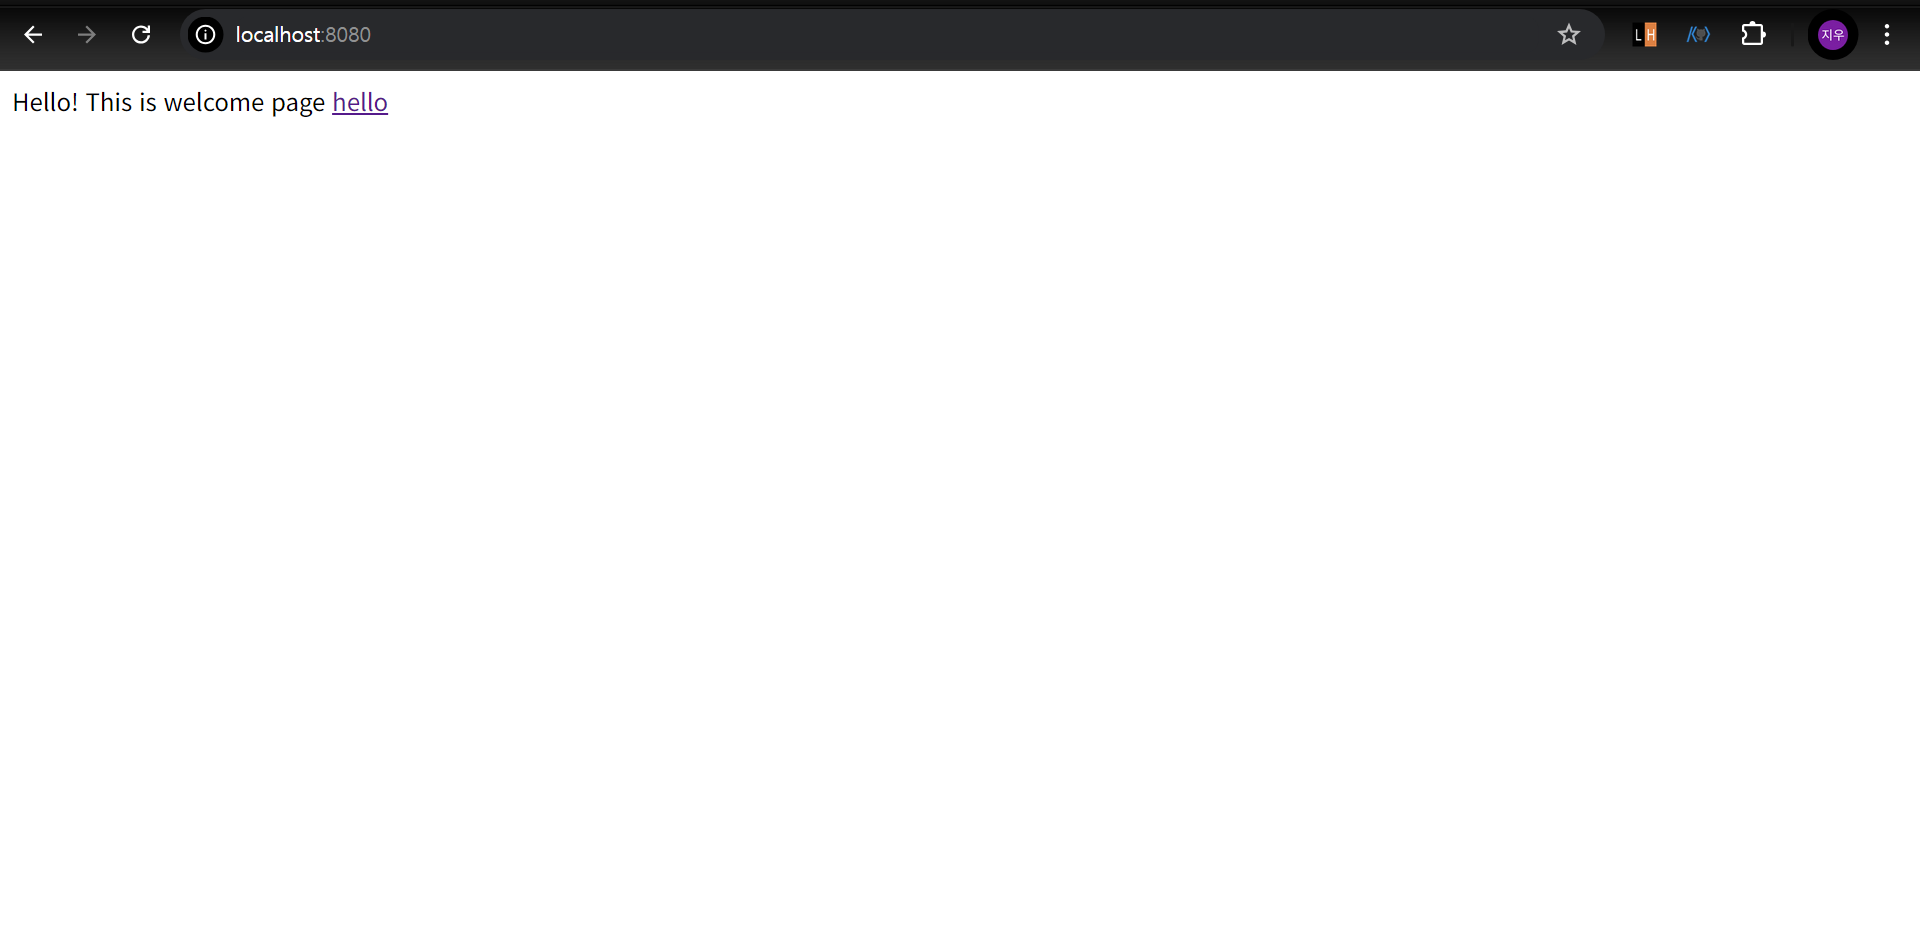
Thymeleaf 템플릿 엔진으로 렌더링된 /hello 페이지