웹을 개발하는 세 가지 방법
1. 정적 컨텐츠
파일을 그대로 웹브라우저에 내리는 것.
2. MVC와 템플릿 엔진
html 파일을 서버에서 프로그래밍해서 동적으로 바꿔서 내리는 것.
3. API
json/xml과 같은 데이터 포맷을 전달해주는 것.
1. 정적 컨텐츠(Static Content)
- Spring Boot는 기본적으로
/static(or/publicor/resourcesor/META-INF/resources) 폴더로부터 정적 콘텐츠를 가져온다.
실습
1. html 파일 작성
resources/static/hello-static.html
  <!DOCTYPE HTML>
  <html>
  <head>
  <title>static content</title>
  <meta http-equiv="Content-Type" content="text/html; charset=UTF-8" />
  </head>
  <body>
  정적 컨텐츠 입니다.
  </body>
  </html>
2. 실행
http://localhost:8080/hello-static.html
위 url로 접속하면 html 컨텐츠가 보인다.
우클릭하여 페이지 소스 보기를 클릭하면, html코드가 그대로 보인다.
작동 방식
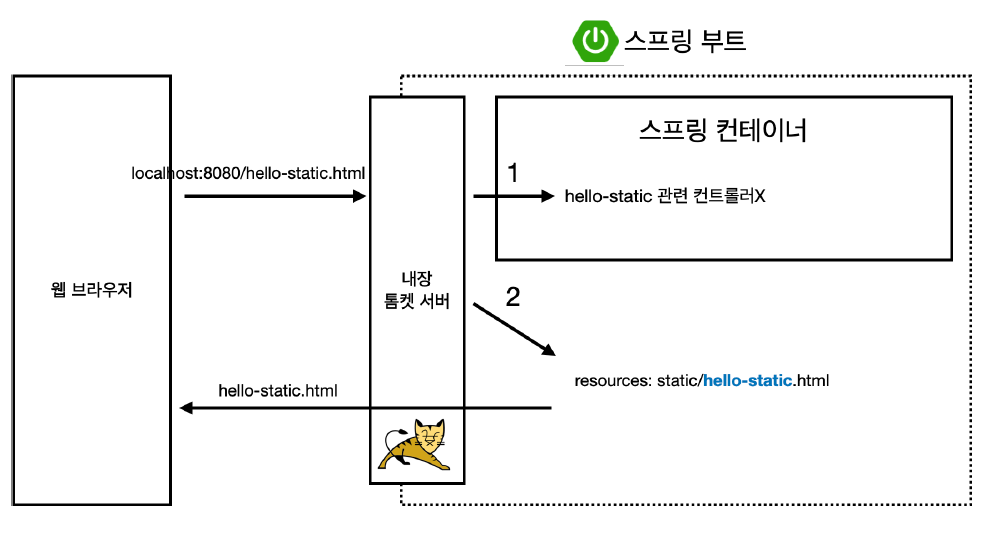
1. 웹 브라우저가 내장 톰캣 서버에게 해당 url 요청
2. 내장 톰캣 서버는 스프링 컨테이너에게 hello-static 전달
- 스프링 컨테이너는 먼저 controller를 찾아본다(우선순위). 없으면
resources/static에서 찾아서 html 코드를 반환해준다.
2. MVC와 템플릿 엔진
가장 많이 쓰이는 방식
jsp, php : 템플릿 엔진
MVC 패턴
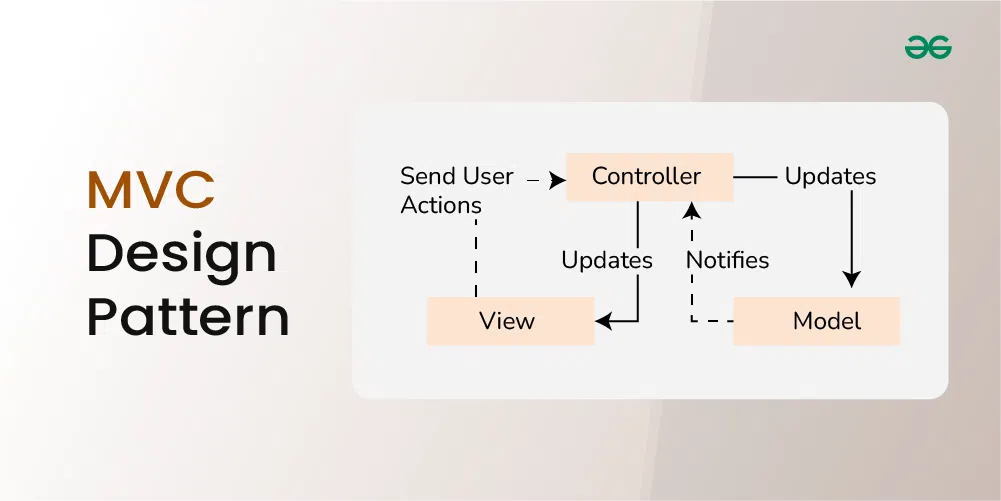
Model
data, application의 business logic 담당
Controller
Model과 View 중개
View
화면 그리는 것 담당
실습
Controller
@Controller
public class HelloController {
    @GetMapping("hello-mvc")
    public String helloMvc(@RequestParam("name") String name, Model model) {
        model.addAttribute("name", name);
        return "hello-template";
    }
}
View
resources/templates/hello-template.html
<html xmlns:th="http://www.thymeleaf.org">
<body>
<p th:text="'hello ' + ${name}">hello! empty</p>
</body>
</html>-
Thymeleaf 템플릿 엔진 장점
파일을 서버 없이 열어도 확인 가능 -
"hello! empty"
파일을 서버 없이 열었을 때 나오는 내용.
템플릿엔진으로 동작하면 앞 내용으로 치환된다. -
$ 표시: 모델에서 값 꺼내는 것
실행
http://localhost:8080/hello-mvc?name=spring
Required
http://localhost:8080/hello-mvc 실행하면 Error가 뜬다.
@RequestParamdocs.spring.io
required 옵션은 Default가 true라 parameter값을 꼭 넘겨줘야 error가 나지 않는다.
Controller
 @GetMapping("hello-mvc")
    public String helloMvc(@RequestParam(value = "name", required = false) String name, Model model){
        model.addAttribute("name", name);
        return "hello-template";
    }
ctrl+p 를 통해 option을 추가할 수 있다.
required option을 false로 수정하면 http://localhost:8080/hello-mvc 실행했을 때
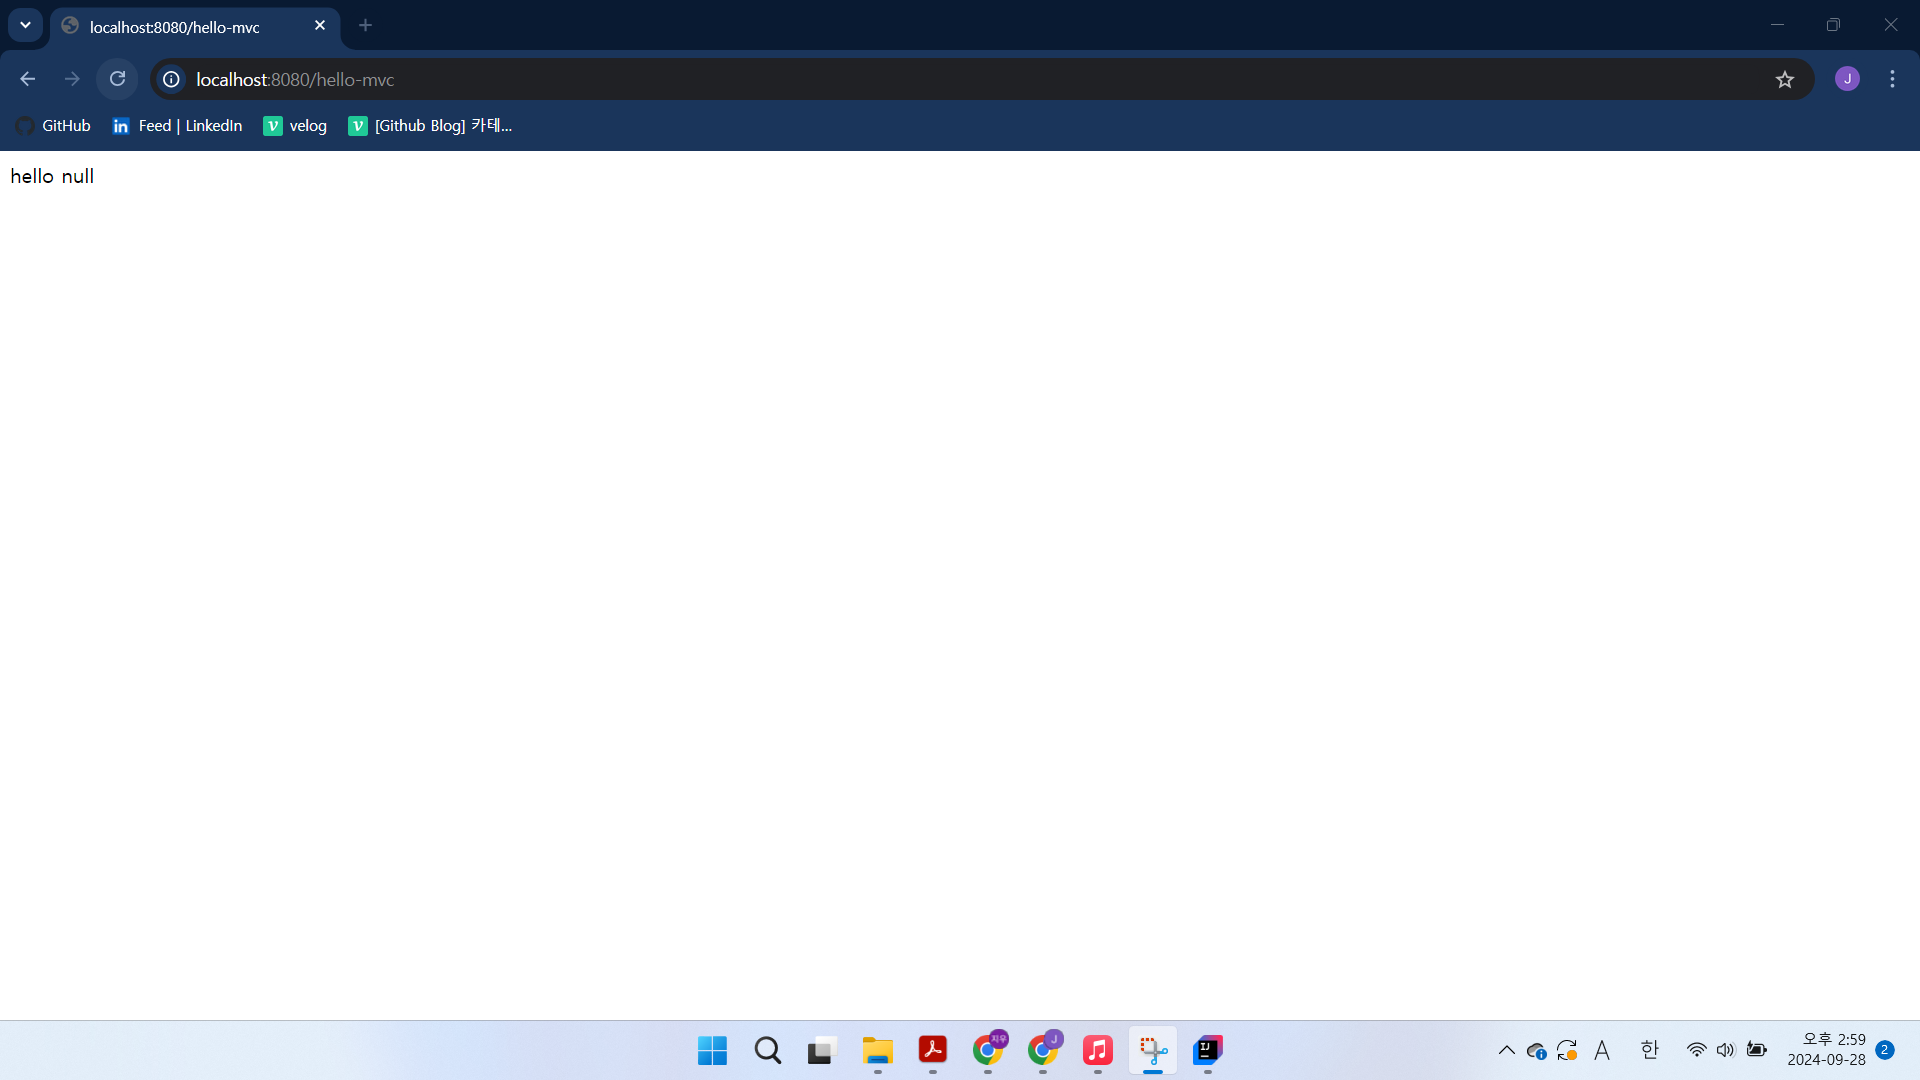 hello null이 표시된다.
작동 방식
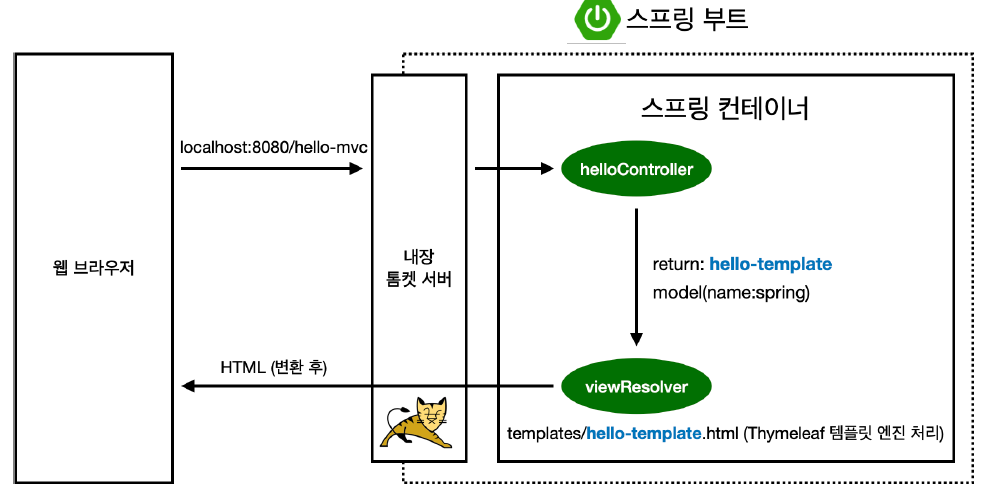
1. 웹 브라우저가 내장 톰캣 서버에게 해당 url 요청
2. 내장 톰캣 서버는 스프링 컨테이너에게 hello-mvc 전달
3. 스프링 컨테이너는 helloController에서 hello-mvc에 맵핑된 method를 호출한다. method에서는 model에 attribute를 추가한 후, viewResolver에 hello-template을 넘겨준다.
4. viewResolver는 templates/hello-template.html을 찾아서 Thymeleaf 템플릿엔진에서 html을 변환한 후 웹브라우저에 넘겨준다.
3. API
@ResponseBody
HTTP의 BODY에 내용을 직접 반환
api로 데이터 전달 -> 화면은 클라이언트가 알아서
서버 간 통신 - html필요 x, 데이터 중요
문자 반환
@Controller
public class HelloController {
@GetMapping("hello-string")
@ResponseBody
public String helloSpring(@RequestParam("name") String name){
return "hello" + name;
}
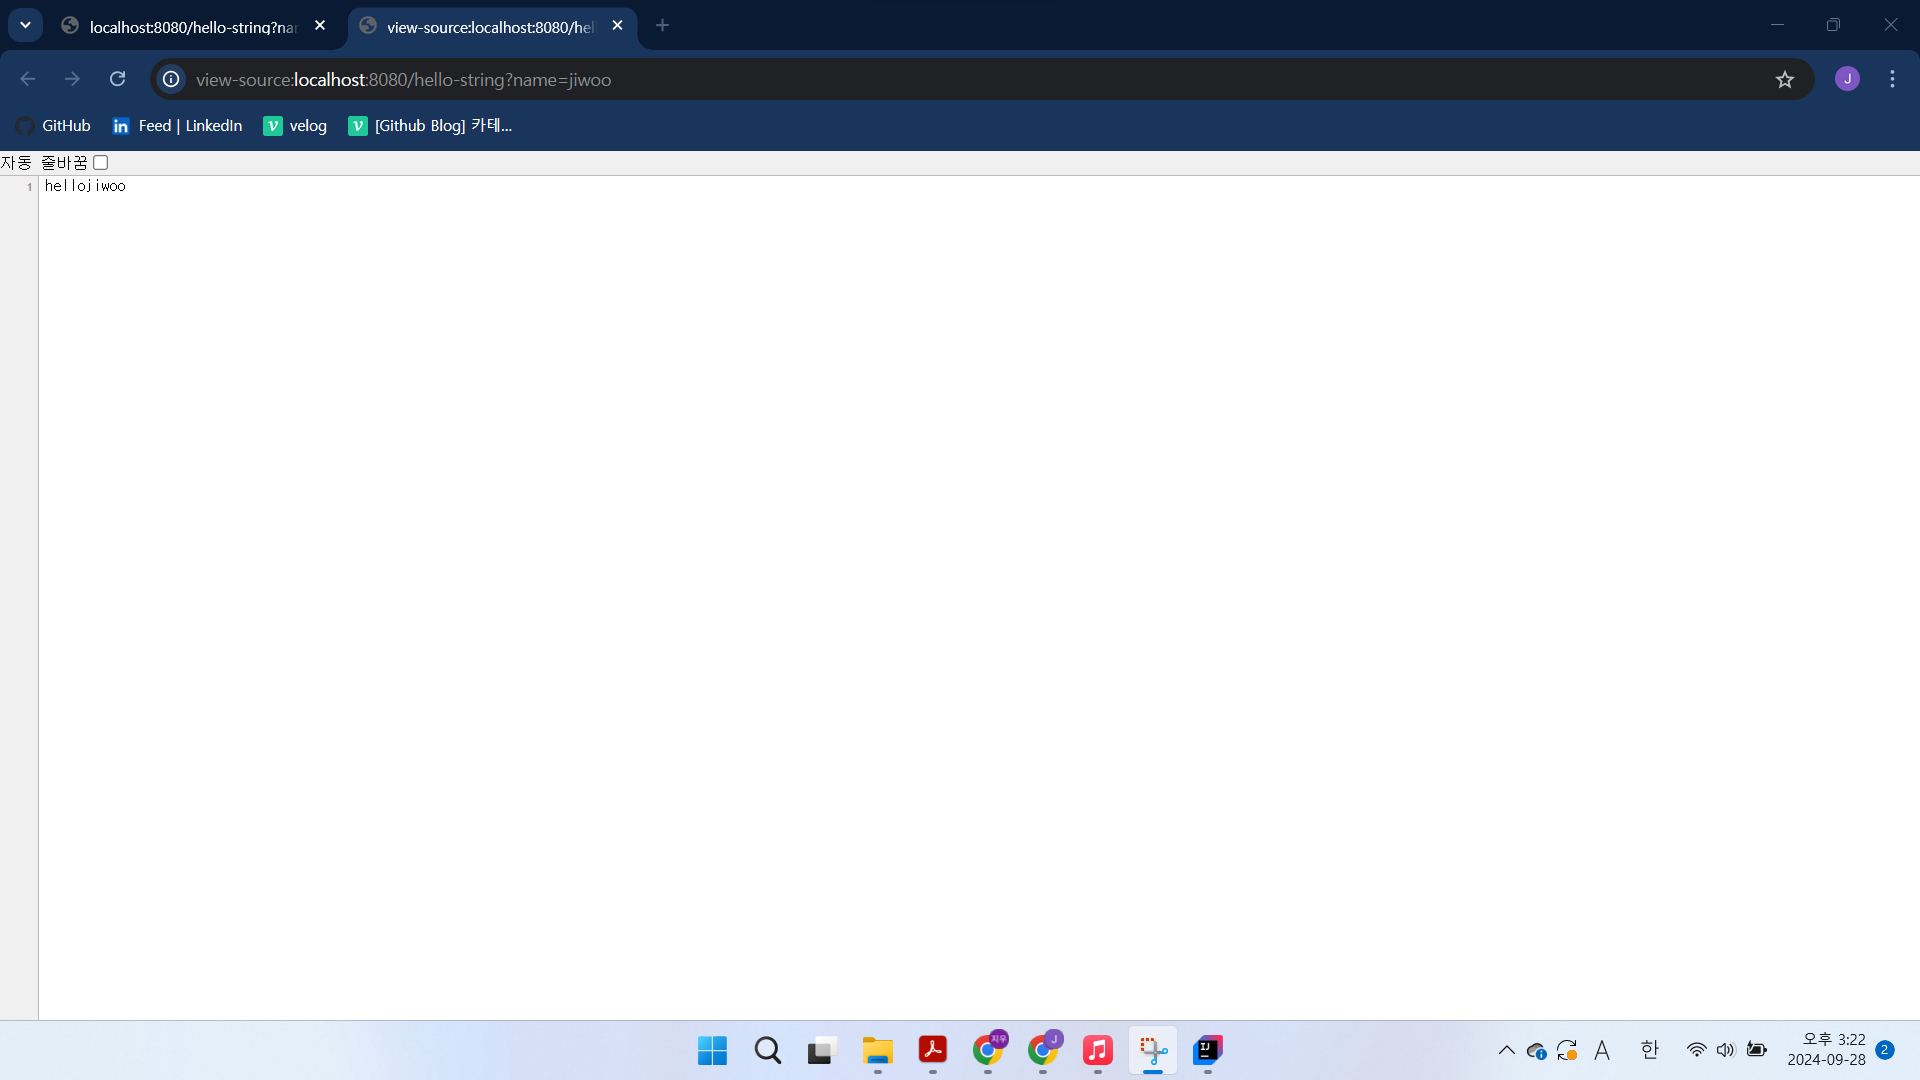
}실행 후 페이지 소스 보기 를 클릭하면 html 태그 없이 문자 내용이 그대로 나온다.
객체 반환
@Controller
    public class HelloController {

    @GetMapping("hello-api")
    @ResponseBody
    public Hello helloApi(@RequestParam("name") String name){
        Hello hello = new Hello();
        hello.setName(name);
        return hello;
    }

    public static class Hello{
        private String name;

        public String getName() {
            return name;
        }

        public void setName(String name) {
            this.name = name;
        }
    }
}- static class
helloController 클래스 안에서 쓸 수 있다. - getter/setter
javaBean 규약
property 접근 방식
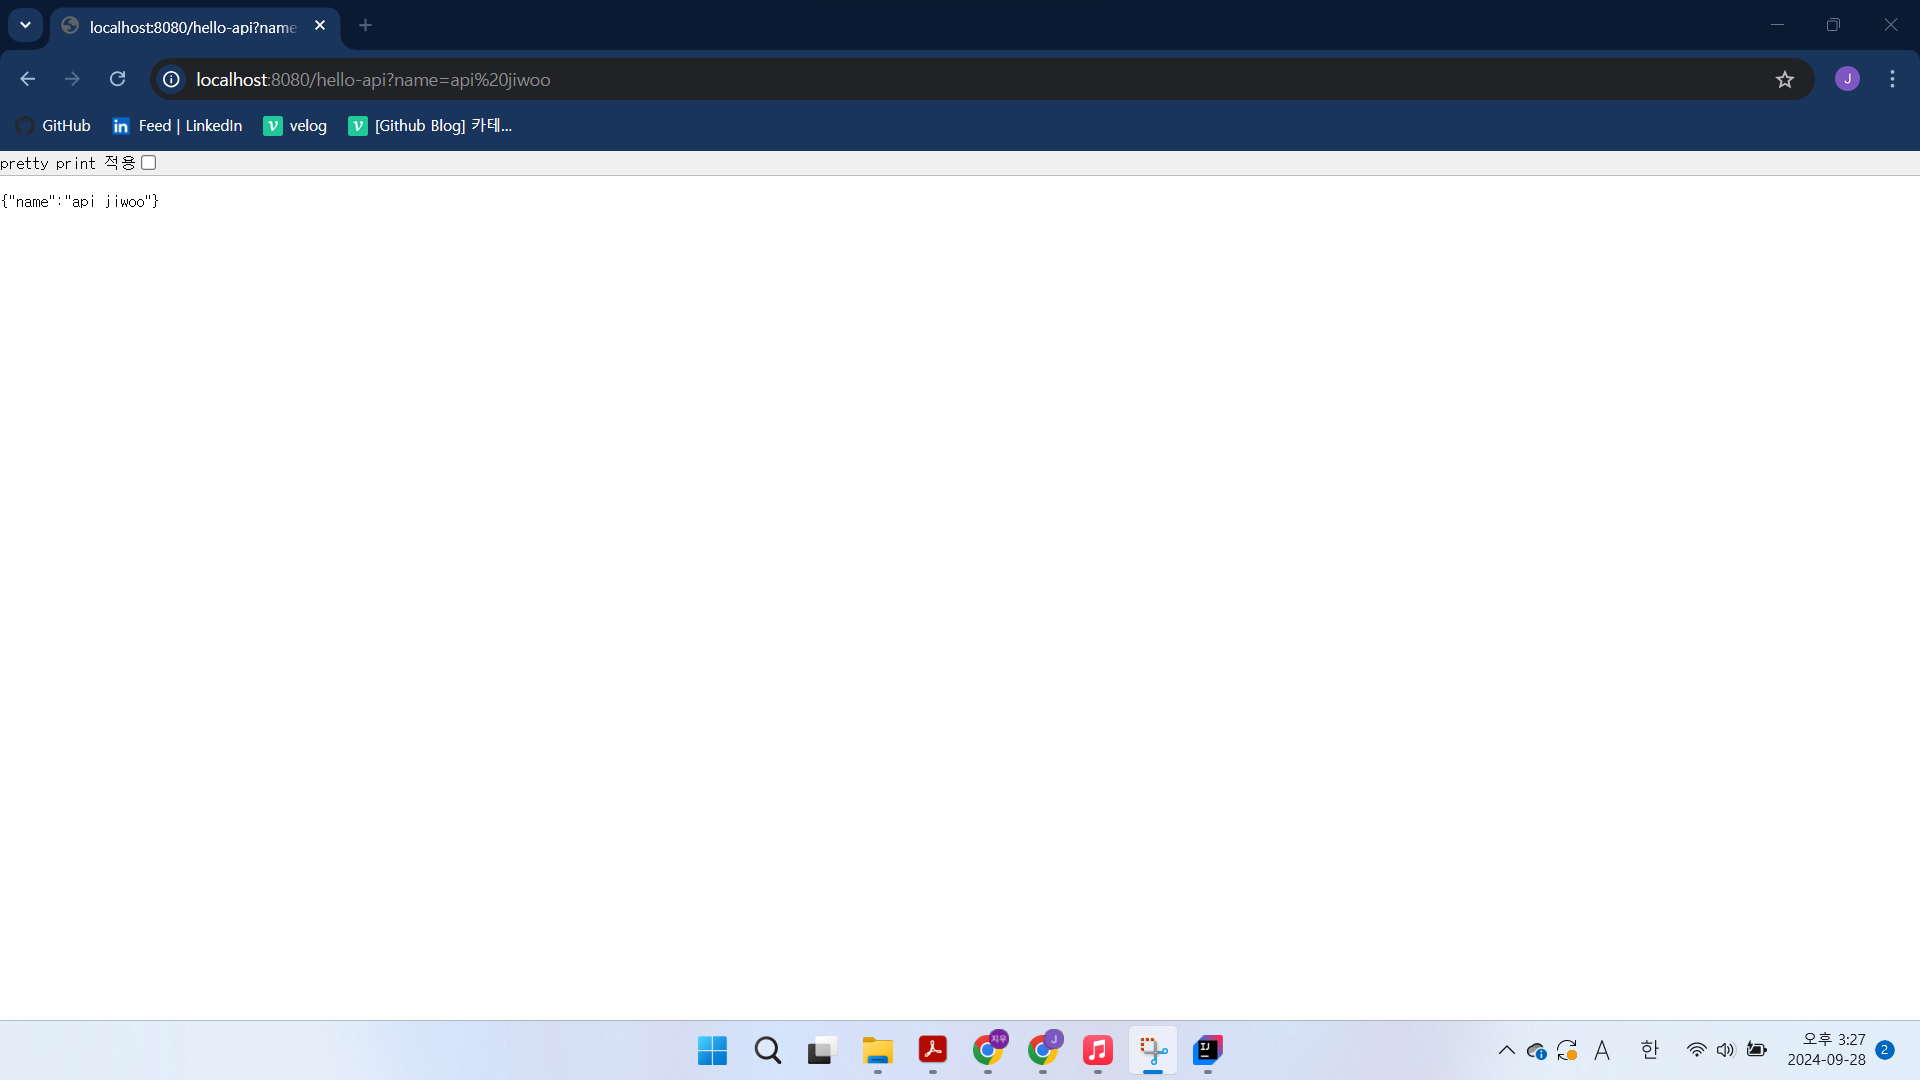 name이 json방식으로 표시된다.
작동 방식
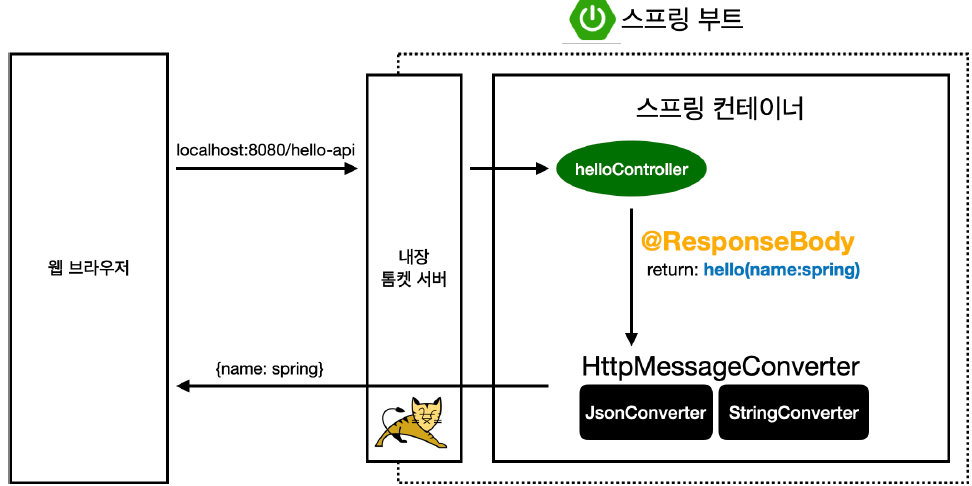
- 웹 브라우저가 내장 톰캣 서버에게 해당 url 요청
- 내장 톰캣 서버는 스프링 컨테이너에게
hello-api전달 - 스프링 컨테이너는
helloController에서hello-api에 맵핑된 method를 호출한다.
hello-api의@ResponseBody어노테이션으로 스프링 컨테이너는 HTTP의 BODY 내용을 그대로 반환한다. 이때 viewResolver 대신 HttpMessageConverter가 동작한다. 객체는 JsonConverter, 문자는 StringConverter가 작동한다.
@ResponseBody
viewResolver대신에HttpMessageConverter가 동작- 기본 문자처리:
StringHttpMessageConverter - 기본 객체처리:
MappingJackson2HttpMessageConverter