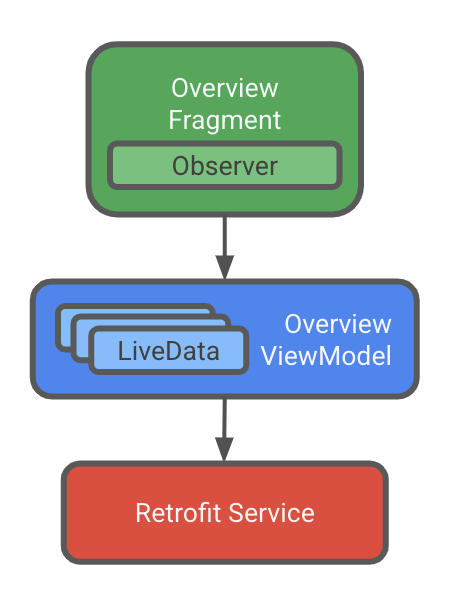
Retrofit 이라는 라이브러리를 사용해서 벡엔드 서버에서 데이터를 가져와보자. 이 실습에서 ViewModel이 네트워크와 직접 통신한다.
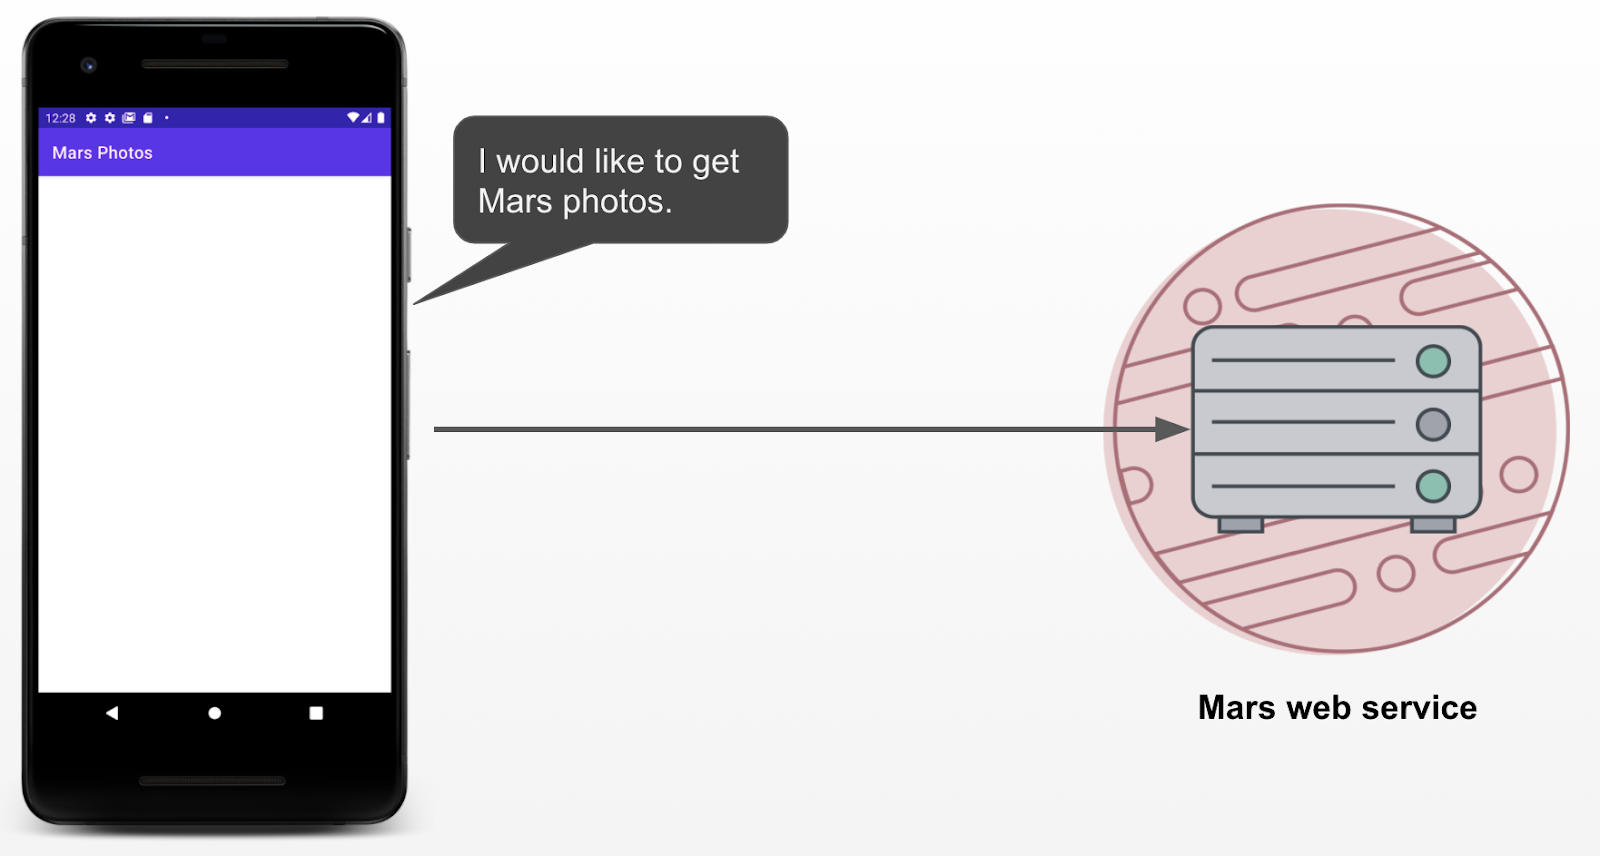
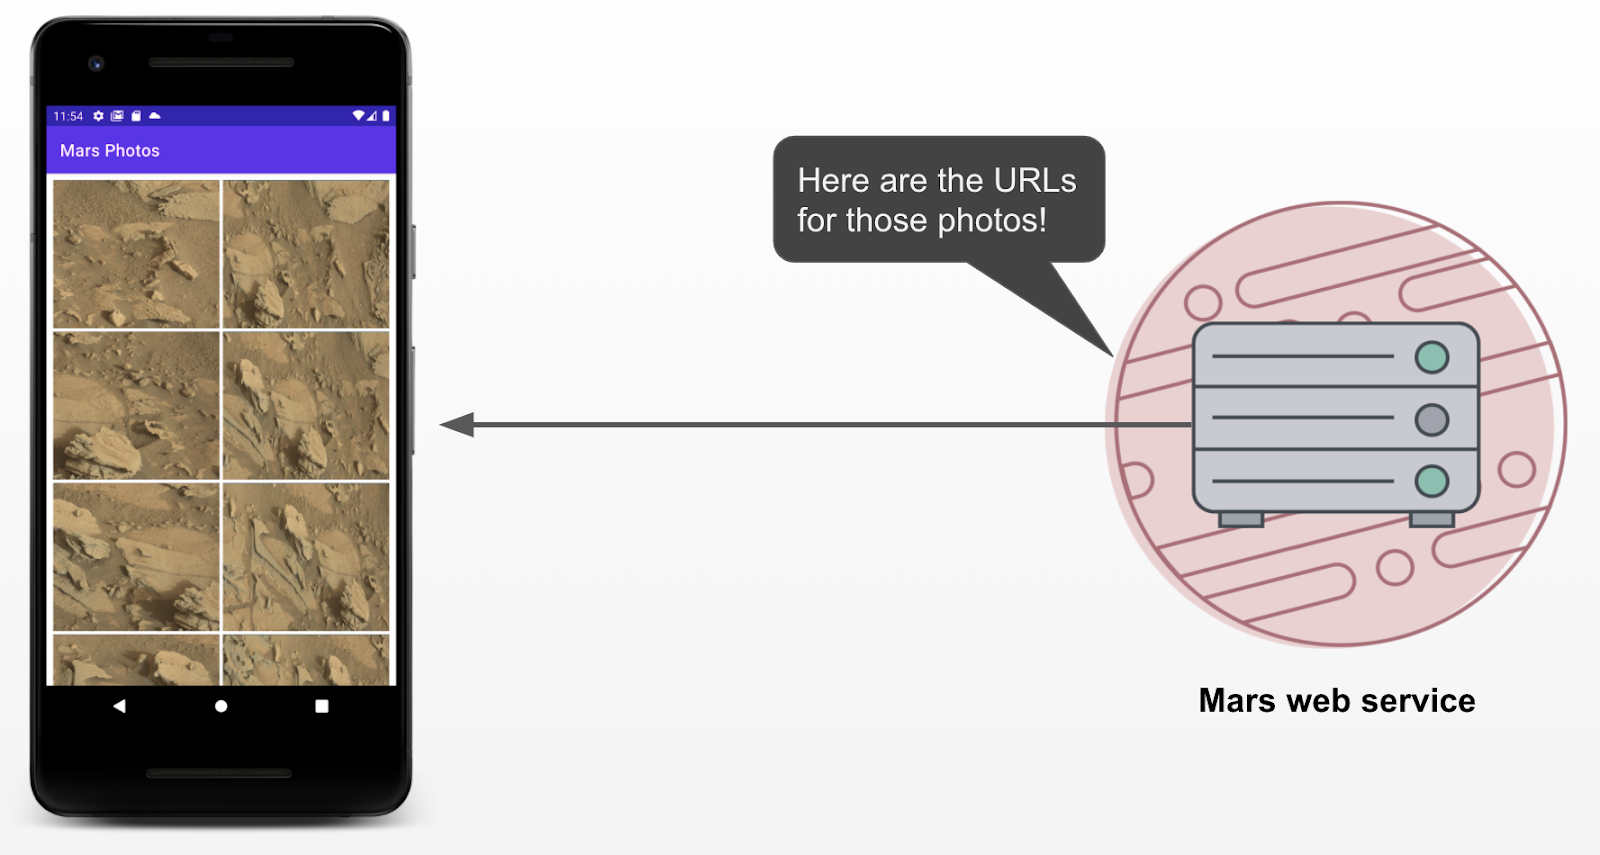
실습에서는 웹서버에서 화성 사진을 받아오는 어플을 만들것이다. LiveData를 사용하여 데이터 변경 시 앱 UI를 업데이트한다.
웹 서비스 및 Retrofit
오늘날 대부분의 웹 서버는 REST(REpresentational State Transfer의 약자)라는 Stateless(일일히 기억 안하는..) 웹 아키텍처를 사용해 웹 서비스를 실행한다. 이 아키텍처를 제공하는 웹 서비스를 RESTful 서비스라고 한다.
표준화된 방법으로 URI를 통해 RESTful 웹 서비스에 요청이 전송한다.
예를 들면..
다음 URL은 사용 가능한 화성 부동산 속성의 목록을 모두 가져온다.
https://android-kotlin-fun-mars-server.appspot.com/realestate
다음 URL은 화성 사진의 목록을 가져온다.
https://android-kotlin-fun-mars-server.appspot.com/photos
이러한 URL은 http를 통해 네트워크에서 가져올 수 있다.
일반적인 HTTP 작업에는 다음이 포함된다.
- 서버 데이터를 검색하는 GET
- 서버에 새로운 데이터를 추가/생성/업데이트하는 POST 또는 PUT
- 서버에서 데이터를 삭제하는 DELETE
실습을 시작하기 전에 세팅을 하자..
build.gradle (Module: MarsPhots.app)에서
// Retrofit with Moshi Converter
    implementation 'com.squareup.retrofit2:converter-moshi:2.9.0'
    implementation 'com.squareup.moshi:moshi-kotlin:1.9.3'
그리고 retrofit이 자바8 기능을 사용하므로
compileOptions {
    sourceCompatibility JavaVersion.VERSION_1_8
    targetCompatibility JavaVersion.VERSION_1_8
  }
인터넷 사용 권한을 얻기 위해 manifests/AndroidManifest.xml의 <application> 태그 바로 앞에
<uses-permission android:name="android.permission.INTERNET" />인터넷에 연결 & json 파싱
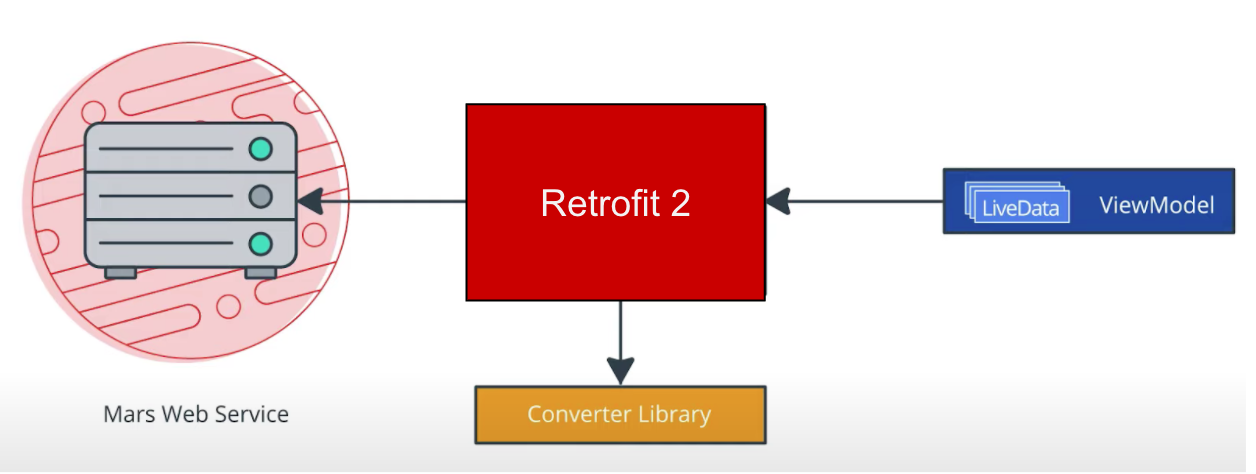
Retrofit은 웹 서비스의 콘텐츠를 기반으로 앱의 네트워크 API를 만든다. 웹 서비스에서 데이터를 가져온 후 변환기 라이브러리를 사용해 응답을 String 등의 객체 형식으로 변환한다.
Moshi는 JSON 문자열을 Kotlin 객체로 변환하는 Android JSON 파서 라이브러리이다.
Moshi는 Kotlin 데이터 클래스가 있어야 파싱된 결과를 저장할 수 있으므로, 데이터 클래스 MarsPhoto를 만들자.
[{
    "id":"424906",
    "img_src":"http://mars.jpl.nasa.gov/msl-raw-images/msss/01000/mcam/1000ML0044631300305227E03_DXXX.jpg"
},
...]
우리가 웹에서 받아온 json 파일은 이런 식으로 생겼다. 그러므로 MarsPhoto는..
data class MarsPhoto (
    val id: String,
    //img_src라는 키를 imgSrcUrl 이라는 변수에 할당.. 카멜표기법으로 하기위해!
    @Json(name = "img_src") val imgSrcUrl: String
)
이렇게 작성한다.
ViewModel이 웹 서비스와 통신하는 데 사용할 네트워크 계층 MarsApiService.kt를 만들자.
private const val BASE_URL =
    "https://android-kotlin-fun-mars-server.appspot.com"


private val moshi = Moshi.Builder()
    .add(KotlinJsonAdapterFactory())
    .build()
private val retrofit = Retrofit.Builder()
    //Moshi를 사용하여 converter를 가져오자.
    .addConverterFactory(MoshiConverterFactory.create(moshi))
    .baseUrl(BASE_URL) //웹 서비스의 기본 URI를 추가
    .build()  //retrofit 객체 만듦

//기본 URL(Retrofit 빌더에서 정의함)에 엔드포인트 photos를 추가해서 가져옴.
interface MarsApiService {
    @GET("photos")
    suspend fun getPhotos(): List<MarsPhoto> //변경
    //참고-suspend 키워드를 붙여서 정지함수로 만들면 코루틴 내에서 이 메서드 호출 가능
}

/*
싱글톤 패턴은 객체의 인스턴스가 하나만 생성되도록 보장함.
Retrofit 객체에서 create() 함수를 호출하는 데는 리소스가 많이 들고,
앱에는 Retrofit API 서비스의 인스턴스가 하나만 필요함. 그러니까 싱글톤 객체로 만들자.
 */
object MarsApi {
    val retrofitService: MarsApiService by lazy { retrofit.create(MarsApiService::class.java) }
}
이제 ViewModel 에서 웹 서비스를 호출할 수 있다. getMarsPhotos()를 구현하자.
class OverviewViewModel : ViewModel() {

    // The internal MutableLiveData that stores the status of the most recent request
    private val _status = MutableLiveData<String>()

    // The external immutable LiveData for the request status
    val status: LiveData<String> = _status
    /**
     * Call getMarsPhotos() on init so we can display status immediately.
     */
    init {
        getMarsPhotos()
    }

    /**
     * Gets Mars photos information from the Mars API Retrofit service and updates the
     * [MarsPhoto] [List] [LiveData].
     */
    private fun getMarsPhotos() {
        //launch 함수 호출해 코루틴 실행.
        viewModelScope.launch {
            try {
                //MarsApiService에서 정의한 함수를 호출
                val listResult = MarsApi.retrofitService.getPhotos()
                //서버에서 받은 결과를 변수에 저장
                _status.value = "Success: ${listResult.size} Mars photos retrieved"
            }
            catch (e: Exception) { //인터넷에 연결 안된 사용자가 튕기지 않도록..
                _status.value = "Failure: ${e.message}"
            }
        }
    }
}
인터넷 이미지 표시하기
웹 URL에서 사진을 표시하는 것은 간단해 보이지만 사실 상당한 엔지니어링이 필요함. 이미지를 다운로드하고, 내부적으로 저장하고, 압축 형식에서 Android가 사용할 수 있는 이미지로 디코딩해야 한다. 이미지는 캐시해야 하고, 이러한 작업들은 우선순위가 낮은 백그라운드 스레드에서 이루어져야 한다. 또한 성능을 위해 둘 이상의 이미지를 한 번에 가져오고 디코딩하는 것이 좋다.
...다행히 Coil이라는 라이브러리를 사용하여 이미지를 다운로드하고 버퍼링 및 디코딩하고 캐시할 수 있다.
	// Coil
    implementation "io.coil-kt:coil:1.1.1"
Coil에는 기본적으로 다음 두 가지가 필요하다.
- 로드하고 표시할 이미지의 URL
- 이미지를 실제로 표시하는 ImageView 객체
결합 어댑터 만들기 및 Coil 사용하기
<ImageView
    android:layout_width="wrap_content"
    android:layout_height="wrap_content"
app:imageUrl="@{product.imageUrl}"/>@BindingAdapter("imageUrl")
fun bindImage(imgView: ImageView, imgUrl: String?) {
imgUrl?.let {
// Load the image in the background using Coil.
}
}
}이런 식으로 쓰는 걸 결합 어댑터라고 한다.
BindingAdapters.kt를 만들자.
class BindingAdapters {
    @BindingAdapter("imageUrl")
    fun bindImage(imgView: ImageView, imgUrl: String?) {
        //let은 코틀린의 범위 함수 중 하나. 객체의 context 내에서 코드 블록 실행
        imgUrl?.let {
            //URL 문자열을 Uri 객체로 변환
            val imgUri = imgUrl.toUri().buildUpon().scheme("https").build()
            // Coil의 load(){}를 사용하여 imgUri 객체에서 imgView로 이미지를 로드
            imgView.load(imgUri)
        }
    }
}
ViewModel에서 LiveData 추가해준다.
//LiveData 설정! List<MarsPhoto>유형으로
    private val _photos = MutableLiveData<List<MarsPhoto>>()
    val photos: LiveData<List<MarsPhoto>> = _photos
try {
_photos.value = MarsApi.retrofitService.getPhotos()
_status.value = "Success: Mars properties retrieved"
} catch (e: Exception) {
_status.value = "Failure: ${e.message}"
}try-catch문도 그에 맞게 수정해준다.
<androidx.recyclerview.widget.RecyclerView
            android:id="@+id/photos_grid"
            android:layout_width="0dp"
            android:layout_height="0dp"
            android:padding="6dp"
            app:layoutManager=
                "androidx.recyclerview.widget.GridLayoutManager"
            app:layout_constraintBottom_toBottomOf="parent"
            app:layout_constraintLeft_toLeftOf="parent"
            app:layout_constraintRight_toRightOf="parent"
            app:layout_constraintTop_toTopOf="parent"
            app:spanCount="2"
            tools:itemCount="16"
            tools:listitem="@layout/grid_view_item"
            app:listData="@{viewModel.photos}"
            android:clipToPadding="false"
/>layout/fragment_overview.xml에 리사이클러뷰 추가해준다.
ListAdapter
ListAdapter는 RecyclerView.Adapter클래스의 서브클래스로,목록 데이터를 RecyclerView에 표시한다.
이 앱에서는 ListAdapter의 DiffUtil 구현을 사용한다. DiffUtil을 사용하면 RecyclerView에서 일부 항목이 추가되거나 삭제 또는 변경될 때 전체 목록이 새로고침되지 않고, 변경된 항목만 새로고침된다.
PhotoGridAdapter.kt를 추가하자.
class PhotoGridAdapter :
    ListAdapter<MarsPhoto, PhotoGridAdapter.MarsPhotosViewHolder>(DiffCallback) {


    class MarsPhotosViewHolder(
        private var binding: GridViewItemBinding
    ) : RecyclerView.ViewHolder(binding.root) {
        fun bind(marsPhoto: MarsPhoto) {
            binding.photo = marsPhoto
            // This is important, because it forces the data binding to execute immediately,
            // which allows the RecyclerView to make the correct view size measurements
            binding.executePendingBindings()
        }
    }


     //리사이클러 뷰가 어떤 아이템이 바뀌었는지 알아내게 해줌
    companion object DiffCallback : DiffUtil.ItemCallback<MarsPhoto>() {
        override fun areItemsTheSame(oldItem: MarsPhoto, newItem: MarsPhoto): Boolean {
            return oldItem.id == newItem.id
        }

        override fun areContentsTheSame(oldItem: MarsPhoto, newItem: MarsPhoto): Boolean {
            return oldItem.imgSrcUrl == newItem.imgSrcUrl
        }
    }

    //새로운 리사이클러뷰 아이템을 만든다. (레이아웃 매니저에 의해 invoke)
    override fun onCreateViewHolder(
        parent: ViewGroup,
        viewType: Int
    ): MarsPhotosViewHolder {
        return MarsPhotosViewHolder(
            GridViewItemBinding.inflate(LayoutInflater.from(parent.context))
        )
    }
    //뷰의 내용을 바꿈 (레이아웃 매니저에 의해 invoke)
    override fun onBindViewHolder(holder: MarsPhotosViewHolder, position: Int) {
        val marsPhoto = getItem(position)
        holder.bind(marsPhoto)
    }
}BindingAdapter.kt에서 리사이클러 뷰에 보이는 데이터를 업데이트하기 위해...
@BindingAdapter("listData")
fun bindRecyclerView(recyclerView: RecyclerView, data: List<MarsPhoto>?) {
    val adapter = recyclerView.adapter as PhotoGridAdapter
    adapter.submitList(data)
}
추가해준다.
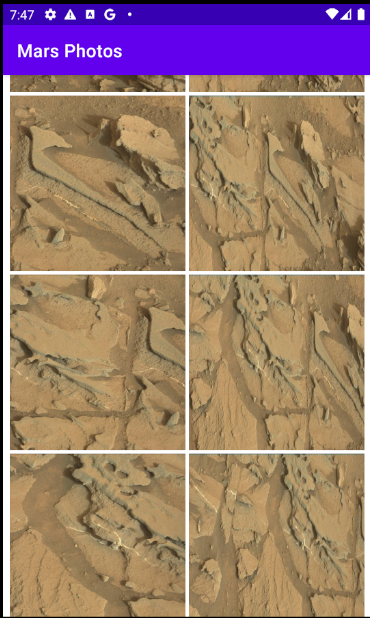
이제 앱을 실행하면 다음과 같이 표시된다.

