동기 로드와 비동기 로드는 적을 때마다 헷갈린다.
동기 로드 - 로드 끝날 때까지 모두 얼음
비동기 로드 - 백그라운드에서 로드 돌리기
한 번 이상하게 적었다가 수정했다. 앞으론 실수하지 말아야지.
ㅡㅡㅡㅡㅡㅡㅡㅡㅡㅡㅡㅡㅡㅡㅡㅡㅡㅡㅡㅡㅡㅡ
오늘도 강의 듣다 말고 딴 길로 한참 샜다. 하지만 어쩌겠는가. 강사가 구현하는 방식이 마음에 들지 않는데..
강사는 디버프 적용 시 재생될 나이아가라를 위해 간단하게 DebuffNiagaraComponent를 구현했다. BeginPlay 시점에 나이아가라를 Activate하고, Owner가 사망하거나 디버프 태그 카운트가 0이 될 때 Deactivate하는 아주 간단한 클래스다. 그리고 이걸 BurnNiagaraComponent라는 이름으로 캐릭터한테 붙였다.(!!!!!!!!!!)
튜토리얼이니까..
그렇다. 강사는 내가 이해하기 쉽도록 최대한 어렵지 않게 구현하고 있다. 또한, 이 강의는 GAS 위주의 강의기 때문에 다른 부분은 빠르게 넘어가려는 의도도 있을 것이다. 솔직히 GA, GE, GC 같은 것만 이해하려 해도 개념이 너무 큼직하다. 그런 와중에 다른 개념에 대해서도 확장성을 고려하고 빡빡하게 최적화하려 든다면 학생들이 떨어져나갈 수도 있다.
하지만 나는 그저그런 개발자가 되고 싶지 않다. 당장은 정답이 아니더라도 내가 생각하는 방식을 적용하며 강의를 따라가고 있다. 오답이면 뭐 어떤가. 그게 오답이라는 걸 알아내는 과정이 되면 좋은 거지.
그래서 내가 한 방식은
우선 디버프부터 설명해야겠다. 사실 나이아가라만이 아니라 디버프를 처음부터 다르게 구현하려 시도했다. 왜냐면 이것도.. 강사의 방식이 마음에 들지 않았기 때문이다. 강사는 데미지 적용과 함께 디버프를 적용했는데, 그렇게 되면 디버프'만' 거는 스킬 같은 건 존재할 수 없기 때문이다. 데미지를 0으로라도 넣어야 디버프를 걸 수 있는 구조가 된다. 그게 마음에 들지 않았다.
그럼 이제 본격적으로 살펴보자.
TArray<FGameplayEffectSpecHandle> UAuraGameplayAbility::MakeDebuffSpecHandle()
{
	if (!DebuffEffectContextHandle.Get())
	{
		DebuffEffectContextHandle = GetAbilitySystemComponentFromActorInfo()->MakeEffectContext();
	}

	const FAuraGameplayTags& GameplayTags = FAuraGameplayTags::Get();
	TArray<FGameplayEffectSpecHandle> DebuffSpecs;
	for (const auto& Data : DebuffData)
	{
		FGameplayEffectSpecHandle DebuffSpecHandle = GetAbilitySystemComponentFromActorInfo()->MakeOutgoingSpec(DebuffEffectClass, 1.f, DebuffEffectContextHandle);
		UAbilitySystemBlueprintLibrary::AddGrantedTag(DebuffSpecHandle, Data.DebuffType);
		UAbilitySystemBlueprintLibrary::AssignTagSetByCallerMagnitude(DebuffSpecHandle, GameplayTags.Debuff_Chance, Data.DebuffChance);
		UAbilitySystemBlueprintLibrary::AssignTagSetByCallerMagnitude(DebuffSpecHandle, GameplayTags.Debuff_Damage, Data.DebuffDamage);
		UAbilitySystemBlueprintLibrary::AssignTagSetByCallerMagnitude(DebuffSpecHandle, GameplayTags.Debuff_Duration, Data.DebuffDuration);
		UAbilitySystemBlueprintLibrary::AssignTagSetByCallerMagnitude(DebuffSpecHandle, GameplayTags.Debuff_Frequency, Data.DebuffFrequency);
		DebuffSpecs.Add(DebuffSpecHandle);
	}

	return DebuffSpecs;
}

void UAuraGameplayAbility::CauseDebuff(AActor* TargetActor, const TArray<FGameplayEffectSpecHandle>& DebuffSpecs)
{
	// 관련 Actor에 추가
	if (DebuffEffectContextHandle.IsValid())
	{
		TArray<TWeakObjectPtr<AActor>> TargetActors;
		TargetActors.Add(TargetActor);
		DebuffEffectContextHandle.AddActors(TargetActors);
	}

	for (auto& DebuffSpecHandle : DebuffSpecs)
	{
		if (TargetActor->Implements<UCombatInterface>() && ICombatInterface::Execute_IsDead(TargetActor))
		{
			return;
		}

		GetAbilitySystemComponentFromActorInfo()->ApplyGameplayEffectSpecToTarget(*DebuffSpecHandle.Data.Get(), UAbilitySystemBlueprintLibrary::GetAbilitySystemComponent(TargetActor));
	}
}
BaseAbility에 선언한 MakeDebuffSpecHandle과 CauseDebuff 함수다. 디버프 적용 전에 Spec부터 만들고, ContextHandle에 타겟 액터로 하나씩 추가하며 디버프를 적용하는 상태다. 여러 개의 디버프를 하나의 스킬로 적용할 수 있도록 배열로 선언한 모습이다.
USTRUCT(BlueprintType)
struct FDebuffData
{
	GENERATED_BODY()

	UPROPERTY(EditDefaultsOnly, BlueprintReadOnly)
	FGameplayTag DebuffType;

	UPROPERTY(EditDefaultsOnly, BlueprintReadOnly)
	float DebuffChance = 0.f;

	UPROPERTY(EditDefaultsOnly, BlueprintReadOnly)
	float DebuffDamage = 0.f;

	UPROPERTY(EditDefaultsOnly, BlueprintReadOnly)
	float DebuffDuration = 0.f;

	UPROPERTY(EditDefaultsOnly, BlueprintReadOnly)
	float DebuffFrequency = 0.f;
};
DebuffData의 모습은 이렇게 생겼다. 데미지가 없는 디버프도 있을 수 있지만, 그거까지 구분하기엔 확장성이 너무 떨어질 것 같아서 위처럼 작성했다.
if (DamageTypes.Num() > 0)
{
	// Damage Context를 생성 및 초기화합니다.
	DamageEffectContextHandle = SourceASC->MakeEffectContext();
	DamageEffectContextHandle.SetAbility(this);
	DamageEffectContextHandle.Get()->AddSourceObject(Projectile);
	FHitResult HitResult;
	HitResult.Location = ProjectileTargetLocation;
	DamageEffectContextHandle.AddHitResult(HitResult);

	// 적중 시 데미지를 줄 수 있도록 Projectile에 Spec을 할당합니다.
	Projectile->DamageEffectSpecHandle = MakeDamageSpecHandle();
}

if (DebuffData.Num() > 0)
{
	// Debuff Context를 생성 및 초기화합니다.
	DebuffEffectContextHandle = SourceASC->MakeEffectContext();
	DebuffEffectContextHandle.SetAbility(this);
	DebuffEffectContextHandle.Get()->AddSourceObject(Projectile);

	// 적중 시 디버프를 줄 수 있도록 Projectile에 Spec을 할당합니다.
	Projectile->DebuffEffectSpecHandle = MakeDebuffSpecHandle();
}

// 액터 스폰
Projectile->FinishSpawning(SpawnTransform);
이건 ProjectileSpell의 수정된 부분이다. Damage도 마찬가지로 Spec을 만드는 함수와 실제로 적용하는 함수로 나눴다. Projectile의 경우 적중 대상에게만 데미지와 디버프를 적용하기 때문에 만들어진 SpecHandle 배열을 할당하는 방식으로 수정했다.
// ExecCalc_Debuff.cpp

// 디버프 부여 확률을 계산합니다.
const float Chance = Spec.GetSetByCallerMagnitude(GameplayTags.Debuff_Chance, false);
const bool bDebuff = FMath::FRandRange(0.f, 100.f) < Chance;
if (!bDebuff)
{
	return;
}

// 부여 성공 시 디버프 관련 계산을 시작합니다.
const float Damage = Spec.GetSetByCallerMagnitude(GameplayTags.Debuff_Damage, false);
const float Duration = Spec.GetSetByCallerMagnitude(GameplayTags.Debuff_Duration, false);
const float Frequency = Spec.GetSetByCallerMagnitude(GameplayTags.Debuff_Frequency, false);
강사는 데미지 계산 시 Debuff 관련 수치까지 가져와서 함께 계산했기 때문에, 별도의 Spec 생성도 없었다. 하지만 나는 DebuffSpec을 만들어서 사용하기 때문에 Attribute를 직접적으로 변화시키진 않지만 수치 계산을 위해 ExecCalc 클래스를 사용했다. 먼저 위처럼 태그를 통해 아까 AssignTagSetByCallerMagnitude로 할당한 값들을 가져온 뒤 디버프 관련 계산을 실시한다.(현재는 아무것도 안 하고 그냥 적용)
FGameplayEffectContextHandle EffectContextHandle = Spec.GetContext();
UAuraAbilitySystemLibrary::SetDebuffDataContext(EffectContextHandle, TypeTagForContext, Damage, Duration, Frequency);

// 이벤트 전달용 Attribute Modifier를 생성 및 할당합니다.
// Magnitude가 0이기 때문에 Attribute에 값 변화가 일어나지 않고 일어난다 해도 게임 플레이에 영향을 주지 않습니다.
// 하지만 AttributeSet에게 '이 Attribute에 값 변화가 발생했다.'고 이벤트가 전달됩니다.
// 사실상 GAS의 시스템을 이용한 트릭성 로직입니다.
const FGameplayModifierEvaluatedData EvaluatedData(UAuraAttributeSet::GetIncomingDebuffAttribute(), EGameplayModOp::Additive, 0.f);
OutExecutionOutput.AddOutputModifier(EvaluatedData);
계산 종료 후 라이브러리 함수를 통해 Context에 해당 값들을 담는다. 먼저 보자.
void UAuraAbilitySystemLibrary::SetDebuffDataContext(FGameplayEffectContextHandle& EffectContextHandle, const FGameplayTag& InDebuffType, const float InDamage, const float InDuration, const float InFrequency)
{
	if (FAuraGameplayEffectContext* AuraEffectContext = static_cast<FAuraGameplayEffectContext*>(EffectContextHandle.Get()))
	{
		FDebuffDataContext Data;
		Data.DebuffType = ReplaceDebuffTypeToEnum(InDebuffType);
		Data.DebuffDamage = InDamage;
		Data.DebuffDuration = InDuration;
		Data.DebuffFrequency = InFrequency;
		AuraEffectContext->SetDebuffDataContext(Data);
	}
}
Context에 담는 간단한 함수다. Context에 구조체로 변수를 하나 추가했고, Serialize도 구현해놨다. ReplaceDebuffTypeToEnum이라는 함수가 눈에 띄는데, {Debuff/Damage, ToEnum/ToTag} 이렇게 총 4개의 조합으로 구성된 라이브러리 함수가 있다. 굳이 이렇게 한 이유는, Context에 담기는 건 결국 패킷이다. Tag는 FName기반이기 때문에 비싸지만 Enum을 uint8로 선언하면 1바이트밖에 안 한다. 변환 과정에서 CPU가 조금 더 일을 하겠지만 이는 클라이언트와 서버가 함께 부담하는 부분이며 해봤자 0.001초도 안 되기 때문에 이렇게 구현했다.
	if (Data.EvaluatedData.Attribute == GetIncomingDebuffAttribute())
	{
		ApplyDebuff(Props);
	}
다음은 AttributeSet으로 넘어간다. ExecCalc_Debuff에서 봤겠지만, IncomingDebuff라는 이름의 Attribute를 0.f 만큼 변화시켜 여기로 들어온다. 사실상 값 변화가 일어나지도 않고, 값에 변화가 있어도 게임 플레이에 영향을 주지 않는 더미 Attribute다. 강제로 이벤트를 발생시켜 로직을 AttributeSet으로 넘기는, 사실상 트릭성 로직이다. 불필요해보일 수 있지만 이외의 방법이 더 불필요한 로직을 거치게 될 수도 있고, {GE적용 -> AttributeSet으로 이동}이라는 직관성과 가독성이 좋은 로직을 얻을 수 있게 된다.
void UAuraAttributeSet::ApplyDebuff(const FEffectProperties& Props) const
{
	const FGameplayEffectContextHandle EffectContextHandle = Props.EffectContextHandle;

	const FDebuffDataContext DebuffData = UAuraAbilitySystemLibrary::GetDebuffData(EffectContextHandle);
	if (DebuffData.DebuffType == EDebuffTypeContext::Burn)
	{
		// 이펙트 적용 시 GrantedTag가 자동으로 부여되므로, 그 전에 이미 해당 디버프가 부여되어있는지 확인해 나이아가라가 중복으로 생기지 않도록 방지합니다.
		const FGameplayTag DebuffTypeTag = UAuraAbilitySystemLibrary::ReplaceDebuffTypeToTag(DebuffData.DebuffType);
		if (!Props.TargetASC->HasMatchingGameplayTag(DebuffTypeTag))
		{
			if (Props.TargetCharacter)
			{
				UDebuffNiagaraComponent* NiagaraComponent = NewObject<UDebuffNiagaraComponent>(Props.TargetCharacter);
				if (NiagaraComponent)
				{
					NiagaraComponent->DebuffTag = DebuffTypeTag;
					NiagaraComponent->SetupAttachment(Props.TargetCharacter->GetMesh());
					NiagaraComponent->RegisterComponent();
				}
			}
		}

		ApplyBurnDebuff(Props, EffectContextHandle, DebuffData);
	}
}
아직은 BurnDebuff밖에 존재하지 않는다. 그래도 로직을 보여주기엔 충분하다. 이제 여기서 GE 적용 전에 View용도의 나이아가라를 재생한다. 생성과 동시에 DebuffTag를 할당해주고, 원하는 위치에 붙인 다음(나중에 소켓도 추가할 예정이다.) RegisterComponent를 호출한다. 이제 BeginPlay가 호출될 거다.
void UDebuffNiagaraComponent::BeginPlay()
{
	Super::BeginPlay();

	// 이 시점에 아직 ASC가 생성되지 않았을 수 있으니, InitActorInfo 시점에 호출되는 델리게이트에 콜백 함수를 바인드하는 람다식을 안전장치로 걸어놓습니다.
	ICombatInterface* CombatInterface = Cast<ICombatInterface>(GetOwner());
	if (UAbilitySystemComponent* ASC = UAbilitySystemBlueprintLibrary::GetAbilitySystemComponent(GetOwner()))
	{
		ASC->RegisterGameplayTagEvent(DebuffTag, EGameplayTagEventType::NewOrRemoved).AddUObject(this, &ThisClass::DebuffTagChanged);
	}
	else if (CombatInterface)
	{
		CombatInterface->GetOnASCRegisteredDelegate().AddWeakLambda(this, [this](UAbilitySystemComponent* InASC)
		{
			InASC->RegisterGameplayTagEvent(DebuffTag, EGameplayTagEventType::NewOrRemoved).AddUObject(this, &ThisClass::DebuffTagChanged);
		});
	}

	// Owner가 사망했을 때도 Destroy되도록 콜백 함수를 바인드합니다.
	if (CombatInterface)
	{
		CombatInterface->GetOnDeathDelegate().AddDynamic(this, &ThisClass::OnOwnerDeath);
	}

	// 나이아가라 재생을 비동기 로드로 시작합니다.
	if (UFXManagerSubsystem* FXManager = GetWorld()->GetGameInstance()->GetSubsystem<UFXManagerSubsystem>())
	{
		FXManager->AsyncGetNiagara(DebuffTag, [this](UNiagaraSystem* InNiagaraSystem)
		{
			if (!IsValid(this) || !InNiagaraSystem)
			{
				Deactivate();
				DestroyComponent();
				return;
			}

			SetAsset(InNiagaraSystem);
			Activate();
		});
	}
}
DebuffNiagaraComponent의 BeginPlay를 살펴보면 이렇다. 이제 여기서 비동기 로드 타이밍 공유 로직이 등장한다.
지난번 FXManager 구현 때는 Sound와 Niagara를 '정해진 위치에서 재생'하는 함수밖에 없었다. 하지만 이 함수는 Component에 할당해야 하므로 원하는 NiagaraSystem을 반환받아야 한다. 평범한 함수로는 하드 포인터로 미리 메모리에 올려놓거나 동기 로드하는 수밖에 없어서, 새로 비동기 로드 및 반환하는 함수를 구현했다.
USTRUCT()
struct FNiagaraAsyncPlayData
{
	GENERATED_BODY()

	UPROPERTY()
	FVector Location;

	UPROPERTY()
	FRotator Rotation;

	UPROPERTY()
	FVector Scale;

	UPROPERTY()
	bool bAutoDestroy = true;

	UPROPERTY()
	bool bAutoActivate = true;
};

USTRUCT()
struct FNiagaraAsyncLoadRequest
{
	GENERATED_BODY()
	// 나이아가라는 그 자리에서 재생해야 하는 경우도 있지만, 사운드와 달리 NiagaraSystem 자체를 반환받아야 하는 경우가 존재합니다.
	// 이를 구분하기 위해 2개의 배열이 있으며, 에셋 로드가 완되면 두 개의 배열을 모두 돌며 나이아가라 재생 함수 혹은 콜백 함수를 호출합니다.
	UPROPERTY()
	TArray<FNiagaraAsyncPlayData> PlayRequests;

	TArray<TFunction<void(UNiagaraSystem*)>> GetterCallbacks;

	FNiagaraAsyncLoadRequest()
	{
	}
};
SpawnSystemAtLocation 호출을 위한 변수들, 그리고 콜백함수 배열이 선언되어있다. 먼저 기존 함수인 AsyncPlayNiagaraAtLocation부터 살펴보면
// 이미 로드 중인 경우 들어가는 분기입니다.
if (FNiagaraAsyncLoadRequest* ExistingRequest = PendingNiagaraLoadRequests.Find(AssetPath))
{
	FNiagaraAsyncPlayData NewPlayData;
	NewPlayData.Location = Location;
	NewPlayData.Rotation = Rotation;
	NewPlayData.Scale = Scale;
	NewPlayData.bAutoDestroy = bAutoDestroy;
	NewPlayData.bAutoActivate = bAutoActivate;

	ExistingRequest->PlayRequests.Add(NewPlayData);

	return;
}
로드 중인 경우 이렇게 바뀌었다. 크게 달라진 건 없다. 로드 완료 시 호출되는 함수가 참조할 수 있도록 배열에 등록할 뿐이다.
// 새로 로드를 시작해야 하는 경우 여기로 내려옵니다.
FNiagaraAsyncPlayData NewPlayData;
NewPlayData.Location = Location;
NewPlayData.Rotation = Rotation;
NewPlayData.Scale = Scale;
NewPlayData.bAutoDestroy = bAutoDestroy;
NewPlayData.bAutoActivate = bAutoActivate;

// 에셋 로딩이 완료되면 위에서 초기화한 정보들을 참조할 수 있도록 배열에 추가합니다.
FNiagaraAsyncLoadRequest NewRequest;
NewRequest.PlayRequests.Add(NewPlayData);
FStreamableDelegate StreamableCompleteDelegate = FStreamableDelegate::CreateUObject(this, &ThisClass::OnNiagaraAsyncLoadComplete, AssetPath);
StreamableManager->RequestAsyncLoad(AssetPath, StreamableCompleteDelegate);

PendingNiagaraLoadRequests.Add(AssetPath, NewRequest);
로드를 시작해야 할 때도 마찬가지다. 이제 새로 작성한 함수인 Getter함수를 보자.
void UFXManagerSubsystem::AsyncGetNiagara(const FGameplayTag& NiagaraTag, const TFunction<void(UNiagaraSystem*)>& OnLoadedCallback)
{
	...

	// 이미 에셋이 로드되어있는 경우 들어가는 분기입니다.
	if (NiagaraToLoad.IsValid())
	{
		OnLoadedCallback(NiagaraToLoad.Get());
		return;
	}

	// 이미 로드 중인 경우 콜백 함수만 등록하고 리턴합니다.
	if (PendingNiagaraLoadRequests.Contains(AssetPath))
	{
		PendingNiagaraLoadRequests[AssetPath].GetterCallbacks.Add(OnLoadedCallback);
		return;
	}

	// 처음 요청된 태그인 경우 콜백 리스트를 생성합니다.
	FNiagaraAsyncLoadRequest NewRequest;
	NewRequest.GetterCallbacks.Add(OnLoadedCallback);
	FStreamableDelegate StreamableCompleteDelegate = FStreamableDelegate::CreateUObject(this, &ThisClass::OnNiagaraAsyncLoadComplete, AssetPath);
	StreamableManager->RequestAsyncLoad(AssetPath, StreamableCompleteDelegate);

	PendingNiagaraLoadRequests.Add(AssetPath, NewRequest);
}
재생용 함수와 마찬가지로 로드된 상태, 로드 중 상태, 처음 요청. 이렇게 3개의 분기로 나눠서 처리하고 있다. 다른 점은 콜백 함수로 반환해주거나 그 콜백 함수를 배열에 추가한다는 점이다.
for (const auto& PlayData : CompletedRequest->PlayRequests)
{
	UNiagaraFunctionLibrary::SpawnSystemAtLocation(GetWorld(), LoadedNiagara, PlayData.Location, PlayData.Rotation, PlayData.Scale, PlayData.bAutoDestroy, PlayData.bAutoActivate);
}
for (const auto& Callback : CompletedRequest->GetterCallbacks)
{
	Callback(LoadedNiagara);
}
로드가 완료되면 두 개의 배열을 돌며 함수를 호출한다.
이렇게 기존에 구현되어있던 나이아가라 재생용 함수 외에도 추가로 에셋 반환용 함수를 만들었다. 성공적으로 두 개의 함수가 작동하는 걸 확인했다. 이렇게 구현하지 않으면 동시에 요청이 진행됐을 때 한 쪽은 응답을 받지 못 하는 일이 발생한다.
void UAuraAttributeSet::ApplyBurnDebuff(const FEffectProperties& Props, FGameplayEffectContextHandle EffectContextHandle, const FDebuffDataContext& DebuffData) const
{
	const FAuraGameplayTags& GameplayTags = FAuraGameplayTags::Get();
	const FGameplayTag DamageType = GameplayTags.Damage_Fire;

	// 동적으로 새로운 GE를 생성합니다.
	const FString DebuffName = FString::Printf(TEXT("DynamicDebuff_%s"), *UAuraAbilitySystemLibrary::ReplaceDebuffTypeToTag(DebuffData.DebuffType).ToString());
	UGameplayEffect* Effect = NewObject<UGameplayEffect>(GetTransientPackage(), FName(DebuffName));

	Effect->DurationPolicy = EGameplayEffectDurationType::HasDuration;
	Effect->Period = DebuffData.DebuffFrequency;
	Effect->bExecutePeriodicEffectOnApplication = false;
	Effect->DurationMagnitude = FScalableFloat(DebuffData.DebuffDuration);

	Effect->StackingType = EGameplayEffectStackingType::AggregateBySource;
	Effect->StackLimitCount = 1;

	const int32 Index = Effect->Modifiers.Num();
	Effect->Modifiers.Add(FGameplayModifierInfo());
	FGameplayModifierInfo& ModifierInfo = Effect->Modifiers[Index];

	ModifierInfo.ModifierMagnitude = FScalableFloat(DebuffData.DebuffDamage);
	ModifierInfo.ModifierOp = EGameplayModOp::Additive;
	ModifierInfo.Attribute = GetIncomingDamageAttribute();

	// Context를 그대로 재사용해 EffectSpec을 생성합니다.
	FGameplayEffectSpec* MutableSpec = new FGameplayEffectSpec(Effect, EffectContextHandle, 1.f);
	if (MutableSpec)
	{
		MutableSpec->DynamicGrantedTags.AddTag(UAuraAbilitySystemLibrary::ReplaceDebuffTypeToTag(DebuffData.DebuffType));
		FAuraGameplayEffectContext* AuraContext = static_cast<FAuraGameplayEffectContext*>(EffectContextHandle.Get());
		AuraContext->SetDamageTypeContext(UAuraAbilitySystemLibrary::ReplaceDamageTypeToEnum(DamageType));

		Props.TargetASC->ApplyGameplayEffectSpecToSelf(*MutableSpec);
	}
}
이제 ApplyBurnDebuff를 볼 차례다. 이건 강사가 구현한 걸 거의 그대로 따라했다. 다른 점은, 강사는 이 런타임 중 생성한 Effect를 적용할 때 새로운 Context를 만들었다. 왜냐면 처음 적용된 GE_Damage와는 다른 GE니까. 하지만 나는 이 로직으로 돌입하기 전 이미 GE_Damage와 별개인 GE_Dubuff에 의해 적용된 상황이다. 따라서 Context를 재사용했다. 데미지 타입만 새로 넣어줬다.
이제 작동하는 모습을 볼 시간이다.
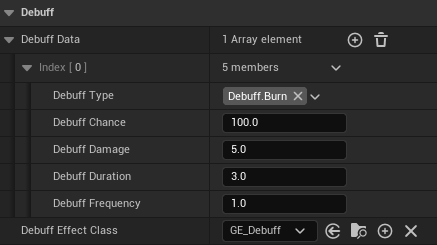
GA_FireBolt에 위와 같이 값을 할당해준 뒤 테스트해보면
따봉
나이아가라 컴포넌트가 땅바닥에 생성된 게 좀 그러니까, 나중에 디버프용 소켓을 하나 만들어서 붙여야겠다.