
Tailwind CSS
class 이름을 이용하여 CSS를 적용할 수 있는 Tailwind CSS에 대해 알아보자.
Tailwind CSS란?
Tailwind CSS란, 유틸리티 클래스 기반 CSS 프레임워크로
미리 만들어진 CSS 조각들을 조합하여 스타일을 만드는 도구다.
Tailwind CSS는 자체적으로 CSS Reset을 포함하고 있기 때문에 별도의 reset.css나 normalize.css를 사용할 필요가 없다.
Tailwind CSS는 공식 사이트만 보고 학습하기에도 큰 어려움이 없을 정도로 설명이 잘 나와있다.
Tailwind CSS
혹시 눈에 잘 안들어오는 거 같다 하면 공식 유튜브도 있으니 한 번 확인해 보는 것을 추천한다.
Tailwind CSS Youtube
장점
- 빠른 스타일링
HTML에 클래스를 작성함으로 CSS 파일을 왔다갔다 하는 일이 없어 바로바로 스타일을 적용할 수 있다.
또한 Tailwind CSS에 기본적으로 적용된 스타일이 있어서 따로 수정하지 않아도 예쁜 스타일이 적용된다.<button class="bg-blue-500 text-white px-4 py-2 rounded"></button> - 일관성 유지
Tailwind CSS에 기본적으로 적용된 스타일을 그대로 사용하면 따로 수정하지 않아도 일관된 스타일을 적용할 수 있다. - 커스터마이징 가능
tailwind.config.js(Tailwind 설정파일)을 이용하여 색상, 폰트, 단위 등을 자유롭게 수정할 수 있다.<button class="p-2 md:p-6"></button> <!-- 작은 화면은 2, 큰 화면은 6 --> - 반응형 디자인 쉬움
접두어를 사용하여 크기별 스타일을 손쉽게 적용할 수 있다.(sm:,md:,lg:) - CSS 파일 최소화
별도의 CSS를 작성할 필요가 거의 없다. - 재사용 가능
공통 클래스 조합을 이용하여 재사용 가능한 컴포넌트로 만들 수 있다.
단점
- HTML 파일이 복잡해짐
class를 많이 적용할 수록 태그가 길어진다.<button class="bg-blue-500 text-white px-4 py-2 rounded shadow-lg mx-auto"></button> - 초반 학습 필요
Tailwind CSS에서 정의되어있는 유틸리티 클래스 이름과 규칙을 학습해야 한다. - 기존 CSS와 혼용 어려움
기존의 CSS를 사용하려 하면 충돌이 일어날 수 있다. - 추가 빌드 필요
CSS를 최적화 하기 위해서 PostCSS나 PurgeCSS 등의 설정이 필요하다.
또한 이를 사용하기 위해 프로젝트에 빌드 환경을 구축해야 한다. - 디자인 자유도 제한
Tailwind CSS에 기본 스타일이 아닌 다른 디자인을 적용하기 위해서는 직접 CSS를 작성하는 등 커스텀을 해야한다.
사용방법
간단한 사용 방법에 대해 알아보자
Tainwind CSS 연결
Tailwind CSS를 사용하기 위해서는 내가 작업할 프로젝트에 연결을 해야 한다.
설치 혹은 CDN 등의 방법을 이용하여 연결 할 수 있다.
Vite
Vite 빌드 도구와 함께 사용하는 방법.
-
Vite 프로젝트 생성
npm create vite@latest my-project -- --template-vanilla cd my-project- my-project: 나의 프로젝트 이름. 원하는 이름으로 작성.
- --template-vanilla: React, Vue 없이 순수 HTML/JS 기반 프로젝트 생성.(선택)
-> 프로젝트 폴더로 이동 후, 필요한 패키지들을 설치할 준비 완료
-
Tailwind CSS 설치
npm install -D tailwindcss @tailwindcss/vite- -D: 개발용 의존성 모드로 설치. (
--save-dev와 동일)(선택) - tailwindcss: Tainwind CSS 핵심 패키지
- @tailwindcss/vite: Tailwind를 vite프로젝트에서 쉽게 연동해주는 플러그인
-> 설치 후 Tailwind를 Vite와 연결하면, 빌드 과정에서 Tailwind의 유틸리티 클래스가 자동으로 적용된다.
- -D: 개발용 의존성 모드로 설치. (
-
Vite 플러그인 구성
vite.config.ts파일을 열고 Tailwind 플러그인 추가/* vite.config.ts */ import { defineConfig } from 'vite' import tailwindcss from '@tailwindcss/vite' /*추가*/ export default defineConfig({ plugins: [ tailwindcss(), /*추가*/ ], })- Plugins 배열에 등록하면 Vite가 Tailwind CSS를 빌드 과정에 통합한다.
- 이제 Vite 개발 서버에서 Tailwind CSS가 적용 가능해진다.
-
CSS에 Tailwind CSS 연결
/* /src/style.css */ @import "tailwindcss";- Tailwind의 기본 스타일과 유틸리티 클래스를 CSS에 포함
-> 여기부터 HTML에서 Tailwind 클래스 사용 가능
- Tailwind의 기본 스타일과 유틸리티 클래스를 CSS에 포함
-
빌드 프로세스 시작
npm run dev- Vite 개발 서버가 실행되고, 브라우저에서
http://localhost:3000접속 시 Tailwind 스타일이 적용된 화면 확인 가능.
- Vite 개발 서버가 실행되고, 브라우저에서
-
HTML에서 사용
<!-- index.html -->
<!doctype html>
<html>
<head>
  <meta charset="UTF-8">
  <meta name="viewport" content="width=device-width, initial-scale=1.0">
  <link href="/src/style.css" rel="stylesheet">
</head>
<body>
  <h1 class="text-3xl font-bold underline">
    Hello world!
  </h1>
</body>
</html>
<link href="/src/style.css" rel="stylesheet">-> CSS 파일 연결class="text-3xl font-bold underline"와 같이 Tailwind 유틸리티 클래스를 사용하여 스타일을 적용 가능
PostCSS
Post CSS 플러그인으로 사용하는 방법.
-
Tailwind CSS 설치
npm install tailwindcss @tailwindcss/postcss postcss- tailwindcss: Tainwind CSS 핵심 패키지
- @tailwindcss/postcss: Tailwind를 PostCSS와 연결해주는 플러그인
- postcss: CSS 전처리기(PostCSS 엔진), 다양한 플러그인과 함께 사용 가능
-> Tailwind와 PostCSS 환경 준비
-
PostCSS 구성에 Tailwind 추가
postcss.config.mjs파일을 열고 Tailwind 플러그인 추가/* postcss.config.mjs */ export default { plugins: { "@tailwindcss/postcss": {}, } }postcss.config.mjs: PostCSS 플러그인들을 관리하는 설정 파일
-> Tailwind CSS를 PostCSS 빌드 파이프라인에 연결할 수 있다.
-
CSS에 Tailwind CSS 연결
/* /src/style.css */ @import "tailwindcss";- Tailwind의 기본 스타일과 유틸리티 클래스를 CSS에 포함
-> 여기부터 HTML에서 Tailwind 클래스 사용 가능
- Tailwind의 기본 스타일과 유틸리티 클래스를 CSS에 포함
-
빌드 프로세스 시작
npm run dev- Vite 개발 서버가 실행되고, 브라우저에서
http://localhost:3000접속 시 Tailwind 스타일이 적용된 화면 확인 가능.
- Vite 개발 서버가 실행되고, 브라우저에서
-
HTML에서 사용
<!-- index.html -->
<!doctype html>
<html>
<head>
  <meta charset="UTF-8">
  <meta name="viewport" content="width=device-width, initial-scale=1.0">
  <link href="/dist/styles.css" rel="stylesheet">
</head>
<body>
  <h1 class="text-3xl font-bold underline">
    Hello world!
  </h1>
</body>
</html>
<link href="/dist/style.css" rel="stylesheet">-> 빌드된 CSS 파일 연결 후 사용
Tailwind CLI
Tailwind 전용 CLI 도구를 사용하는 방법.
-
Tailwind CSS 설치
npm install tailwindcss @tailwindcss/cli- tailwindcss: Tailwind CSS 핵심 패키지
- @tailwindcss/cli: Tailwind 전용 CLI(Command Line Interface) 도구
-> CLI를 통해 CSS 빌드를 직접 실행할 수 있게 한다.
-
CSS에 Tailwind CSS 연결
/* src/input.css */ @import "tailwindcss";- Tailwind가 빌드 할 원본 CSS 파일
-> 이 안에@import "tailwindcss"를 추가하면 Tailwind CSS가 적용 가능해진다.
- Tailwind가 빌드 할 원본 CSS 파일
-
Tailwind CLI 빌드 프로세스 시작
npx @tailwindcss/cli -i ./src/input.css -o ./src/output.css --watch- -i: 입력 파일(input.css) 지정
- -o: 출력 파일(output.css) 지정
- --watch: 파일이 변경될 때마다 자동으로 다시 빌드.(선택)
-> 실행 후output.css가 생성되며, 이 파일을 HTML에서 불러와 사용
-
HTML에서 사용
<!-- src/index.html -->
<!doctype html>
<html>
<head>
  <meta charset="UTF-8">
  <meta name="viewport" content="width=device-width, initial-scale=1.0">
  <link href="./output.css" rel="stylesheet">
</head>
<body>
  <h1 class="text-3xl font-bold underline">
    Hello world!
  </h1>
</body>
</html>
<link href="/src/output.css" rel="stylesheet">-> CLI가 최종 빌드한 CSS 파일 연결
CDN
CDN 링크를 통해 바로 사용하는 방법.
- HTML에 CDN 스크립트를 추가 후 사용
<!-- index.html -->
<!doctype html>
<html>
<head>
  <meta charset="UTF-8">
  <meta name="viewport" content="width=device-width, initial-scale=1.0">
  <script src="https://cdn.jsdelivr.net/npm/@tailwindcss/browser@4"></script>
</head>
<body>
  <h1 class="text-3xl font-bold underline">
    Hello world!
  </h1>
</body>
</html>
<script src="https://cdn.jsdelivr.net/npm/@tailwindcss/browser@4"></script>-> 스크립트 한 줄로 연결 가능
CDN 방식은 별도의 설치나 설정 없이 HTML 파일에 CDN 링크만 추가하면 바로 사용 가능하여,
학습 목적으로 가장 간단하고 빠른 방법이다.
단, 구버전은 cdn 다운로드 속도에서 차이가 있으니 반드시 3버전 이상을 사용하는 것이 좋다.(25년 9월 기준 최신버전 - 4.1버전)
Tainwind CSS 사용 방법
클래스 네이밍 규칙
spacing 단위
Tailwind CSS의 spacing 단위는 1 = 0.25rem으로 정의되어 있다.
1rem은 보통 브라우저 기본값에서 16px으로 0.25rem = 4px라고 할 수 있다.
즉, w-1 = 0.25rem = 4px이다.
size
숫자가 아닌 문자를 이용한 사이즈에 대한 값도 있다.
xs, sm, base, lg, xl, 2xl등의 값을 이용해서 크기를 작성할 수도 있다.
크기
위에서 알아봤듯이 Tailwind CSS는 미리 정의되어있는 단위가 있지만, 원하는 값이 없는 경우 직접 입력할 수 있다.
w-[n]의 형식으로 대괄호([]) 안에 단위를 넣은 값을 사용할 수 있다.
즉, w-[163px]과 같이 입력하면 163px의 값을 사용할 수 있다.
단위는 px, %, rem 등 CSS에서 사용하는 단위면 다 가능하다.
색
Tailwind CSS에서 기본적으로 제공하는 core concept 색상이 있다.
50부터 950까지 11가지 단계로 이루어진 색 팔레트이다.
border-red-200, bg-blue-50 등 색상을 사용하는 여러가지 속성의 클래스명에 함께 사용할 수 있다.
단, 같은 숫자일 때 우선순위를 강제로 가지게 되어 class 순서와는 상관없이 color를 가지는 경우가 있으니 주의해야 한다.
(tailwindcss Colors - core concept)[https://tailwindcss.com/docs/colors]
커스텀 CSS
<style type="text/tailwindcss"></style> 코드블록 사이에 커스텀 CSS를 작성하여 사용할 수 있다.
<style type="text/tailwindcss">
  @theme {
  	--color-clifford: #da373d;
  }
</style>
...
 <h1 class="text-3xl font-bold underline text-clifford">
   Hello world!
</h1>:root에 변수를 지정하는 방식과 같이 @theme에 커스텀 값을 정의해두면 기존의 값 대신 직접 커스텀한 값을 넣어서 사용할 수 있다.
VS Code 확장프로그램
VSCode에서 Tailwind CSS를 사용할 때 함께 쓰면 좋은 확장프로그램을 추천한다.
Tailwind CSS Intellisense
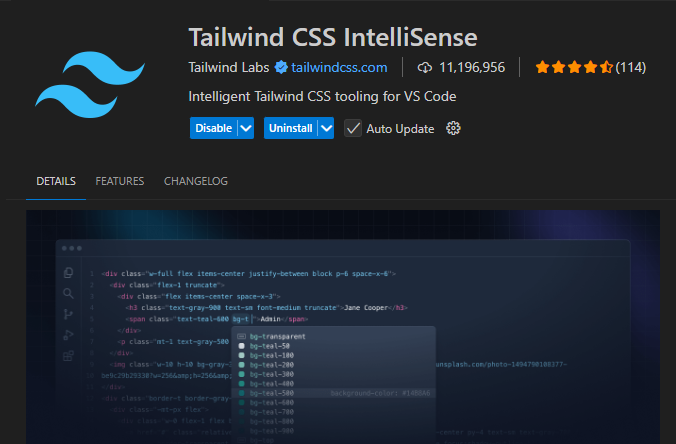
Tailwind CSS의 class 이름을 미리보기할 수 있다.
다운로드 후 VSCode를 한 번 껐다가 켜면 더 잘 된다.