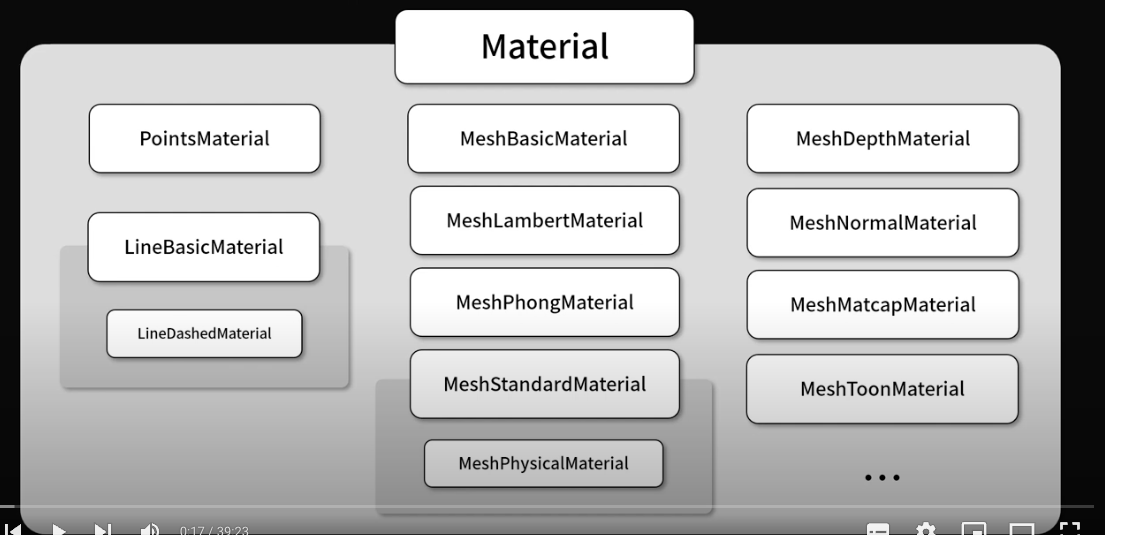
- three.js에서 제공하는, Material 클래스
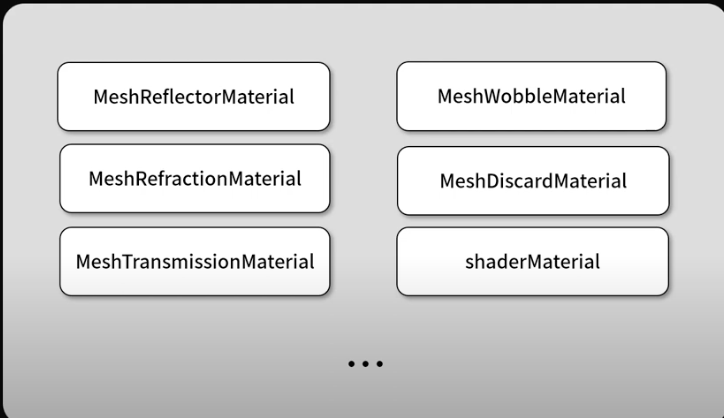
- drei 라이브러리에서 제공하는 Material 클래스
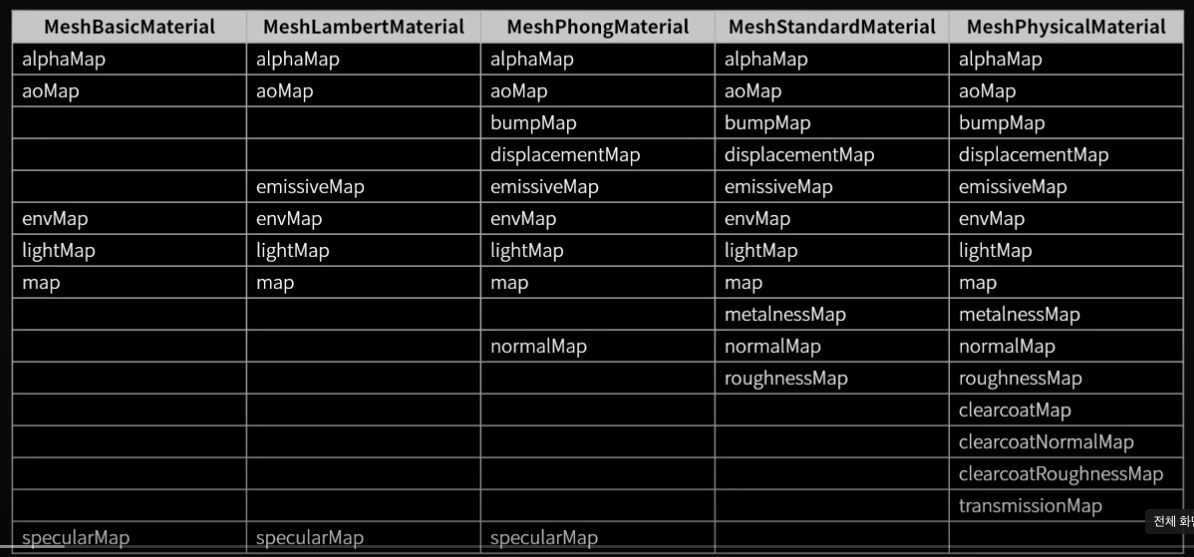
three.js에서 제공하는, Material 클래스
meshStandardMaterial 의 속성들
-
color : default/"white"
-
visible : default/true 모델 보여질지 여부
-
transparent : default/false 투명효과를 사용할지
-
opacity : default/1 투명도 조절(transparent가 true일때 사용사능)
-
depthTest : default/true depth test를 수행할지 결정. false로 지정하면 암시적으로 depth write도 비활성화된다.
-
depthWrite : default/true
-
side : default/THREE.FrontSide(===0) 어느 면이 렌더될 지 결정
-
wireframe : default/false 선 형태로 모델을 보여줌
-
emissive : 재질자체에서 방출하는 색상값
-
specular : 광원에 의해 반사되는 색상값
-
shininess : 광 재질
-
flatShading : mesh를
-
roughness : 거칠기
-
metalness : 금속성을 나타내는 속성
<mesh position={[0.7, 0, 0]} ref={refMesh}>
        <boxGeometry />
        <meshStandardMaterial
          visible={true}
          transparent={false}
          opacity={1}
          depthTest={true}
          depthWrite={true}
          side={THREE.DoubleSide}
          color={0xff0000}
          emissive={0x000000}
          specular={0xffff00}
          roughness={0.7}
          shininess={1000}
          flatShading={false}
          wireframe={false}
        />
</mesh>- UI에서 변경할 수 있게 컬트롤러 추가
  const { roughness, metalness } = useControls({
    roughness: { value: 0, min: 0, max: 1, step: 0.01 },
    metalness: { value: 0, min: 0, max: 1, step: 0.01 },
  });

<mesh position={[0.7, 0, 0]} ref={refMesh}>
        <boxGeometry />
        <meshStandardMaterial
          roughness={roughness}
          metalness={metalness}
        />
      </mesh>
meshPhysicalMaterial
- meshPhysicalMaterial은 meshStandardMaterial의 클래스를 상속받기 때문에 meshStandardMaterial기능 뿐만아니라 보다 나은 기능을 제공한다. (유리같은 재질효과)
속성
- clearcoat : 0 ~ 1사이로 코팅 효과를 줄수 있다.
- clearcoatRoughness : 0 ~ 1사이로 코딩에 대한 거칠기 값
- transmission : 0 ~ 1 투명도
- thickness : 유리두께
- ior : 1 ~ 2.3333사이 굴절유리
유리효과
- transparent={true}로 변경
const {
    roughness,
    metalness,
    clearcoat,
    clearcoatRoughness,
    transmission,
    thickness,
    ior,
  } = useControls({
    roughness: { value: 0, min: 0, max: 1, step: 0.01 },
    metalness: { value: 0, min: 0, max: 1, step: 0.01 },
    clearcoat: { value: 0, min: 0, max: 1, step: 0.01 },
    clearcoatRoughness: { value: 0, min: 0, max: 1, step: 0.01 },
    transmission: { value: 0, min: 0, max: 1, step: 0.01 },
    thickness: { value: 0, min: 0, max: 1, step: 0.01 },
    ior: { value: 0, min: 1, max: 2.3333, step: 0.01 },
  });
  return (
    <>
      <OrbitControls />

      <ambientLight intensity={0.1} />
      <directionalLight position={(0, 1, 0)} />
      <directionalLight position={(1, 2, 8)} intensity={0.7} />

      <mesh position={[0.7, 0, 0]} ref={refMesh}>
        <torusKnotGeometry args={[0.5, 0.15, 256, 128]} />
        <meshPhysicalMaterial
          visible={true}
          transparent={true}
          opacity={1}
          depthTest={true}
          depthWrite={true}
          side={THREE.DoubleSide}
          color={0xffffff}
          emissive="#000"
          roughness={roughness}
          shininess={1000}
          flatShading={false}
          wireframe={false}
          metalness={metalness}
          clearcoat={clearcoat}
          clearcoatRoughness={clearcoatRoughness}
          transmission={transmission}
          thickness={thickness}
          ior={ior}
        />
      </mesh>
meshDepthMaterial
- 만약 camera로 부터 거리가 3.5인 px지점은 1이 할당, 6인곳은 2가 할당된다.
<Canvas camera={{ near: 3.5, far: 6 }}>
        <MYElement3D></MYElement3D>
</Canvas> <meshDepthMaterial />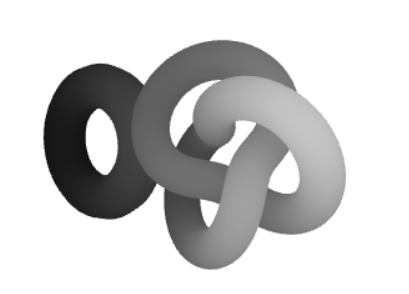
meshMatcapMaterial
-
쉐이딩결과 이미지를 활용하는 Material 미리 만둘어둔 쉐이딩을 사용하기때문에 별도의 광원을 필요로 하지 않는다.
-
matcaps 이미지 모음
https://github.com/emmelleppi/matcaps -
쉐이딩으로 사용할 이미지를 useTexture로 가져옴
const matcap = useTexture("./images/mapcap.jpg")- matcap속성에 불러오면 끝
<meshMatcapMaterial matcap={matcap} />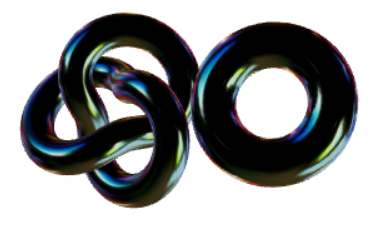
- 그 외 속성 flatShading은 각진 효과를 낸다.
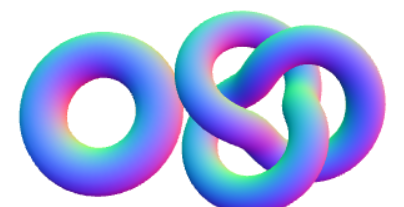
meshNormalMaterial
- mesh표면에 대한 법선 벡터. 법선 벡터의 x,y,z 값을 색상요소값인 rgb값을 사용해서 표현한 재질
meshToonMaterial
-
만화효과를 나타내는 재질
-
색상톤을 나타낼 수 있는 이미지 필요함

- useTexture로 이미지를 가져오고 fivetone의 색상을 변경해줘야함.
minFilter, magFilter를 NearestFilter로 지정을 해줘서 색상 보관이 이루어지지 않도록 해야함.
  const fivetone = useTexture("./images/fivetone.jpg");
  fivetone.minFilter = THREE.NearestFilter;
  fivetone.magFilter = THREE.NearestFilter;
  .
  .
  .
   <meshToonMaterial gradientMap={fivetone} color="cyan" />

drei 라이브러리에서 제공하는 Material 클래스
MeshRefractionMaterial
- 다른 Mesh가 반사되는 재질 거울이나 대리석같은 효과
https://github.com/pmndrs/drei?tab=readme-ov-file#meshreflectormaterial
<mesh>
  <planeGeometry />
  <MeshReflectorMaterial
    blur={[0, 0]} // 지면 반사 (width, height), 0 skips blur
    mixBlur={0} //  표면 거칠기와 혼합되는 블러의 양(기본값 = 1)
    mixStrength={1} // 반사 강도
    mixContrast={1} // 반사 대비
    resolution={256} // Off-buffer resolution, lower=faster, higher=better quality, slower
    mirror={0} // 미러 환경, 0 = texture colors, 1 = pick up env colors
    depthScale={0} // Scale the depth factor (0 = no depth, default = 0)
    minDepthThreshold={0.9} // Lower edge for the depthTexture interpolation (default = 0)
    maxDepthThreshold={1} // Upper edge for the depthTexture interpolation (default = 0)
    depthToBlurRatioBias={0.25} // Adds a bias factor to the depthTexture before calculating the blur amount [blurFactor = blurTexture * (depthTexture + bias)]. It accepts values between 0 and 1, default is 0.25. An amount > 0 of bias makes sure that the blurTexture is not too sharp because of the multiplication with the depthTexture
    distortion={1} // Amount of distortion based on the distortionMap texture
    distortionMap={distortionTexture} // The red channel of this texture is used as the distortion map. Default is null
    debug={0} /* Depending on the assigned value, one of the following channels is shown:
      0 = no debug
      1 = depth channel
      2 = base channel
      3 = distortion channel
      4 = lod channel (based on the roughness)
    */
    reflectorOffset={0.2} // Offsets the virtual camera that projects the reflection. Useful when the reflective surface is some distance from the object's origin (default = 0)
  />
</mesh>
MeshRefractionMaterial
-
다이아몬드같은 반짝거리는 재질을 표현한다.
-
보석 표면에 반사되는 주변 환경에 대한 이미지가 필요하다.(hdr 이미지 많이 사용)
https://dl.polyhaven.org/file/ph-assets/HDRIs/hdr/1k/aerodynamics_workshop_1k.hdr -
큐브 카메라 추가해서 6개의 면에대한 반사 이미지를 얻어올 수 있다.
-
CubeCamera callback 함수 안에 mesh를 넣어주고 필요한 속성을 추가한다.
<CubeCamera resolution={1024} frames={1} envMap={texture}>
        {(texture) => (
          <mesh>
            <dodecahedronGeometry />
            <MeshRefractionMaterial
              envMap={texture}
              toneMapped={false}
              bounces={2}
              aberrationStrength={0.03}
              ior={2.75}
              fresnel={1}
              color="white"
              fastChroma={true}
            />
          </mesh>
        )}
      </CubeCamera>
MeshTransmissionMaterial
-
유리재질 컴포넌트
-
controls 생성
const config = useControls({
    transmissionSampler: false,
    backSide: false,
    samples: { value: 10, min: 1, max: 32, step: 1 },
    resolution: { value: 2048, min: 256, max: 2048, step: 256 },
    transmission: { value: 1, min: 0, max: 1 },
    roughness: { value: 0.0, min: 0, max: 1, step: 0.01 },
    thickness: { value: 3.5, min: 0, max: 10, step: 0.01 },
    ior: { value: 1.5, min: 1, max: 5, step: 0.01 },
    chromaticAberration: { value: 0.6, min: 0, max: 1 },
    anisotropy: { value: 0.1, min: 0, max: 1, step: 0.01 },
    distortion: { value: 0.0, min: 0, max: 1, step: 0.01 },
    distortionScale: { value: 0.3, min: 0.01, max: 1, step: 0.01 },
    temporalDistortion: { value: 0.5, min: 0, max: 1, step: 0.01 },
    clearcoat: { value: 1, min: 0, max: 1 },
    attenuationDistance: { value: 0.5, min: 0, max: 10, step: 0.01 },
    attenuationColor: "#ffffff",
    color: "#c9ffa1",
    bg: "#839681",
});- controls 값 받아와서 config.bg 사용
 <MeshTransmissionMaterial
          {...config}
          background={new THREE.Color(config.bg)}
        />
MeshWobbleMaterial
- 흔들리는 재질
<MeshWobbleMaterial factor={1} speed={10} />- factor : 흔들리는 정도
MeshDistortMaterial
-
외곡 재질
-
distort: 외곡 어느정도 할지
MeshDiscardMaterial
-
이 재질이 적용된 mesh를 화면에 표시하지 않음
-
일반 mesh에 visible={false}하는 것과 다른 점은 MeshDiscardMaterial은 그림자는 보여줌
재질에 대한 매핑 속성
textureMapping이란?
-
mesh 표면에 이미지 데이터를 사용해서 보다 사실적인 재질을 표현하기위한 기능
-
MeshStandardMaterial를 가장 많이 사용함.
-
텍스쳐 매핑 데이터 사이트
https://3dtextures.me/
map
- useTexture사용해서 이미지 데이터 가져옴
const textures = useTexture({
    map: "./images/glass/Glass_Window_002_basecolor.jpg",
});- useTexture사용해서 이미지 데이터 가져옴
const textures = useTexture({
    map: "./images/glass/Glass_Window_002_basecolor.jpg",
});- map속성 사용해서 textures불러오고, 앞뒷면 모두 적용하기 위해
side={THREE.DoubleSide}로 설정
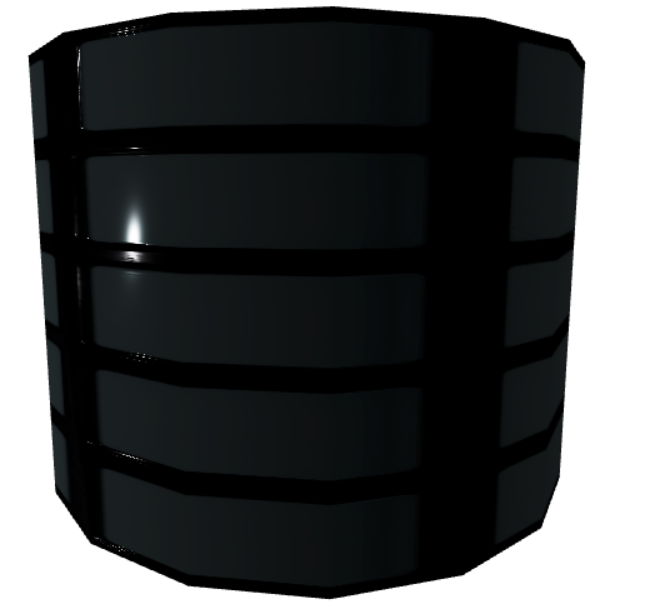
<meshStandardMaterial map={textures.map} side={THREE.DoubleSide} />roughnessMap
-
거칠기를 표현(표면이 반짝거려짐)
-
roughnessMap-color={THREE.NoColorSpace} 사용해서 이미지 밝기에
따른 거칠기를 지정해줘야됨
<mesh>
        <cylinderGeometry args={[2, 2, 3, 16, 1, true]} />
        <meshStandardMaterial
          map={textures.map}
          roughnessMap={textures.roughnessMap}
          roughnessMap-color={THREE.NoColorSpace}
          side={THREE.DoubleSide}
        />
      </mesh>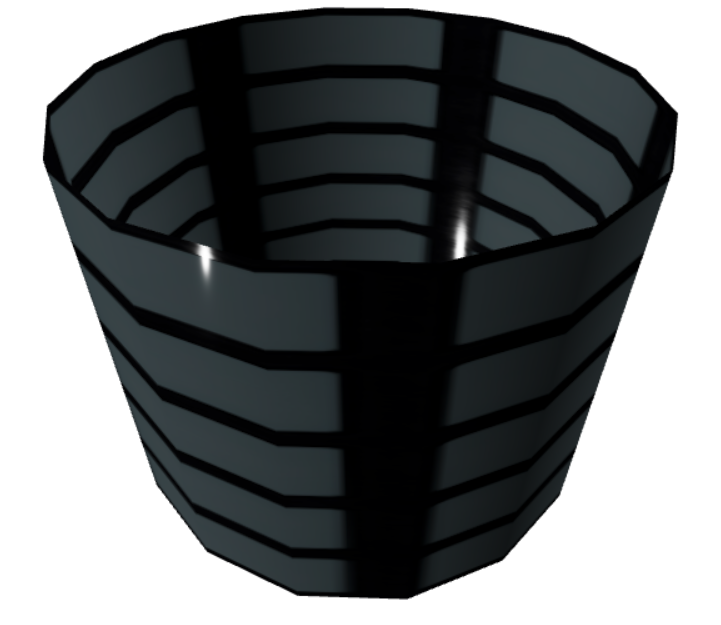
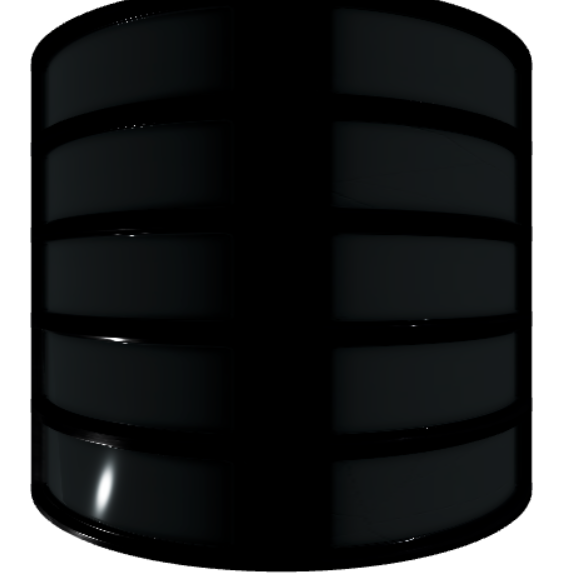
metallicMap
- 이미지가 밝을 수록 금속성이 더 잘보임
<mesh>
        <cylinderGeometry args={[2, 2, 3, 16, 1, true]} />
        <meshStandardMaterial
          map={textures.map}
          roughnessMap={textures.roughnessMap}
          roughnessMap-color={THREE.NoColorSpace}
          side={THREE.DoubleSide}
          metallicMap={textures.metallicMap}
          metalness={0.5} //meshStandardMaterial의 기본값이 0이여서 아무리 곱해도 0이기때문에 0.5정도로 설정
        />
      </mesh>
normalMap
-
법선 벡터(Normal Vector)의 보간
법선 벡터 : 면에 대한 수직 벡터로 광원에 대한 시각적인 효과를 계산하기 위해 사용함
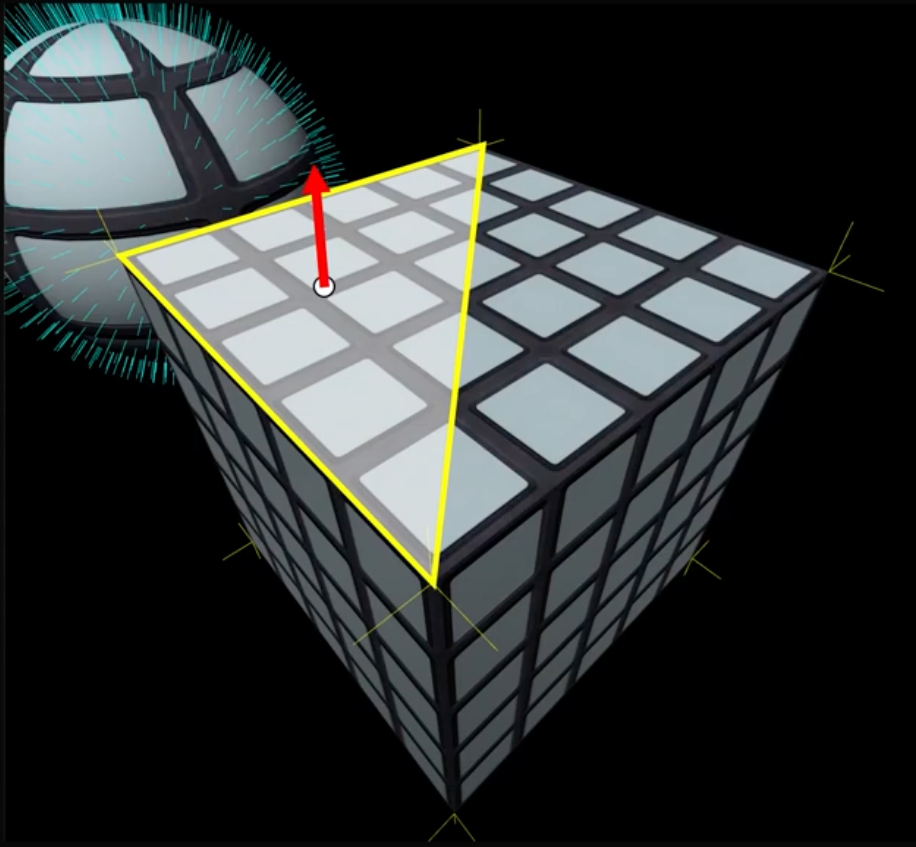
-
normalMap으로 법선 벡터를 지정할 수 있음
function MYElement3D() {
  const textures = useTexture({
    map: "./images/glass/Glass_Window_002_basecolor.jpg",
    roughnessMap: "./images/glass/Glass_Window_002_roughness.jpg",
    metallicMap: "./images/glass/Glass_Window_002_metallic.jpg",
    normalMap: "./images/glass/Glass_Window_002_normal.jpg",
  });

  textures.metallicMap.encoding = THREE.sRGBEncoding; //색상 공간 지정
  textures.normalMap.encoding = THREE.sRGBEncoding; //색상 공간 지정

  return (
    <>
      <OrbitControls />

      <ambientLight intensity={0.1} />
      <directionalLight position={(0, 1, -0.8)} intensity={0.4} />
      <directionalLight position={(1, 2, 8)} intensity={0.4} />

      <mesh>
        <cylinderGeometry args={[2, 2, 3, 16, 1, true]} />
        <meshStandardMaterial
          map={textures.map}
          roughnessMap={textures.roughnessMap}
          roughnessMap-color={THREE.NoColorSpace}
          side={THREE.DoubleSide}
          metallicMap={textures.metallicMap}
          metalness={0.5} //meshStandardMaterial의 기본값이 0이여서 아무리 곱해도 0이기때문에 0.5정도로 설정
          normalMap={textures.normalMap}
          normalScale={1}
        />
      </mesh>
    </>
  );
}
displacementMap
-
normalMap가 눈속임이라면 displacementMap는 실제 mesh에 geoMetry 좌표를 변경해서 입체감을 진짜로 나타내는 방법
-
메모리 많이 사용됨
-
segment 인자 늘려줌
<cylinderGeometry args={[2, 2, 3, 256, 256, true]} />- 이미지 데이터 불러옴 displacementMap
<mesh>
        <cylinderGeometry args={[2, 2, 3, 256, 256, true]} />
        <meshStandardMaterial
          map={textures.map}
          roughnessMap={textures.roughnessMap}
          roughnessMap-color={THREE.NoColorSpace}
          side={THREE.DoubleSide}
          metallicMap={textures.metallicMap}
          metalness={0.5} //meshStandardMaterial의 기본값이 0이여서 아무리 곱해도 0이기때문에 0.5정도로 설정
          normalMap={textures.normalMap}
          normalScale={1}
          displacementMap={textures.displacementMap}
           displacementScale={0.2} //displacementMap하면 커져서 줄여줘야됨
          displacementBias={-0.2} //displacementMap하면 커져서 줄여줘야됨

        />
      </mesh>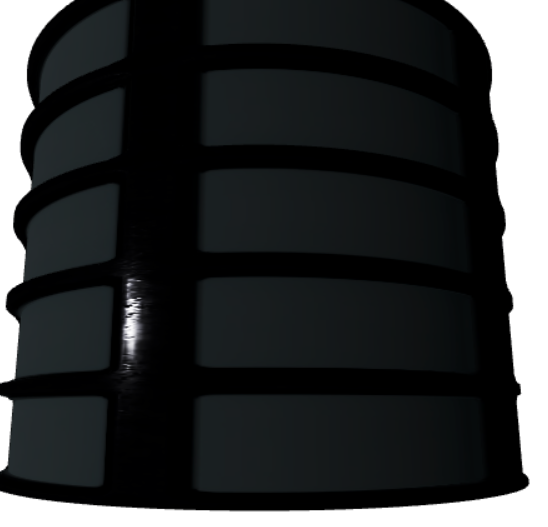
Ambient Occlusion Map
-
mesh 표면에 그림자를 사용해서 더 입체감을 살려준다.
-
ambientLight가 꼭 있어야하고 Geometry에 uv2가 있어야함
  const mesh = useRef();

  useEffect(() => {
    mesh.current.geometry.setAttribute(
      "uv2",
      new THREE.BufferAttribute(mesh.current.geometry.attributes.uv.array, 2)
    );
  }, []);
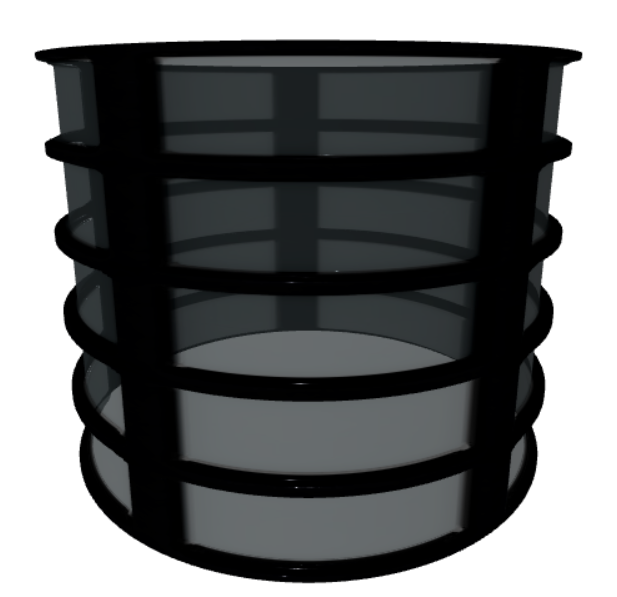
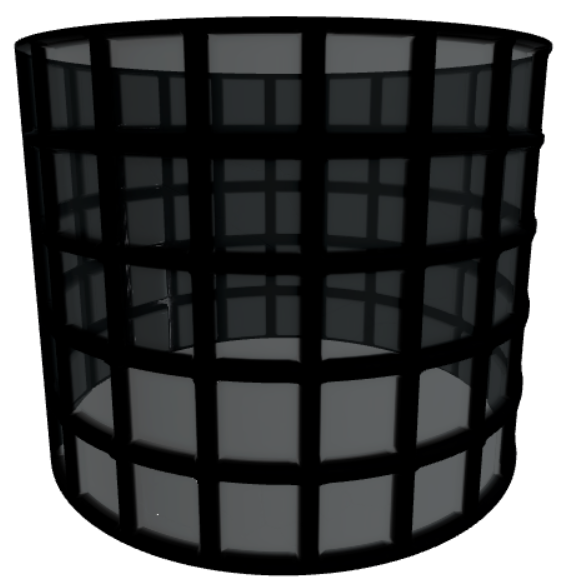
alphaMap
-
색상이 어두울수록 투명하고 밝을 수록 불투명 표면
-
속성 추가
alphaMap={textures.alphaMap}
          transparent
        />
마무리
useEffect(() => {
    textures.map.repeat.x =
      textures.displacementMap.repeat.x =
      textures.ambientOcclusionMap.repeat.x =
      textures.roughnessMap.repeat.x =
      textures.metallicMap.repeat.x =
      textures.normalMap.repeat.x =
      textures.alphaMap.repeat.x =
        4; //텍스쳐이미지 반복수

    textures.map.wrapS =
      textures.displacementMap.wrapS =
      textures.ambientOcclusionMap.wrapS =
      textures.roughnessMap.wrapS =
      textures.metallicMap.wrapS =
      textures.normalMap.wrapS =
      textures.alphaMap.wrapS =
        THREE.MirroredRepeatWrapping; //반복이 시작되는 시점에서 어떻게 텍스쳐 이미지를 사용할 것인지 (wrapS수평 / wrapT수직)

    textures.map.needsUpdate =
      textures.displacementMap.needsUpdate =
      textures.ambientOcclusionMap.needsUpdate =
      textures.roughnessMap.needsUpdate =
      textures.metallicMap.needsUpdate =
      textures.normalMap.needsUpdate =
      textures.alphaMap.needsUpdate =
        true; //textures를 업뎃하라고해야 적용됨

    mesh.current.geometry.setAttribute(
      "uv2",
      new THREE.BufferAttribute(mesh.current.geometry.attributes.uv.array, 2)
    );
  }, []);
이 글은 아래 유투브 강의를 듣고 작성한 글 입니다.
https://www.youtube.com/watch?v=0jnGlLb_z7w&list=PLe6NQuuFBu7HUeJkowKRkLWwkdOlhwrje&index=4