우선 데이터베이스가 없는 상태에서 만들고있기 때문에 Mockdata를 활용해 API를 구동시켜보았다.
📌MockData
const users = [
  {
    id: 1,
    name: "Rebekah Johnson",
    email: "Glover12345@gmail.com",
    password: "123qwe",
  },
  {
    id: 2,
    name: "Fabian Predovic",
    email: "Connell29@gmail.com",
    password: "password",
  },
  { id: 3, name: "Jun", email: "Jun23@gmail.com", password: "13334423" },
];

let posts = [
  {
    id: 1,
    title: "간단한 HTTP API 개발 시작!",
    content: "Node.js에 내장되어 있는 http 모듈을 사용해서 HTTP server를 구현.",
    userId: 1,
  },
  {
    id: 2,
    title: "HTTP의 특성",
    content: "Request/Response와 Stateless!!",
    userId: 3,
  },
  {
    id: 3,
    title: "특성",
    content: "1234567!!",
    userId: 1,
  },
  {
    id: 4,
    title: "게임",
    content: "게임은 좋아~~!!",
    userId: 2,
  },
];
1. 회원가입
const createUser = (req, res) => {
  const user = req.body.inform;
  const lastUser = users[users.length - 1];
  if (lastUser) {
    users.push({
      id: lastUser.id + 1,
      name: user.name,
      email: user.email,
      password: user.password,
    });
  } else {
    users.push({
      id: 1,
      name: user.name,
      email: user.email,
      password: user.password,
    });
  }
  res.json({ message: "user-created" });
  res.status(200).json();
};
데이터베이스가 없는 상태이기때문에 id를 자동이 아닌 수동으로 지정해주어야해서 id값을
지정해주기위해 유저가 존재 하는지 존재하지 않는지의 경우로 나누어 코드를 작성했다.
유저가 없다면 1번id로 users의 배열에 push를 해주고 유저가 존재한다면 마지막유저의 id에 +1이 되어서
푸쉬가 되도록 지정해주었다. 나머지 데이터들은 요청받는 body값 안에 user의 데이터들로 들어가도록
만들었고 성공적으로 되었으면 status코드 200과 응답으로 user-created로 응답하게끔 코드를 작성했다.
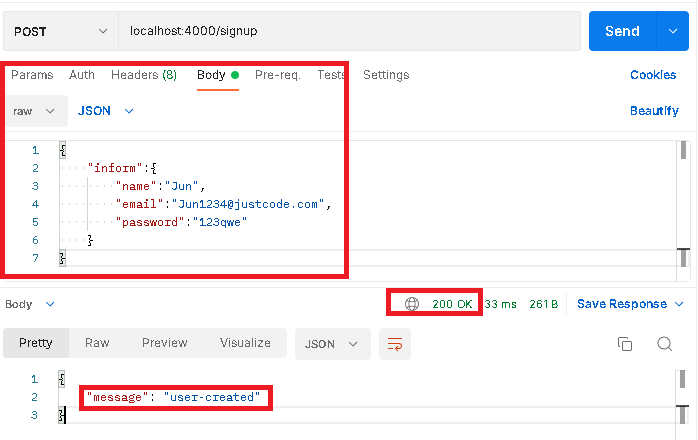
◾postman결과
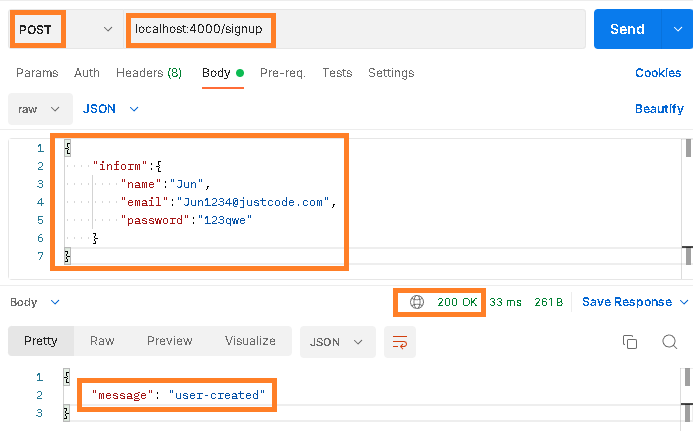
url을 /signup , 메서드는 POST로하고 body 에 json형태로 저러한 요청이 들어왔을 때
응답으로 message "user-created" 를 반환해주고
status code가 200번인 것을 보면 성공적으로 요청과 응답이 처리되었다는 뜻이다.
2. 게시물 작성
const createPost = (req, res) => {
  const postData = req.body.inform;
  const lastPost = posts[posts.length - 1];
  if (lastPost) {
    posts.push({
      id: lastPost.id + 1,
      title: postData.title,
      content: postData.content,
      userId: postData.userId,
    });
  } else {
    posts.push({
      id: 1,
      title: postData.title,
      content: postData.content,
      userId: postData.userId,
    });
  }
  res.json({ message: "post-created" });
  res.status(200).json();
};
유저와 마찬가지로 posts에 데이터가 없다면 id 값을 1로해서 첫번째로 지어주고
존재한다면 마지막 post에 +1한 값을 id로 넣어주라고 하였고 나머지 데이터는 요청받는 데이터의 값으로
지정해주었다.
◾postman결과
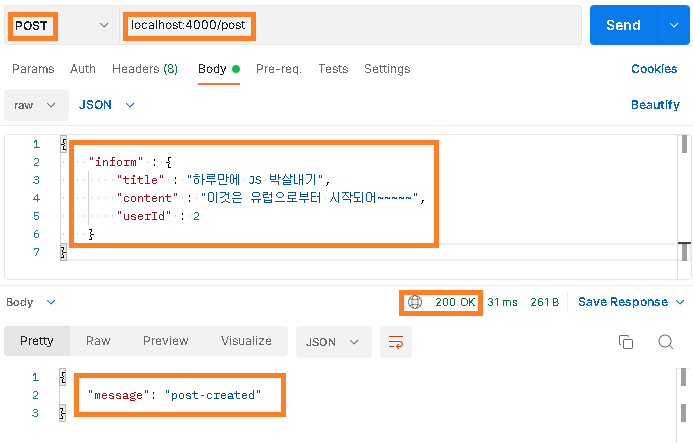
마찬가지로 미리 지정해두었던 url /post 메서드는 POST로 했을때
응답으로 post-created 가 나오고 status code가 200번인것을 보면 성공적으로 요청과 응답이 이루어졌다.
3. 게시물 조회하기
const viewingListofPosts = (req, res) => {
  let newPosts = posts.map((post) => {
    const userN = users.find((user) => post.userId === user.id);

    return {
      userID: post.userId,
      userName: userN.name,
      postingId: post.id,
      postingTitle: post.title,
      postingContent: post.content,
    };
  });

  res.json({ data: [newPosts] });
  res.status(200).json();
};
map 메서드를 사용해서 posts 데이터들을 순회하며 반복하고
그 안에서 find 메서드를 사용해 post에 있는 user_id가 현재 user테이블에있는 id와 일치하는 객체만을
반환하여 user의 name을 구해주었다.
반환 값은 위의 return 값에 있는 포맷으로 반환하였다.
◾postman결과
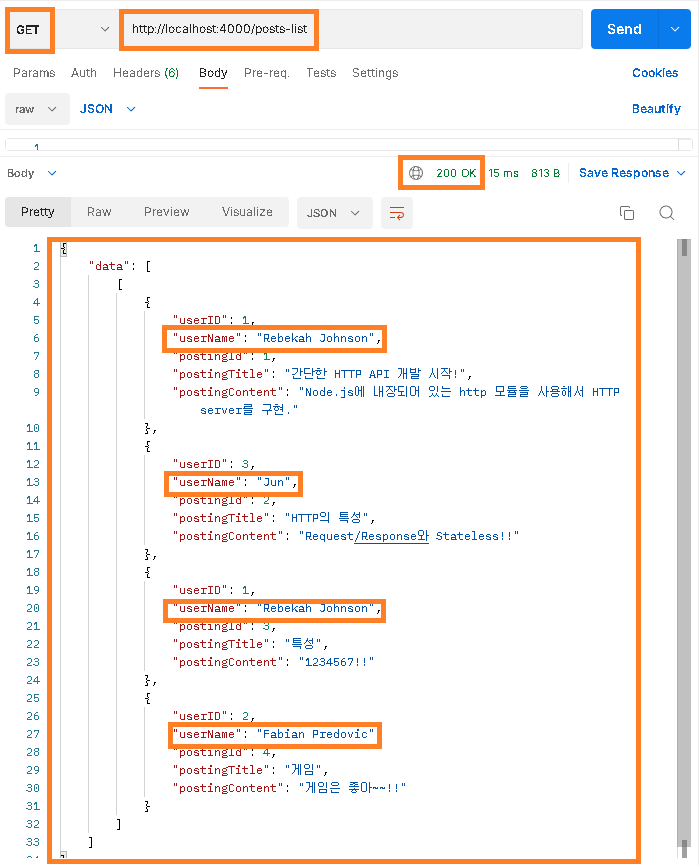
위의 posts테이블에는 username이 없고 user_id만 존재하기 때문에
작성한 함수를 통해 user테이블에 접근하여 name을 불러왔고 알맞은 데이터들이 반환된 모습을 볼 수 있다.
다음 포스트에 이어서 포스팅 하겠다.