Spring Boot JWT + Spring Security 01 이어서 작성하려고 했는데 기존에 Form Login 했던 방식에서 JWT 방식으로 교체하는데 문제가 생겨서 기존에 설정 다 지우고 다시 세팅했음.
기초적인 설명 포함해서 재작성함
JWT(Json Web Token)
- 로그인 인증 정보를 토큰에 담아서 서버가 아닌 클라이언트(브라우저)가 보관하도록하는 방식이다.
- 기존 방식(Form Login): 서버에서 세션을 관리
- JWT 방식: 서버는 토큰만 발급하고, 클라이언트가 이를 저장 -> 서버는 상태를 유지하지 않음(무상태)
라이브러리 추가(Gradle)
// JWT 핵심 API
// jjwt-api -> JWT 토큰 생성 및 파싱 API
implementation 'io.jsonwebtoken:jjwt-api:0.12.6'

// JWT 내부 구현체 (필수)
// jjwt-impl -> JWT 내부 동작 구현체
runtimeOnly 'io.jsonwebtoken:jjwt-impl:0.12.6'

// JSON 처리 (Jackson 기반)
// jjwt-jackson -> JWT에서 아용할 JSON 변환 처리 (Jackson 기반)
runtimeOnly 'io.jsonwebtoken:jjwt-jackson:0.12.6'

// Spring Security 추가 되어있어야 됨
JWT 서비스 구현 단계
- JWT 설정 파일 만들기(
JwtProperties) - JWT 토큰 생성 및 검증 클래스 만들기(TokenProvider)
- Spring Security 설정 변경하기
- JWT 필터 추가 -> 요청마다 토큰을 검사하도록 필터 연결
- 로그인 시 JWT 토큰 발급
🔧 1단계: JWT 설정 파일 만들기
시크릿 키나 토큰 만료 시간을 관리하는 설정 파일
✅ JwtProperties.java
@Getter
@Component
@ConfigurationProperties("jwt")
public class JwtProperties {
    private String issuer;      // 토큰 발급자
    private String secretKey;   // 시크릿 키
}
✅ application.properties 또는 application.yml
# JWT 설정
jwt.issuer=원하는 이름
jwt.secret-key=원하는 키issuer: 토큰 발급자(이메일, 이름 등)secret-key: 토큰을 서명할 비밀 키(가장 중요함!!!!!!!!!!!!!)
secret-key가 중요한 이유는 해당 키를 뺏기는 순간 모든 권한이 넘어간다
맥북 기준 터미널에 해당 명령어 입력하면 토큰의 암복호화에 사용될 랜덤 암호가 나온다.
HS256 알고리즘을 사용하기 위해 32글자 이상으로 설정
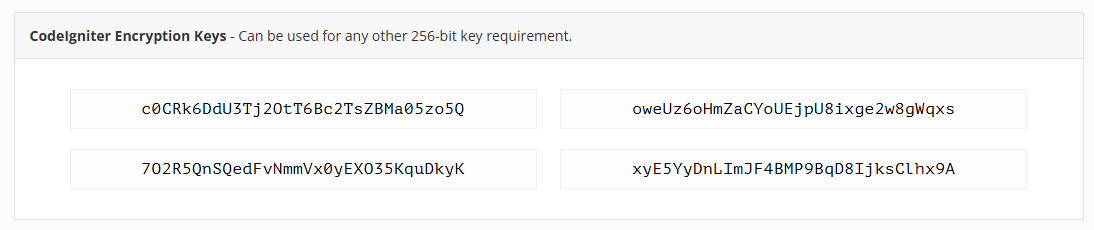
openssl rand -hex 32윈도우라면 새로고침 될 때마다 랜덤으로 키를 던저주는 사이트가 있음
https://randomkeygen.com/
사이트에 들어가 codelgniter Encryption Keys 부분 중 아무거나 사용하면 됨
🔧 2단계: JWT 토큰 생성 및 검증
✅ TokenProvider.java
/* 토큰 생성 및 검증 역할만 담당 */
@Slf4j
@RequiredArgsConstructor
@Service
public class TokenProvider {
    private final JwtProperties jwtProperties;
    private final UserRepository userRepository;

    /* 토큰 생성 */
    public String generateToken(UserEntity userEntity, Duration expiration) {
        Date now = new Date();
        String token = makeToken(new Date(now.getTime() + expiration.toMillis()), userEntity);
        log.info("발급된 토큰: {}", token);  // ✅ 토큰 발급 확인
        return token;
    }

    /* 실제 토큰 생성 로직 */
    private String makeToken(Date expiry, UserEntity userEntity) {
        Date now = new Date();

        /*
        Keys.hmacShaKeyFor: 문자열 형태의 Secret Key를 HMAC 서명에 맞는 안전한 SecretKey 객체로 변환한다.
        */
        SecretKey key = Keys.hmacShaKeyFor(jwtProperties.getSecretKey().getBytes(StandardCharsets.UTF_8));

        return Jwts.builder()
                .setIssuer(jwtProperties.getIssuer())      // 발급자: jwtProperties -> application.yaml에서 설정해준 값
                .setIssuedAt(now)                   // 내용 iat 발급 시간: 현재 시간
                .setExpiration(expiry)                     // 내용 exp 만료 시간
                .setSubject(userEntity.getUserid())          // 내용 sub 사용자 ID
                .claim("role", userEntity.getRole())    // 클레임 id 권한(Role) 추가
                .claim("username", userEntity.getUsername()) // 클레임 username
                // 서명: 비밀값과 함께 해시값을 HS256 방식으로 암호화
                .signWith(key, SignatureAlgorithm.HS256)   // 서명
                .compact();
    }

    /* JWT 토큰 유효성 검사 */
    public boolean validToken(String token) {
        try {
            SecretKey key = Keys.hmacShaKeyFor(jwtProperties.getSecretKey().getBytes(StandardCharsets.UTF_8));

            /*
            Jwts.parser():  Parser 객체를 생성
                            JWT 문자열을 해석하고 검증하는 역할을 한다.

            .setSigningKey: 서명 검증을 위해 Secret Key를 설정한다.
                            토큰의 서명 부분을 비밀 키로 검증하여 위변조 여부를 판단한다.

            .build: 설정한 파서를 빌드하여 최종적으로 사용할 수 있는 JWT 파서 객체를 만든다.

            .parseClaimsJws(): JWT 토큰을 복호화하고, 서명을 검증한다.
                                유효한 토큰이라면 **Claims(데이터)**를 반환하고, 유효하지 않다면 예외를 발생시킨다.
            */

            Jwts.parser()
                    .setSigningKey(key) // 비밀값으로 복호화
                    .build()
                    .parseClaimsJws(token);

            return true;
        } catch (JwtException | IllegalArgumentException e) {
            /* 복호화 과정에서 에러가 난다면 유효하지 않은 토큰 */
            return false;
        }
    }

    /* 토큰 기반으로 인증 정보를 가져오는 메서드 */
    public Authentication getAuthentication(String token) {
        Claims claims = getClaims(token);

        // ✅ 토큰에서 사용자 ID 추출
        String userid = claims.getSubject();

        // ✅ DB에서 사용자 정보 조회
        UserEntity userEntity = userRepository.findByUserid(userid)
                .orElseThrow(() -> new UsernameNotFoundException("존재하지 않는 사용자입니다."));

        // ✅ 사용자 권한(Role) 조회
        String role = userEntity.getRole();  // 예: ROLE_USER, ROLE_ADMIN

        // ✅ 권한 부여
        // SimpleGrantedAuthority: Spring Security에서 권한을 표현하는 객체
        Set<SimpleGrantedAuthority> authorities = Collections.singleton(new SimpleGrantedAuthority(role));

        // ✅ Authentication 객체 반환
        return new UsernamePasswordAuthenticationToken(userEntity, null, authorities);
    }

    /*토큰에서 Claims 조회*/
    private Claims getClaims(String token) {
        SecretKey key = Keys.hmacShaKeyFor(jwtProperties.getSecretKey().getBytes(StandardCharsets.UTF_8));

        return Jwts.parser()
                .setSigningKey(key)
                .build()
                .parseClaimsJws(token)
                .getBody();
    }
}
🔧 3단계: Spring Security 설정
/* JWT + Security 설정 */
@EnableWebSecurity
@Configuration
@RequiredArgsConstructor
public class SecurityConfig {
    private final TokenProvider tokenProvider;  // ✅ TokenProvider 주입

    /**
     * ✅ 비밀번호 암호화에 사용할 BCryptPasswordEncoder 빈 등록
     */
    @Bean
    public BCryptPasswordEncoder passwordEncoder() {
        return new BCryptPasswordEncoder();
    }

    /**
     * ✅ AuthenticationManager 빈 등록 (로그인 처리에 필요)
     */
    @Bean
    public AuthenticationManager authenticationManager(AuthenticationConfiguration authenticationConfiguration) throws Exception {
        return authenticationConfiguration.getAuthenticationManager();
    }

    /**
     * ✅ Security FilterChain 설정
     */
    @Bean
    public SecurityFilterChain securityFilterChain(HttpSecurity http) throws Exception {
        http
                // ✅ CSRF 비활성화 (JWT는 세션을 사용하지 않으므로 필요 없음)
                .csrf(csrf -> csrf.disable())

                // ✅ 세션 사용하지 않도록 설정 (Stateless)
                .sessionManagement(session -> session
                        .sessionCreationPolicy(SessionCreationPolicy.STATELESS))

                // ✅ URL별 접근 권한 설정
                .authorizeHttpRequests(auth -> auth
                        .requestMatchers("/", "/auth/login", "/auth/signup").permitAll()  // 인증 없이 접근 가능
                        .requestMatchers("/admin/**").hasRole("ADMIN")                 // ADMIN 권한 필요
                        .requestMatchers("/user/**").hasAnyRole("USER", "ADMIN")       // USER 또는 ADMIN 접근 가능
                        .anyRequest().authenticated()                                  // 그 외 요청은 인증 필요
                );

        return http.build();
    }
}
CSRF를 비활성화 하는 이유
- 앞에 작성한 Spring Security(form Login) 게시글에서는 개발하기 위해 비활성화 처리하고 배포할 때는 활성화 처리한다고 작성했다.
- JWT 인증방식에서 비활성화 처리하는데 이유가 있다.
🔍 CSRF란?(재설명)
CSRF(Cross-Site Request Forgery, 사이트 간 요청 위조)는
사용자의 인증 정보를 이용해 공격자가 의도하지 않은 요청을 보내는 보안 공격이다.
✅ CSRF 공격 예시
- 사용자가 사이트 A에 로그인한 상태에서
- 공격자가 만든 사이트 B에 접속합니다.
- 사이트 B가 사용자의 쿠키/세션을 이용해 사이트 A에 요청을 보냅니다.
- 사용자는 모르게 사이트 A에서 원하지 않는 동작이 실행됩니다.
🔒 Spring Security의 CSRF 기본 동작
- Spring Security는 POST, PUT, DELETE 같은 데이터 변경 요청에서
CSRF 토큰이 없으면 요청을 차단합니다. - Form Login 방식에서는 CSRF 토큰이 자동으로 발급되고,
폼 제출 시 함께 전송되어 보안이 유지됩니다. - Spring에서는 <sec:csrfInput/> 이런식으로 CSRF를 form에 넣고 요청을 보냈다.
🔑 왜 JWT에서는 CSRF를 비활성화할까?
✅ JWT 인증의 특징
- JWT는 Stateless(무상태) → 서버가 세션/쿠키를 관리하지 않습니다.
- 클라이언트가 토큰을 직접 저장하고, 요청 헤더에 실어서 보냅니다.
- 서버는 오직 토큰 검증으로 인증을 처리합니다.
🔥 CSRF가 필요 없는 이유
- CSRF는 주로 세션 기반 인증에서 발생합니다.
- 하지만 JWT 인증은 세션을 사용하지 않기 때문에
- CSRF 공격 위험이 없습니다.
🔎 즉, JWT 기반 인증에서는 CSRF 토큰이 필요하지 않아 불필요한 검사를 비활성화 처리한다.
⚠️ 언제 CSRF를 활성화하고 비활성화 해야될까?
- 폼 로그인(Form Login)기반 웹 서비스 -> CSRF 활성화 유지
- 세션/쿠키를 사용하는 웹 서비스 -> CSRF 활성화 유지
- REST API + JWT 서비스 -> CSRF 비활성화
🔧 4단계: JWT 인증 필터 추가(JwtAuthenticationFilter)
@Slf4j
/* JWT 인증 필터 추가 */
public class JwtAuthenticationFilter extends OncePerRequestFilter {

    private final TokenProvider tokenProvider;

    // ✅ TokenProvider를 주입받아 JWT 검증 및 인증 처리에 사용
    public JwtAuthenticationFilter(TokenProvider tokenProvider) {
        this.tokenProvider = tokenProvider;
    }

    /**
     * ✅ 실제 필터링 로직
     * - 요청이 들어올 때마다 실행됨
     * - JWT 토큰을 검사하고, 유효하면 인증 정보를 등록함
     */
    @Override
    protected void doFilterInternal(HttpServletRequest request,
                                    HttpServletResponse response,
                                    FilterChain filterChain) throws ServletException, IOException {
        // 1️⃣ 요청 헤더에서 JWT 토큰 추출
        String token = resolveToken(request);

        // 2️⃣ 토큰이 존재하고 유효하다면 인증 정보 등록
        if (token != null && tokenProvider.validToken(token)) {
            log.info("토큰 확인: " + token);

            // 3️⃣ 토큰으로부터 Authentication 객체를 생성
            Authentication authentication = tokenProvider.getAuthentication(token);

            // 4️⃣ SecurityContext에 인증 정보 저장 (로그인 처리)
            SecurityContextHolder.getContext().setAuthentication(authentication);
            log.info("인증 정보 저장 완료: " + authentication.getPrincipal());
        } else {
            // 5️⃣ 토큰이 없거나 유효하지 않으면 경고 로그 출력
            log.warn("토큰 없음 또는 유효하지 않음");
        }

        // 6️⃣ 다음 필터로 요청 전달 (필수)
        filterChain.doFilter(request, response);
    }

    /**
     * ✅ Authorization 헤더에서 Bearer 토큰을 추출하는 메서드
     * - "Authorization: Bearer {token}" 형태에서 토큰 부분만 잘라서 반환
     */
    private String resolveToken(HttpServletRequest request) {
        // 1️⃣ 요청 헤더에서 Authorization 값 추출
        String bearerToken = request.getHeader("Authorization");
        log.info("Authorization 헤더: {}", bearerToken);  // ✅ 헤더 값 로그로 출력

        // 2️⃣ "Bearer "로 시작하면 토큰 부분만 반환
        if (bearerToken != null && bearerToken.startsWith("Bearer ")) {
            return bearerToken.substring(7);  // "Bearer " 이후 토큰 값만 추출
        }

        // 3️⃣ 조건에 맞지 않으면 null 반환
        return null;
    }
}
Authorization 헤더에서 Bearer 토큰을 꺼냅니다.
토큰 유효성 검사 후, 인증 정보를 SecurityContext에 저장합니다.
Bearer 토큰
토스페이먼츠의 Basic 인증과 Bearer 인증 설명
🔧 5단계: JWT 필터를 Security 설정에 추가
아까 만든 JwtAuthenticationFilter를 SecurityConfig에 연결.
@Bean
    public SecurityFilterChain securityFilterChain(HttpSecurity http) throws Exception {
        http
                // ✅ CSRF 비활성화 (JWT는 세션을 사용하지 않으므로 필요 없음)
                .csrf(csrf -> csrf.disable())

                // ✅ 세션 사용하지 않도록 설정 (Stateless)
                .sessionManagement(session -> session
                        .sessionCreationPolicy(SessionCreationPolicy.STATELESS))

                // ✅ JWT 인증 필터 추가 (UsernamePasswordAuthenticationFilter 앞에 추가)
                .addFilterBefore(new JwtAuthenticationFilter(tokenProvider), UsernamePasswordAuthenticationFilter.class)

                // ✅ URL별 접근 권한 설정
                .authorizeHttpRequests(auth -> auth
                        .requestMatchers("/", "/auth/login", "/auth/signup").permitAll()  // 인증 없이 접근 가능
                        .requestMatchers("/admin/**").hasRole("ADMIN")                 // ADMIN 권한 필요
                        .requestMatchers("/user/**").hasAnyRole("USER", "ADMIN")       // USER 또는 ADMIN 접근 가능
                        .anyRequest().authenticated()                                  // 그 외 요청은 인증 필요
                );

        return http.build();
    }
🔎 설명
- JWT 인증 필터를 UsernamePasswordAuthenticationFilter 앞에 추가
- /auth/login, /auth/signup → 인증 없이 접근 가능
- 그 외 모든 요청은 JWT 인증 필요
🔧 6단계: 로그인 시 JWT 토큰 발급 JSON 응답 (Controller)
@Slf4j
@Controller
@RequestMapping("/auth")
@RequiredArgsConstructor
public class AuthController {
    private final TokenProvider tokenProvider;
    private final UserService userService;

    /**
     * ✅ 로그인 페이지 이동 (GET)
     */
    @GetMapping("/login")
    public String login() {
        return "pages/security/login";
    }

    /**
     * ✅ 로그인 처리 (POST) - JWT 토큰 발급
     */

    /**
     * ResponseEntity<?>
     *     - HTTP 응답 전체를 표현하는 객체이다.
     *     - 응답의 상태 코드(Status Code), 응답 데이터(Body), 헤더(Header)등을 포함할 수 있다.(200,400,500) 등
     * <?>
     *     `<?>`는 모든 타입을 받을 수 있다는 의미
     *     ResponseEntity<String>, ResponseEntity<UserDTO>, ResponseEntity<List<UserDTO>> 등
     * ResponseEntity.ok()
     *      HTTP 200 OK 상태 코드를 반환하면서, 응답 본문(Body)을 함께 보낼 때 사용한다.
     */

    @PostMapping("/login")
    @ResponseBody
    public ResponseEntity<?> login(@RequestBody UserDTO loginRequest){
        log.info("로그인 요청: {}", loginRequest);

        // 로그인 처리 및 JWT 발급
        String token = userService.login(loginRequest);

        if(token == null){
            return ResponseEntity.status(HttpStatus.UNAUTHORIZED).body("아이디 또는 비밀번호가 잘못되었습니다.");
        }

        return ResponseEntity.ok(token);
    }
🔧 7단계: 로그인 시 JWT 토큰 발급(Service)
@Slf4j
@Service
@RequiredArgsConstructor
public class UserServiceImpl implements UserService {
    private final UserRepository userRepository;
    private final BCryptPasswordEncoder bCryptPasswordEncoder;
    private final TokenProvider tokenProvider;

    @Override
    public boolean isUserIdExist(String userId) {
        return userRepository.existsByUserid(userId);
    }

    /**
     * ✅ 로그인 처리 및 JWT 토큰 발급
     */
    @Override
    public String login(UserDTO loginRequest) {
        /* 아이디 존재 여부 확인 */
        log.info("login userDTO: {}", loginRequest);
        Optional<UserEntity> user = userRepository.findByUserid(loginRequest.getUserid());
        if(user.isEmpty()){
            log.warn("존재하지 않는 아이디");
            return null;
        }

        UserEntity userEntity = user.get();

        /* 비밀번호 검증 */
        if(!bCryptPasswordEncoder.matches(loginRequest.getPassword(), userEntity.getPassword())){
            log.warn("비밀번호 불일치");
            return null;
        }

        /* 토큰 발급(1시간 유효) */
        String token = tokenProvider.generateToken(userEntity, Duration.ofHours(1));
        log.info("토큰 발급 완료: {}",token);

        return token;
    }
}
🔧 8단계: 로그인 페이지(View)
<main layout:fragment="content">
    <h1>로그인</h1>
    <form id="loginForm">
        <label for="userid">아이디:</label>
        <input type="text" id="userid" name="userid" required><br>

        <label for="password">비밀번호:</label>
        <input type="password" id="password" name="password" required><br>

        <button type="button" onclick="login()">로그인</button>
    </form>

    <script>
        function login() {
            // 1️⃣ 입력값 가져오기
            const userid = document.getElementById("userid").value;
            const password = document.getElementById("password").value;

            // 2️⃣ JSON 변환
            const loginData = {
                userid: userid,
                password: password
            };

            // 3️⃣ 서버로 로그인 요청
            fetch("/auth/login", {
                method: "POST",
                headers: {
                    "Content-Type": "application/json"
                },
                body: JSON.stringify(loginData)
            })
                .then(response => {
                    /* 상태 코드가 200이 아니라면 */
                    console.log(response);
                    if (!response.ok) throw new Error("로그인 실패");
                    return response.text();
                })
                .then(token => {
                    alert("로그인 성공!");

                    // 4️⃣ JWT 토큰 저장 (로컬스토리지)
                    localStorage.setItem("accessToken", token);

                    // 5️⃣ 메인 페이지로 이동
                    window.location.href = "/";
                })
                .catch(error => {
                    console.error("에러 발생:", error);
                    alert("로그인에 실패했습니다.");
                });
        }
    </script>
</main>
🔧 9단계: 개발자 도구에서 토큰 확인(View)
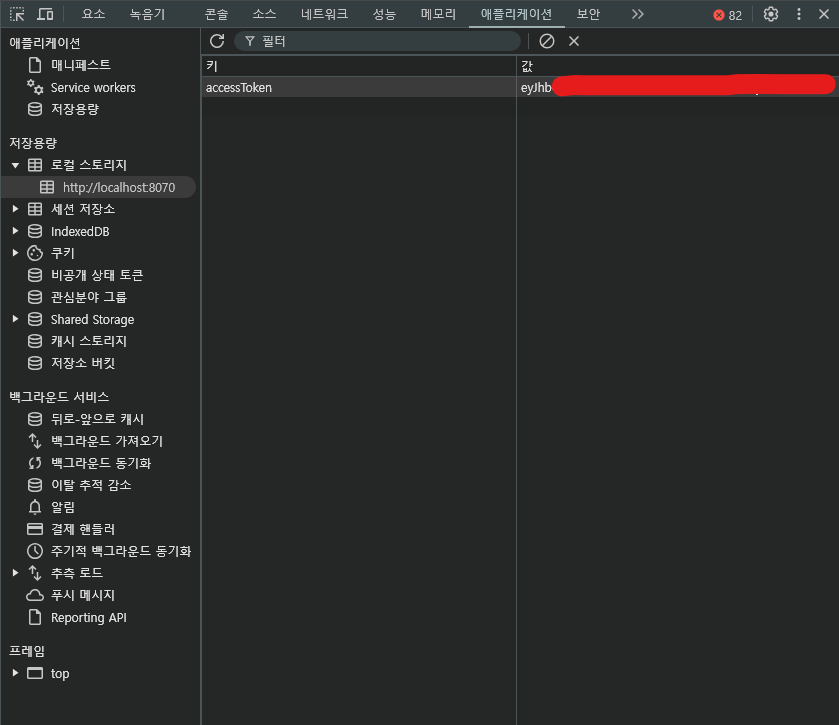
추후 메인 페이지에서 로그인한 사용자인지 아닌지 구분하는 방법과, 권한 별로 구분하는 방법 포스팅하겠습니다!
독학으로 책 없이 구글링으로만 공부하려니 힘들군ㅠㅠ🥲