리액트 개발 라이프를 도와줄 ui 컴포넌트 개발환경 '스토리북'에 대해서 알아보자.
Storybook
스토리북은 각종 라우팅과 스테이트들로 연결되어있는 리액트 presentational component들을 노멀라이즈시켜 독립된 환경에서 돌아가게 도와주는 라이브러리이다.
리액트용으로 개발이 시작되었고, 현재는 뷰, 앵귤러까지 지원가능하다.
그렇다면 storybook이 ui컴포넌트 개발을 어떻게 도와준다는 것인지 왜 만들어졌는지에 집중해보자.
탄생배경에 대해서 알아보려면 우선 react의 패턴에 대한 설명이 필요하다.
presentational & container pattern
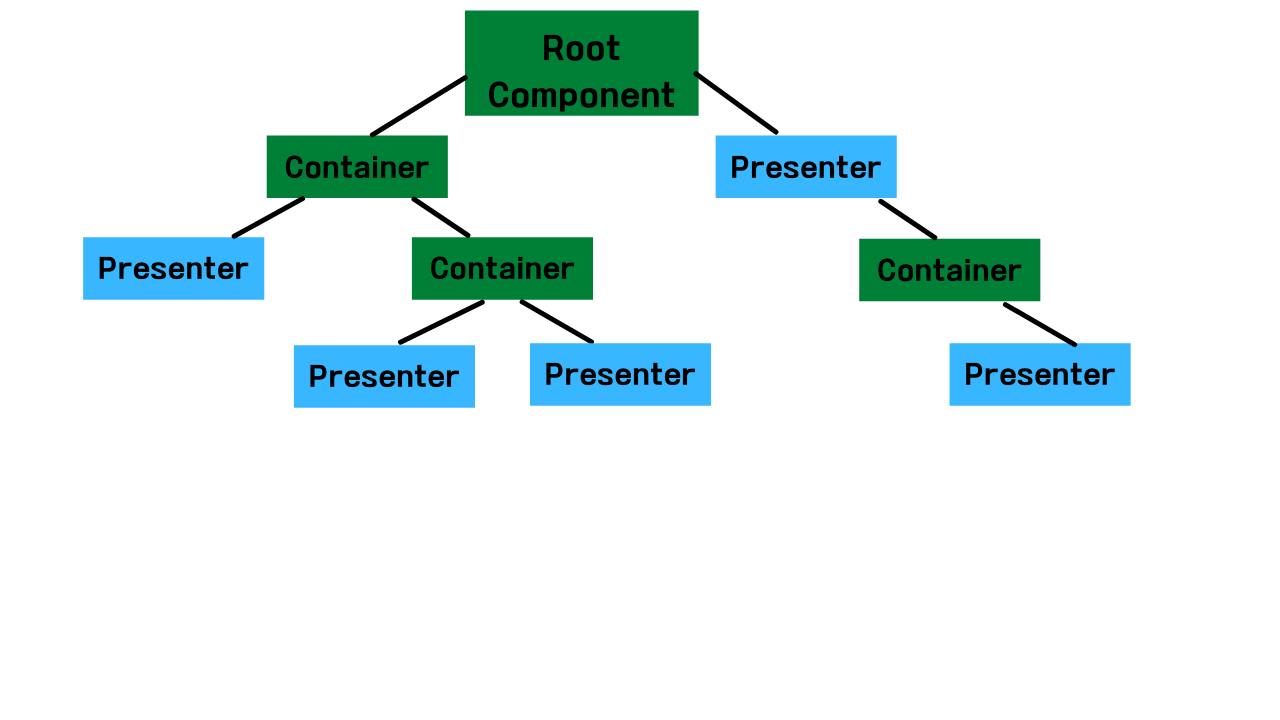
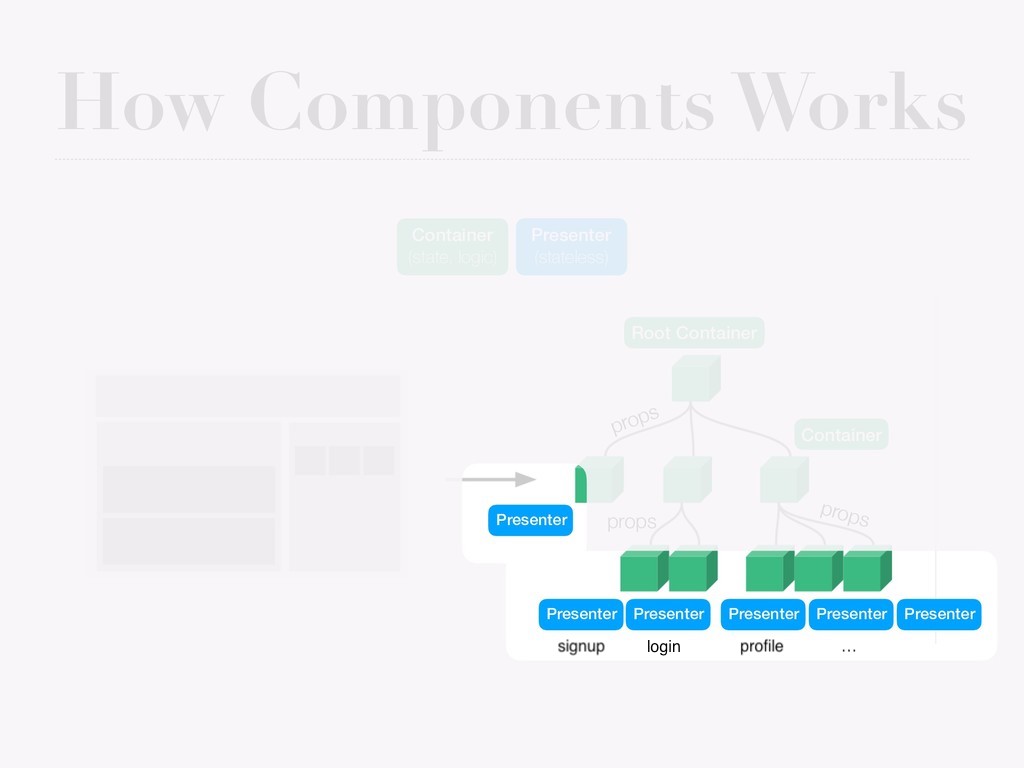
react를 사용할 때 흔히 presentational & container 디자인 패턴을 사용한다. 로직을 수행하는 container, state조작이 없고 뷰만 보여주는 presentational 컴포넌트로 분리된 패턴을 말한다.

위와 같은 패턴을 쓰면 로직을 수행하는 container에 집중을 할 수 있다는 장점이 있지만, 반대로 뷰(ui요소)에 집중하지 못할 수도 있다.
예를들어, 로그인해야 보여지는 컴포넌트가 있는데 다른 작업을 하다가 이 컴포넌트를 보기 위해서는 매번 로그아웃했다고 로그인하는 귀찮은 과정이 반복된다. 그래서 스테이트 구조가 많이 갖춰진 상황에서 컴포넌트 스타일링이나 뷰를 수정하려고 하면 힘들어진다.
이때 스토리북을 사용하면 present 컴포넌트들만 모아서 나열해주기 때문에 ui컴포넌트를 개발하는데 도움을 받을 수 있다.

storybook 특징
- 스토리는 사용자에 따라 자유롭게 정의될 수 있다(뷰가 다르게 보일 수 있는 상태).
- 기존의 앱과는 별개로 실행되는 앱을 갖는다.
- 디자이너, 기획자, 개발자가 사용할 수 있는 협업툴로서 실시간으로 화면 스택을 체크할 수 있다.
- state를 자유롭게 주입할 수 있다.(같은 페이지 내에서 데이터가 없을 경우의 ui, 로딩중 ui, 데이터가 있을 경우의 ui를 구성하는 것이 가능)
Storybook 실행하기
설치하기
npx sb init
예전에는 cli설치해주고, 프로젝트 디렉토리 storybook설치해주는 명령어를 따로 입력해줘야 했는데 이제는 'npx sb init' 명령어 하나로 모든 설치가 가능해졌다.
설치가 완료되면 .storybook 디렉토리와 src에 stories 디렉토리가 자동으로 생성된다.npm run storybookoryarn storybook
개발 모드에서 실행하기
만들어보기
button component를 예시로 primary button,small button, large button을 만들어보자.
//Button.tsx
import React from 'react';
import './button.css';

export interface ButtonProps {
  primary?: boolean;
  backgroundColor?: string;
  size?: 'small' | 'large';
  label: string;
  onClick?: () => void;
}

export const Button: React.FC<ButtonProps> = ({
                                                primary = false,
                                                size = 'small',
                                                backgroundColor,
                                                label,
                                                ...props
                                              }) => {
  const mode = primary ? 'storybook-button--primary' : 'storybook-button--secondary';
  return (
    <button
      type="button"
      className={['storybook-button', `storybook-button--${size}`, mode].join(' ')}
      style={{ backgroundColor }}
      {...props}
    >
      {label}
    </button>
  );
};
//Button.stories.tsx
import React from 'react';
import { Story, Meta } from '@storybook/react';

import { Button, ButtonProps } from './Button';

export default {
  title: 'Example/Button',
  component: Button,
  argTypes: {
    backgroundColor: { control: 'color' },
  },
} as Meta;

const Template: Story<ButtonProps> = (args) => <Button {...args} />;

export const Primary = Template.bind({});
Primary.args = {
  primary: true,
  label: 'Primary button',
};

export const Large = Template.bind({});
Large.args = {
  size: 'large',
  label: 'Large button',
};

export const Small = Template.bind({});
Small.args = {
  size: 'small',
  label: 'Small button',
};
with styled-system
styled-component와 styled-system로 스타일링을 정의해서 상황에 맞는버튼들을 만들어보자.
Styled-System을 사용하기 위해서는 Styled Component나 Emotion같은 CSS-in-JS 라이브러리가 선행되어야 한다.
// Button.tsx
import * as React from 'react';
import styled from 'styled-components';
import { variant } from 'styled-system';

export type ButtonProps = {
  children?: React.ReactNode | string;
  theme: 'default' | 'primary' | 'success' | 'danger';
  size: 'large' | 'middle' | 'small';
  disabled: boolean;
  onClick?: () => void;
};

const sizeVariants = variant({
  prop: 'size',
  variants: {
    small: {
      padding: '0px 7px',
      height: '24px',
    },
    middle: {
      padding: '4px 15px',
    },
    large: {
      padding: '6px 15px',
      height: '40px',
    },
  },
});

const themeVariants = variant({
  prop: 'theme',
  variants: {
    default: {
      color: 'black',
    },
    primary: {
      border: 'none',
      backgroundColor: 'black',
      color: '#FFFFFF',
    },
    success: {
      border: 'none',
      backgroundColor: '#21D05F',
      color: '#FFFFFF',
    },
    danger: {
      border: 'none',
      backgroundColor: '#FF4D4E',
      color: '#FFFFFF',
    },
  },
});

//default styles
const ButtonStyles = styled.button`
  background-color: #ffffff;
  padding: 4px 15px;
  min-width: 75px;
  font-size: 14px;
  border: 1px solid black;
  outline: none;

  &:hover {
    cursor: pointer;
  }

  :disabled {
    background-color: #eeeeee;
    border-color: #eeeeee;
  }

  ${themeVariants};
  ${sizeVariants};
`;

export const Button = ({ disabled = false, children, ...props }: ButtonProps) => {
  return <ButtonStyles {...props}>{children}</ButtonStyles>;
};
기준별로 나눈 prop들을 변수로 만들고, 정의된 styled-component에 변수들을 포함시켜줌.
//button.stories.tsx

import * as React from 'react';
import { Button } from '@/components/atoms/button';
import { Meta, Story } from '@storybook/react';

...생략

const sizes: ('large' | 'middle' | 'small')[] = ['large', 'middle', 'small'];

export const Size: Story<React.ComponentProps<typeof Button>> = ({ children, size, ...args }) => {
  return (
    <>
      {sizes.map((each) => (
        <Button2 {...args} size={each}>
          {children ?? each}
        </Button2>
      ))}
    </>
  );
};

// 스토리북 사이즈-테이블 안보이도록 설정
Size.argTypes = {
  size: {
    table: {
      disable: true,
    },
  },
};
