withRouter?
다른 것들은 무조건 Link를 사용해서 해당 component를 렌더링 하지만, withRouter를 사용하면, 굳이 Link없이도 화면 렌더링이 가능해짐
WithRouterSample.js같은 아무이름으로 파일을 만들고 난 후,
import {withRouter} from 'react-router-dom';으로 import
그 다음에, 다음처럼 코드 작성
import React from 'react';
import { withRouter } from 'react-router-dom';

function WithRouterSample({ location, match, history }) {
  return (
    <div>
      <h4>location</h4>
      <textarea value={JSON.stringify(location, null, 2)} readOnly></textarea>
      <h4>match</h4>
      <textarea value={JSON.stringify(match, null, 2)} readOnly></textarea>
      <button onClick={() => history.push('/')}>홈으로</button>
    </div>
  );
}

export default withRouter(WithRouterSample);
보다시피, 매개변수로 location, match, history를 받는 걸 알 수 있음
다른 .js파일에서 렌더링 부분에 WithRouterSample을 넣게 되면
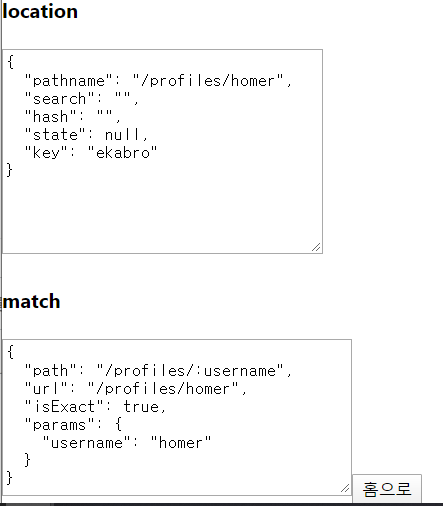
다음같은 화면이 들어가게 됨 이 말은 뭐냐, 다른 .js파일로 부터 match에 대한 정보, 그리고 location에 대해 정보를 받았다는 걸 뜻함.
홈으로버튼을 눌러도 홈으로 잘 이동함
JSON.stringify(match, null, 2) 이부분은 match안의 내용이 JSON인데, string화 시키겠다는 표현이고, 뒤에 null, 2는 들여쓰기에 필요한 내용
routerHook?
withRouter와 유사한 라이브러리가 있는데 이게 routerHook라이브러리
yarn add use-react-router로 yarn을 통해 라이브러리 추가를 해줘야 하는 커스텀 훅임 정식 훅은 아닌 듯 함
import useReactRouter from 'use-react-router';다 했으면 import
function RouterHookSample() {
  const { history, location, match } = useReactRouter();
  console.log(history, location, match);
  return null;
}

export default RouterHookSample;useReactRouter를 통해 history, location, match를 받아올 수 있음
사용은 기존의 withRouter와 거의 동일한 것 같음
import React from 'react';
import useReactRouter from 'use-react-router';

function RouterHookSample() {
  const { history, location, match } = useReactRouter();
  return (
    <div>
      <h4>location</h4>
      <textarea value={JSON.stringify(location, null, 2)} readOnly></textarea>
      <h4>match</h4>
      <textarea value={JSON.stringify(match, null, 2)} readOnly></textarea>
      <button onClick={() => history.push('/')}>홈으로</button>
    </div>
  );
}

export default RouterHookSample;
이렇게 withRouter에서 썼던 코드를 그대로 써도 아무문제 없이 잘 출력됨


코딩의 고수가 되고 싶은 종한이