Client
App.js
1) App 컴포넌트의 isLogin 상태에 따라 Mypage 혹은 Login 컴포넌트를 렌더링합니다. 적절한 props를 Mypage/Login 컴포넌트에 전달합니다.
import React, { Component } from "react";

import Login from "./components/Login";
import Mypage from "./components/Mypage";

class App extends Component {
  constructor(props) {
    super(props);
    this.state = {
      isLogin: false,
      accessToken: "",
    };

    this.loginHandler = this.loginHandler.bind(this);
    this.issueAccessToken = this.issueAccessToken.bind(this);
  }

  // app 화면 전환을 위한 조건
  loginHandler() {
    this.setState({
      isLogin: true,
    })
  }

  // 1) 핸들러를 Login, Mypage에 Props로 전달한다.
  // 2) 로그인을 통해 accessToken을 획득할 예정이고, 해당 토근을 통해 App.js의 accessToken state값이 변경될 예정이다.
  // 3) 그 토큰을 Props로 Mypage에 넘겨줄 예정이다.
  issueAccessToken(token) {
    this.setState({
      accessToken: token
    })
  }

  render() {} //...생략
  export default App;
2) Login 컴포넌트의 loginRequestHandler메소드를 사용하여 상위 컴포넌트인 App 컴포넌트의 state를 적절히 변경시킵니다.
Login.js
class Login extends Component {
  constructor(props) {
    super(props);
    this.state = {
      userId: "",
      password: "",
    };
    this.inputHandler = this.inputHandler.bind(this);
    this.loginRequestHandler = this.loginRequestHandler.bind(this);
  }

  inputHandler(e) {
    this.setState({ [e.target.name]: e.target.value });
  }

  // accessToken을 획득하는 메소드이다.
  // 사용자 id와 pw를 서버 endpoint로 Body로 보낸다. (서버에서 해당 정보의 사용자가 있는지 확인해서 accessToken을 넘겨줄 예정이다.)
  loginRequestHandler() {
    axios
    .post("https://localhost:4000/login",
    {
      userId: this.state.userId,
      password: this.state.password
    },
    {
      'Content-Type':'application/json',
      withCredentials: true // cors 요청을 위해 필요하다.
    })
    .then((res) => {
      this.props.loginHandler(); // 로그인 true로 변경해 주고,
      this.props.accessTokenHandler(res.data.data.accessToken); // 서버에서 data라는 키로 정보를 넘길 예정인데, `res.data`로 접근해야 'data'라는 키에 접근하여 실제 토큰을 획득할 수 있다. 이 토큰은 App으로 전달될 예정이다.
    }
    );
  }
  render() {} //...생략
  export default Login;
Mypage.js
3) Mypage 컴포넌트 accessTokenRequest, refreshTokenRequest 메소드를 구현합니다.
class Mypage extends Component {
  constructor(props) {
    super(props);
    this.state = {
      userId: "",
      email: "",
      createdAt: "",
    };
    this.accessTokenRequest = this.accessTokenRequest.bind(this);
    this.refreshTokenRequest = this.refreshTokenRequest.bind(this);
  }

    /*
    App 컴포넌트에서 내려받은 accessToken props를 authorization header에 담아 요청을 보낸다. 서버에서 해당 토큰을 검증하여, 사용자에게 등록된 토큰이 맞으면 요청하는 정보를 전달해 준다.
    */
  accessTokenRequest() {
    axios
    .get("https://localhost:4000/accesstokenrequest",
    { headers: {
        Authorization: `Bearer ${this.props.accessToken}`
      }
    },
    {
      withCredentials: true
    })
    .then((res) => {
      this.setState({
      userId: res.data.data.userInfo.userId,
      email: res.data.data.userInfo.email,
      createdAt: res.data.data.userInfo.createdAt})
    })
  }

    /*
    accessToken이 만료되면 refreshToken을 통해 accessToken을 다시 생성할 수 있어야 한다. 서버에 담긴 refreshToken
    */
  refreshTokenRequest() {
    axios
    .get("https://localhost:4000/refreshtokenrequest",
    { withCredentials: true }
      )
    .then((res) => {
      this.setState({
      userId: res.data.data.userInfo.userId,
      email: res.data.data.userInfo.email,
      createdAt: res.data.data.userInfo.createdAt})
      this.props.accessTokenHandler(res.data.data.accessToken)
    }
    )
  }
Server
1) JWT 활용 방법
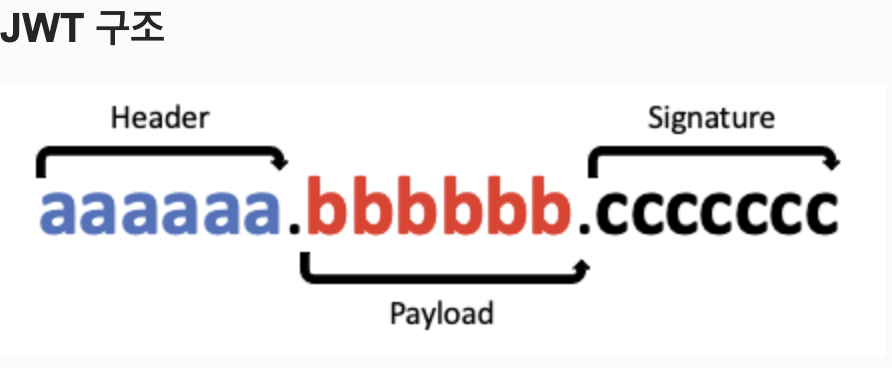
- JWT의 구조
- 토큰 생성하기
const jwt = require('jsonwebtoken');
const token = jwt.sign(토큰에_담을_값, ACCESS_SECRET, { 옵션1: 값, 옵션2: 값, ... });
// .sign(payload, 비밀키, header)로 토큰 생성
- 토큰 검증하기
jwt.verify(token, secretkey, 익명함수)
- token: client에게서 받은 token
- secretkey : token 생성 시 사용했던 secretKey
- 3번째 인자로 들어간 익명함수 : 유효성 검사 결과를 처리할 callback 함수
login.js
1) request로부터 받은 userId, password와 일치하는 유저가 DB에 존재하는지 확인합니다.
- 일치하는 유저가 없을 경우 : 로그인 요청을 거절합니다.
- 일치하는 유저가 있을 경우 :
필요한 데이터를 담은 두 종류의 JWT(access, refresh)를 생성합니다.
생성한 JWT를 적절한 방법으로 반환합니다.
access token은 클라이언트에서 react state로 다루고 있습니다.
refresh token은 클라이언트의 쿠키에서 다루고 있습니다.
module.exports = async (req, res) => {

  // App 클라이언트에서 보낸 id와 pw로 사용자 데이터를 수집
  const userInfo = await Users.findOne({
    where: { userId: req.body.userId, password: req.body.password },
  })

  if (!userInfo) {
    res.status(401).json({data: null, message: 'not authorized'})
  } else {
    const { id, userId, email, createdAt, updatedAt } = userInfo

    // jwt.sign(payload, 비밀키값, header)
    const accessToken = jwt.sign({ id, userId, email, createdAt, updatedAt }, process.env.ACCESS_SECRET, {
      algorithm : "HS256", // 해싱 알고리즘
      expiresIn : "1h",  // 토큰 유효 기간
    });
    console.log('accessToken', accessToken)
    const refreshToken = jwt.sign({ id, userId, email, createdAt, updatedAt }, process.env.REFRESH_SECRET, {
      algorithm : "HS256", // 해싱 알고리즘
      expiresIn : "3h",  // 토큰 유효 기간
    });

    // refreshToken은 쿠키에, accessToken은 응답에 답아 전달한다.
    res.status(200)
    .cookie('refreshToken', refreshToken, {
      domain: 'localhost',
      path: '/',
      httpOnly: true,
      secure: true,
      sameSite: 'None',
    })
    .json({data: {accessToken}, message: 'ok' })
  }
}
accessTokenRequest.js
1) Login 클라이언트에서 get요청을 해당 end point로 autorization 헤더로 accessToken을 보냈다.
2) accessToken은 'Bearer xxxxxx....'와 같이 전달되어 const token = accessToken.split(' ')[1];로 accessToken값만 추출할 수 있다.
2) 해당 accessToken을 jwt.verify로 검증을 한다. callback으로 들어가는 비동기 함수에 의해 data에 토큰 생성에 보냈던 사용자 정보 (payload)의 내용이 들어가게 된다.
module.exports = async (req, res) => {
  const accessToken = req.headers['authorization'];

  if (!accessToken) {
    res.status(400).json({ data: null, message: "invalid access token" })
  } else {
    const token = accessToken.split(' ')[1];

    jwt.verify(token, process.env.ACCESS_SECRET, async (err, data) => {
      const userInfo = await Users.findOne({
        where: { userId: data.userId },
      })

      if (!userInfo) {
        res.status(400).json({ data: null, message: "access token has been tempered" })
      } else {

        const { id, userId, email, createdAt, updatedAt } = userInfo;

        res.status(200).json({ data: {userInfo: { id, userId, email, createdAt, updatedAt } }, message: "ok" })
      }
    })
  }
refreshTokenRequest.js
1) 로그인 당시 서버는 클라이언트 cookies에 refreshToken을 넣어 주었다.
2) accessToken과 같이 해당 refreshToken을 검증한다.
3) refreshToken 토큰 검증을 통해 얻은 사용자 정보로 새 accessToken을 생성하는 과정이다.
module.exports = (req, res) => {
  const token = req.cookies.refreshToken;

  if (!token) {
    res.status(400).json({ data: null, message: "refresh token not provided" })
  }
  jwt.verify(token, process.env.REFRESH_SECRET, async(err, data)=>{
    if (err) {
      res.status(400).json({data: null, message: "invalid refresh token, please log in again"})
    } else {
      const userInfo = await Users.findOne({
        where: { userId: data.userId }
      });

      if (!userInfo){
        res.status(400).json({ data: null, message: "refresh token has been tempered"})
      } else {
        const { id, userId, email, createdAt, updatedAt } = userInfo;
        const accessToken = jwt.sign(
          {id, userId, email, createdAt, updatedAt},
          process.env.ACCESS_SECRET,
          {expiresIn: '1h'}
          );

        res.status(200).json({
          data: {
            accessToken,
            userInfo: { id, userId, email, createdAt, updatedAt }
          },
          message: 'ok'
        });
      }
    }
  });
};
정리
1) 토큰은 클라이언트에 state로 관리되고 있었다.
2) 서버는 소유하고 있던 acceessSecret, refreshSeceret Key를 가지고 토큰 생성 및 검증만 진행한다.
3) refreshToken을 쿠키로 클라이언트에 심어 놓아서, accessToken이 만료되면, refreshToken의 기한 내에 새 accessToken을 생성할 수 있다.
4) JWT (JSON Web Token)을 통해 sign (생성 또는 토큰 암호화), verify (검증 또는 토큰 복호화)를 통해 사용자 정보를 활용한다.

