UE4에서 Input을 관리하던 방법
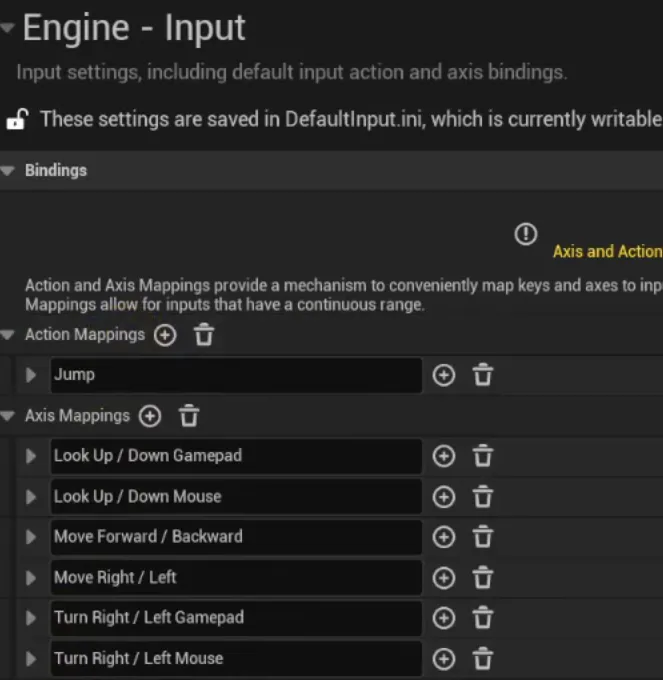
- UE5로 오면서 Input을 관리하는 방식이 바뀌었다
- 장점이 많지만 단점으로는 복잡하고 처음에 세팅하는 것이 어렵다
- 상황에 맞게 Input 시스템을 바꿀 수 있다는 장점이 있다
UE5 Enhanced Input
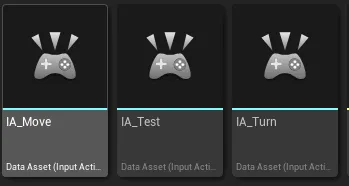
- 우클릭 → Input → Input Action
- Enhanced Input을 사용하기 위해서 build.cs에 모듈을 추가해줘야 한다.
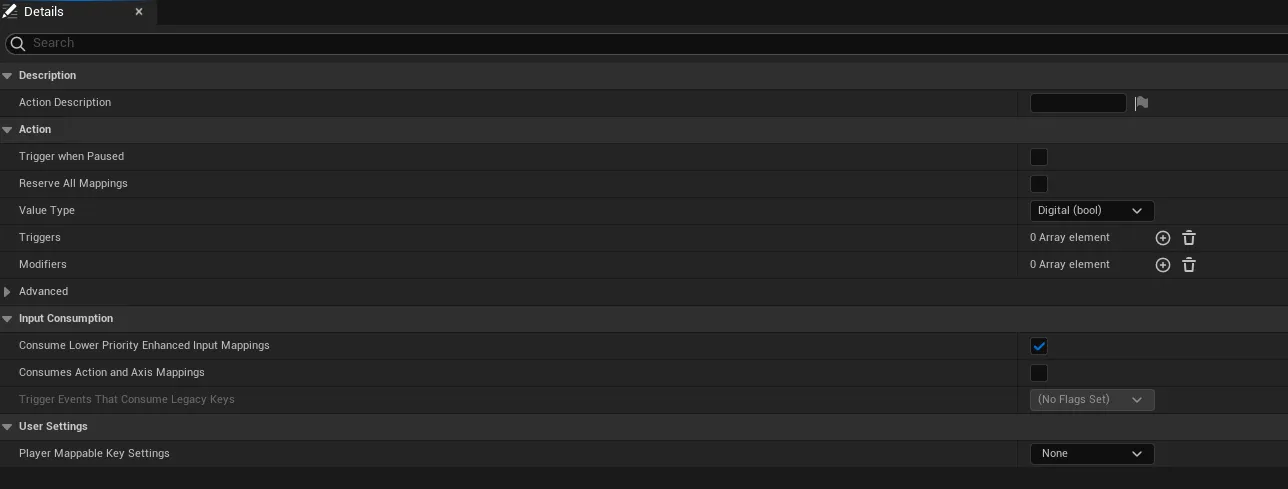
- 입력의 Value Type을 정해주어야 한다
- bool: 눌렀다 뗐다의 Action
- Axis 1D: 앞, 뒤 같은 축 1개의 움직임
- Axis2D: x, y 2개 축의 움직임
- Axis3D: x, y, z 3개 축의 움직임
- 행동마다 Input Action을 만들어서 관리한다
- 이후 Input Mapping Context를 통해 만든 Input Action과 키보드를 실제로 매핑할 수 있다
- 우클릭 → Input → Input Mapping Context
- 만들어둔 Input Action을 등록하여 관리한다
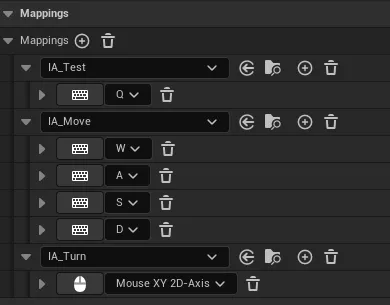
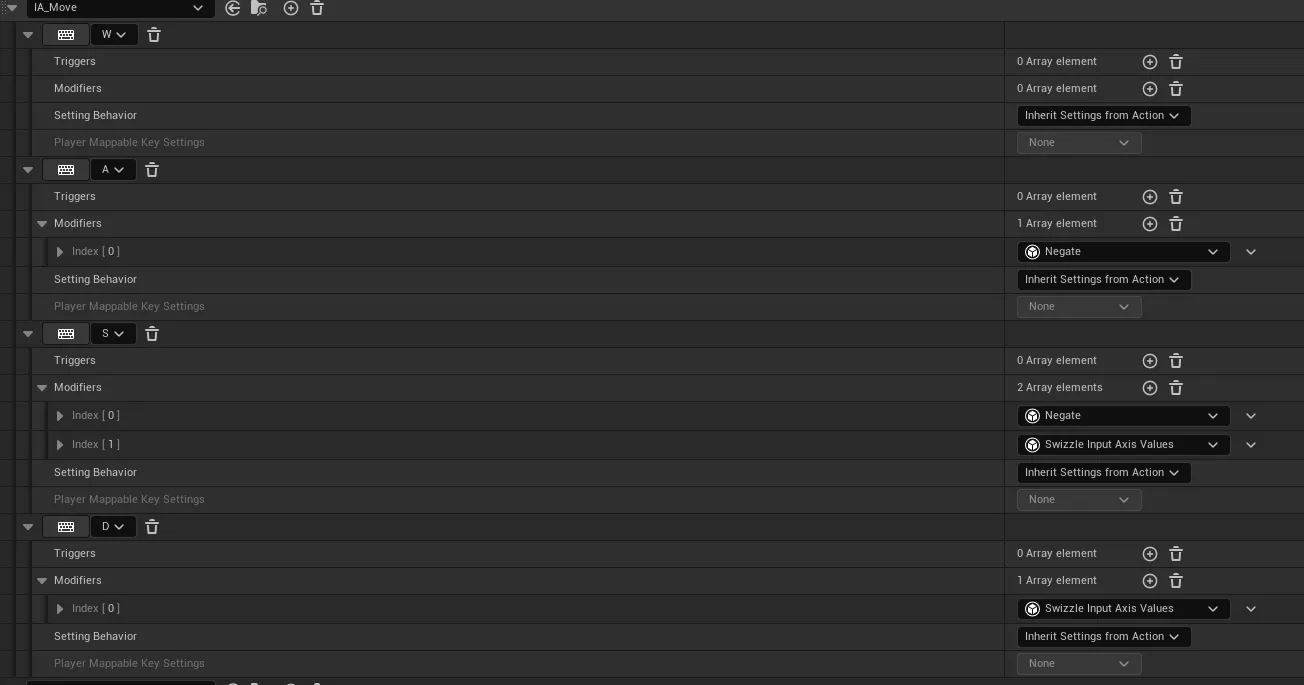
- Modifiers를 통해 입력 값을 음수로 바꾸거나 입력 축의 순서(x, y) → (y, x)를 바꿀 수 있다
PlayerController에서 위에서 만든 Input Action과 Input Mapping Context를 바인딩 해보자
    // header
    struct FInputActionValue;

    UCLASS()
    class PROJECT_API ARPlayerController : public APlayerController
    {
    	GENERATED_BODY()
    public:
    	ARPlayerController(const FObjectInitializer& ObjectInitializer);

    protected:
    	virtual void BeginPlay() override;
    	virtual void SetupInputComponent() override;

    private:
    	void Input_Test(const FInputActionValue& InputValue);
    	void Input_Move(const FInputActionValue& InputValue);
    	void Input_Turn(const FInputActionValue& InputValue);

    protected:
    	UPROPERTY(EditAnywhere, Category = Input)
    	TObjectPtr<class UInputMappingContext> InputMappingContext;

    	UPROPERTY(EditAnywhere, Category = Input)
    	TObjectPtr<class UInputAction> TestAction;

    	UPROPERTY(EditAnywhere, Category = Input)
    	TObjectPtr<class UInputAction> MoveAction;

    	UPROPERTY(EditAnywhere, Category = Input)
    	TObjectPtr<class UInputAction> TurnAction;

};- PlayerController의 생성자에서는 인자로 FObjectInitializer& 를 받아야 한다.
- 콜백 함수로 바인딩 하기 위해서 인자로 FInputActionValue& 를 받아야 한다.
// cpp
    ARPlayerController::ARPlayerController(const FObjectInitializer& ObjectInitializer)
    	: Super(ObjectInitializer)
    {
    }

    void ARPlayerController::BeginPlay()
    {
    	Super::BeginPlay();

    	// Subsystem은 범위가 있는 싱글톤으로 플레이어의 생명 주기를 따라감
    	// 대입 하자마자 null check
    	if(auto* Subsystem = ULocalPlayer::GetSubsystem<UEnhancedInputLocalPlayerSubsystem>(GetLocalPlayer()))
    	{
    		// Subsystem에 MappingContext 추가
    		Subsystem -> AddMappingContext(InputMappingContext, 0);
    	}
    }

    void ARPlayerController::SetupInputComponent()
    {
    	Super::SetupInputComponent();

    	if(auto* EnhancedInputComponent = Cast<UEnhancedInputComponent>(InputComponent))
    	{
    		// 객체를 대상으로 실행하는 것이기 때문에 자신에 대한 포인터를 넘겨준다
    		// InputAction에 대한 콜백 함수 바인딩
    		EnhancedInputComponent->BindAction(TestAction, ETriggerEvent::Triggered, this, &ThisClass::Input_Test);
    		EnhancedInputComponent->BindAction(MoveAction, ETriggerEvent::Triggered, this, &ThisClass::Input_Move);
    		EnhancedInputComponent->BindAction(TurnAction, ETriggerEvent::Triggered, this, &ThisClass::Input_Turn);
    	}
    }

    void ARPlayerController::Input_Test(const FInputActionValue& InputValue)
    {

    }

    void ARPlayerController::Input_Move(const FInputActionValue& InputValue)
    {
    	FVector2d movementVector = InputValue.Get<FVector2d>();

    	// 0 체크는 효율성 때문
    	if(movementVector.X != 0)
    	{
    		FVector Direction = FVector::ForwardVector * movementVector.X;
    		GetPawn()->AddActorWorldOffset(Direction*50.f);
    	}
    	if(movementVector.Y != 0)
    	{
    		FVector Direction = FVector::ForwardVector * movementVector.Y;
    		GetPawn()->AddActorWorldOffset(Direction*50.f);
    	}
    }

    void ARPlayerController::Input_Turn(const FInputActionValue& InputValue)
    {
    	float Val = InputValue.Get<float>();	// x값만 가져옴
    	AddYawInput(Val);
    }
    ```
- EnhancedInput을 사용하기 위해서 EnhancedInputComponent, EnhancedInputSubsystmes 헤더를 포함시켜야 한다
- Kismet/KismetMathLibrary에는 이동 관련 유틸성 함수가 있다
- Input_Move 개선

```cpp
    void ARPlayerController::Input_Move(const FInputActionValue& InputValue)
    {
    	FVector2d movementVector = InputValue.Get<FVector2d>();

    	// 0 체크는 효율성 때문
    	if(movementVector.X != 0)
    	{
    		// PlayerController의 회전값을 가져옴
    		FRotator Rotator = GetControlRotation();
    		// 내가 바라보고 있는 방향에 대한 회전값을 기준으로 앞 방향을 가져옴
    		FVector Direction = UKismetMathLibrary::GetForwardVector(FRotator(0, Rotator.Yaw, 0));
    		GetPawn()->AddMovementInput(Direction, movementVector.X);		// move가 아닌 MovementInput을 추가한다는 것, 입력하는 방향
    	}
    	if(movementVector.Y != 0)
    	{
    		FRotator Rotator = GetControlRotation();
    		FVector Direction = UKismetMathLibrary::GetRightVector(FRotator(0, Rotator.Yaw, 0));
    		GetPawn()->AddMovementInput(Direction, movementVector.Y);
    	}
}- Movement Component를 사용하기 위해 AddMovementInput 사용
- Pawn에 Floating Pawn Movement Component를 추가해 이동할 수 있다
- 대각선으로 이동하면 빠르게 이동하는 문제를 처리해주는 것이 Movement Component 이다.
- Movement Component는 속도와 시간을 곱해 이동 처리를 담당한다
- Movement Input은 Pawn에, 회전과 관련된 Input은 PlayerController에 넣어야한다

게임 개발 공부중입니다.