
프로젝트 개요
이미 서비스 중인 사이트를 clone하는 clone coding 프로젝트로
대상 사이트는 "https://www.osulloc.com/" 입니다.
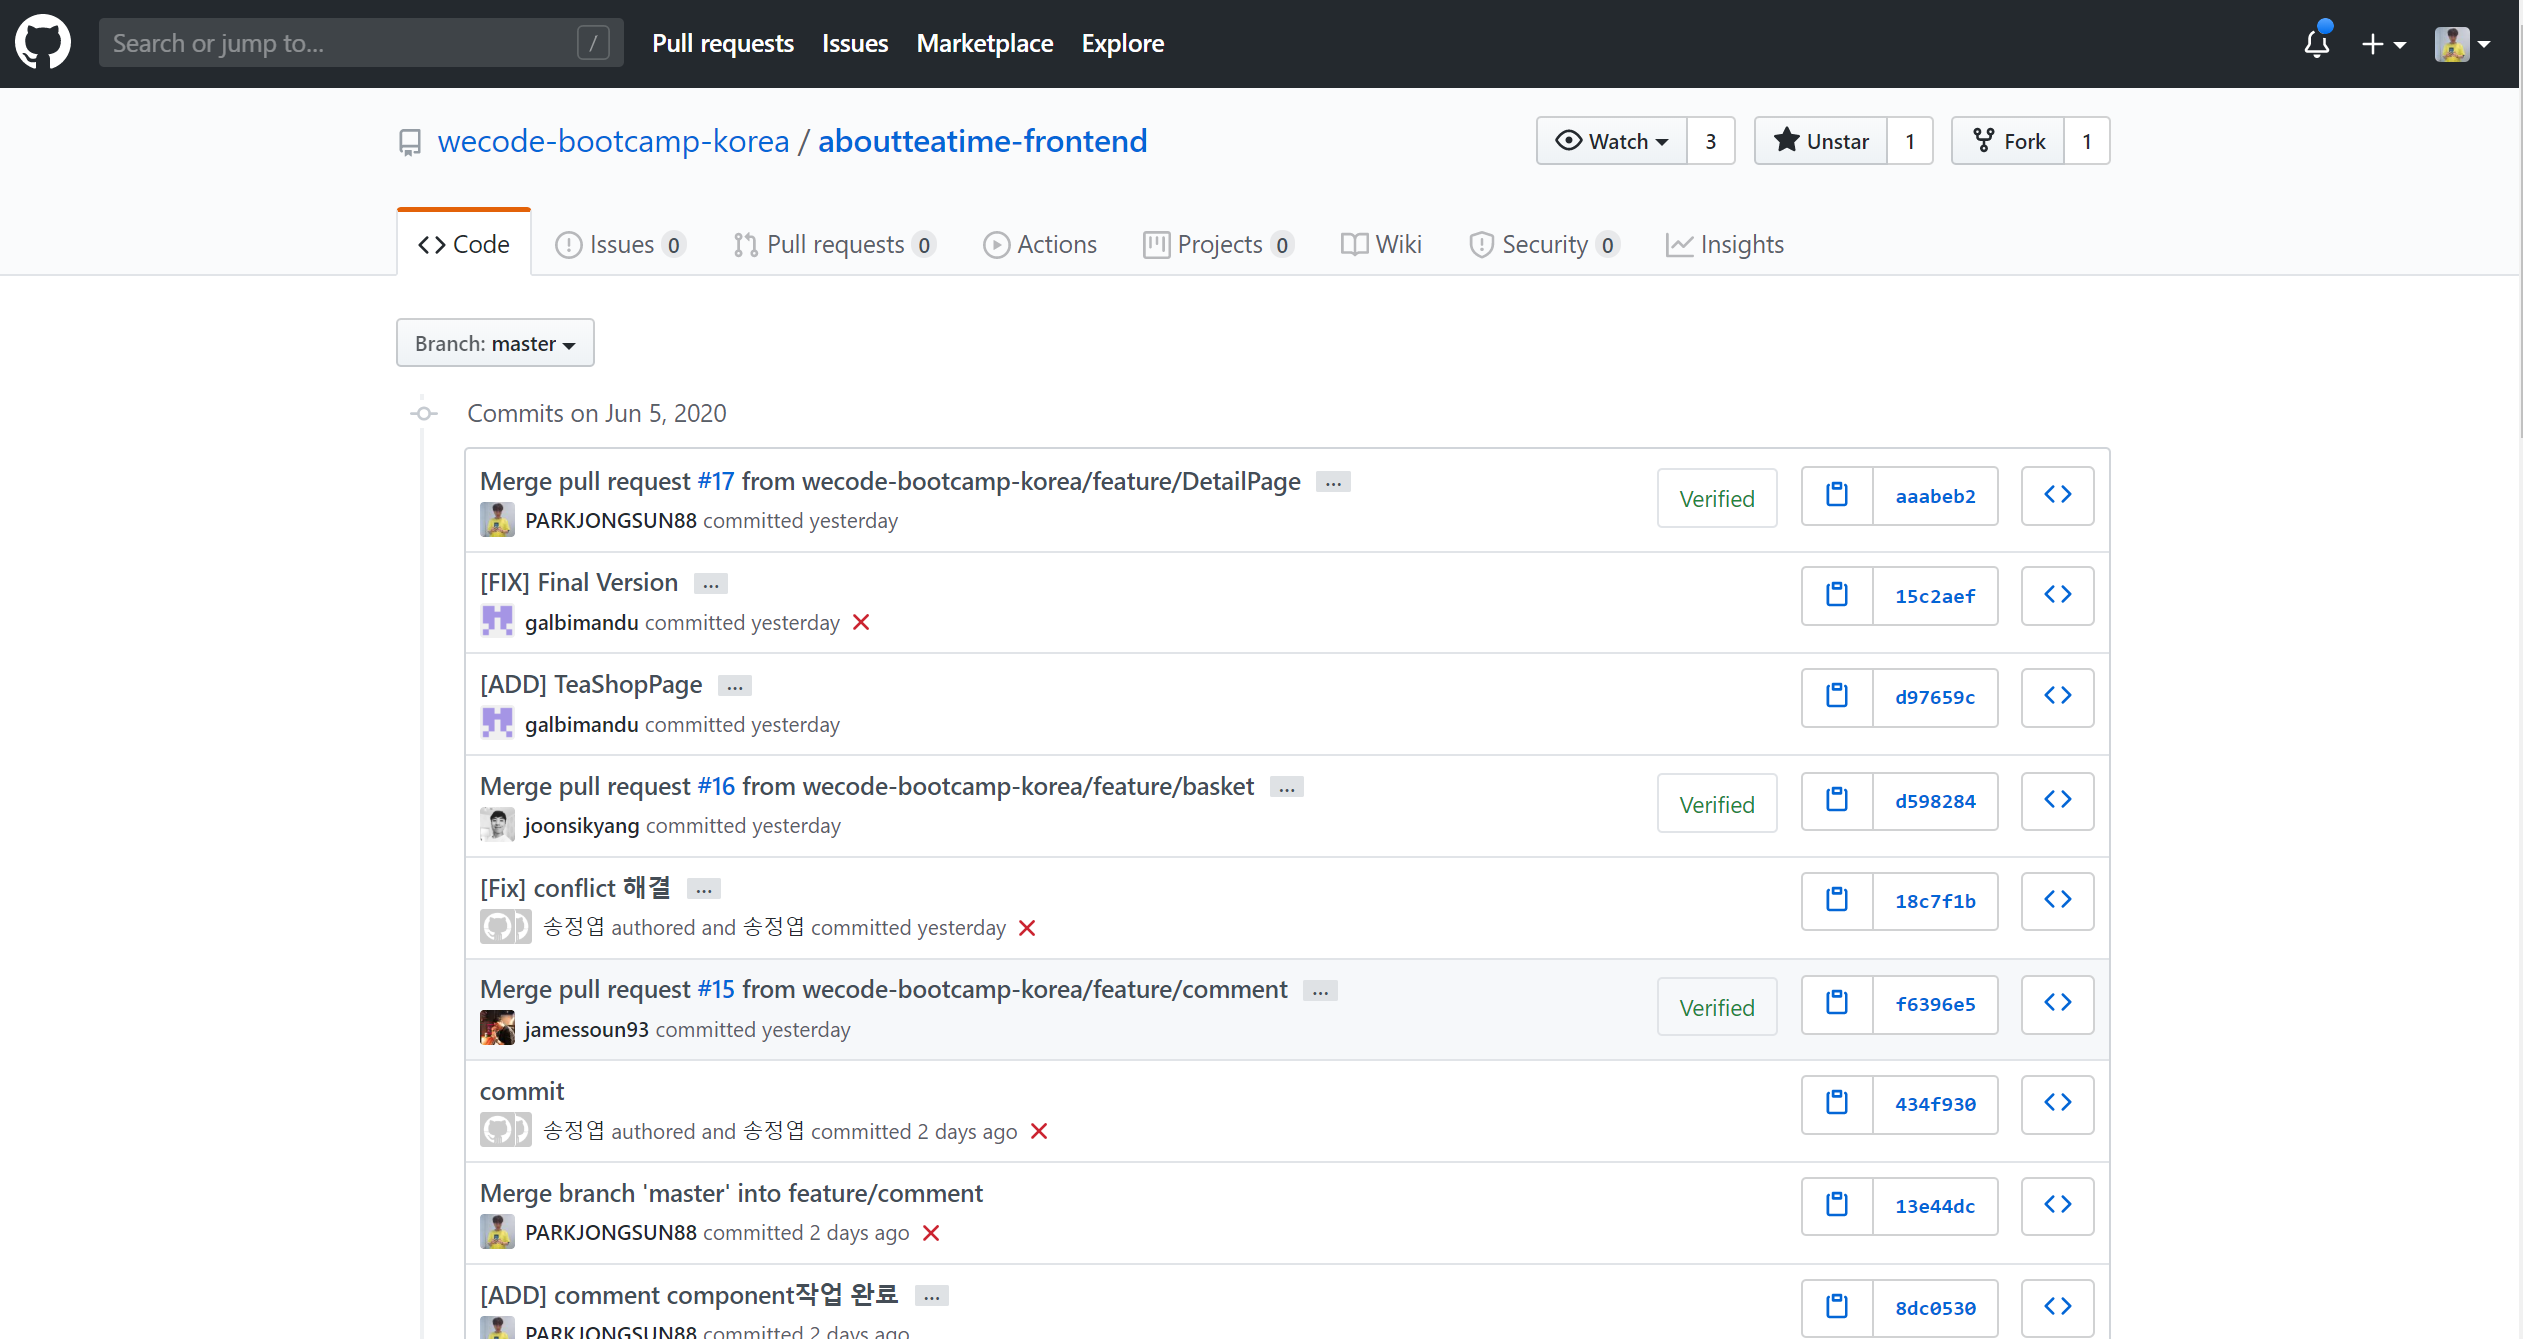
- github : https://github.com/PARKJONGSUN88/wecode_project_2
- 구현된 페이지 동영상 : https://www.youtube.com/watch?v=vfKG_wyZkGc
- 담당 부분 회고글 : https://velog.io/@jongsunpark88/projectW1me

clone coding
클론 프로젝트는 순수 개발시간의 극대화를 위해 기획이나 디자인 시간을 제외하기 위하여 진행하는 것으로 사이트의 구조나 소스만 참고하고 로직이나 구현방법은 직접 코딩하였습니다.
프로젝트의 공동 목표
- 다수가 함께 하는 작업으로 Team으로 개발하는 방법을 학습하고자 했습니다.
- 이를 위해 Trello라는 팀 planer를 사용하였고 1일 1회의 스탠딩 미팅을 진행하였습니다.
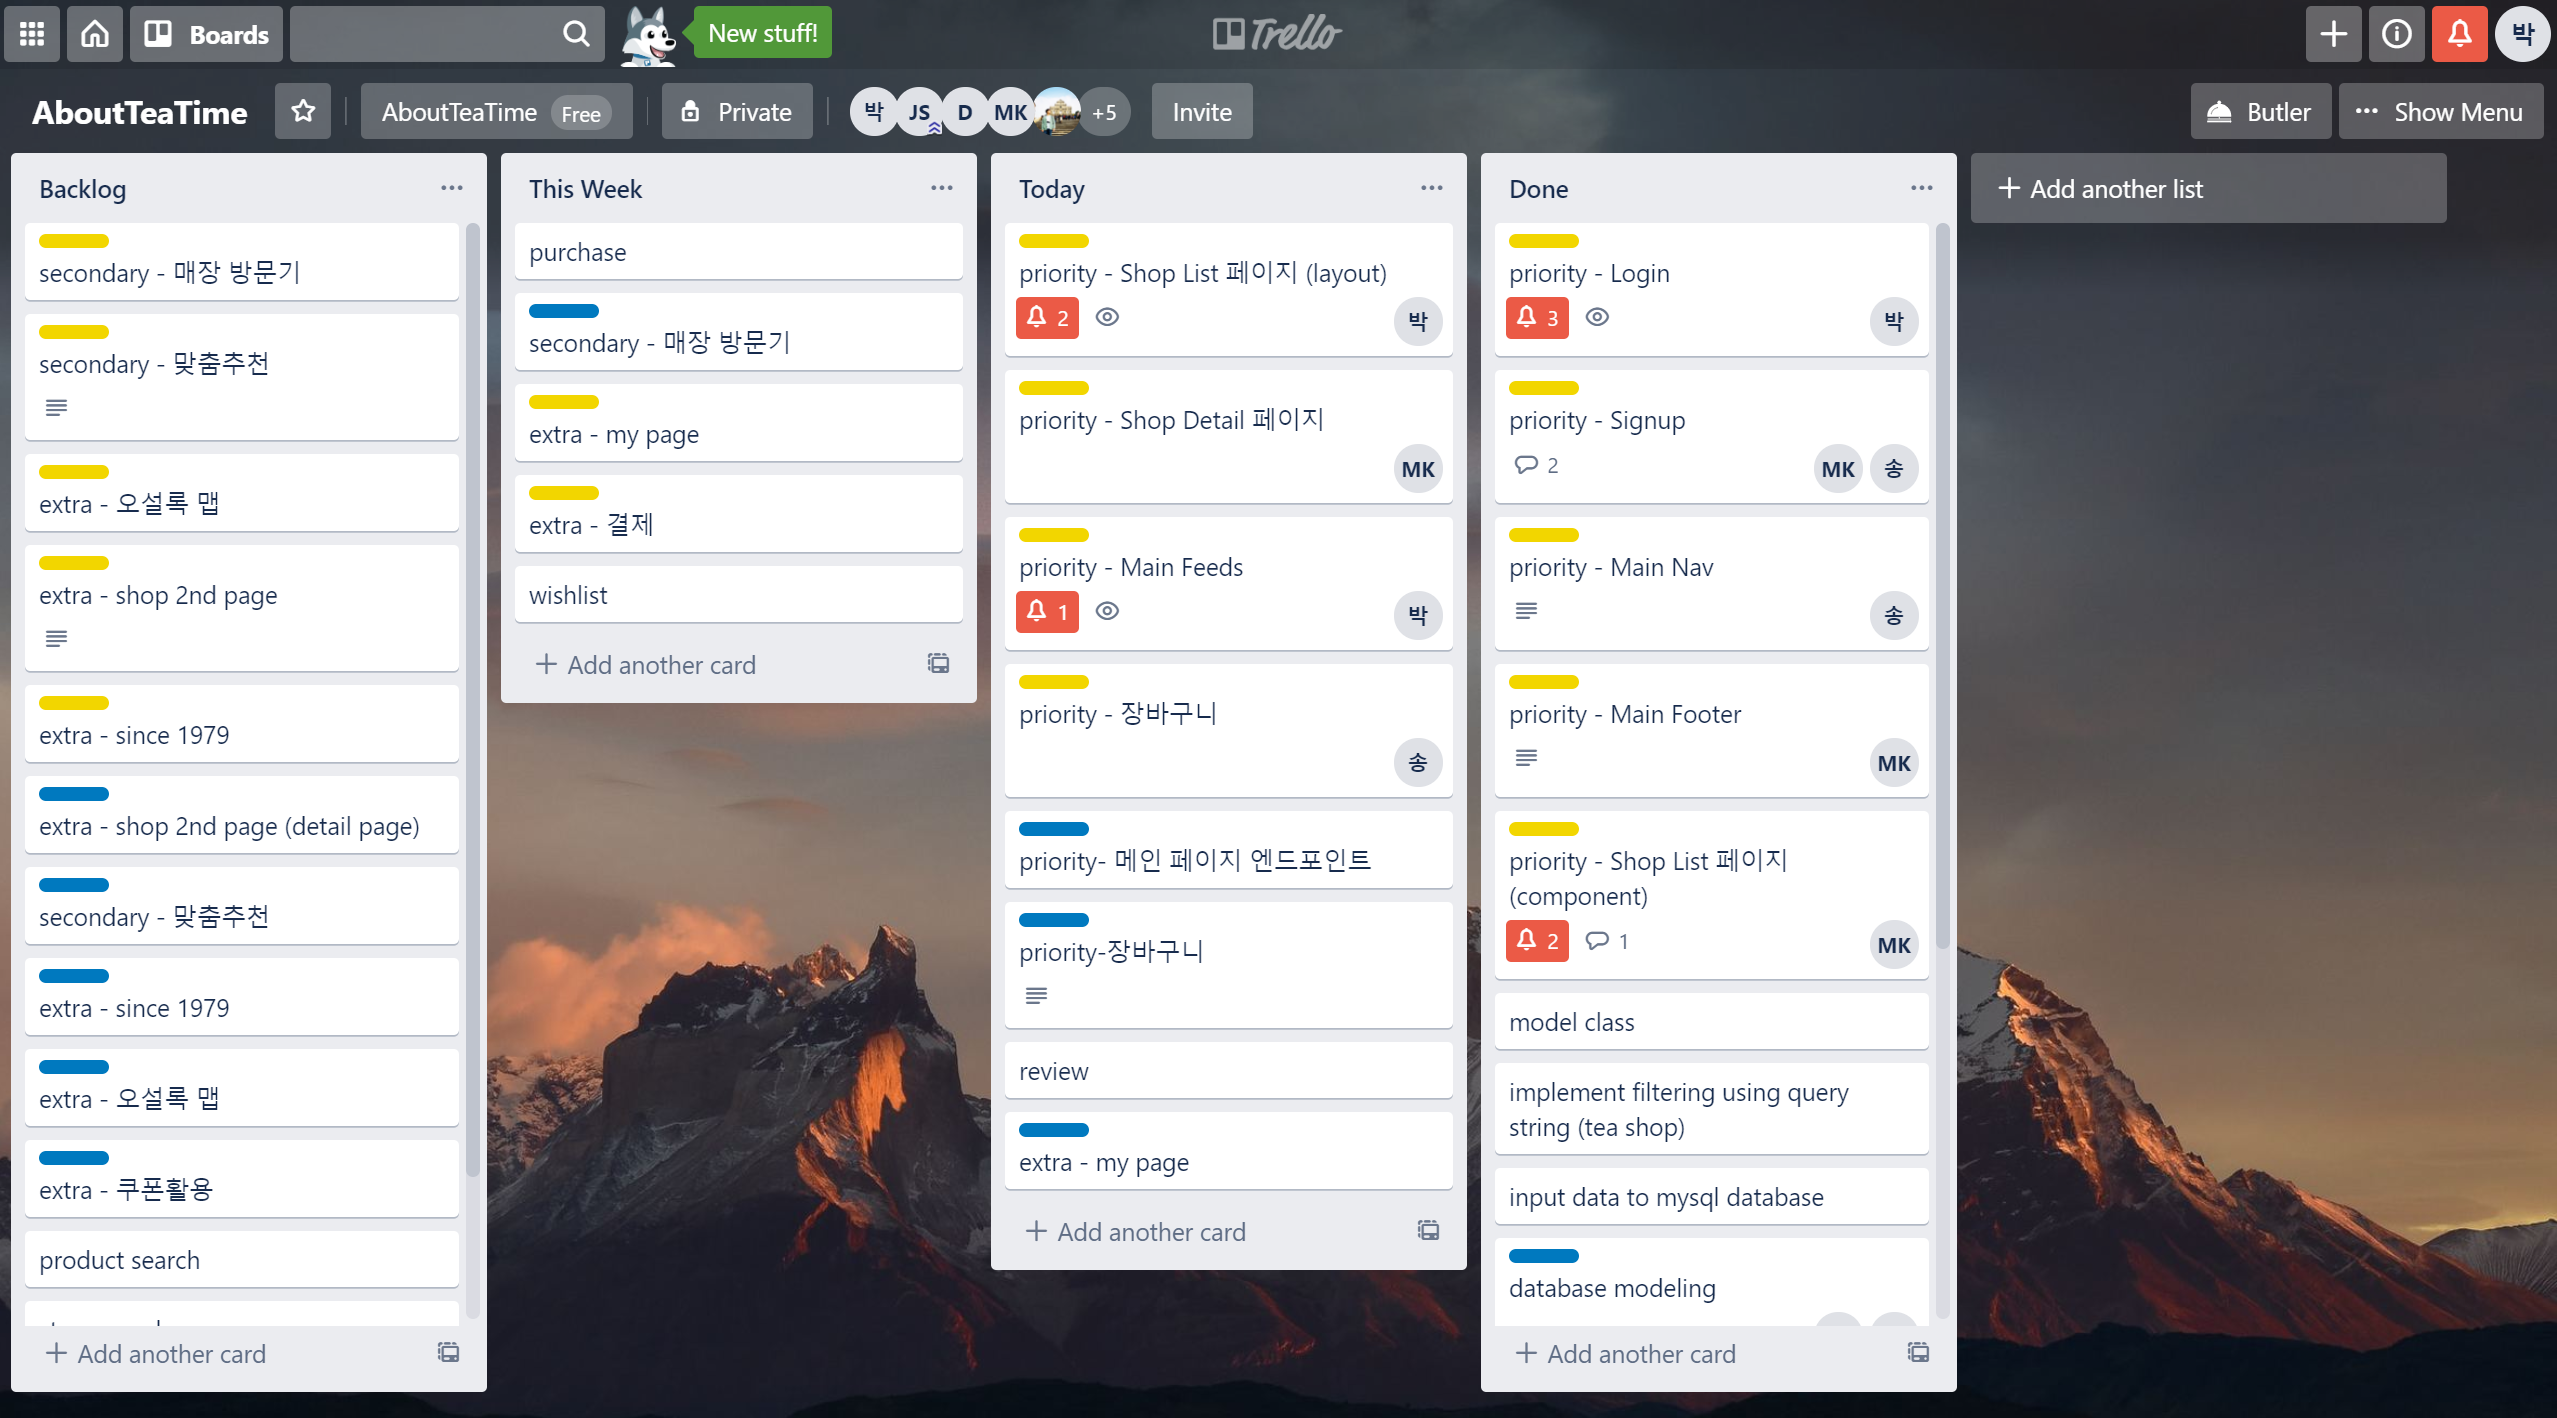
- git, github를 적극적으로 활용하여 실무처럼 개발하고자 하였습니다.
- 2주간의 1주에 한 스프린트로 진행하는 scrum 방식으로 프로젝트를 진행하였습니다.
프로젝트에 사용된 기술
프론트엔드: ReactJs, Sass
백엔드: Django, MySQL
배포 : AWS
소스관리:git, github
프로젝트에서의 담당
프론트엔드 3명, 백엔드 2명으로 구성되었으며
본인은 프론트엔드 개발자로써 참여하여
login페이지, main페이지, comment기능,
상품리스트 페이지의 video slide을 담당하였습니다.
프로젝트 구현
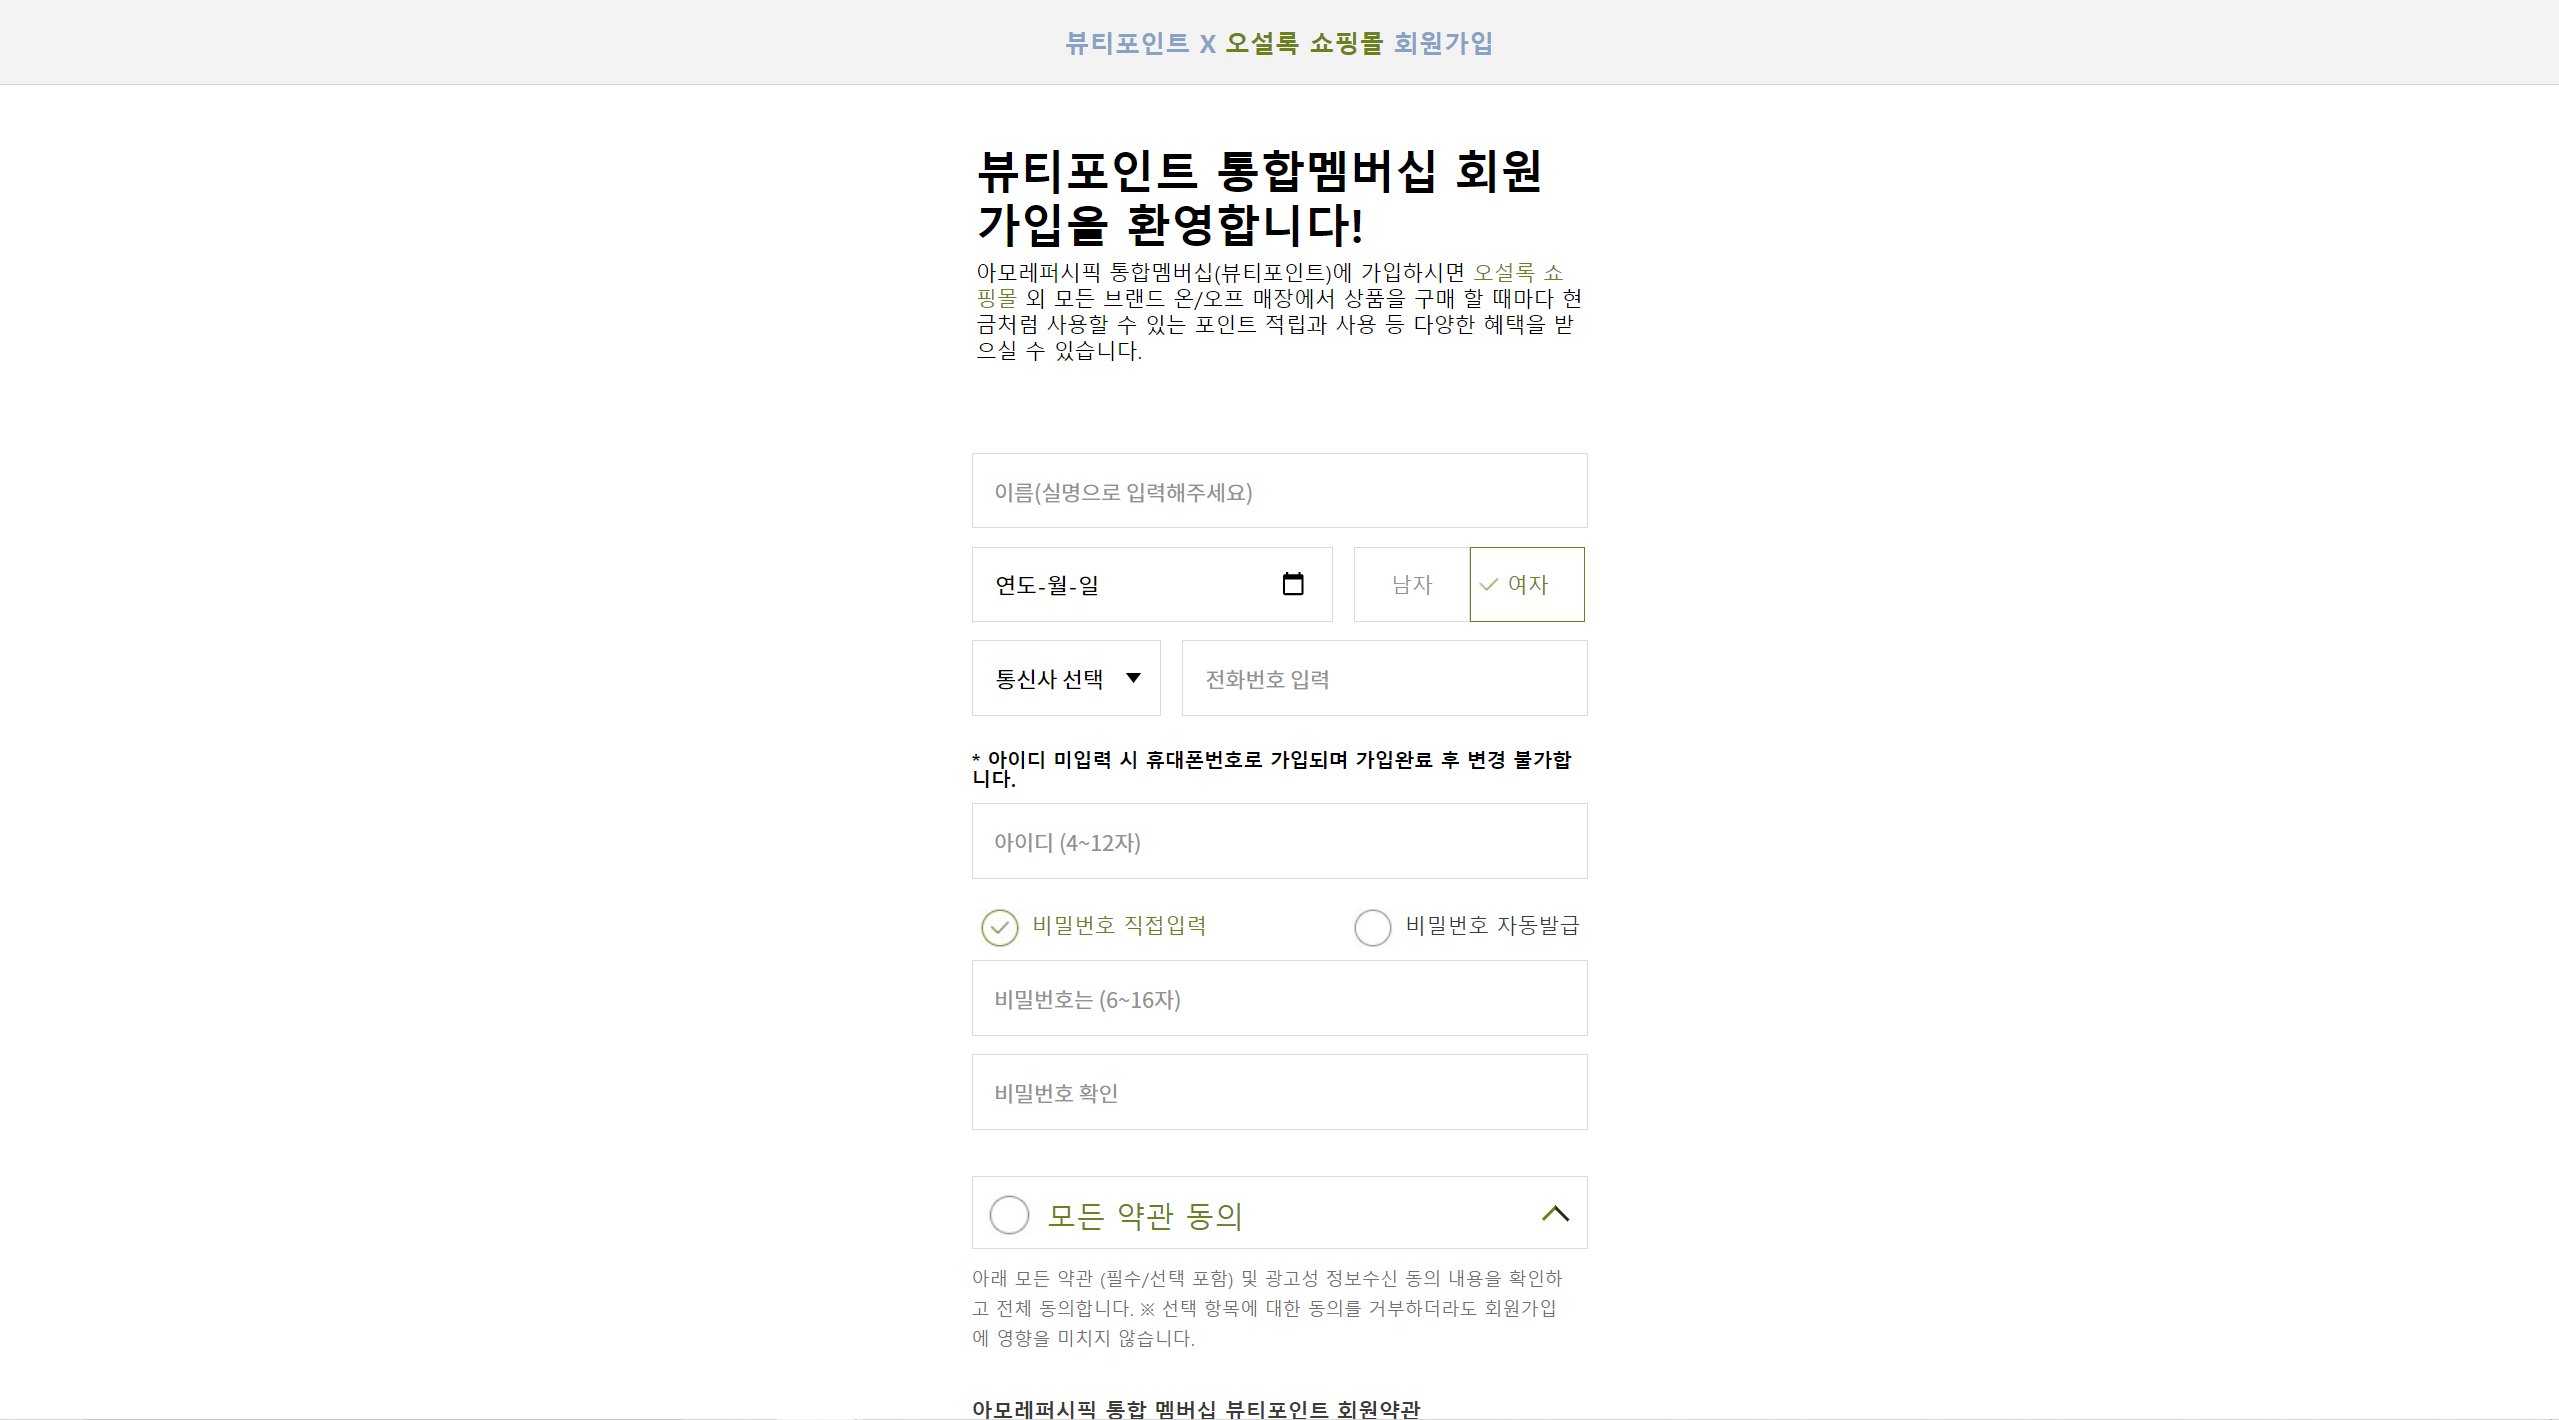
- 회원가입, 로그인
- 오설록 소개 메인페이지(실제 사이트에서는 Brand Story)
- 상품 리스트 페이지
- 상품 상세 페이지
- 장바구니 페이지
1. 회원가입, 로그인
회원가입
class Signup extends Component {
  constructor() {
    super();

    this.state = {
      realname: "",
      username: "",
      birthday: "",
      gender: "",
      provider: "",
      phone: "",
      password: "",
      password_confirm: "",
    };
}- 프론트엔드에서는 state에 user의 값을 모았다가 fetch함수를 백엔드api에 데이터를 전달하였다.
- 백엔드에서는 전달받은 데이터를 저장하며 이중 유저의 비밀번호는 Bcrypt 암호화를 하여 저장한다.
로그인
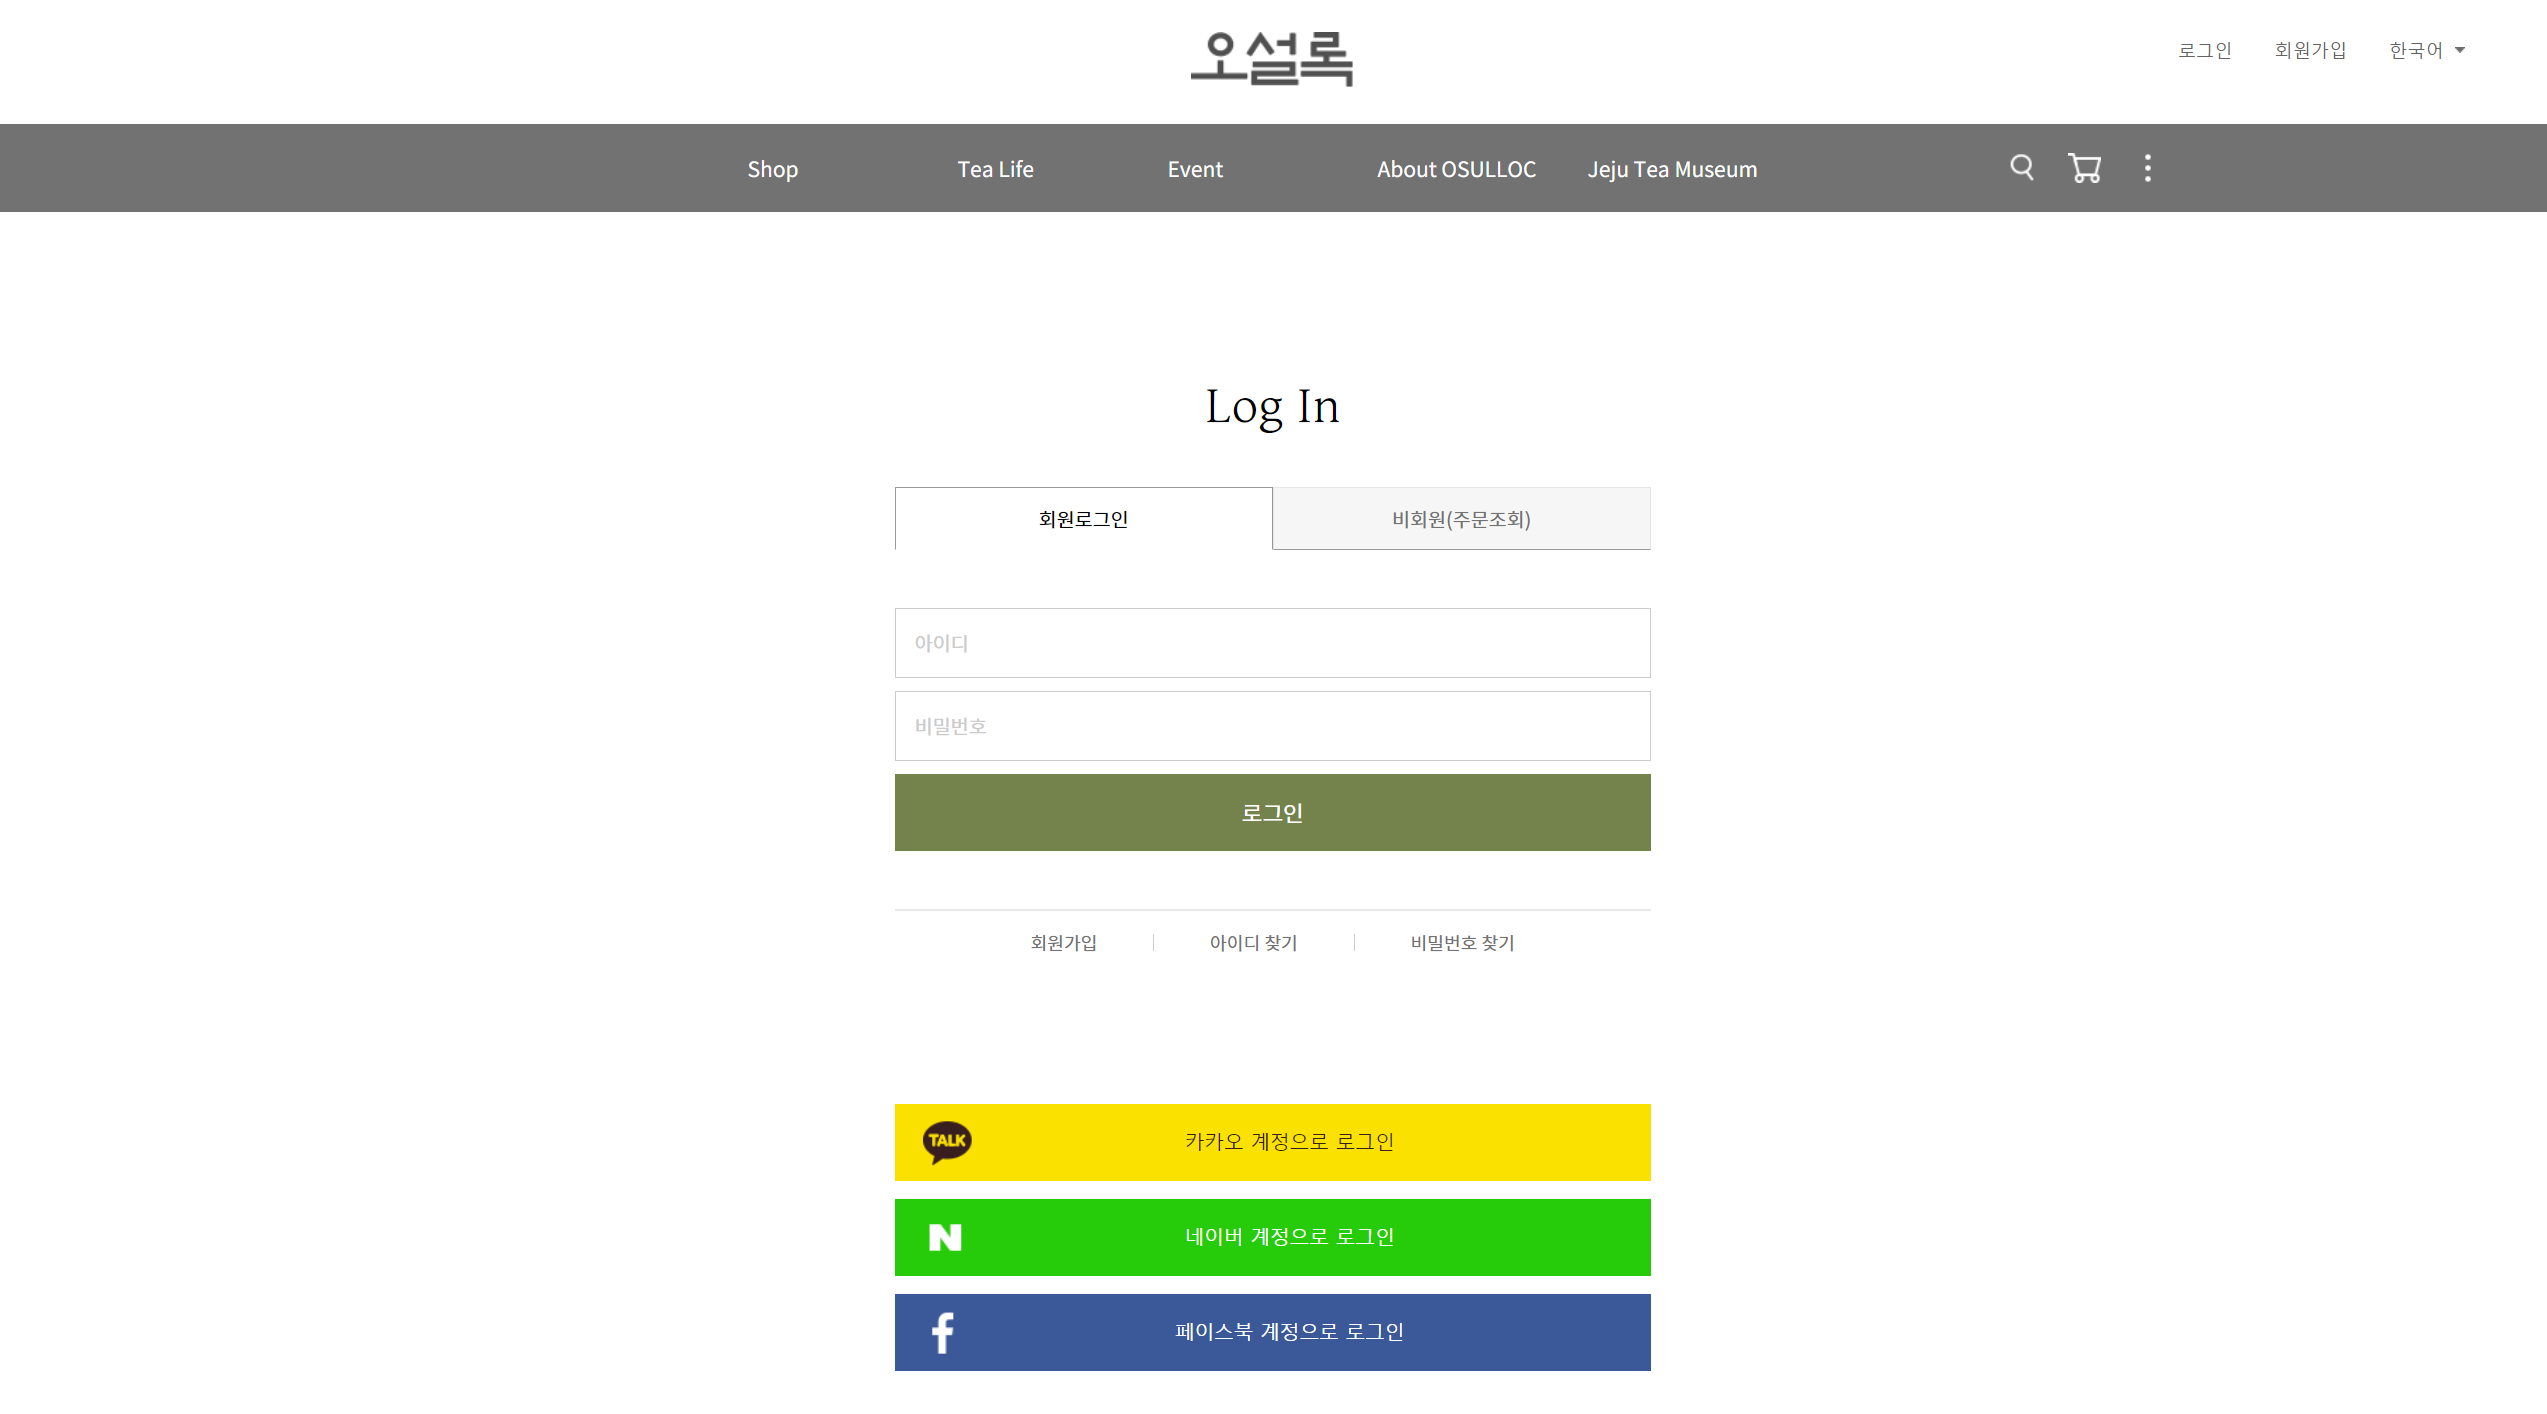
  // 페이지 이동 함수 //
  goToMain() {
    const token = localStorage.getItem("token");
    fetch(`${url}/user/sign-in`, {
      method: "POST",
      headers: {
        Authorization: token,
        "Content-Type": "application/json",
      },
      body: JSON.stringify({
        username: this.state.id,
        password: this.state.password,
      }),
    }).then((response) => {
      if (response.status === 401) {
        alert("아이디 혹은 비밀번호가 일치하지 않습니다.");
      }
      if (response.status === 400) {
        alert("서버에 일시적으로 오류가 발생하였습니다.");
      }
      if (response.status === 200) {
        response.json().then((res) => localStorage.setItem("token", res.token));
        this.props.history.push("/");
      }
    });
}- 프론트엔드에서는 fetch함수를 통해 로그인 정보를 보내고 로그인시 토큰이 발행된 것이 response로 들어온다면 localstorage에 저장하여 로그인 정보를 유지토록 하였다.
- 백엔드에서는 로그인시 들어온 정보를 확인하여 이미 저장되어있는(가입되어 있는)유저 정보라면 JWT Access Token을 발행하여 요청의 응답에 함께 보낸다.
2. main

componentDidMount() {
    // Step1. scroll 이벤트 add //
    // javascript 윈도우 객체의 scroll 이벤트 가져와서 준비 //
    window.addEventListener("scroll", this.addScrollFunc.bind(this)); //"scroll"이 내장이벤트 default이름임
    // Step End. 자동 스크롤 이벤트 계속 요청할 함수 //
    // 2초 딜레이 후 시작 //
    setTimeout(() => {
      this.timer = setInterval(
        this.scrollAutoMovingFunc.bind(this),
        this.intervalNum
      );
    }, 1500);
}-
원래 사이트에서는 브랜드를 소개하는 페이지로, 스크롤이벤트에 따라 이미지와 텍스트들을 보여주고 있는 페이지이다.
-
해당 페이지를 구현할때는 리액트에서 직접적으로 scroll이벤트를 할 수가 없어 직접 BOM(Browser Object Model)의 window객체에 접근하였다.
-
윈도우 객체에 접근하여 javascript의 이벤트를 메서드인
addEventListener이용하여scroll이벤트를 사용케 하였다.
그리고 특정스크롤 값에서 요소들이 transform(translate)되는 interactive한 이벤트를 구현하였다. 또한 타이머함수(setInterval)을 사용하여 유저가 페이지로 진입시 초기에 자동으로 이벤트가 실행토록 하였다.
3. 상품 리스트
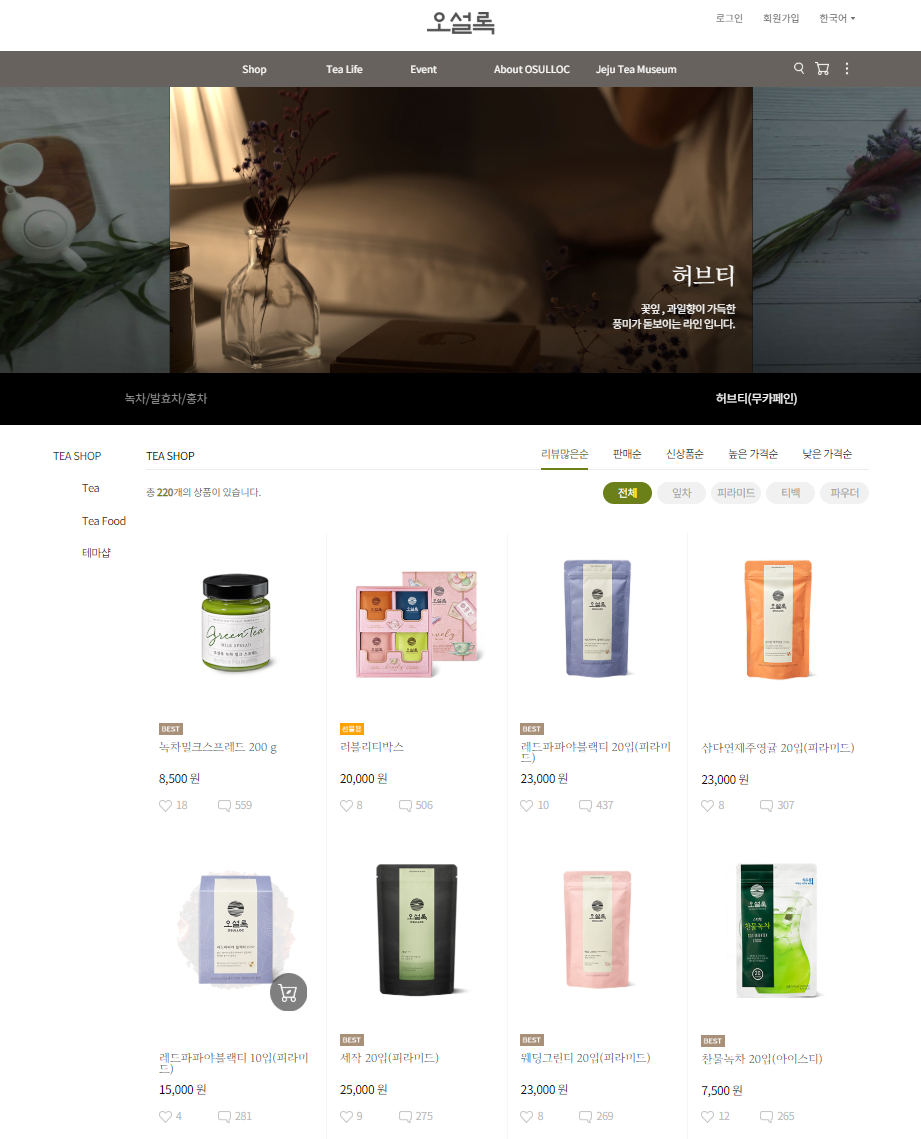
// map을 이용하여 화면에 데이터 구현 //
 const test = arr.map((el) => {
      if (el === this.state.pick) {
        return (
          <button className="pick" id={el}>
            {el + 1}
          </button>
        );
      }

// sort시 쿼리스트링을 이용하여 필요한 데이터 요청 //
componentDidUpdate = (prevProps) => {
    if (this.props.location.search !== prevProps.location.search) {
      fetch(`${url}/item/teashop/list${this.props.location.search}`)
        .then((res) => res.json())
        .then((res) => {
          this.setState({ data: res.items, num_pages: res.num_pages });
        });
    }
};- 프론트엔드에서는 초기에 리스트데이터를 가져오고 array.map함수를 이용하여 반복되는 데이터들을 화면에 구현한다. 그 후 유저가 클릭하는 sort메뉴에 쿼리스트링을 이용하여 백엔드로 받을 데이터를 요청한다. 또한 쿼리스트링을 이용하여 페이지네이션을 구현한다.
- 백엔드에서는 요청되는 쿼리스트링에 따라 DB에서 기존데이터를 원하는 결과에 맞게 산출하여 프론트엔드로 전달해준다.
4. 상세 페이지
상세 페이지 상단
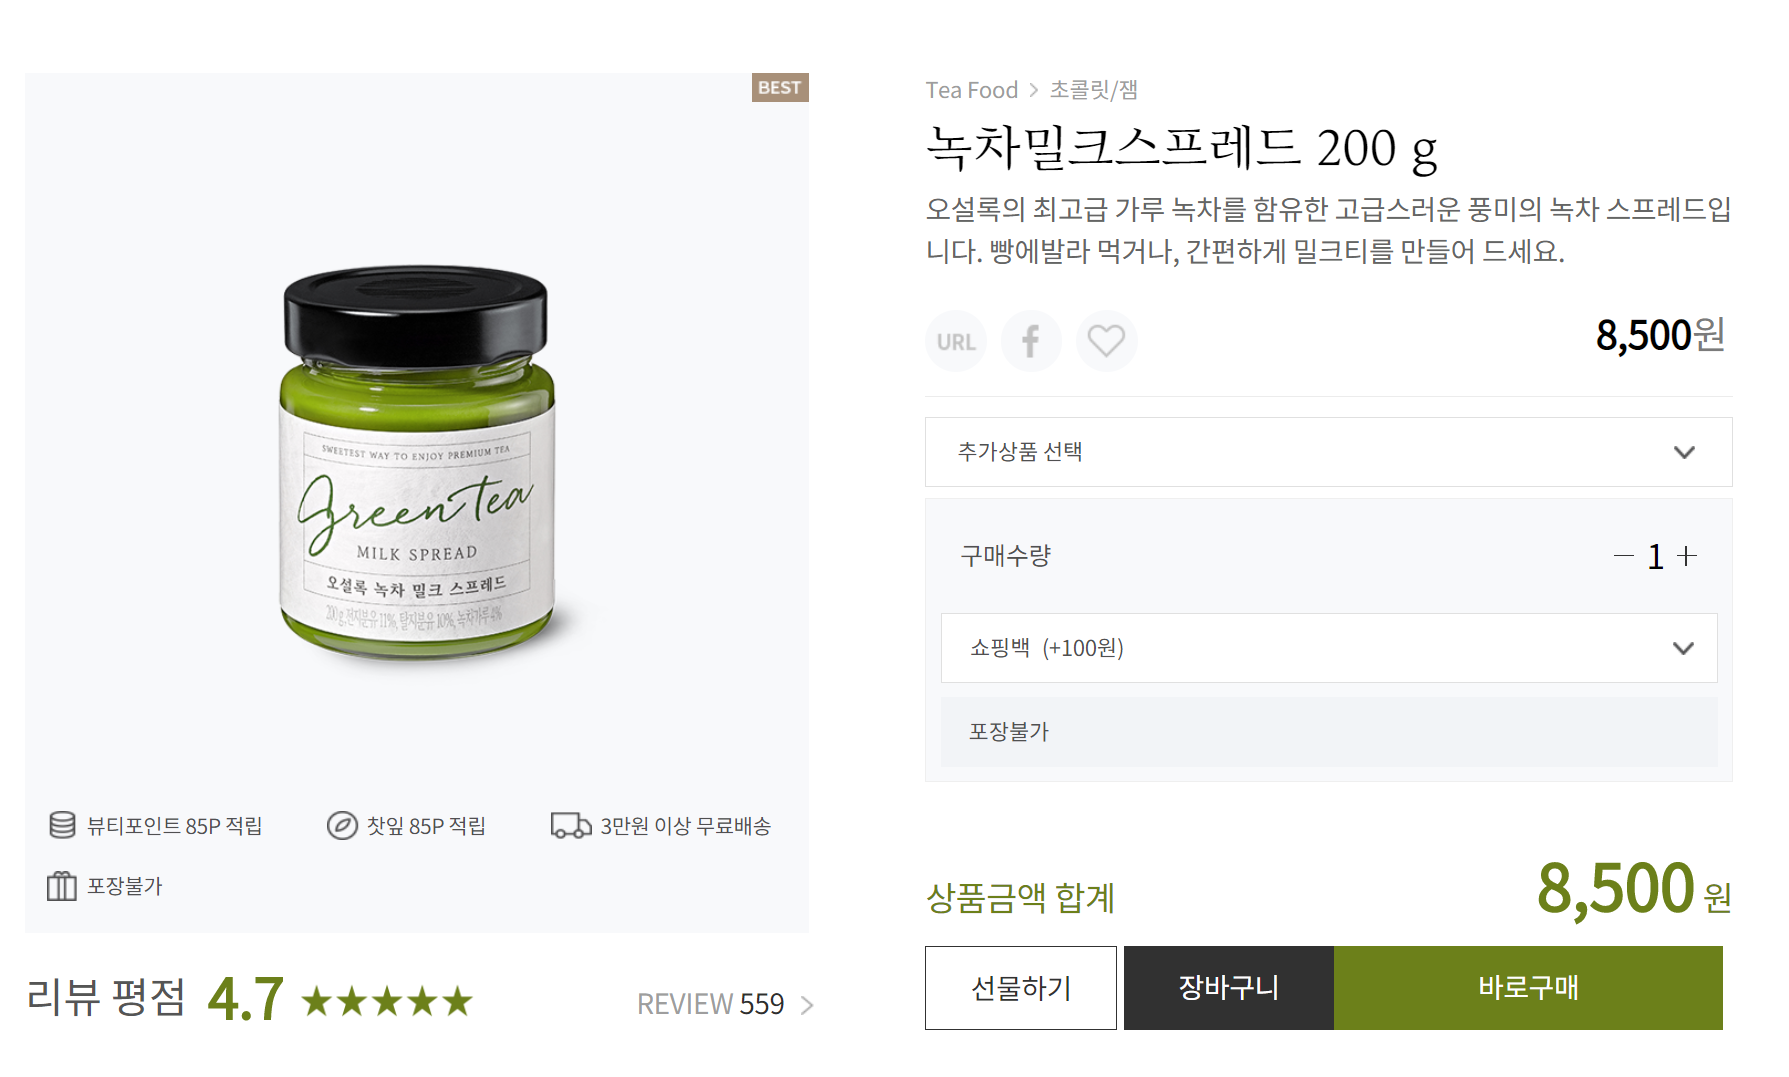
componentDidMount = () => {
    fetch(
      `${urlset}/item/teashop/detail/${this.props.match.params.minchang}`,
      {}
    )
      .then((response) => response.json())
      .then((response) => {
        this.setState({
          benefits: response.item.benefits,
          best: response.item.best,
          bonus: response.item.bonus,
          gift: response.item.gift,
          neww: response.item.new,
          on_sale: response.item.on_sale,
          sold_out: response.item.sold_out,
          sub_category: response.item.sub_category,
          fourth_category: response.item.fourth_category,
          description: response.item.description,
          main_image: response.item.main_image,
          price: Math.floor(response.item.price),
          num_reviews: response.item.num_reviews,
          rating: response.item.rating.overall_rating__avg,
          title: response.item.title,
          item: response.item,
          discount_percent: response.item.discount_percent,
        });
        this.bottomTagCheck();
        this.revNum();
      });
};- 프론트엔드에서는 상세페이지로 이동시 해당페이지의 키값을 쿼리스트링을 이용하여 상세페이지의 데이터를 요청한다.
- 백엔드에서는 요청되는 키 값을 확인하고 데이터를 전달해 준다.
상세 페이지 댓글 output

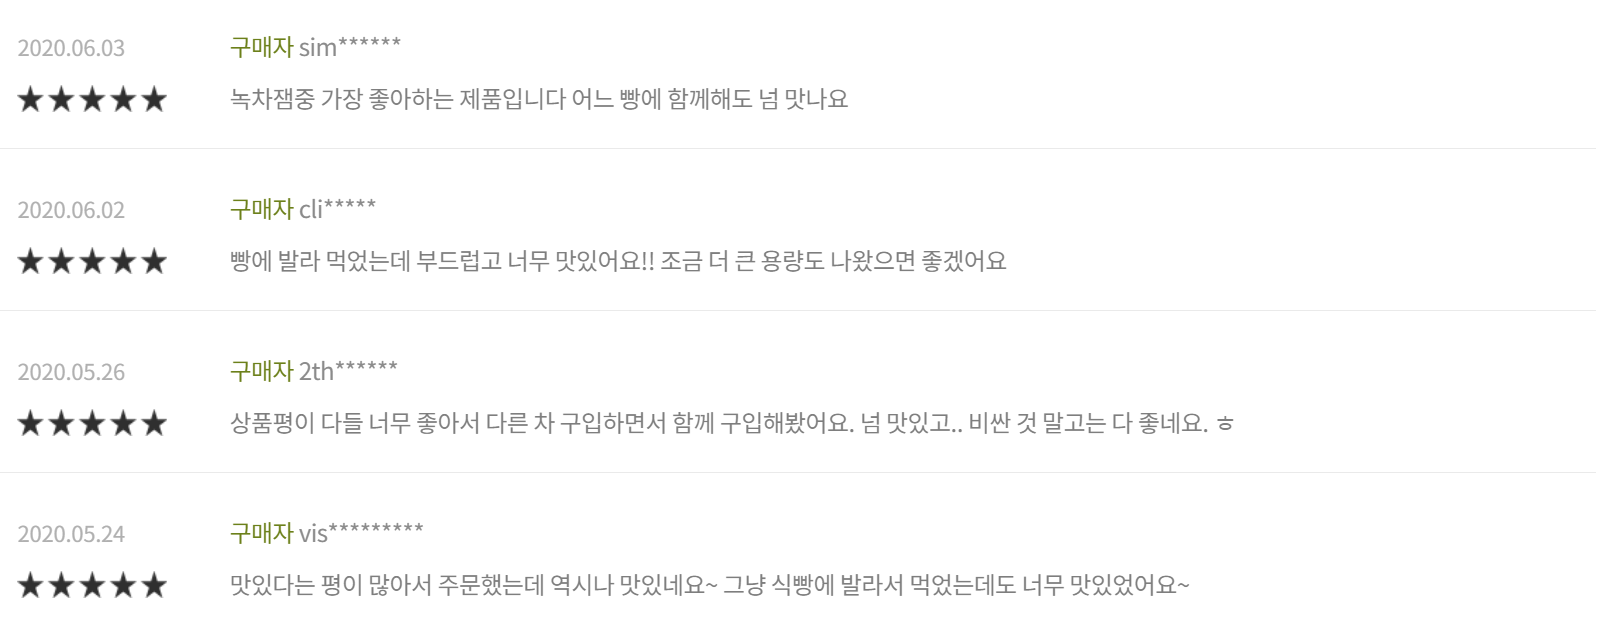
 render() {
    const TapObj = {
      1: <Tap1 />,
      2: (
        <Tap2
          commentList={this.state.commentList}
          getFunc={this.getFunc.bind(this)}
          id={this.props.match.params.id}
        />
      ),
      3: <Tap3 />,
    };
    const { tapInx, commentList } = this.state;
    return (

 // CommentOutput.js
  class CommentOutput extends Component {
  render() {
    return (
      <div className="commentOutput">
        {this.props.commentList.map((item, index) => {
          return (
            <CommentOutputChild
              key={index}
              commentUser={item.username}
              commentDate={item.date}
              commentScore={item.overallrate}
              commentText={item.comment}
            />
          );
        })}
</div> - 프론트엔드에서는 해당 제품에 맞는 키값을 전달하여 데이터를 요청하고 그후 들어온 데이터를 array.map메서드를 통하여 화면에 구현한다.
- 백엔드에서는 키값을 확인하여 DB에 있는 데이터를 전달해준다.
상세 페이지 댓글 input

//commentStar.js
 const starColor = {
      width: `${this.props.score * 20}%`,
    };

//comment.js
    <CommentStar
              score={this.state.score}
scoreHandler={(input) => this.setState({ score: input })}- 프론트엔드에서 유저에게 데이터를 입력받을 때 실제로 보낼 값은
Number이지만 별 이미지를 클릭하는 기능을 통해 값을 입력받는 기능을 구현해보았다.
5. 장바구니
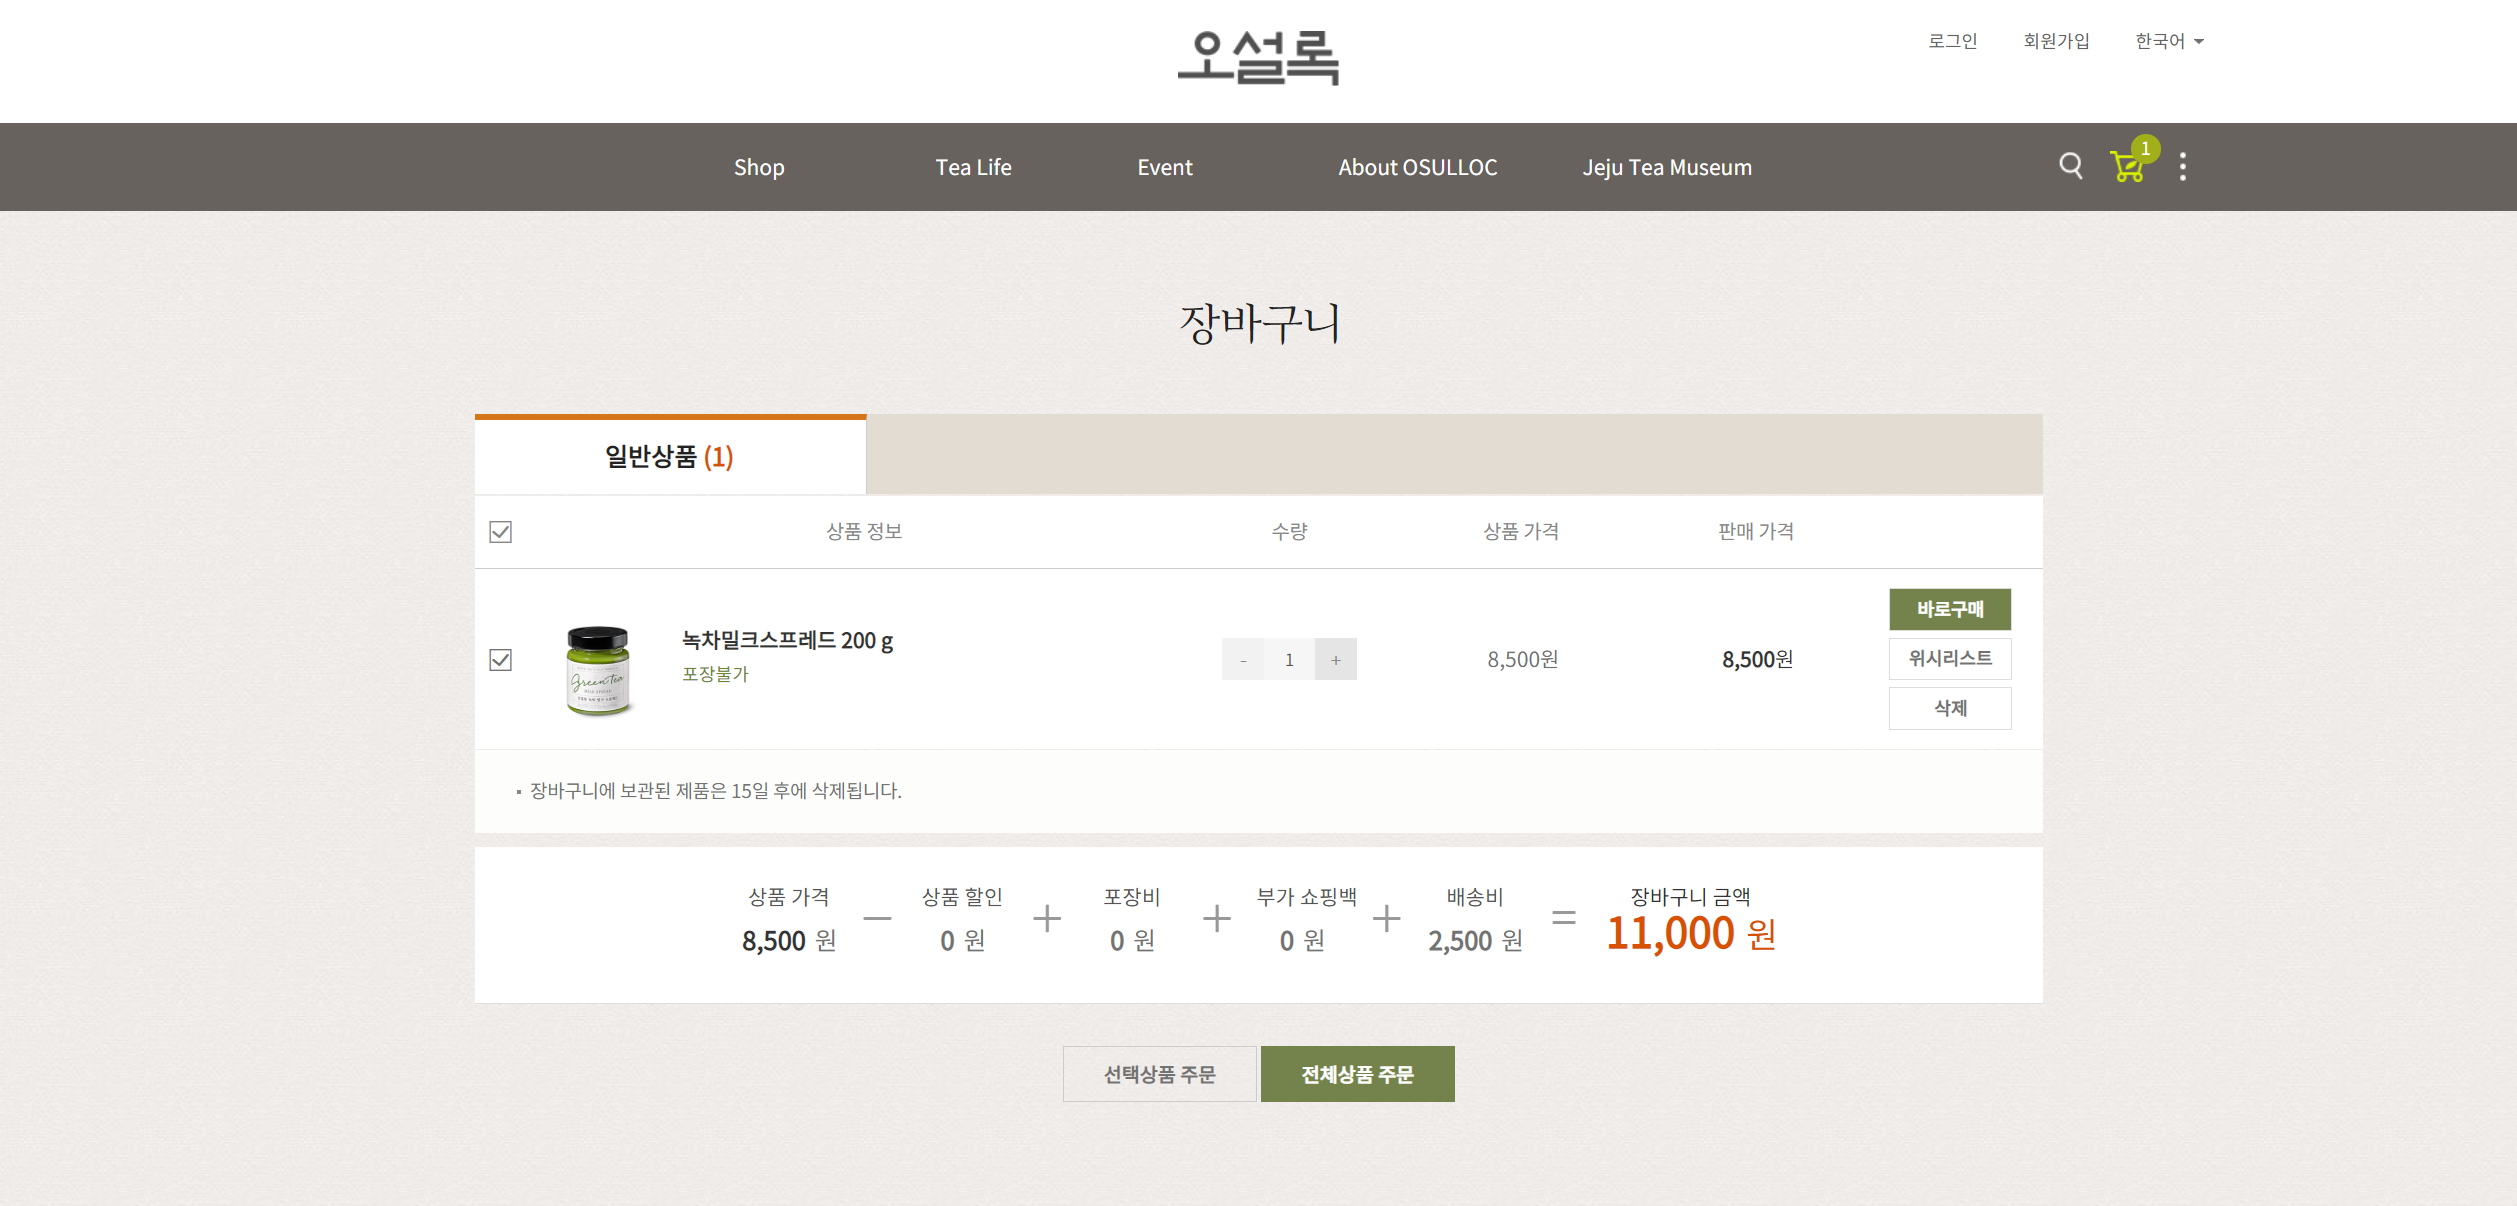
 getData = () => {
    const token = localStorage.getItem("token");
    console.log("getData 실행");
    fetch(url + "/order/cart", {
      method: "GET",
      headers: {
        Authorization: token,
      },
    })
      .then((res) => res.json())
      .then((res) =>
        this.setState({
          feeds_arr: res.items,
          price_arr: res.summaries,
          empty_feed: true,
        })
      );
};- 프론트엔드에서는 유저가 이벤트를 발생시킬시때마다 백엔드로 결과를 전송하고 다시 값을 전달받아 출력한다.
- 백엔드에서는 요청시미다 결과를 저장하고 그 결과를 다시 보내준다.
- 장바구니 같은 경우는 유저가 완전히 결정하기 전까지 결과를 프론트에서 가지고 있다가 백엔드로 한번에 최종 결과를 보내는 것도 방법이다. 그러나 아직 리덕스를 배우기 전이기에 만약 그 경우 만약 유저가 중간에 로그아웃을 한다면 장바구니에 담겨있던 정보가 초기화가 되므로 이번 프로잭트에서는 그때그때마다 백엔드로 데이터를 전달하였다.
프로젝트를 진행하며 개인적으로 학습하고자 한 것
리액트를 배우고 처음으로 실제사이트처럼 만드는 것이 프로젝트였습니다.
그렇기에 리액트의 기본기를 학습하고자 했습니다.
- CRA기본기: 프로젝트의 시작은 당연히 개발환경 초기세팅이라 할 수 있을 것입니다. react 초기 환경을 제공하는 CRA(create-react-app)을 기본을 다룩 사용하고자 했습니다.
- page이동을 위한 react Router를 사용했습니다. Router를 이용하여 페이지를 이동하고 또한 쿼리스트링을 이용하여 원하는 데이터를 받고자 했습니다.
- 리액트의 기본이자 꽃인 component. 자유롭게 만들고 활용하고자 했습니다. 그렇기에 우리 팀은 분업시에도 page단위가 아닌 component단위로 분업을 하기도 했습니다.
- component를 다루는데 state와 props가 빠질순 없을 것입니다. state와 props를 적극적으로 활용하여 더욱 리액트답게 사용하고자 했습니다.
- event handler 또한 원하는데로 사용하여 실제 사이트처럼 구현하고자 했습니다.
- 백엔드 api에 데이터 요청을 위해서는 Fetch를 사용하였습니다. axios같은 좋은 라이브러리도 있지만 Fetch로 기본기를 다지고자 했습니다.
- sass를 사용하여 nesting단위로 사용하고 했습니다.
프로젝트를 마치며..
담당부분 코드에 대한 자세한 후기 : https://velog.io/@jongsunpark88/projectW1me
처음 리액트를 배울 때가 기억납니다.
과연 잘 할수 있을까? 어렵다고 하는데 제대로 쓸 수 있을까?
그러나 프로젝트를 진행하다보니.. 학습했던 리액트가 실제로 적용되는 것을 보면서 어느새 react를 즐기고 있는 제 자신이 보였습니다.
하나하나 생각한 것들이 만들어지고 새로운 것이 만들어지는 것을 보다보면
너무나도 즐거웠습니다.
그리고 가장 크게 느낀 것이 있었습니다.
역시 기본인 javascript 기본기는 더욱 필요하다는 것.
리액트는 도구이고 기본은 javascript. 그리고 더 나아가 브라우저 자체에 대한 이해.
하지만 이제 걱정은 없습니다.
무엇을 해야되는지 알았다는 것은 즐거운 것이니까요.ㅎ

위코드 선배님! 잘읽었습니다!