📚 MyBatis란
MyBatis는 SQL Mapping Framework를 말한다. 자바 코드에서 SQL문을 분리해서 관리하며 매개변수 설정과 쿼리 결과를 읽어오는 코드를 제거하기 때문에 코드의 간결함을 통한 생산성 향상과 유지 보수가 편리하다는 장점이 있다.
코드를 통해 마이바티스 살펴보기
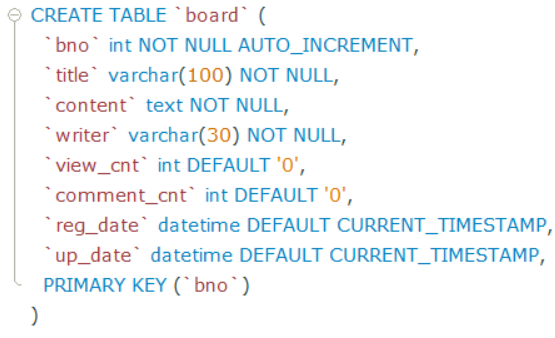
📚 board 테이블 생성
create table board (
	bno int auto_increment primary key,
    title varchar(30) not null,
    content text not null,
    writer varchar(30) not null,
    view_cnt int default 0 null,
    comment_cnt int default 0 null,
    reg_date datetime null
);
📚 Mapper XML
board 테이블에 CRUD를 하기 위한 SQL문을 작성한다. parameterType과 resultType을 잘 구분하여 작성해야 한다. select문의 경우 bno로 게시글을 select해서 BoardDto 객체를 리턴하기 때문에 parameterType은 bno의 타입인 int, resultType은 BoardDto객체로 지정한다.
<mapper namespace="com.project.dao.BoardMapper">
    <select id="select" parameterType="int" resultType="BoardDto">
        select bno,title,content,
               writer,view_cnt,comment_cnt,
               reg_date,up_date
        from board
        where bno = #{bno}
    </select>

    <delete id="delete" parameterType="int">
        delete from board where bno = #{bno} and writer = #{writer}
    </delete>

    <delete id="deleteAll">
        delete from board
    </delete>

    <insert id="insert" parameterType="BoardDto">
        insert into board (title,content,writer)
        values ('title','content','jane')
    </insert>

    <update id="update" parameterType="BoardDto">
        update board
        set title = #{title},
            content = #{content},
            up_date = now()
        where bno = #{bno}

    </update>
</mapper>
📚 typeAlias 지정하기
Mapper xml에서 resultType을 객체명으로 바로 지정할 수 있는 이유는 마이바티스 설정에서 typeAlias를 객체명으로 지정했기 때문이다. typeAlias로 패키지에 대한 별명을 지정할 수 있는데 아래 예제와 같이 typeAlias 태그의 type에 풀 패키지명을 입력하고 alias에 별명을 지정한다.
mybatis-config.xml
<?xml version="1.0" encoding="UTF-8"?>
<!DOCTYPE configuration
        PUBLIC "-//mybatis.org//DTD Config 3.0//EN"
        "http://mybatis.org/dtd/mybatis-3-config.dtd">
<configuration>
    <typeAliases>
        <typeAlias alias="BoardDto" type="com.fastcampus.ch4.domain.BoardDto"/>
    </typeAliases>
</configuration>
📚 DTO(Data Transfer Object)
계층간의 데이터를 주고 받기 위해 사용되는 객체
BoardDto
public class BoardDto {
    private Integer bno;
    private String title;
    private String content;
    private String writer;
    private int view_cnt;
    private int comment_cnt; //댓글 개수
    private Date reg_date;
    private Date up_date;

    public BoardDto(){} //기본생성자

    public BoardDto(String title, String content, String writer){
        this.title = title;
        this.content = content;
        this.writer = writer;
    }

    public Integer getBno() {
        return bno;
    }

    public void setBno(Integer bno) {
        this.bno = bno;
    }

    public String getTitle() {
        return title;
    }

    public void setTitle(String title) {
        this.title = title;
    }

    public String getContent() {
        return content;
    }

    public void setContent(String content) {
        this.content = content;
    }

    public String getWriter() {
        return writer;
    }

    public void setWriter(String writer) {
        this.writer = writer;
    }

    public int getView_cnt() {
        return view_cnt;
    }

    public void setView_cnt(int view_cnt) {
        this.view_cnt = view_cnt;
    }

    public int getComment_cnt() {
        return comment_cnt;
    }

    public void setComment_cnt(int comment_cnt) {
        this.comment_cnt = comment_cnt;
    }

    public Date getReg_date() {
        return reg_date;
    }

    public void setReg_date(Date reg_date) {
        this.reg_date = reg_date;
    }

    public Date getUp_date() {
        return up_date;
    }

    public void setUp_date(Date up_date) {
        this.up_date = up_date;
    }

    @Override
    public String toString() {
        return "BoardDto{" +
                "bno=" + bno +
                ", title='" + title + '\'' +
                ", content='" + content + '\'' +
                ", writer='" + writer + '\'' +
                ", view_cnt=" + view_cnt +
                ", comment_cnt=" + comment_cnt +
                ", reg_date=" + reg_date +
                ", up_date=" + up_date +
                '}';
    }

    @Override
    public boolean equals(Object o) {
        if (this == o) return true;
        if (o == null || getClass() != o.getClass()) return false;
        BoardDto boardDto = (BoardDto) o;
        return Objects.equals(bno, boardDto.bno) && Objects.equals(title, boardDto.title) && Objects.equals(content, boardDto.content) && Objects.equals(writer, boardDto.writer);
    }

    @Override
    public int hashCode() {
        return Objects.hash(bno, title, content, writer);
    }
}
board 테이블에 있는 데이터를 BoardDto 객체에 담아서 가져온다. 게시판에 글을 쓰면 BoardDto 객체에 값을 넣어서 데이터베이스의 board 테이블에 저장한다.
📚 DAO 인터페이스
DAO 인터페이스는 생략하고 Mapper작성 후 바로 DAO 구현 클래스를 작성해도된다.
public interface BoardDao {
BoardDto select(Integer bno) throws Exception;
int delete(Integer bno) throws Exception;
int insert(BoardDto dto) throws Exception;
int update(BoardDto dto) throws Exception;
int increaseViewCnt(Integer bno) throws Exception;
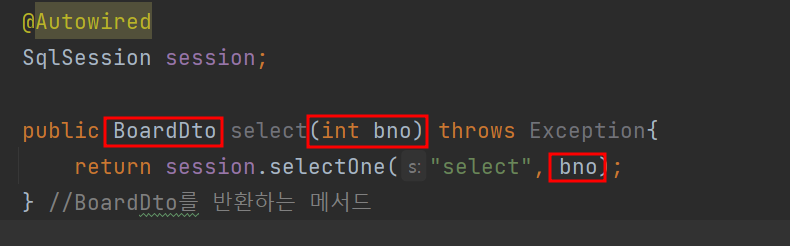
}📚 DAO 인터페이스 구현
@Repository 와 DAO객체
DAO 객체를 생성하고 @Repository 애너테이션을 붙여주면 스프링 빈으로 등록되면서 Data Access Layer라는 것을 스프링이 인지하게 된다.
@Repository
public class BoardDaoImpl implements BoardDao {
	@Autowired
    private SqlSession session;

    private static String namespace="com.project.dao.BoardMapper";

    public BoardDto select(Integer bno) throws Exception {
    	return session.selectOne(namespace + "select", bno);

    }

}
Board Mapper

BoardDao
📚 DAO Test 코드 작성하기
@RunWith(SpringJUnit4ClassRunner.class)
@ContextConfiguration(locations = {"file:src/main/webapp/WEB-INF/spring/**/root-context.xml"})
public class BoardDaoImplTest {

    @Autowired
    BoardDao boardDao;

    @Test
    public void select() throws Exception {
       assertTrue(boardDao != null);
        System.out.println("boardDao = " + boardDao);

        BoardDto boardDto = boardDao.select(1);
        System.out.println("boardDto: " + boardDto);

        assertTrue(boardDto.getBno().equals(1));
    }
}
이 글은 남궁성님의 스프링의 정석 강의를 듣고 정리한 내용입니다.
