🐶 프로젝트 생성
- 인텔리제이를 사용하여 생성
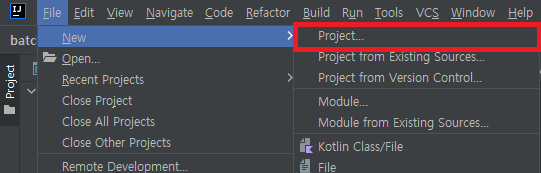
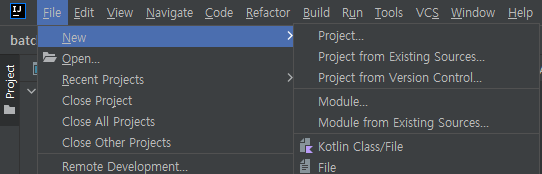
- File > New > Project

- Generators에서 Maven Archetype, Name, Archetype, 필요하다면 Version 설정 후 Create
🐶 pom.xml
- pom.xml은 메이븐 환경에서 dependency들을 관리하는 파일이다.
<project xmlns="http://maven.apache.org/POM/4.0.0" xmlns:xsi="http://www.w3.org/2001/XMLSchema-instance"
  xsi:schemaLocation="http://maven.apache.org/POM/4.0.0 http://maven.apache.org/xsd/maven-4.0.0.xsd">
  <modelVersion>4.0.0</modelVersion>

  <groupId>org.example</groupId>
  <artifactId>batch</artifactId>
  <version>1.0-SNAPSHOT</version>
  <packaging>jar</packaging>

  <name>batch</name>
  <url>http://maven.apache.org</url>

  <properties>
    <project.build.sourceEncoding>UTF-8</project.build.sourceEncoding>
    <maven.compiler.source>1.8</maven.compiler.source>
    <maven.compiler.target>1.8</maven.compiler.target>
    <spring.batch.version>4.2.1.RELEASE</spring.batch.version>
    <spring.version>5.2.2.RELEASE</spring.version>
    <hibernate.version>5.4.10.Final</hibernate.version>
    <apache.dbcp2.version>2.7.0</apache.dbcp2.version>
    <h2.version>1.4.200</h2.version>
    <junit.version>4.12</junit.version>
  </properties>

  <dependencies>
    <!-- 스프링 배치의 코어를 담당하는 파트들을 가지고 있다. -->
    <dependency>
      <groupId>org.springframework.batch</groupId>
      <artifactId>spring-batch-core</artifactId>
      <version>${spring.batch.version}</version>
    </dependency>

    <!-- DB table과 Java간의 매핑을 가능케 해준다. -->
    <dependency>
      <groupId>org.springframework</groupId>
      <artifactId>spring-orm</artifactId>
      <version>${spring.version}</version>
    </dependency>

    <!-- spring-orm은 인터페이스이고 hibernate은 구현체. -->
    <dependency>
      <groupId>org.hibernate</groupId>
      <artifactId>hibernate-core</artifactId>
      <version>${hibernate.version}</version>
    </dependency>

    <!-- 디비 관련 유틸리티. -->
    <dependency>
      <groupId>org.apache.commons</groupId>
      <artifactId>commons-dbcp2</artifactId>
      <version>${apache.dbcp2.version}</version>
    </dependency>

    <!-- getter/setter를 자동으로 만들어준다. -->
    <dependency>
      <groupId>org.projectlombok</groupId>
      <artifactId>lombok</artifactId>
      <version>1.18.10</version>
      <scope>provided</scope>
    </dependency>


    <!-- ########## 테스트 관련 디펜던시들 ########## -->
    <!-- <scope>test</scope>은 테스트 코드에서만 사용 가능하다. -->

    <!-- 스프링 배치 어플리케이션 테스트 유틸리티. -->
    <dependency>
      <groupId>org.springframework.batch</groupId>
      <artifactId>spring-batch-test</artifactId>
      <version>${spring.batch.version}</version>
      <scope>test</scope>
    </dependency>

    <!-- 단위 테스트 -->
    <dependency>
      <groupId>junit</groupId>
      <artifactId>junit</artifactId>
      <version>${junit.version}</version>
      <scope>test</scope>
    </dependency>

    <!-- 메모리상에서 돌아가는 디비. 단위 테스트에 많이 쓰임. -->
    <dependency>
      <groupId>com.h2database</groupId>
      <artifactId>h2</artifactId>
      <version>${h2.version}</version>
      <scope>test</scope>
    </dependency>
  </dependencies>
</project>- 내 환경에서 test.JobLauncherTestUtils가 빨간불이 뜨는데 불러오기, 실행등은 잘 된다.
🐶 Chunk & Tasklet
- 스프링 배치에서 Job은 1개이상의 step으로 이루어 지는데 step을 구성하는 방법은 2가지가 있다.
1. Chunk oriented
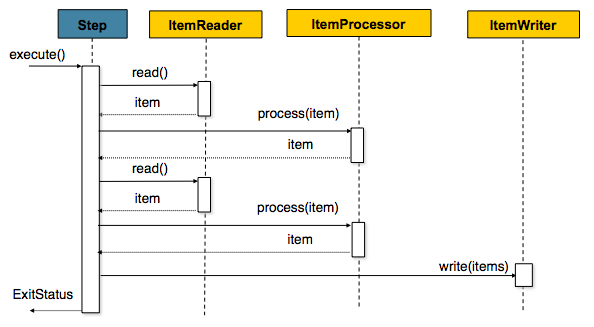
⦁ chunk란 덩어리로 작업할 때 각 커밋사이에 처리되는 row의 수를 말한다.
⦁ 한번에 Reader를 통해 읽어오고, 이를 chunk 단위로 만든 뒤 트랜잭션 등을 chunk 단위로 실행하는 것을 chunk 지향 처리라고 한다.
⦁ read, process는 1개단위로 실행되며 write는 chunk 단위로 진행된다.
⦁ 읽어올 때 page 단위로 읽어오게 되는데(chunk와는 다름) chunk보다 page 단위가 적어 한번 chunk단위로 트랜잭션을 처리하는데 page조회가 5번 발생하면 성능상 이슈가 발생할 수 있다. 이 때문에 배치는 큰 페이지 크기를 설정하고, 페이지 크기와 일치하는 커밋 간격을 사용하면 성능이 향상된다고 명시해놓았다. 성능 뿐만 아니라 page, chunk 단위를 다르게 설정하면 JPA 사용시 영속성 컨텍스트가 깨지는 문제가 발생할 수 있다. 즉 2개 값을 일치시키는 것이 보편적으로 좋은 방법이니 권장된다.
2. Tasklet
⦁ 사용자가 정의한 업무를 하나의 클래스로 처리하는 방법.
⦁ 때문에 배치 사이즈가 작을수록, 처리과정이 쉬울수록 tasklet 방식을 사용하는 것이 이득이다.
⦁ 배치에 정의된 Tasklet을 implement 하여 구현하면 된다. (execute 메서드 override로 실행)
🐶 Job 만들기
⦁ Job - resources/hello_world_job.xml
<?xml version="1.0" encoding="UTF-8"?>

<beans xmlns="http://www.springframework.org/schema/beans"
       xmlns:batch="http://www.springframework.org/schema/batch"
       xmlns:xsi="http://www.w3.org/2001/XMLSchema-instance"
       xmlns:context="http://www.springframework.org/schema/context"
       xmlns:tx="http://www.springframework.org/schema/tx"
       xmlns:jdbc="http://www.springframework.org/schema/jdbc"
       xsi:schemaLocation="http://www.springframework.org/schema/batch http://www.springframework.org/schema/batch/spring-batch.xsd
  http://www.springframework.org/schema/jdbc http://www.springframework.org/schema/jdbc/spring-jdbc-4.3.xsd
  http://www.springframework.org/schema/beans http://www.springframework.org/schema/beans/spring-beans.xsd
  http://www.springframework.org/schema/context http://www.springframework.org/schema/context/spring-context.xsd
  http://www.springframework.org/schema/tx http://www.springframework.org/schema/tx/spring-tx-4.3.xsd">

    <job id="helloWorldJob"
         xmlns="http://www.springframework.org/schema/batch">
        <description>
            첫 스프링 배치 어플리케이션.
            콘솔에 로그를 찍고 끝나는 간단한 스텝 예제.
        </description>

        <step id="helloWorldStep">
            <tasklet ref="helloWorldTasklet" />
        </step>
    </job>


    <!-- Tasklet -->
    <!-- scope은 빈을 어떻게 생성할지 결정한다. 세개의 scope 종류를 보자.
        - step: 각 스텝마다 스텝에 종속된 고유한 빈을 만든다.
        - prototype: 빈을 reference (참조) 할 때마다 새로운 빈을 반환한다.
        - singleton: 배치 job이 생성될 때 하나의 고유한 빈을 만든다.
    -->
    <bean id="helloWorldTasklet"
          class="org.example.HelloWorldTasklet" scope="step" />


    <!-- Misc Beans -->
    <!-- 해당 섹션에 있는 빈들은 별도의 xml로 관리하는 것이 좋다.
        재사용을 위해 나중에 common.xml을 만들어보자. -->


    <!-- 스프링 배치의 metadata를 담당하는 빈. -->
    <bean id="jobRepository"
          class="org.springframework.batch.core.repository.support.MapJobRepositoryFactoryBean">
    </bean>

    <!-- 스프링 배치 job을 실행하는 빈. -->
    <bean id="jobLauncher"
          class="org.springframework.batch.core.launch.support.SimpleJobLauncher">
        <property name="jobRepository" ref="jobRepository" />
    </bean>

    <bean id="transactionManager"
          class="org.springframework.batch.support.transaction.ResourcelessTransactionManager" />

    <!-- 스프링 배치 job을 테스트할 때 쓰는 유틸리티. -->
    <bean id="jobLauncherTestUtils"
          class="org.springframework.batch.test.JobLauncherTestUtils" />

</beans>
⦁ Tasklet
public class HelloWorldTasklet implements Tasklet {

    @Override
    public RepeatStatus execute(StepContribution stepContribution, ChunkContext chunkContext) throws Exception {
        System.out.println("작업시작 ...");
        System.out.println("작업완료 ...!");
        return null;
    }
}
🐶 테스트
⦁ 코드
@RunWith(SpringJUnit4ClassRunner.class)
@ContextConfiguration(locations = {"/hello_world_job.xml"})
public class HelloWorldJobTest {
@Autowired
private JobLauncherTestUtils jobLauncherTestUtils;
@Test
public void testJob() throws Exception {
final JobExecution jobExecution = jobLauncherTestUtils.launchJob();
System.out.println("Job이 정상적으로 끝났는지 확인한다.");
Assert.assertEquals(ExitStatus.COMPLETED.getExitCode(), jobExecution.getExitStatus().getExitCode());
}
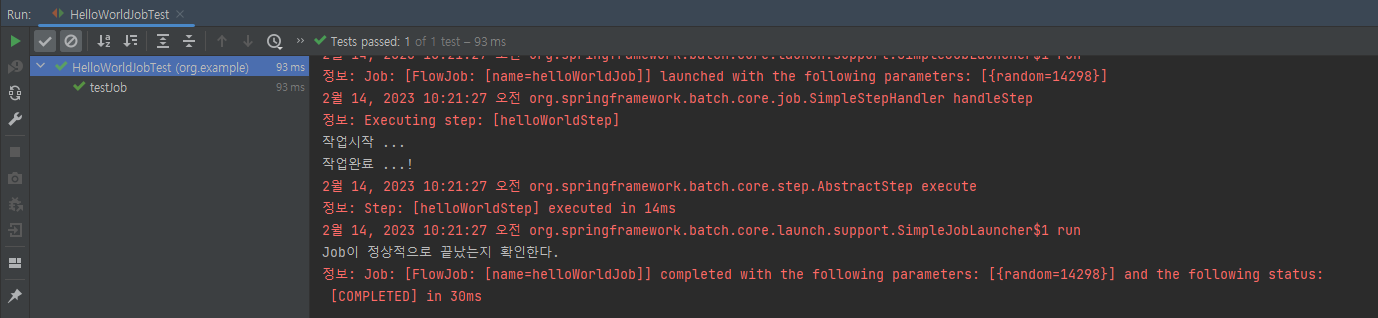
}⦁ 결과
References

응애 개발자지망생이 알고리즘에 고통받는 중