wsl 설치
WSL
PowerShell 관리자 권한으로 실행 이후 dism 명령어 입력
dism.exe /online /enable-feature /featurename:Microsoft-Windows-Subsystem-Linux /all /norestart이 코드는 WSL 시스템을 활성화
dism.exe /online /enable-feature /featurename:VirtualMachinePlatform /all /norestart이 코드는 Virtual Machine 기능을 활성화
컴퓨터 재부팅을 해줍니다.
wsl --set-default-version 2- WSL2로 업데이트 후 설정변경
wsl_update_x64.msi 패키지를 다운로드, 실행하여 WSL2로 업그레이드하자.
다운로드 - https://wslstorestorage.blob.core.windows.net/wslblob/wsl_update_x64.msi
우분투 microsoft에서 설치
ubuntu kernel 설치
wsl --install -d Ubuntu-20.04로그인 화면 나오면 새로운 계정 생성
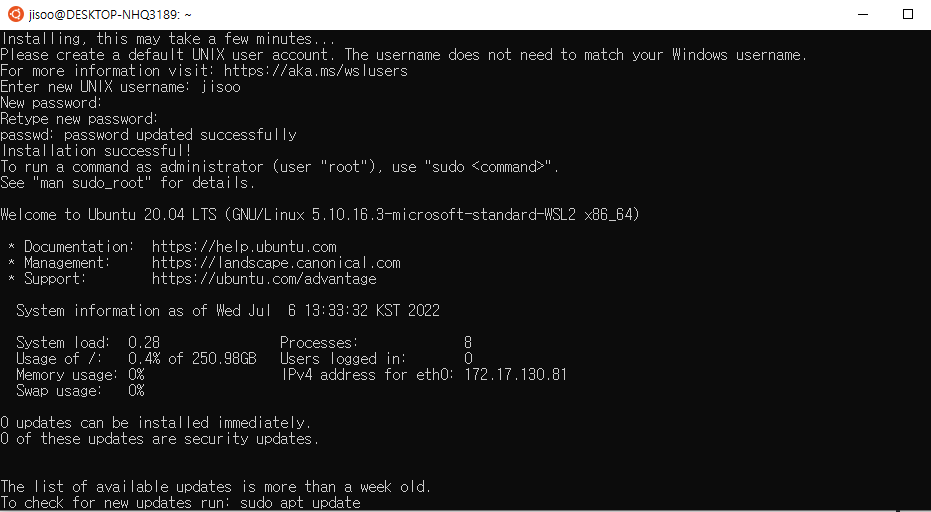
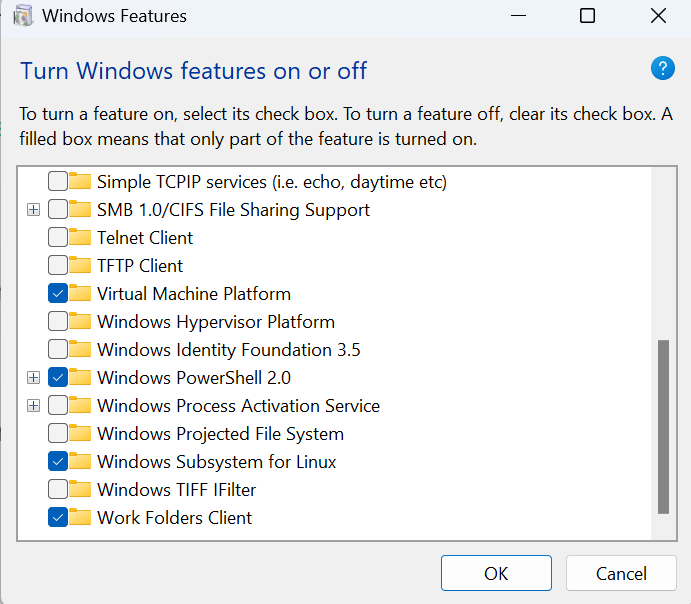
로그인 화면이 나오지 않고 error code: 0x80370114 가 뜬다면 Window Feature > Turn Windows Features on or off 에서 Virtual Machine Platform 과 Windows Subsystem for Linux를 선택하기
Terminal
https://www.microsoft.com/store/productId/9N0DX20HK701 에 접속해서 Terminal 앱을 다운로드 받습니다.
https://github.com/romkatv/dotfiles-public/raw/master/.local/share/fonts/NerdFonts/MesloLGS%20NF%20Regular.ttf 폰트를 다운로드 받습니다.
Terminal -> 설정 -> 시작 -> 기본 프로필 -> Ubuntu-20.04 로 설정해줍니다.
Terminal -> 설정 -> 프로필 -> Ubuntu-20.04 -> 모양 -> 글꼴 -> MesloLGS NF 로 설정해줍니다.
ZSH
sudo apt install -y git zsh curl \
&& chsh -s $(which zsh) \
&& sh -c "$(curl -fsSL https://raw.githubusercontent.com/ohmyzsh/ohmyzsh/master/tools/install.sh)"
git clone https://github.com/zsh-users/zsh-completions \
${ZSH_CUSTOM:=~/.oh-my-zsh/custom}/plugins/zsh-completions \
&& git clone https://github.com/zsh-users/zsh-syntax-highlighting.git \
${ZSH_CUSTOM:-~/.oh-my-zsh/custom}/plugins/zsh-syntax-highlighting \
&& git clone https://github.com/zsh-users/zsh-autosuggestions \
${ZSH_CUSTOM:-~/.oh-my-zsh/custom}/plugins/zsh-autosuggestionsgit clone --depth=1 https://github.com/romkatv/powerlevel10k.git \
${ZSH_CUSTOM:-$HOME/.oh-my-zsh/custom}/themes/powerlevel10kvim ~/.zshrc명령어로 .zshrc를 엽니다. 아래 스크립트를 붙여넣기 전에 :set paste 명령으로 vim을 붙여넣기 모드로 변경합니다.
GG > Shift + V > Shift + G 로 전체를 선택한 후 아래의 정보를 붙여넣습니다.
# Path to your oh-my-zsh installation.
export ZSH="$HOME/.oh-my-zsh"

ZSH_THEME="powerlevel10k/powerlevel10k"

zstyle '"':omz:update'"' mode auto
zstyle '"':omz:update'"' frequency 13 # in days

DISABLE_UNTRACKED_FILES_DIRTY="true"

plugins=(
    git
    zsh-completions
    zsh-syntax-highlighting
    zsh-autosuggestions
    fzf
)

source $ZSH/oh-my-zsh.sh
autoload -U compinit && compinit

# To customize prompt, run `p10k configure` or edit ~/.p10k.zsh.
[[ ! -f ~/.p10k.zsh ]] || source ~/.p10k.zsh

is_installed() {
    [ -n "$(command -v "$1" 2>/dev/null)" ]
}

# User configuration

# export

export PATH=$PATH:$HOME/.local/bin

# alias

if is_installed rsync; then
    alias cp="rsync -h --info=progress2"
fi
:wq 로 저장 및 종료 진행
아래 명령어로 powerlevel10k를 본인 취향에 맞춰 설정합니다.
p10k configureTool
pip가 없는 경우 아래의 코드를 먼저 실행하세요
sudo apt-get update
sidp apt-get upgrade # optional
sudo apt install python3-pip
tldr
유명한 명령어들의 간단한 사용법을 알려주는 커맨드 입니다.
python3 -m pip install tldrtldr <command>fd
sudo apt-get install -y fd-find \
&& sudo update-alternatives --install /usr/local/bin/fd fd `which fdfind` 1
fzf
편한 검색을 위한 툴로, 이를 지원하는 다양한 커맨드와 조합하여 사용할 수 있습니다.
git clone --depth 1 https://github.com/junegunn/fzf.git ~/.fzf \
&& ~/.fzf/install
.zshrc에 아래 스크립트를 추가해줍니다.
export FZF_DEFAULT_OPTS='--height 40% --layout=reverse --border'

# fdfind를 사용하는 경우
export FZF_DEFAULT_COMMAND='fd --type f --follow' # --hidden --exclude .git
export FZF_CTRL_T_COMMAND="$FZF_DEFAULT_COMMAND"
bat
이쁘게 출력해주는 cat
sudo apt install -y bat \
&& sudo update-alternatives --install /usr/local/bin/bat bat `which batcat` 1
cat 대신 사용하기 위해 아래 스크립트를 .zshrc에 추가해주세요.
# cat 대신 bat 사용
alias cat="bat -p --paging=never"
ripgrep(rg)
grep 대신 사용하는 명령어로 (여러) 파일 내에 특정 단어가 있는지 검색하는 툴입니다.
sudo apt-get install -y ripgrep
/usr/.crates2.json관련 에러가 나면sudo apt install -o Dpkg::Options::="--force-overwrite" ripgrep로 시도해보면 됩니다. rust관련 패키지 설치시 자주 나는 에러입니다.
lsd
ls 대신 사용하는 명령어로 이쁘게 표현해줍니다.
wget https://github.com/Peltoche/lsd/releases/download/0.21.0/lsd_0.21.0_amd64.deb \
&& sudo dpkg -i lsd_0.21.0_amd64.deb
ls 대신 사용하기 위해 아래 스크립트를 .zshrc에 추가해주세요.
alias ls='lsd --icon never'bpytop
각종 컴퓨터 사용량을 보기 위한 툴입니다.
python3 -m pip install bpytop \
&& sudo update-alternatives --install /usr/local/bin/btop btop `which bpytop` 1
asdf
git clone https://github.com/asdf-vm/asdf.git ~/.asdf- python 설치
asdf plugin add python
asdf list all python -- python list 확인
asdf install python 3.11.4 -- install해야 global/local 사용 가능
asdf global python 3.11.4  # 전체 디렉토리
asdf local python 3.10.4   # 현재 디렉토리
